I've been working on my 11 year old neighbor's bedroom makeover this week! She's an interior designer in the making and has a big vision, but only a small budget. I wanted to find a creative way to fill one of her walls to fit in with her modern boho theme. We came up with a simple DIY yarn wall hanging which cost us less than $10!
This post contains affiliate links, which means that I may earn a small commission if you purchase something that I have recommended, at no cost to you. More information can be found on my disclosures page.
QUICK LINKS
- Materials needed to make a yarn wall hanging
- Amazon shopping list with all of the items you will need for this project
- Jump straight to the tutorial
How can I decorate a large blank wall for cheap?
As I mentioned before, my 11 year old client had lots of big ideas but didn't have the budget to match. Blank walls can be difficult to fill when you're on a budget. Larger pieces are more expensive, and more affordable smaller pieces can often feel lost and out of proportion on a large wall. This yarn wall hanging was a great solution to that problem, as it added a lot of texture and color to the wall without costing much at all.
Related: The Power of Paint: Adding Color to Our Playroom with a Modern Landscape Mural
How do you make an easy DIY yarn wall hanging?
This wall hanging was seriously so easy. It did take a while, so you might need a bit of patience (or you could work on it while catching up on a podcast or watching TV!) but you don't need to be super crafty or skilled to make one! We made a very large wall hanging, so I bet it would be a lot quicker and even cheaper to make a smaller one.
I've put a short tutorial together for this project, and I'm going to share the supplies we used and the steps we took to make this simple modern boho wall hanging.
Related: A Modern Boho Tween Bedroom Makeover on a Budget
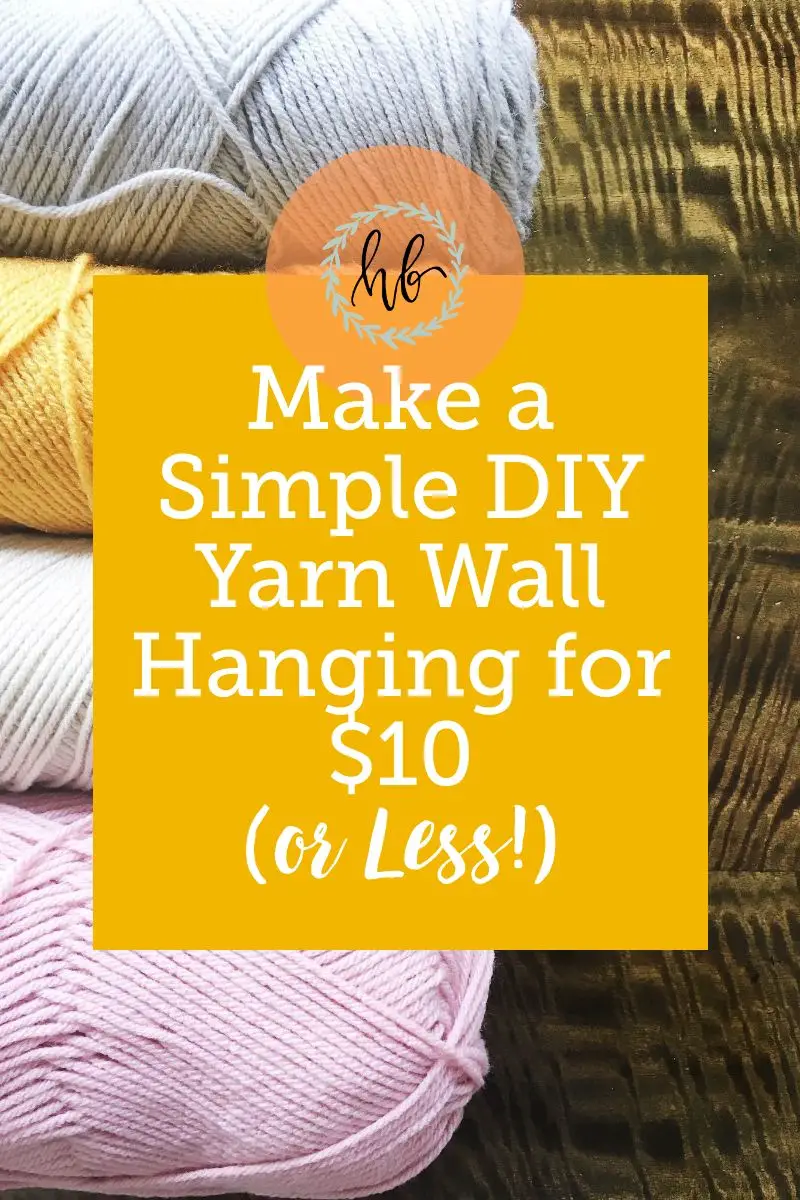
How to Make a Simple DIY Yarn Wall Hanging for $10 (or Less!)
1) GATHER SUPPLIES
-
Some kind of dowel, copper pipe, or even a branch/piece of driftwood. We used a 3/4 x 36 inch dowel which we found at a craft store for less than $2.
-
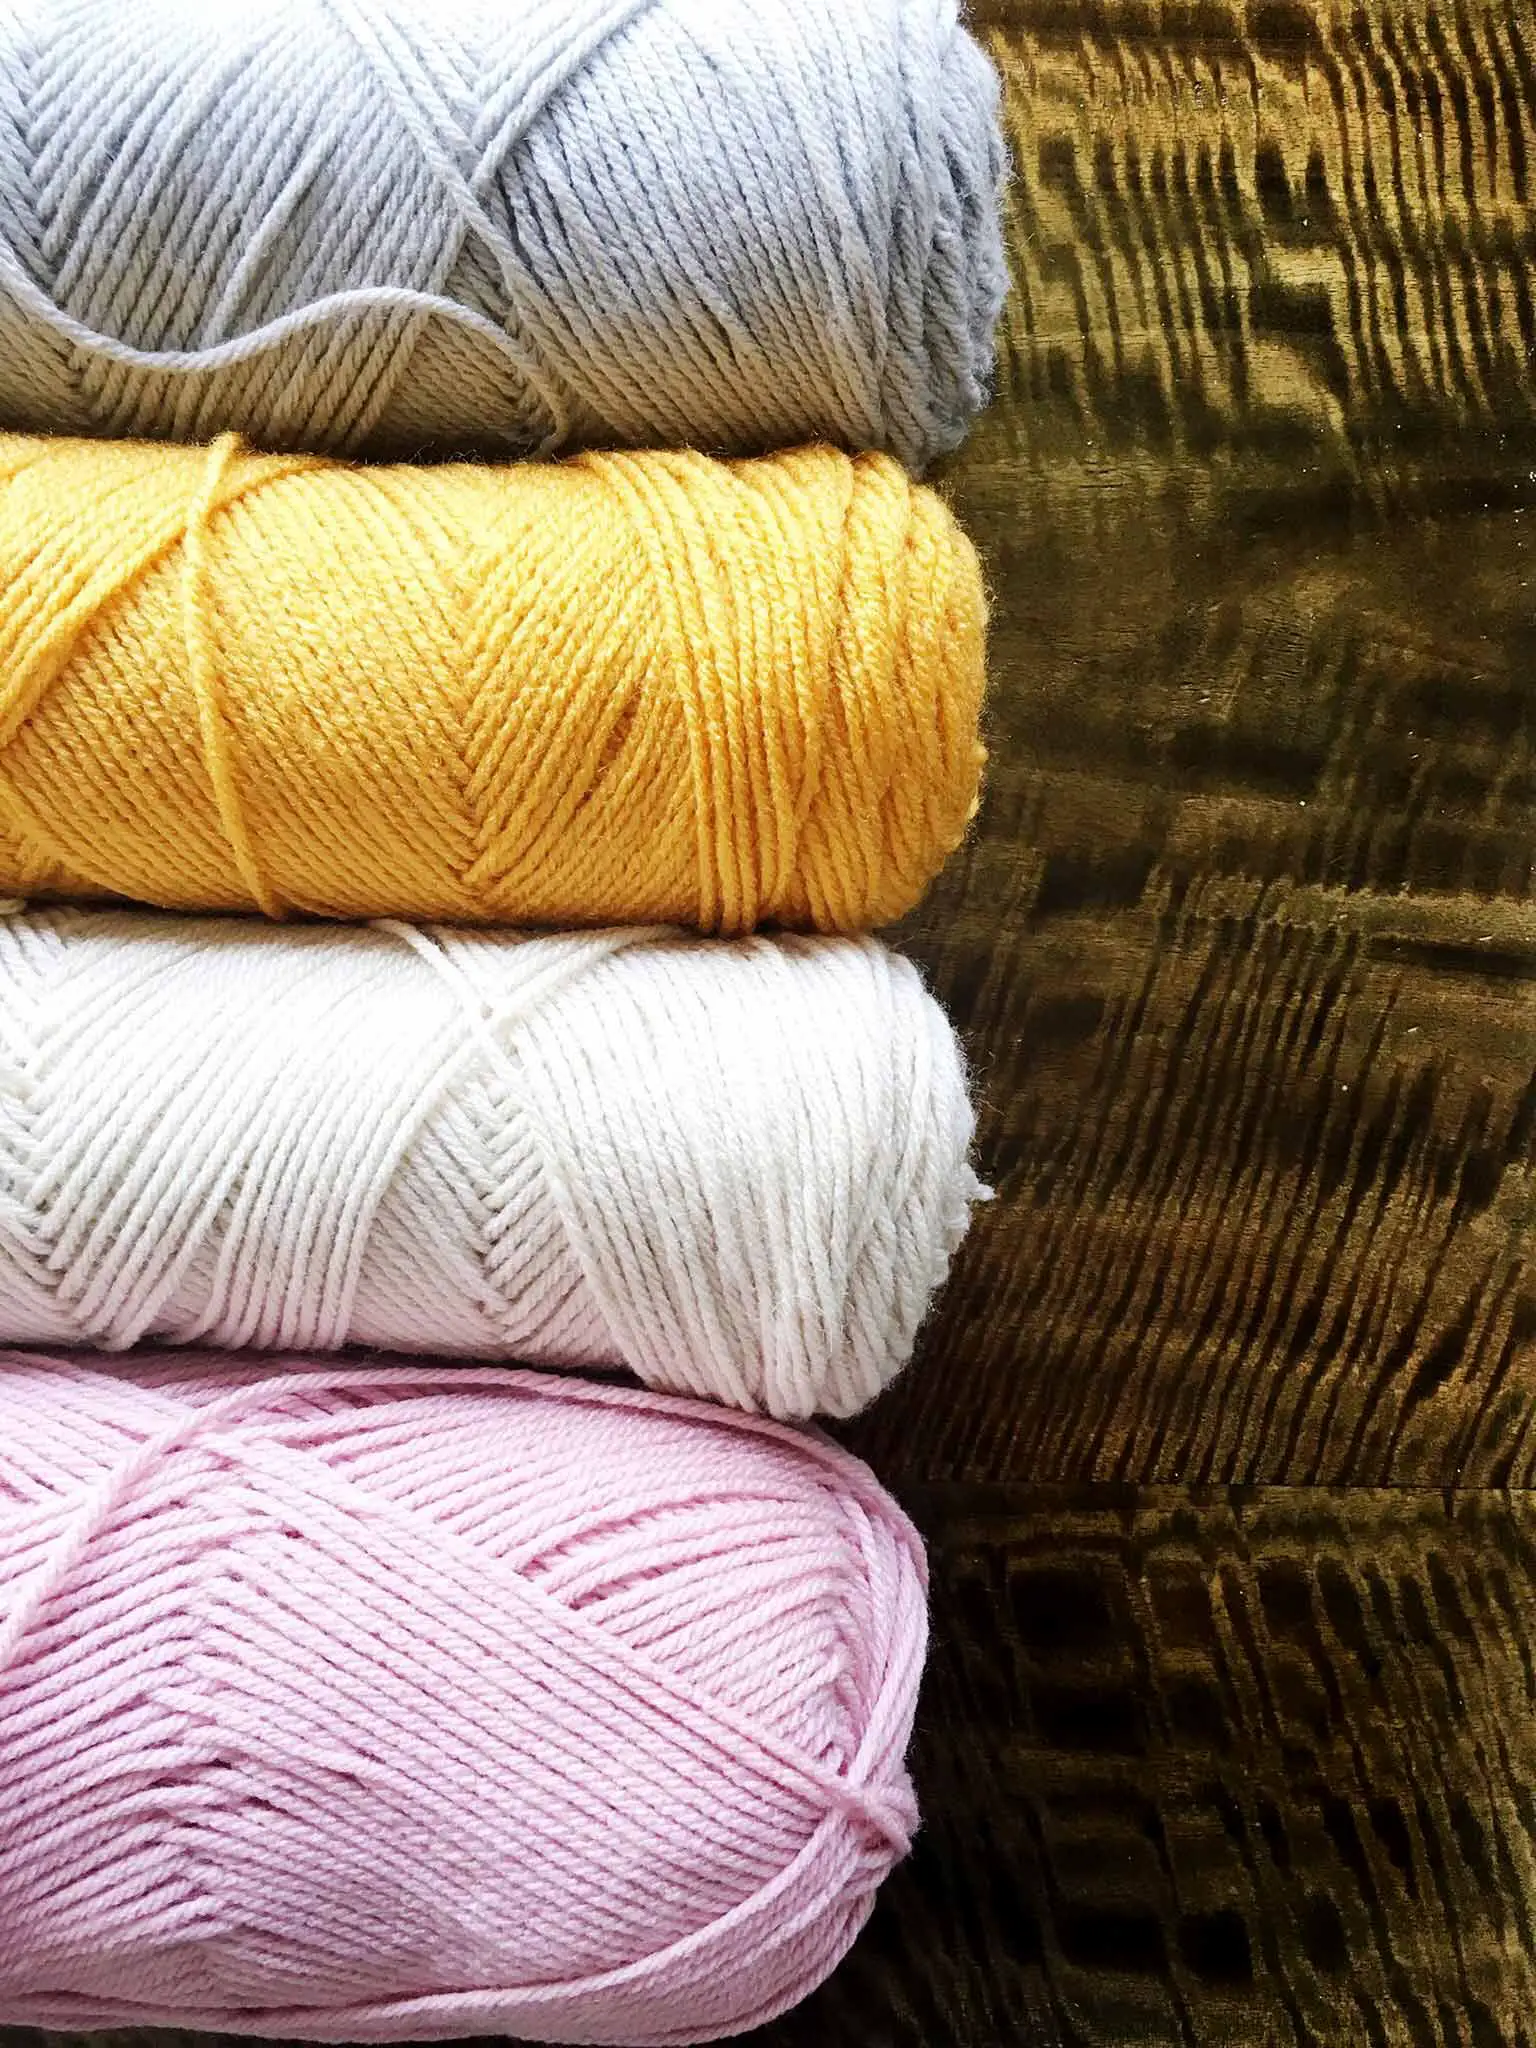
Yarn in various colors. We used 4 different colors, and there was plenty left over to make another wall hanging! Note: if you purchase a yarn bundle like the one linked below, this project will cost you a bit more than $10—but you will have plenty of supplies left over for future craft projects! It's probably more economical to purchase your yarn in this way, but you will be spending a little bit more upfront.
-
Tape measure
-
Scissors
-
Painter's tape
-
Twine to hang (not essential)
And that is IT!
For your convenience, I've created an Amazon shopping list with all of the items that you will need for this project. You can access it here.
2) DECIDE ON YOUR PATTERN
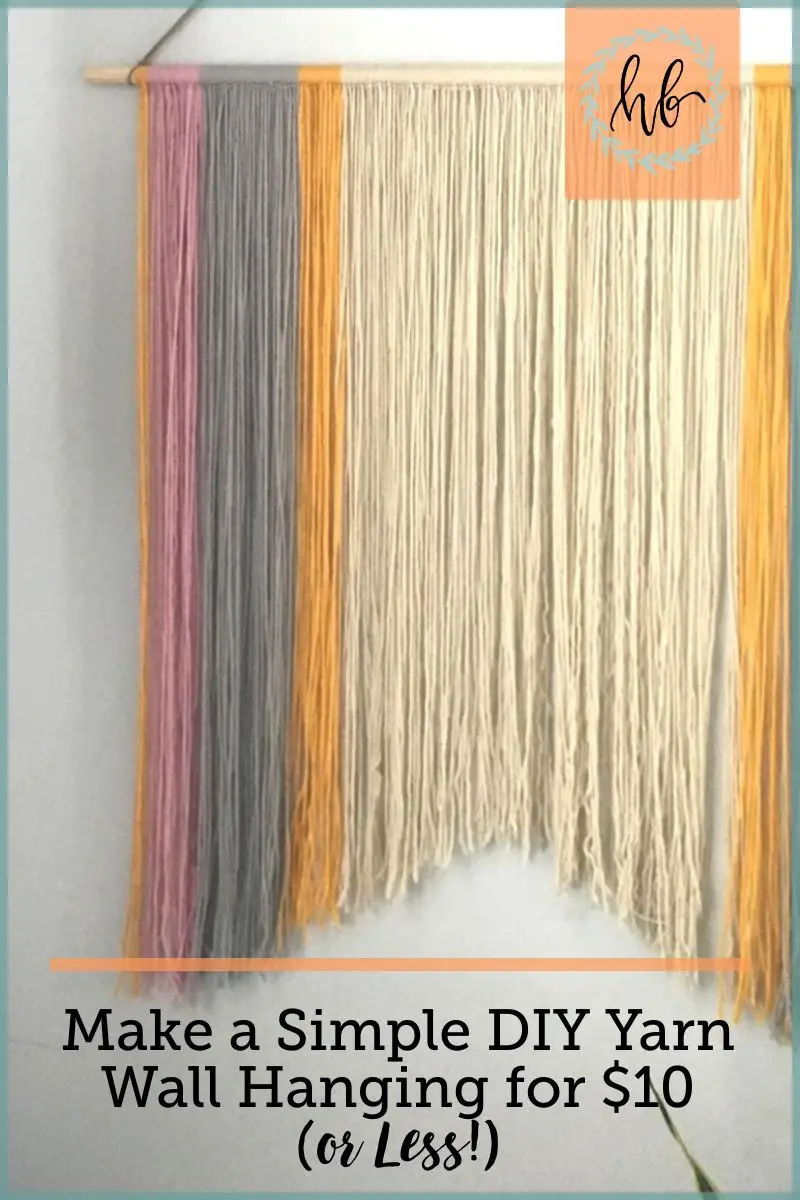
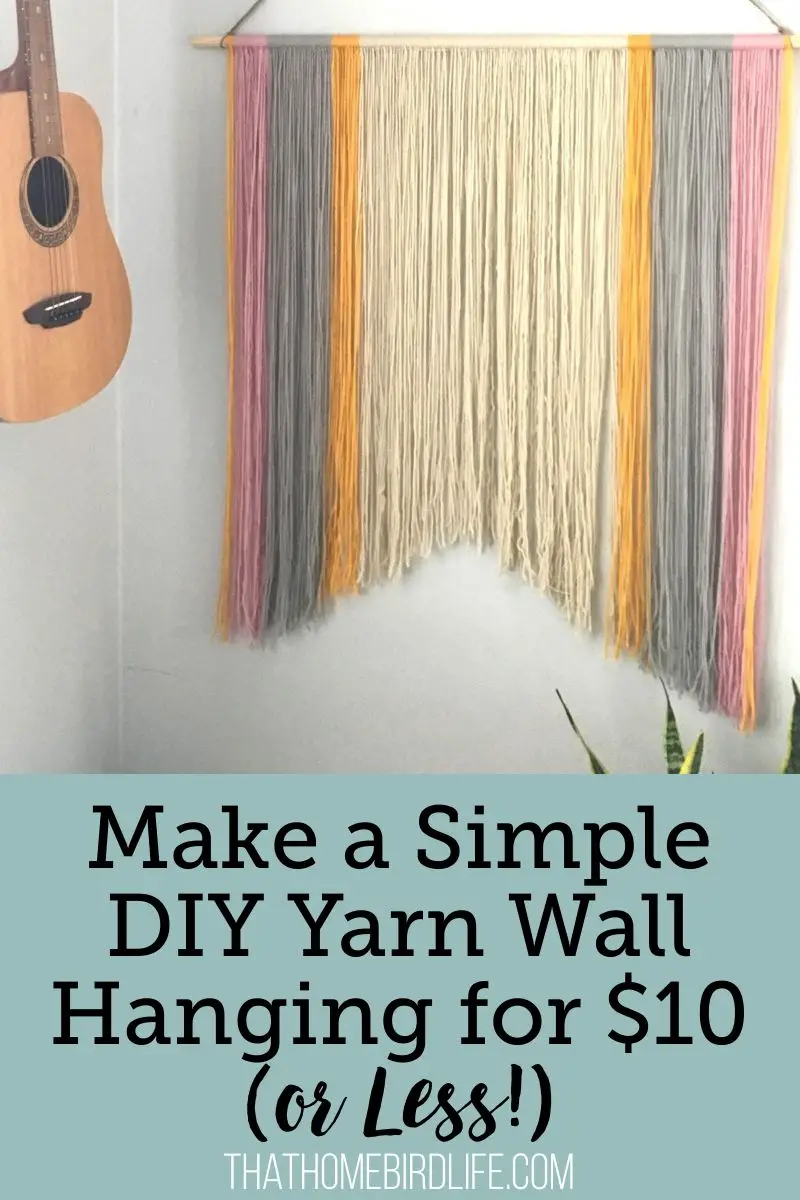
If you are creating a symmetrical piece, then you'll need to plan out your design ahead of starting. Decide which order you want to use you colors and the width that each color section will be, and jot that down on a piece of paper. We came up with a symmetrical design with a large central neutral section, flanked with smaller sections of the brighter colors.
If you are going with an asymmetrical design, then you can be more flexible with the design and figure it out as you go along (if that's your style!) Or you can write out the order of colors and the width of each section in advance if you want to have a fixed design before getting started.
Whichever option you choose, you will want to think about what colors you want to use next to each other, and which colors you want to be more prominent in the design—you can vary the widths of each color section to add more visual interest. It's also worth considering the wall color of where you are hanging it—my neighbor's walls are a very pale gray so we chose colors that would contrast nicely when it was hung up.
If you are finding it hard to come up with a design, then you can lay pieces of yarn out to help visualize it. Just be careful not to get them tangled up!
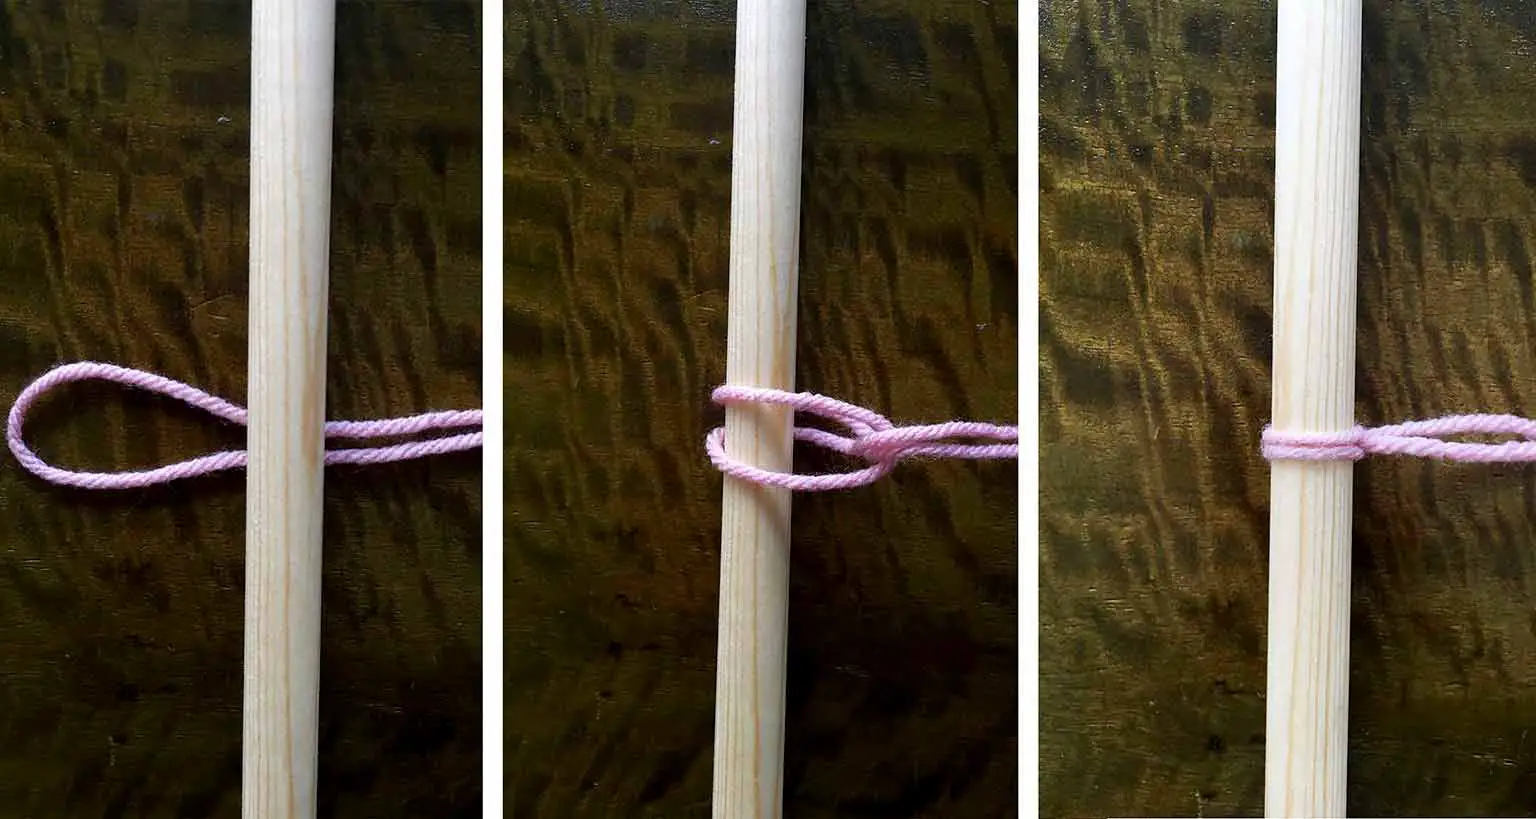
3) CUT, TIE AND REPEAT...x10000000000
This is the repetitive, monotonous part of the process (although I actually found it surprisingly therapeutic!)
Cut pieces of yarn that are double the length that you want your wall hanging to be. To attach them to the pole, fold a piece of yarn in half, put the folded end under the pole, poke the ends through the loop and pull it tight.
We found that it was easier to cut lots of lengths of yarn at once so that you can get into more of a rhythm of tying them. We worked with it laying flat on the dining room table, but you could also hang it on the wall and work vertically.
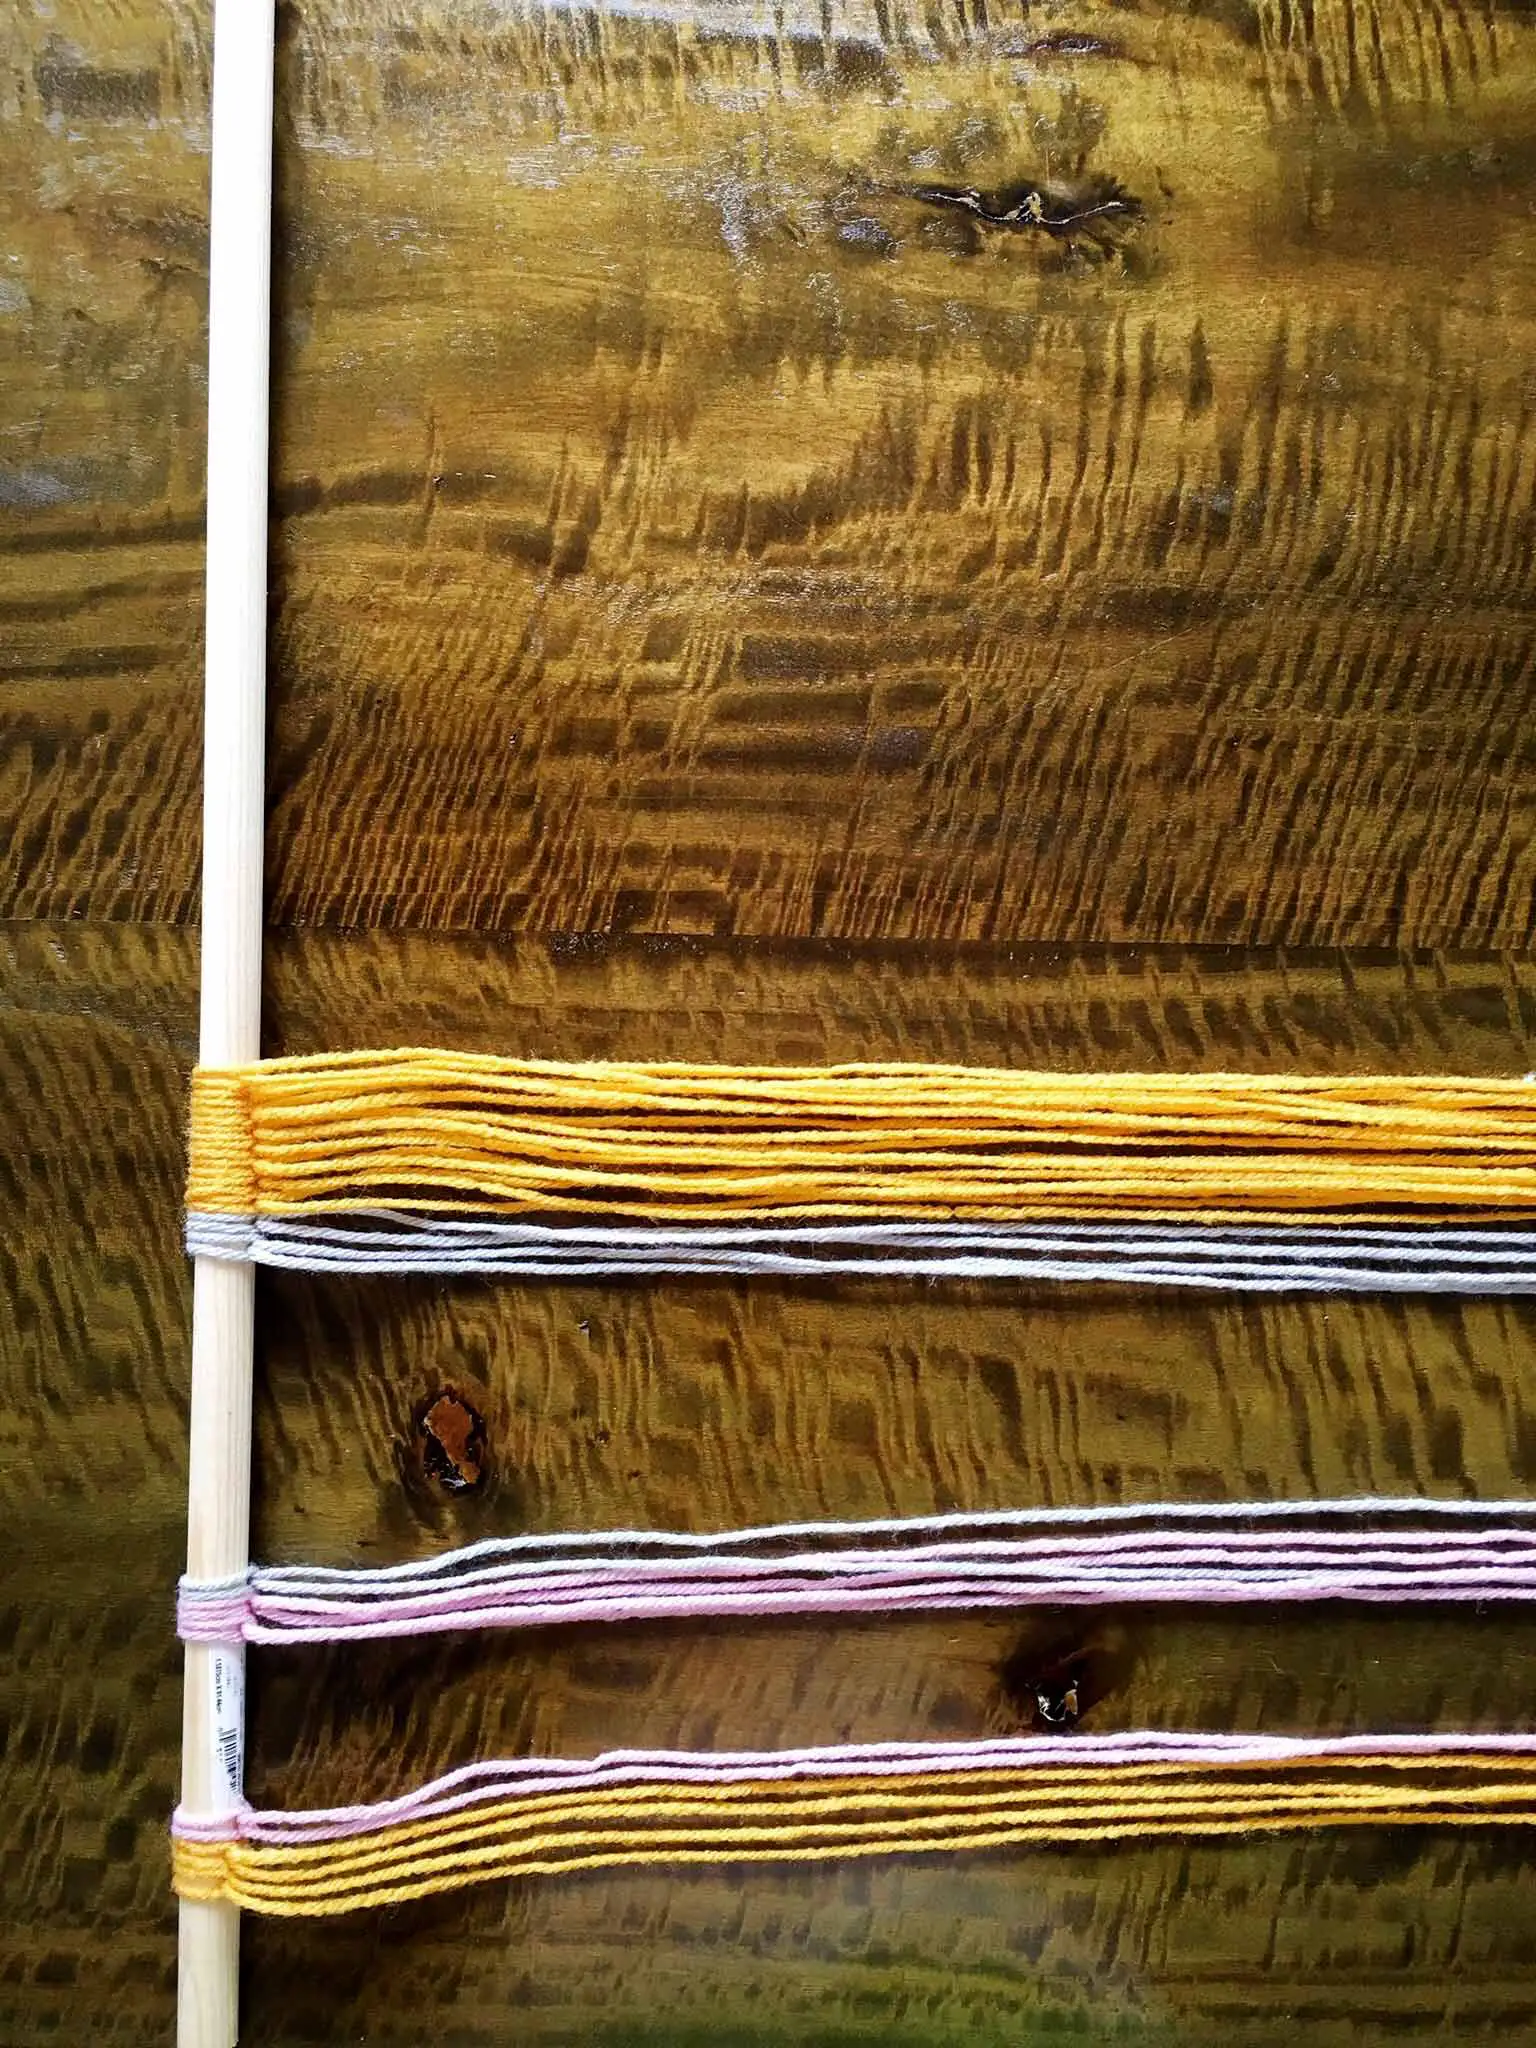
If you are following a design, keep measuring your sections with the tape measure as you go along to stay on track.
Carry on tying pieces of yarn on until there are no gaps left on the dowel.
4) TRIM INTO SHAPE
This works best if you hang it in place on the wall first. To hang it up, you can either tie a large length of twine or yarn to each end of the pole and hang it from a single nail, or you can put in two nails either side at an upward angle and rest the pole along the top.
You could either trim the yarn ends straight across, or into a symmetrical shape, or on an angle—it's up to you! We decided on an inverted 'V' for ours. It was more challenging than I was expecting to cut it evenly—let's just say I'm not going to try my hand at cutting my children's hair any day soon! In hindsight, adding painter's tape to the wall as a guide would have helped me out a lot, and I'll definitely be using that technique next time I make one of these.
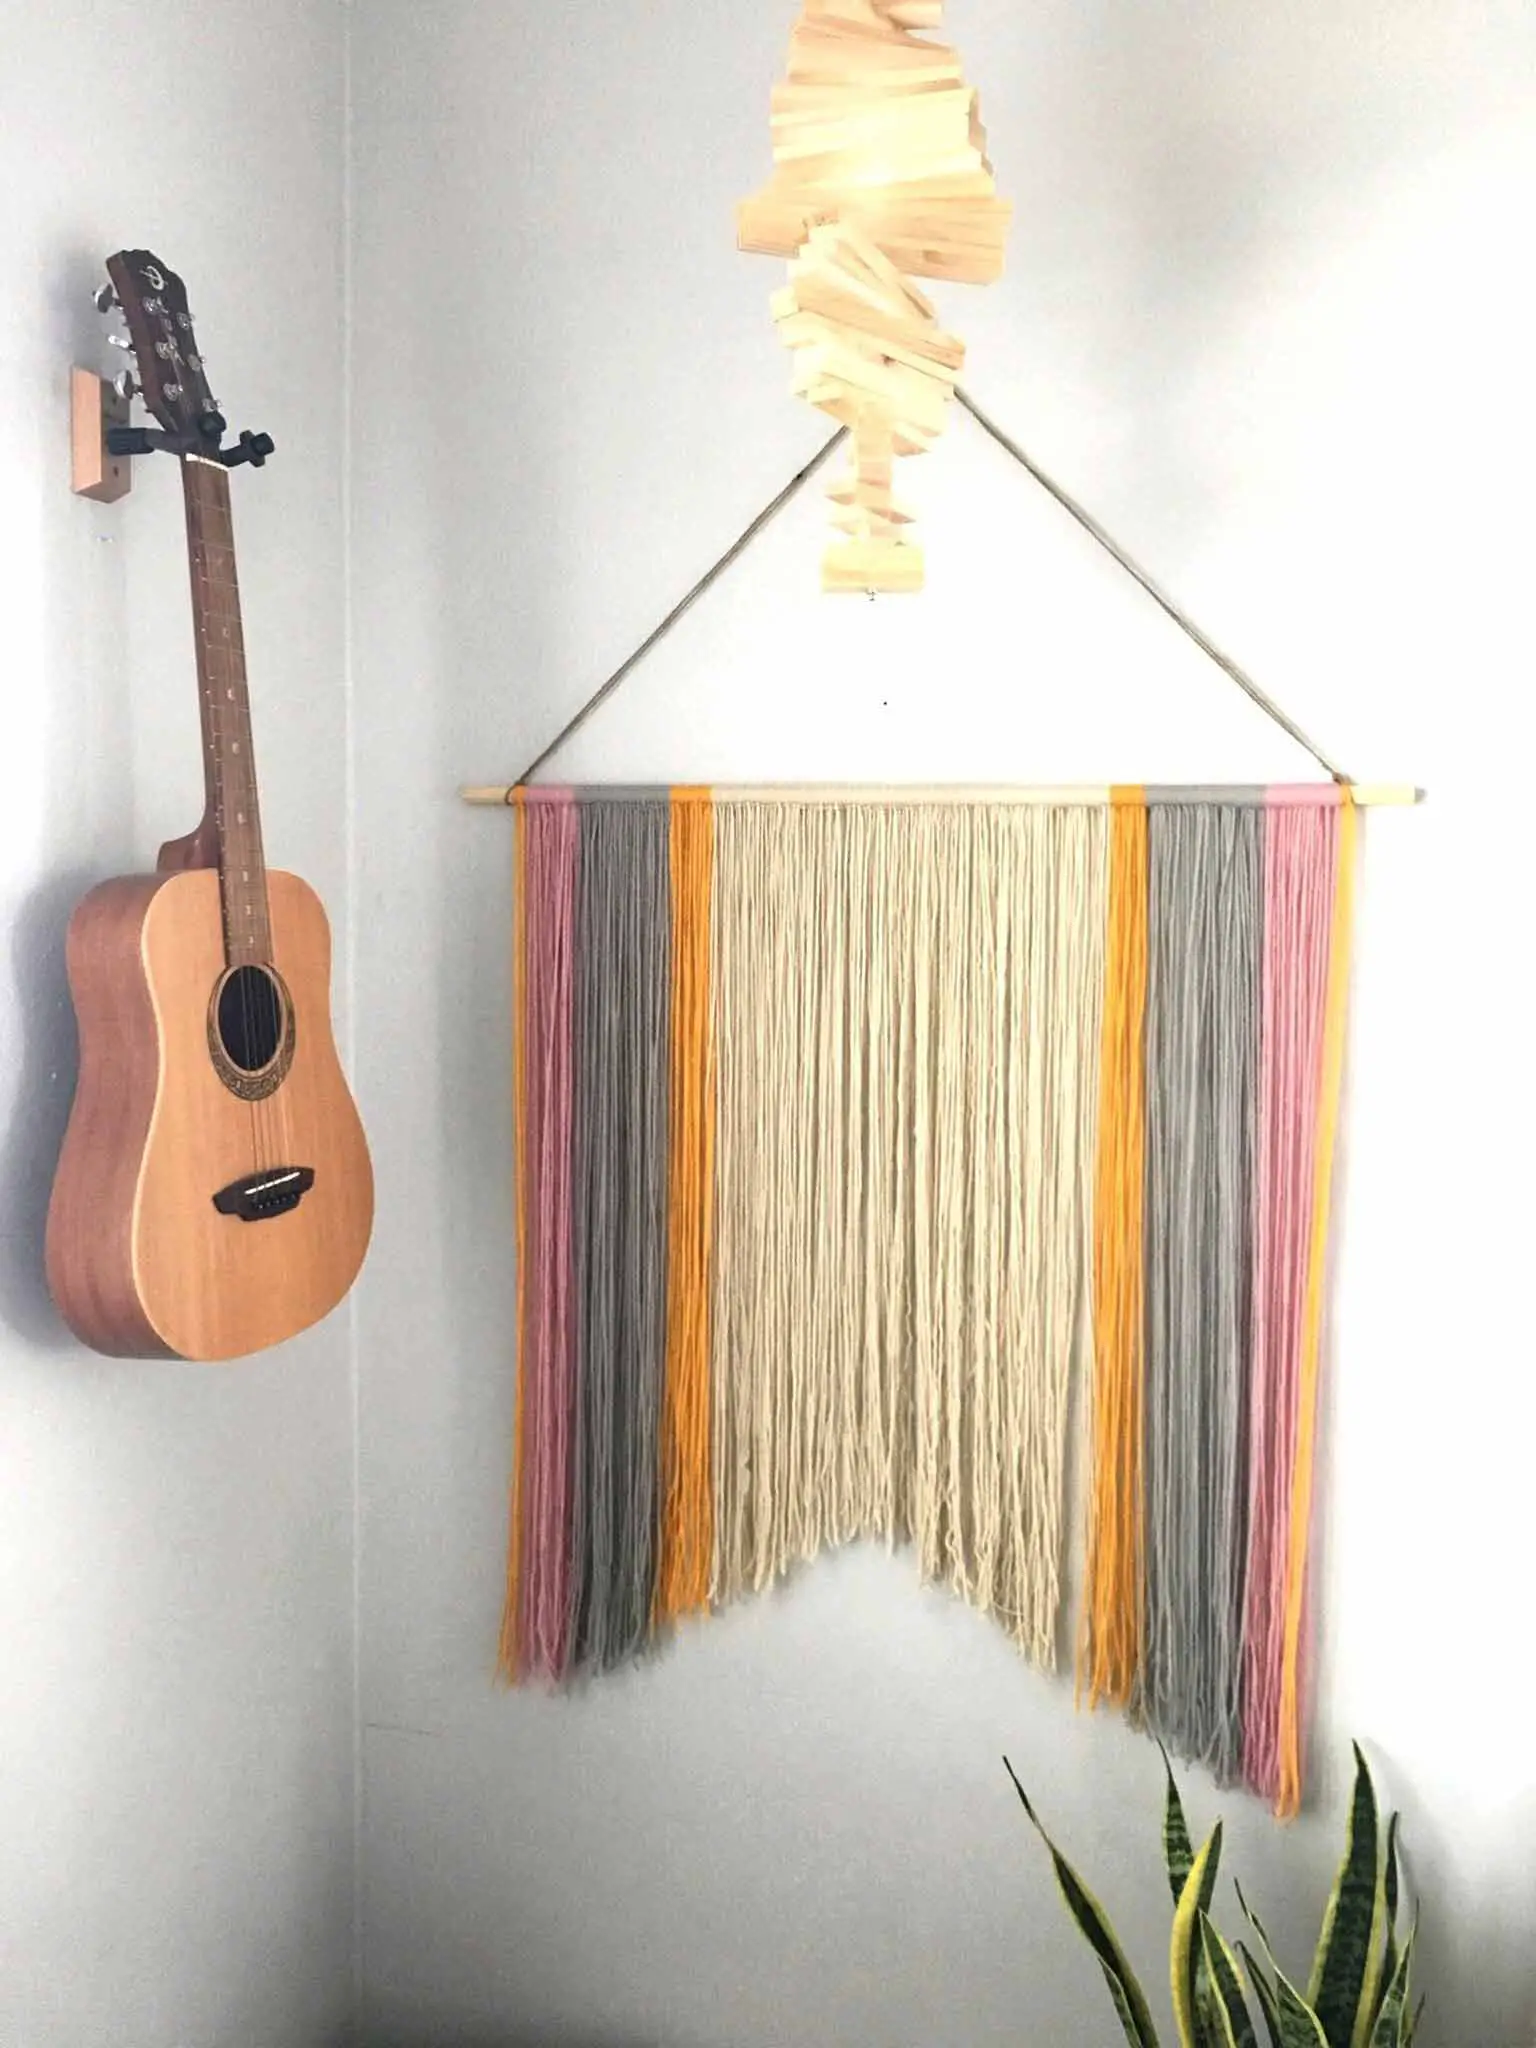
And that is it! — a simple, easy and inexpensive DIY craft to bring some boho flair and pops of color into your home. Make sure to check out the whole bedroom makeover—this was a such a fun project and we found some amazing bargains to transform her room on a budget!
Looking for more easy DIY and craft projects? I've got you covered! Here are some you might like to try:
DIY Stenciled Doormat Tutorial
Craft Resin Coasters for Beginners