This post is sponsored by KILZ® Brand but the content and opinions expressed here are my own.
While we are patiently waiting for our house build to get rolling, I have been keeping half an eye out for projects to get stuck into. The kids bedroom in the apartment is lacking storage (we weren't expecting to be living here for so long...) and so when I saw a solid pine dresser on Facebook Marketplace that I thought would work in the apartment and in our new home, I snapped it up as quickly as I could!
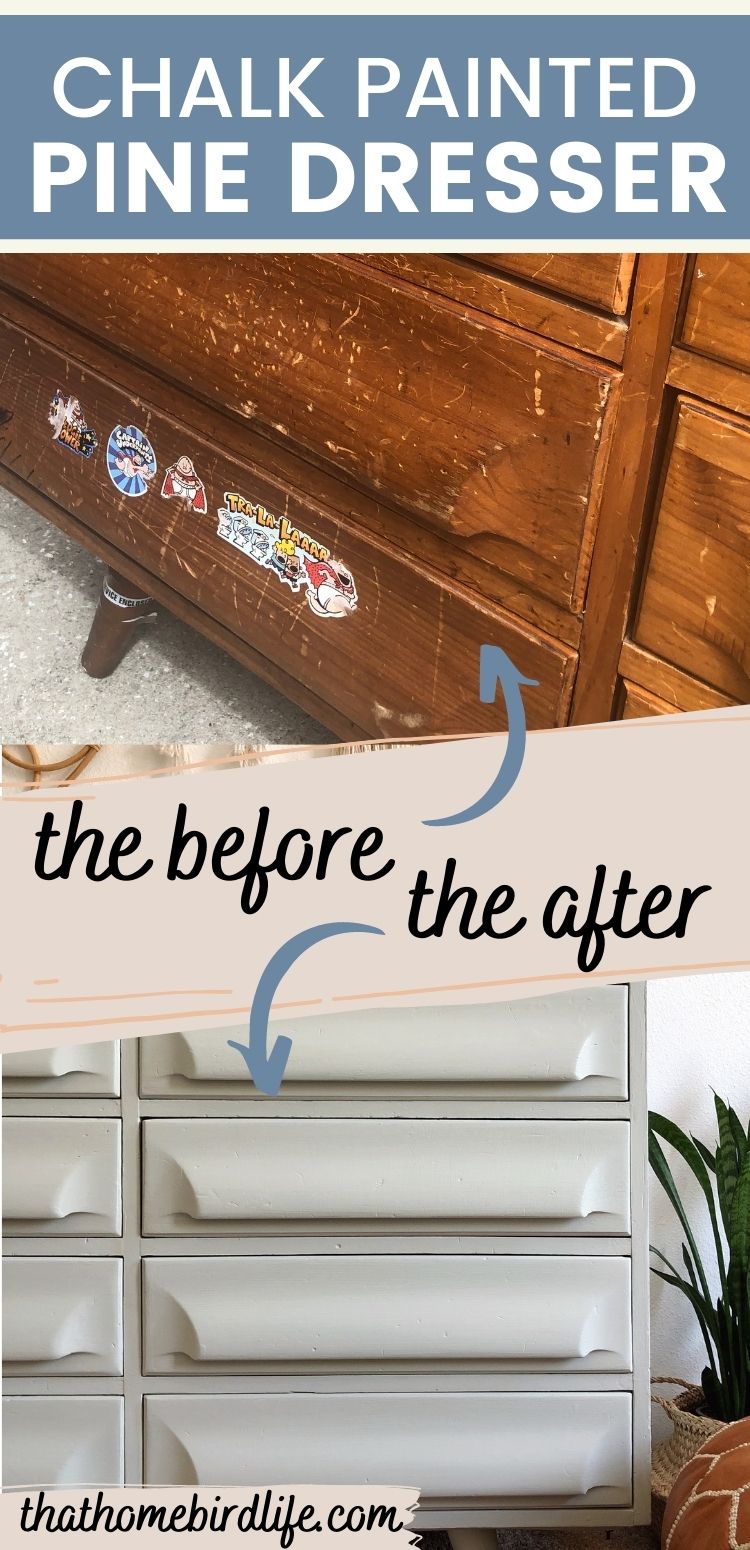
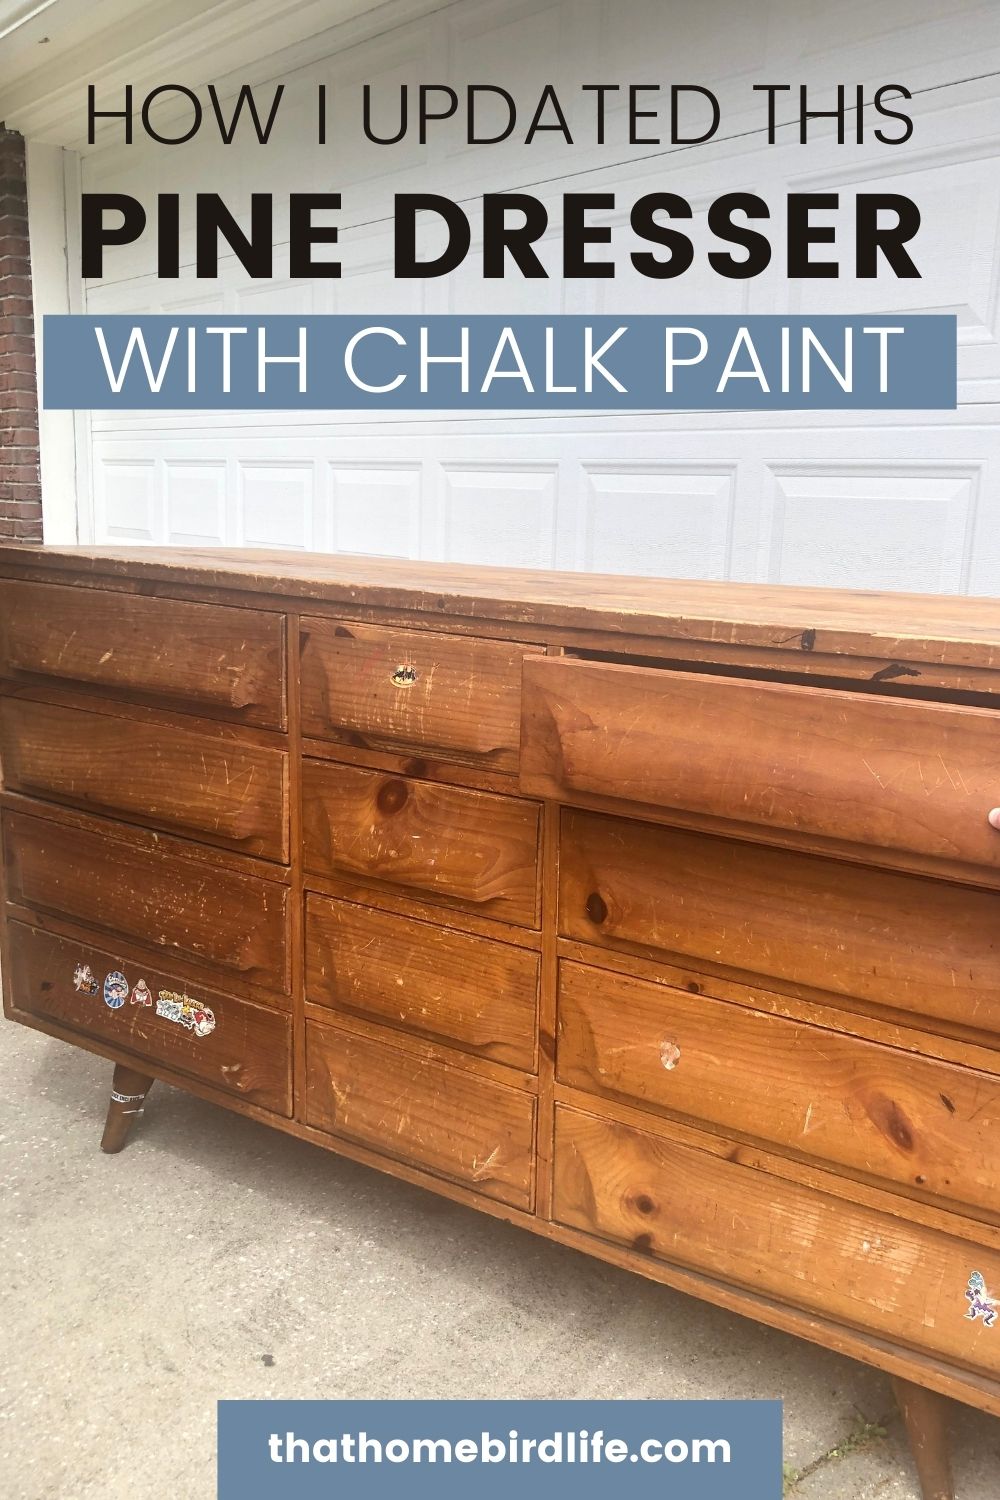
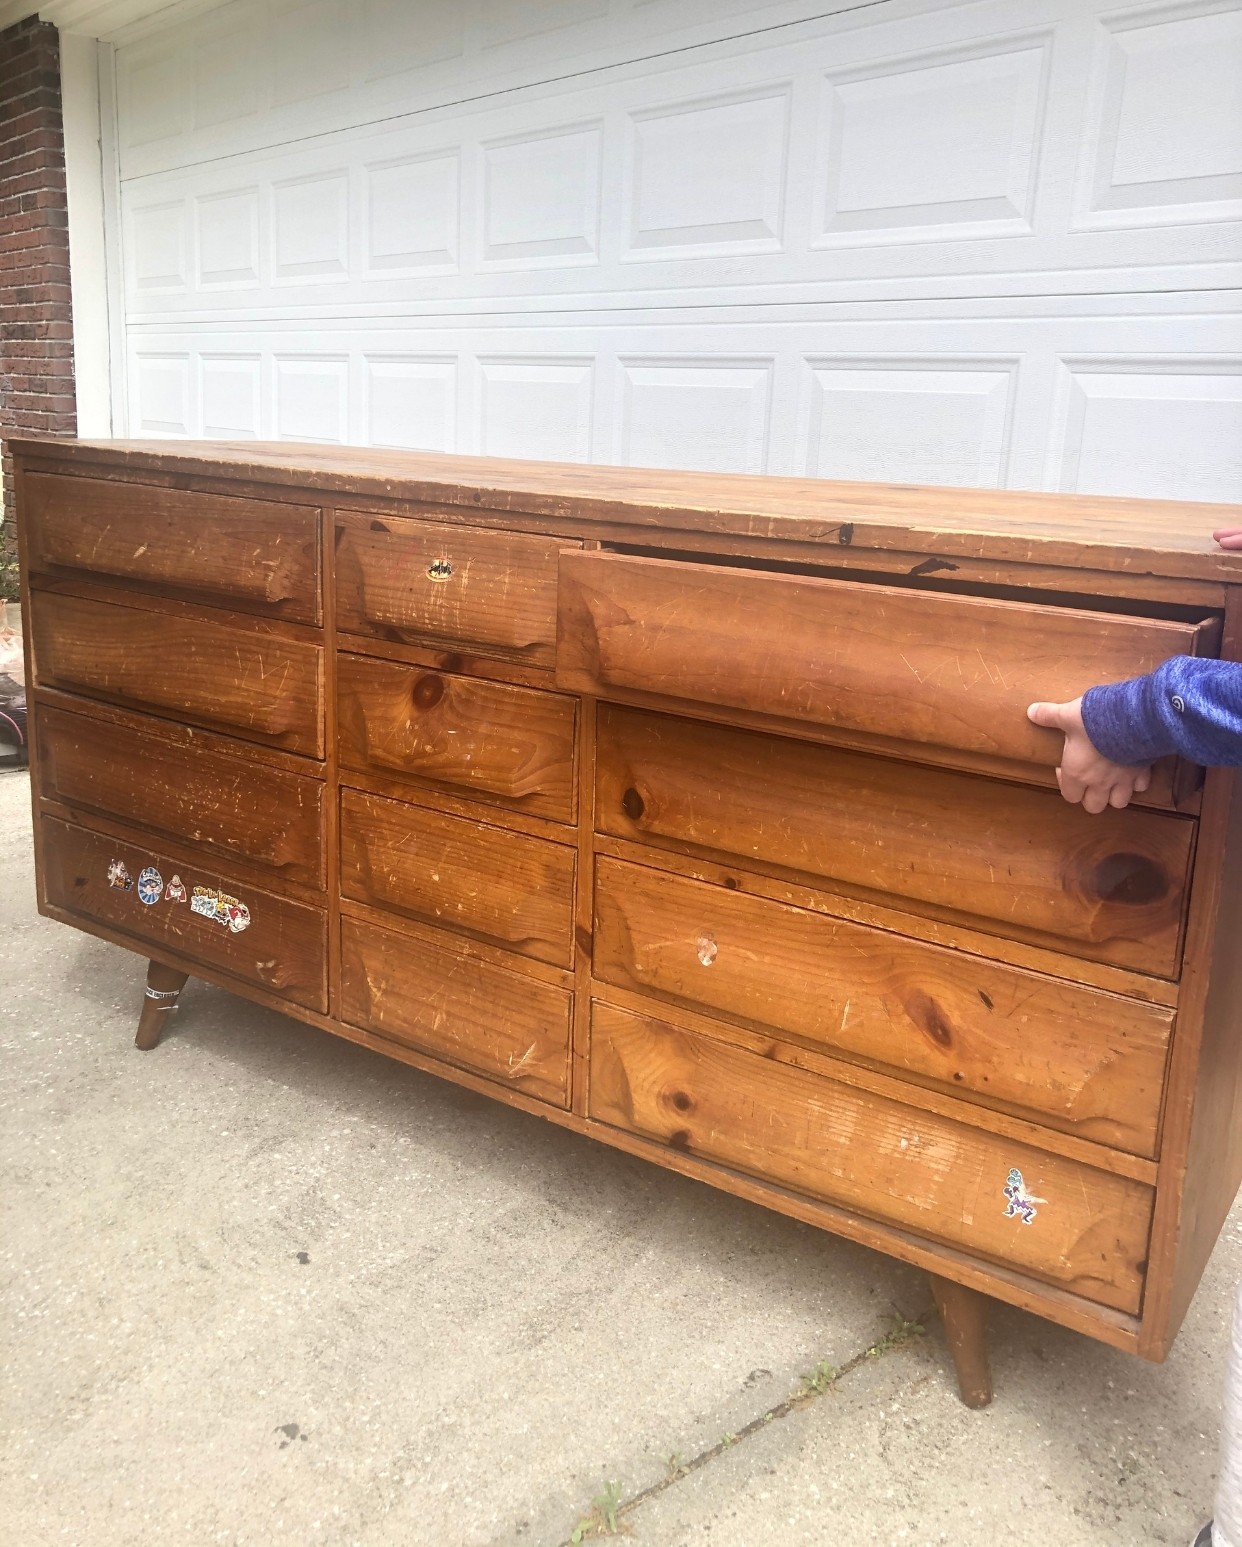
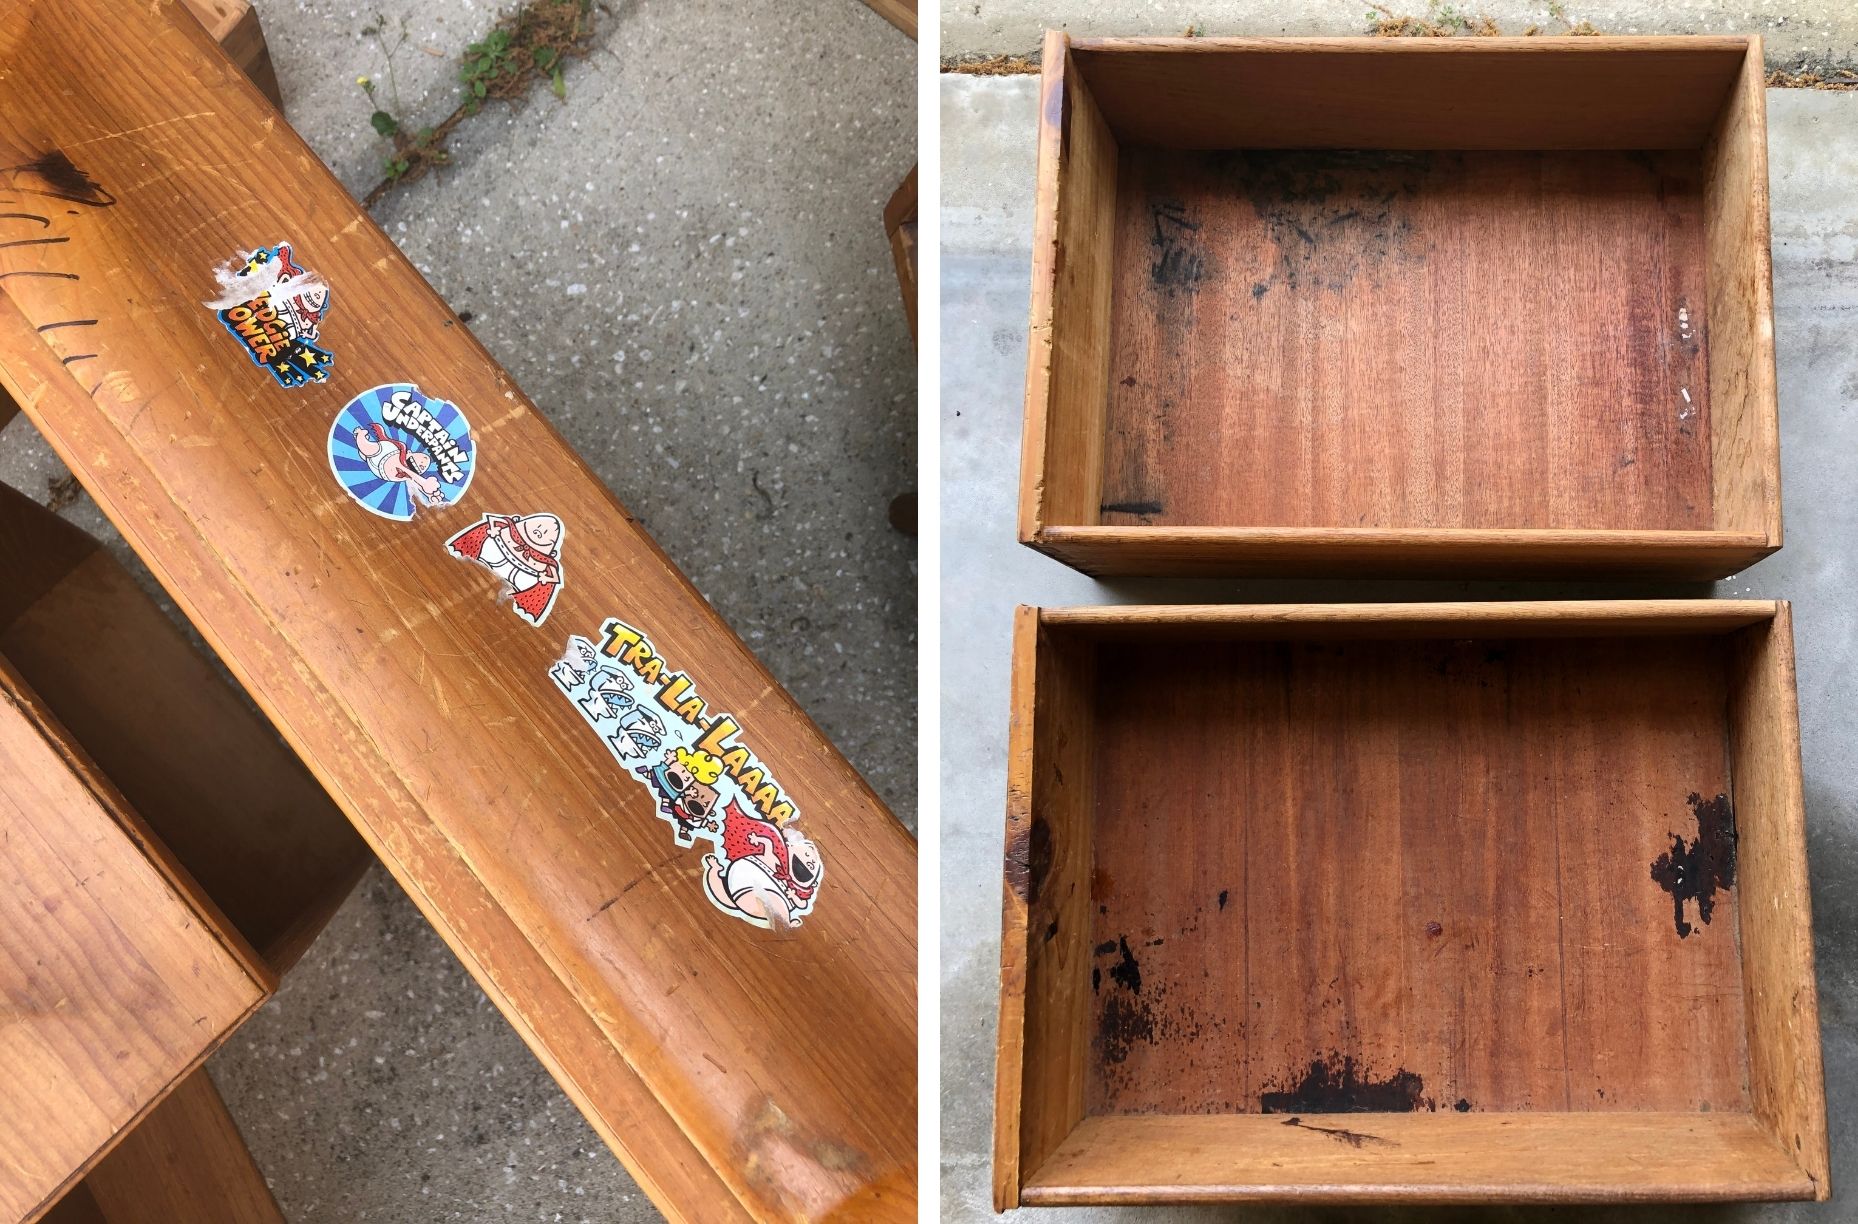
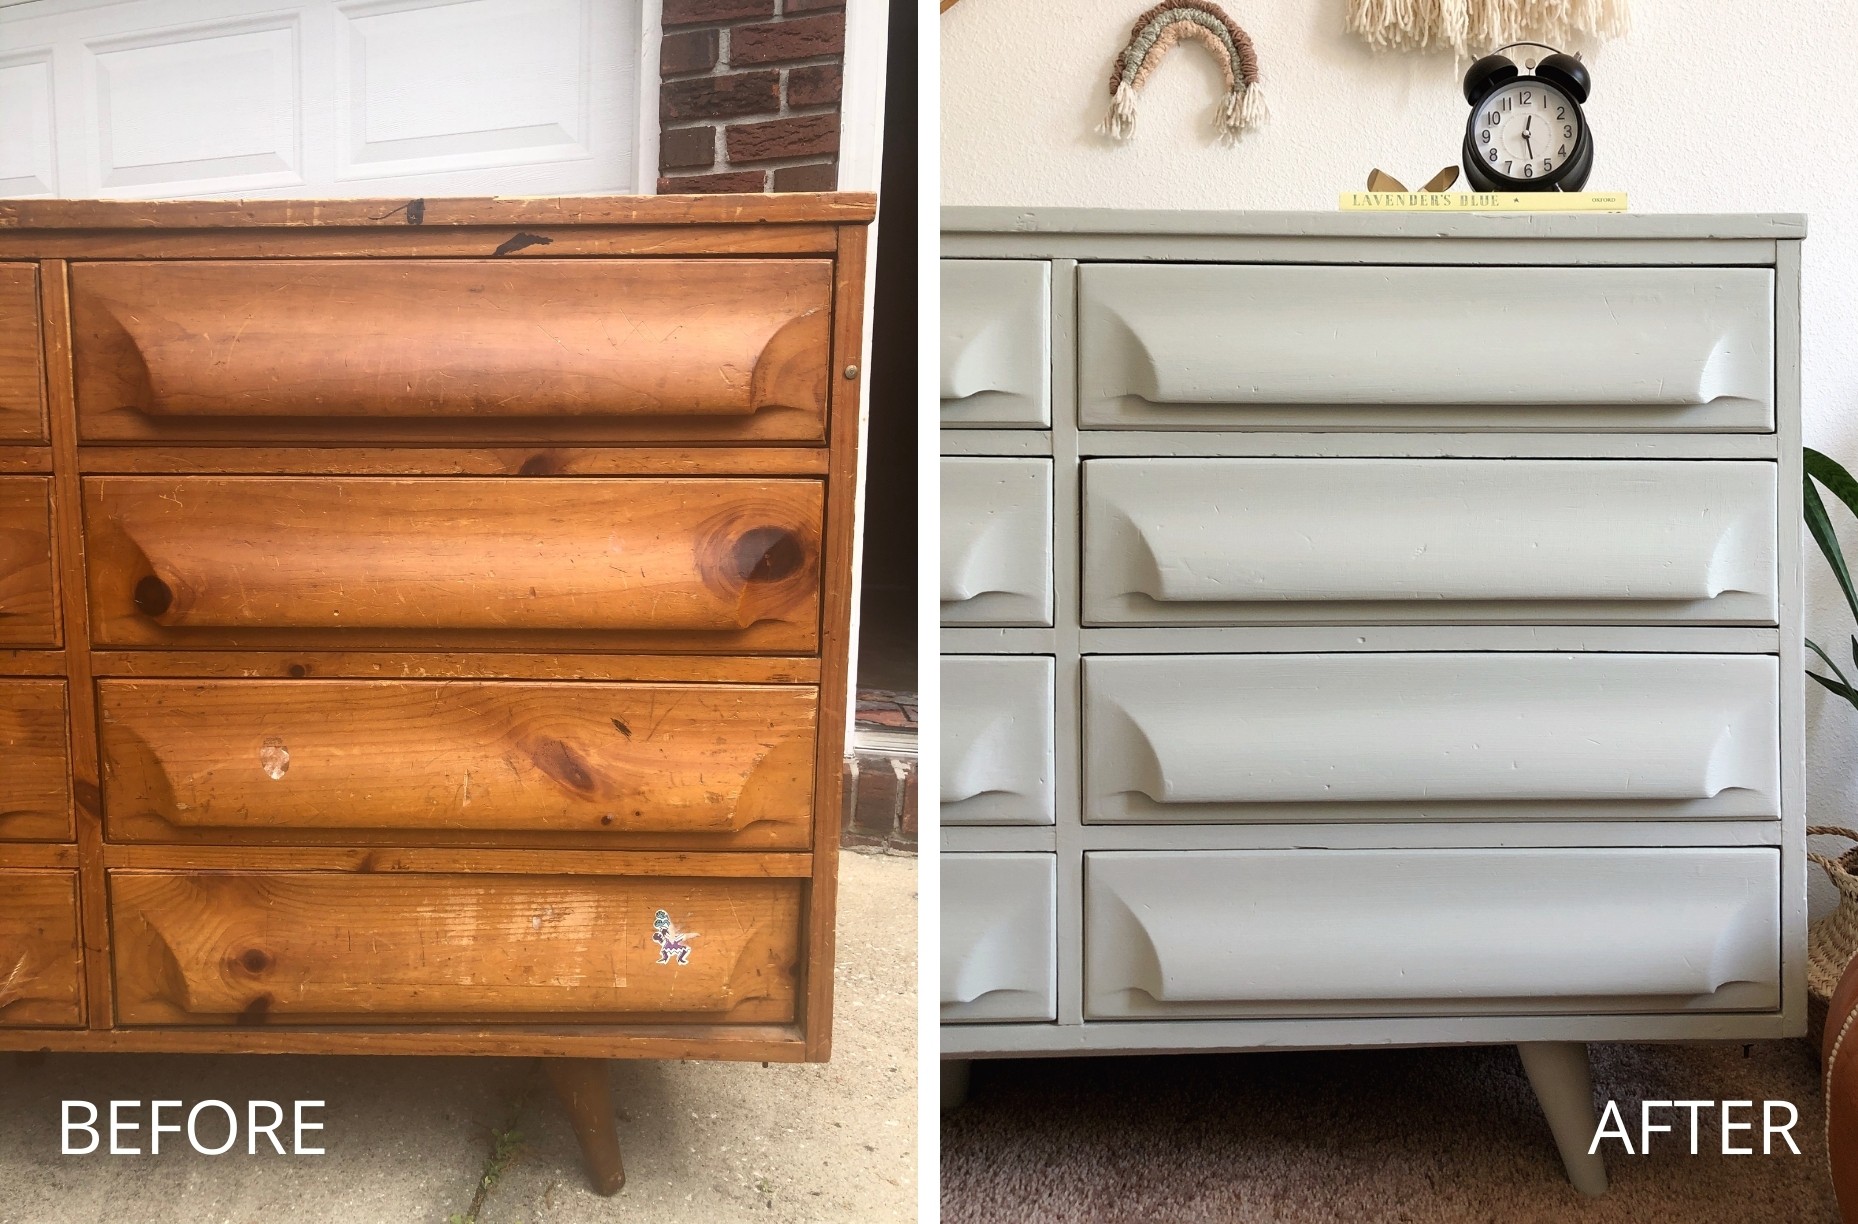
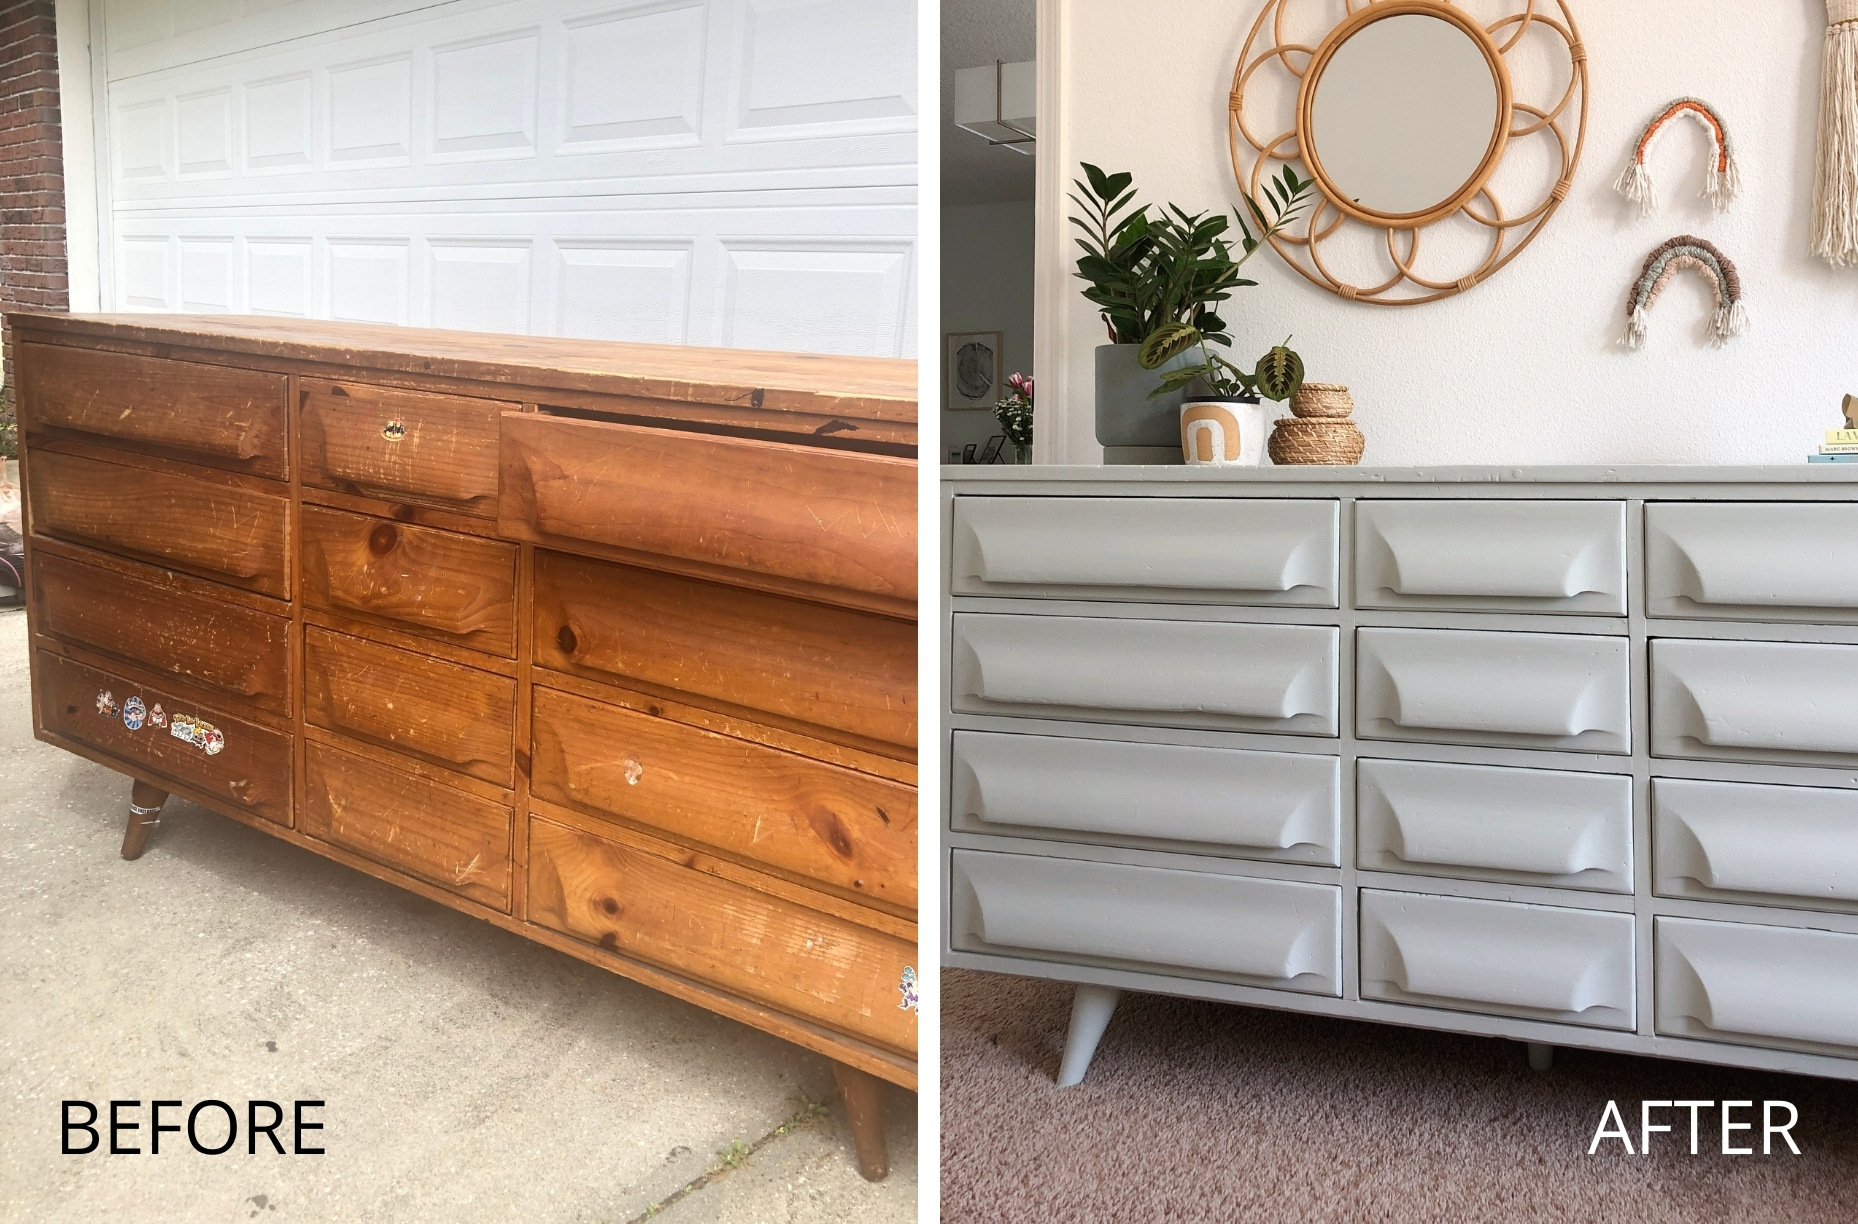
There's always a worrying moment when you see what you are purchasing for the first time, and in this case, the dresser was in worse condition than I was expecting. The owner told me that it had been used (and abused...) by a couple of generations of kids in their family, and it definitely showed. On the plus side, it was very well constructed, original to the 1960s and I loved the shape of it. So we muscled it into the back of our SUV with kids in tow and I hatched a plan on how I was going to make it beautiful again.
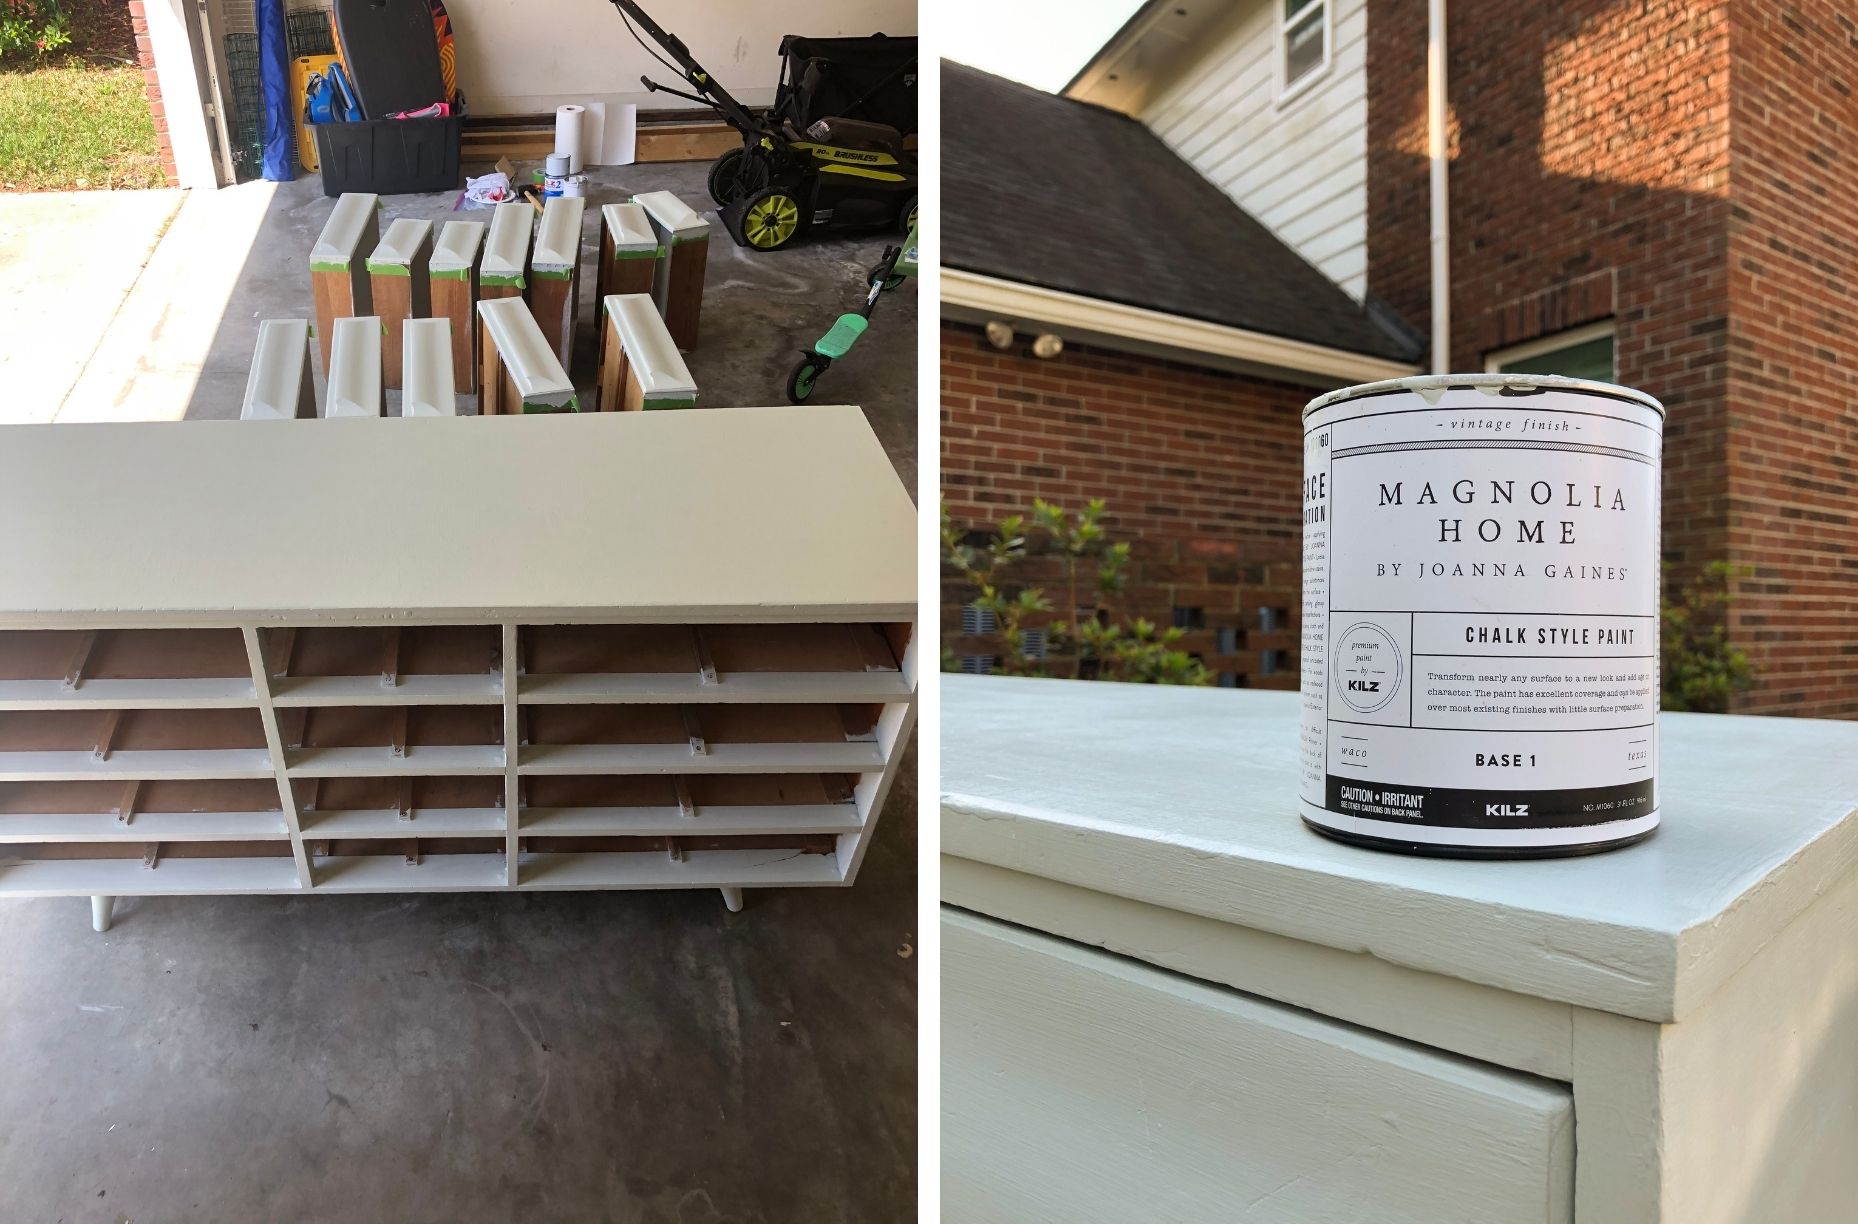
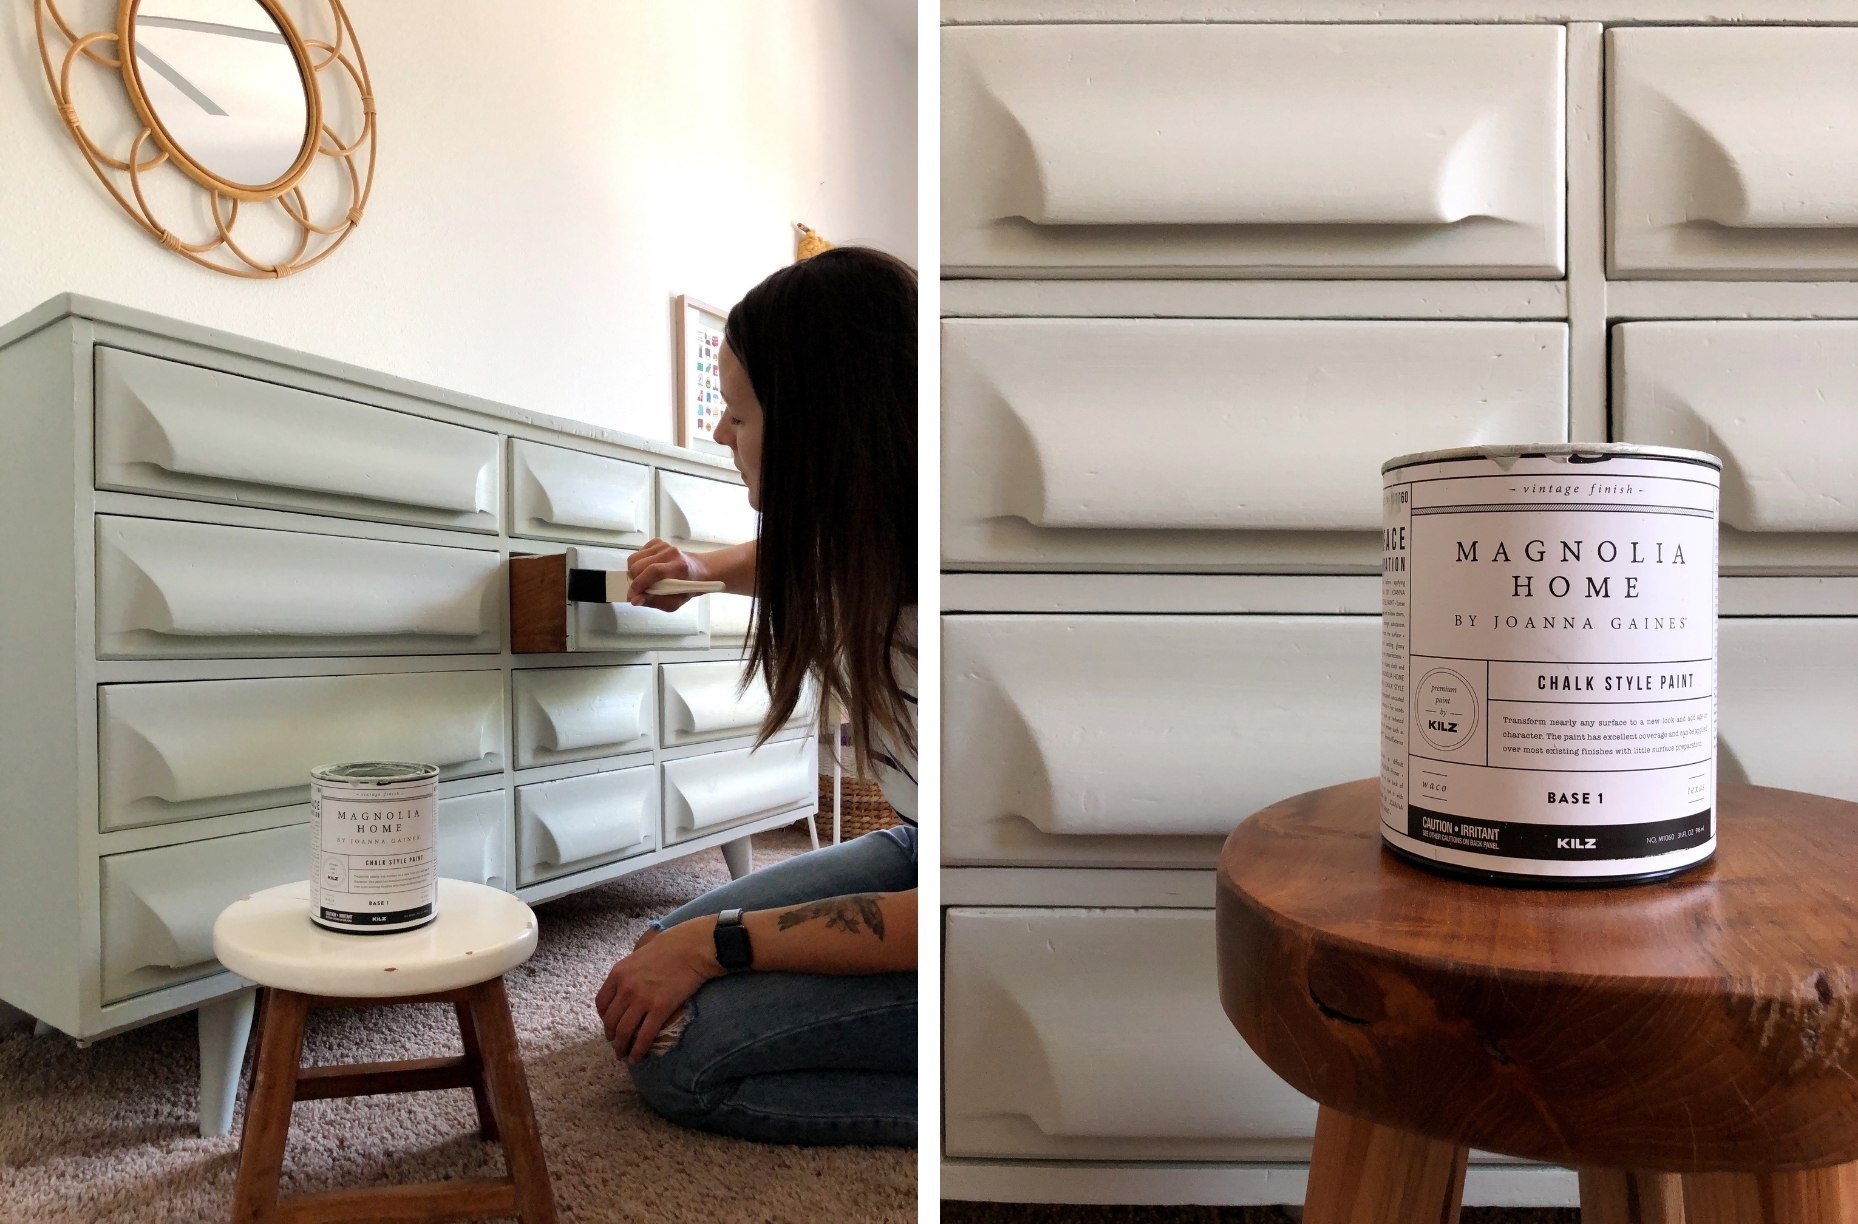
Given the bad shape the wood was in, my plan of action was to use chalk style paint from the Magnolia Home by Joanna Gaines® paint line with a good primer underneath to block all the stained areas. I decided this dresser would be perfect for my 8 year old daughter's room in the new house, so I gave Immy the important task of picking out a color. I had an inkling she would choose a blue/green tone, and since the entire collection is curated by Joanna Gaines, there really wasn't a wrong choice.
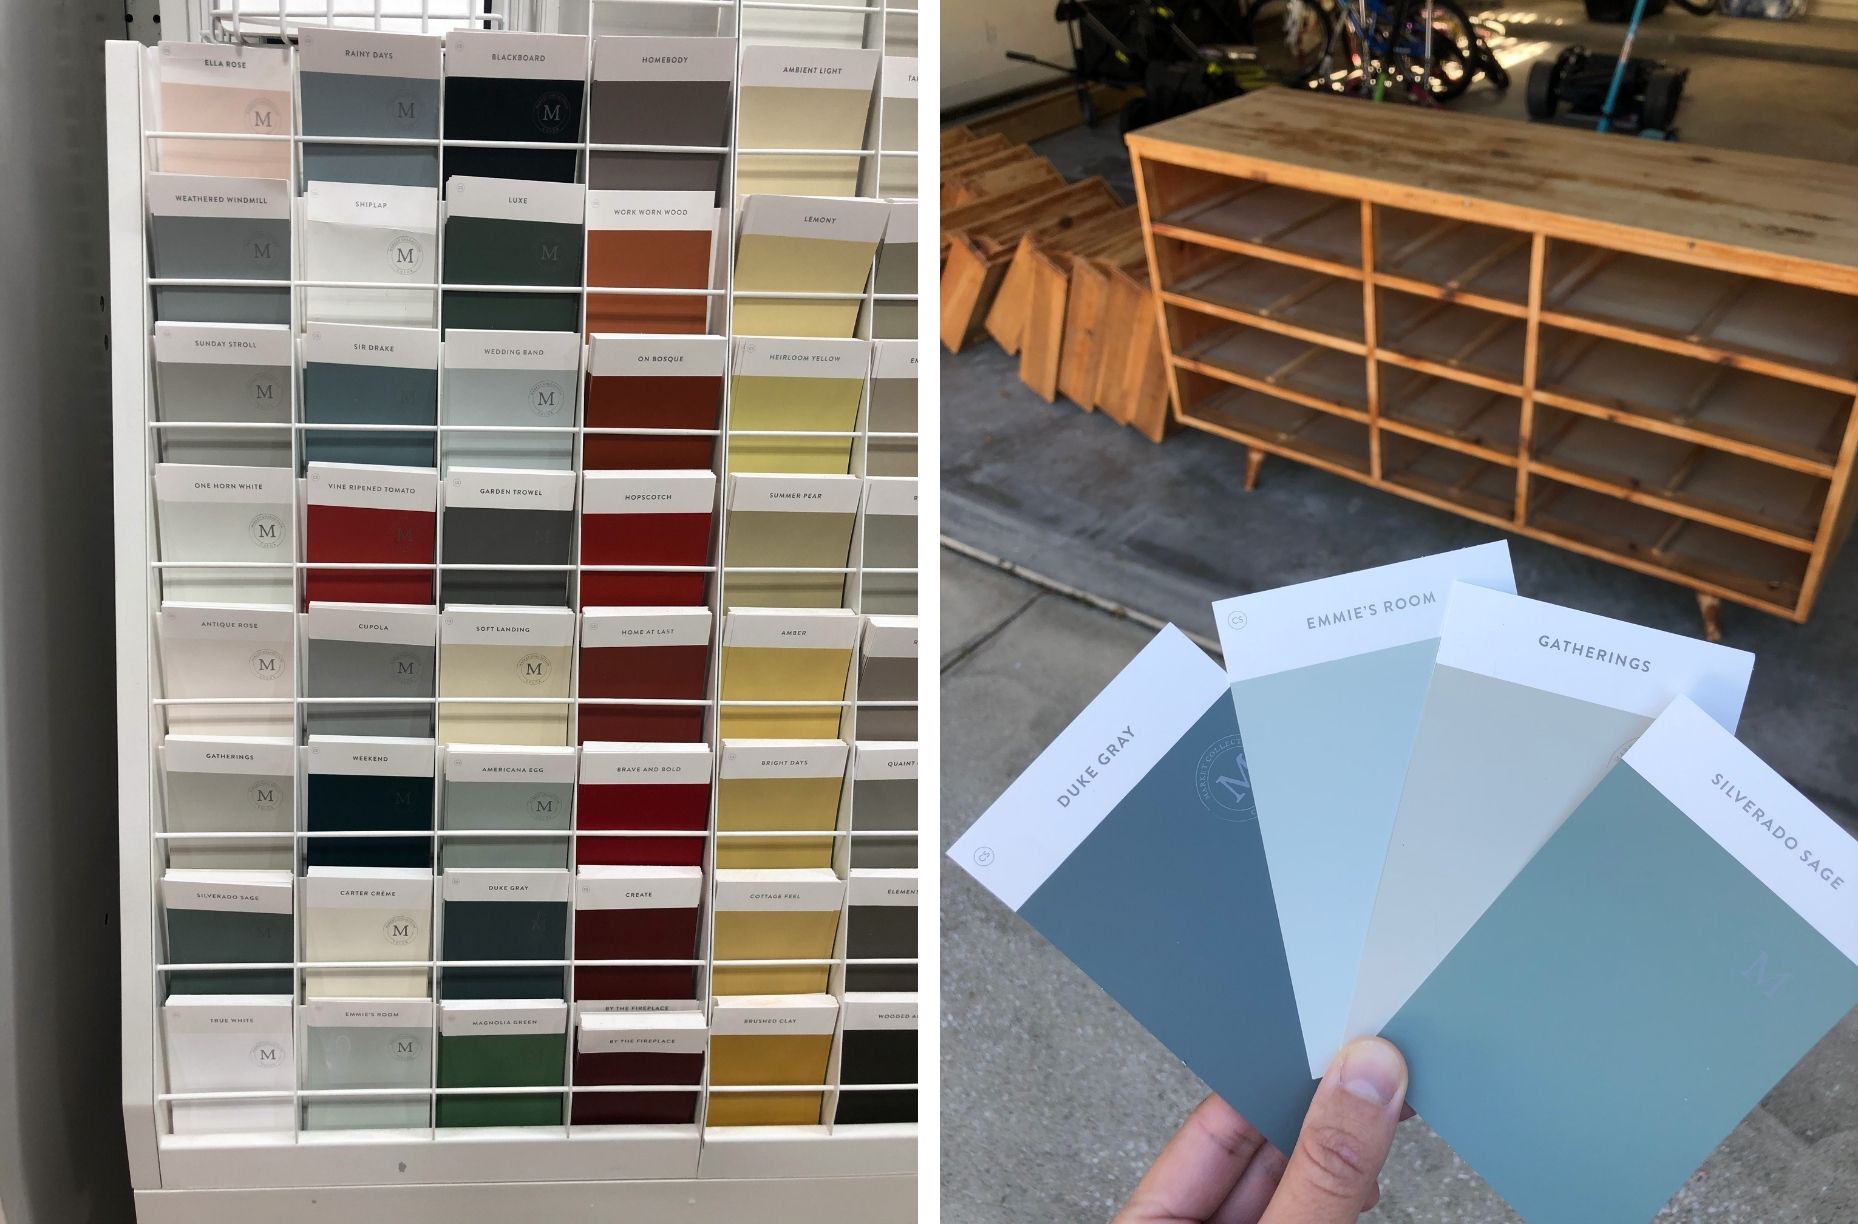
The "M" on the paint swatch indicates that it is a part of the Market Collection—a palette of 25 colors personally crafted by Joanna. Immy ultimately decided on 'Emmie's Room' which is a beautiful muted green-gray.
Here are the supplies I used for the project:
- Quart of Magnolia Home by Joanna Gaines chalk style paint in 'Emmie's Room'
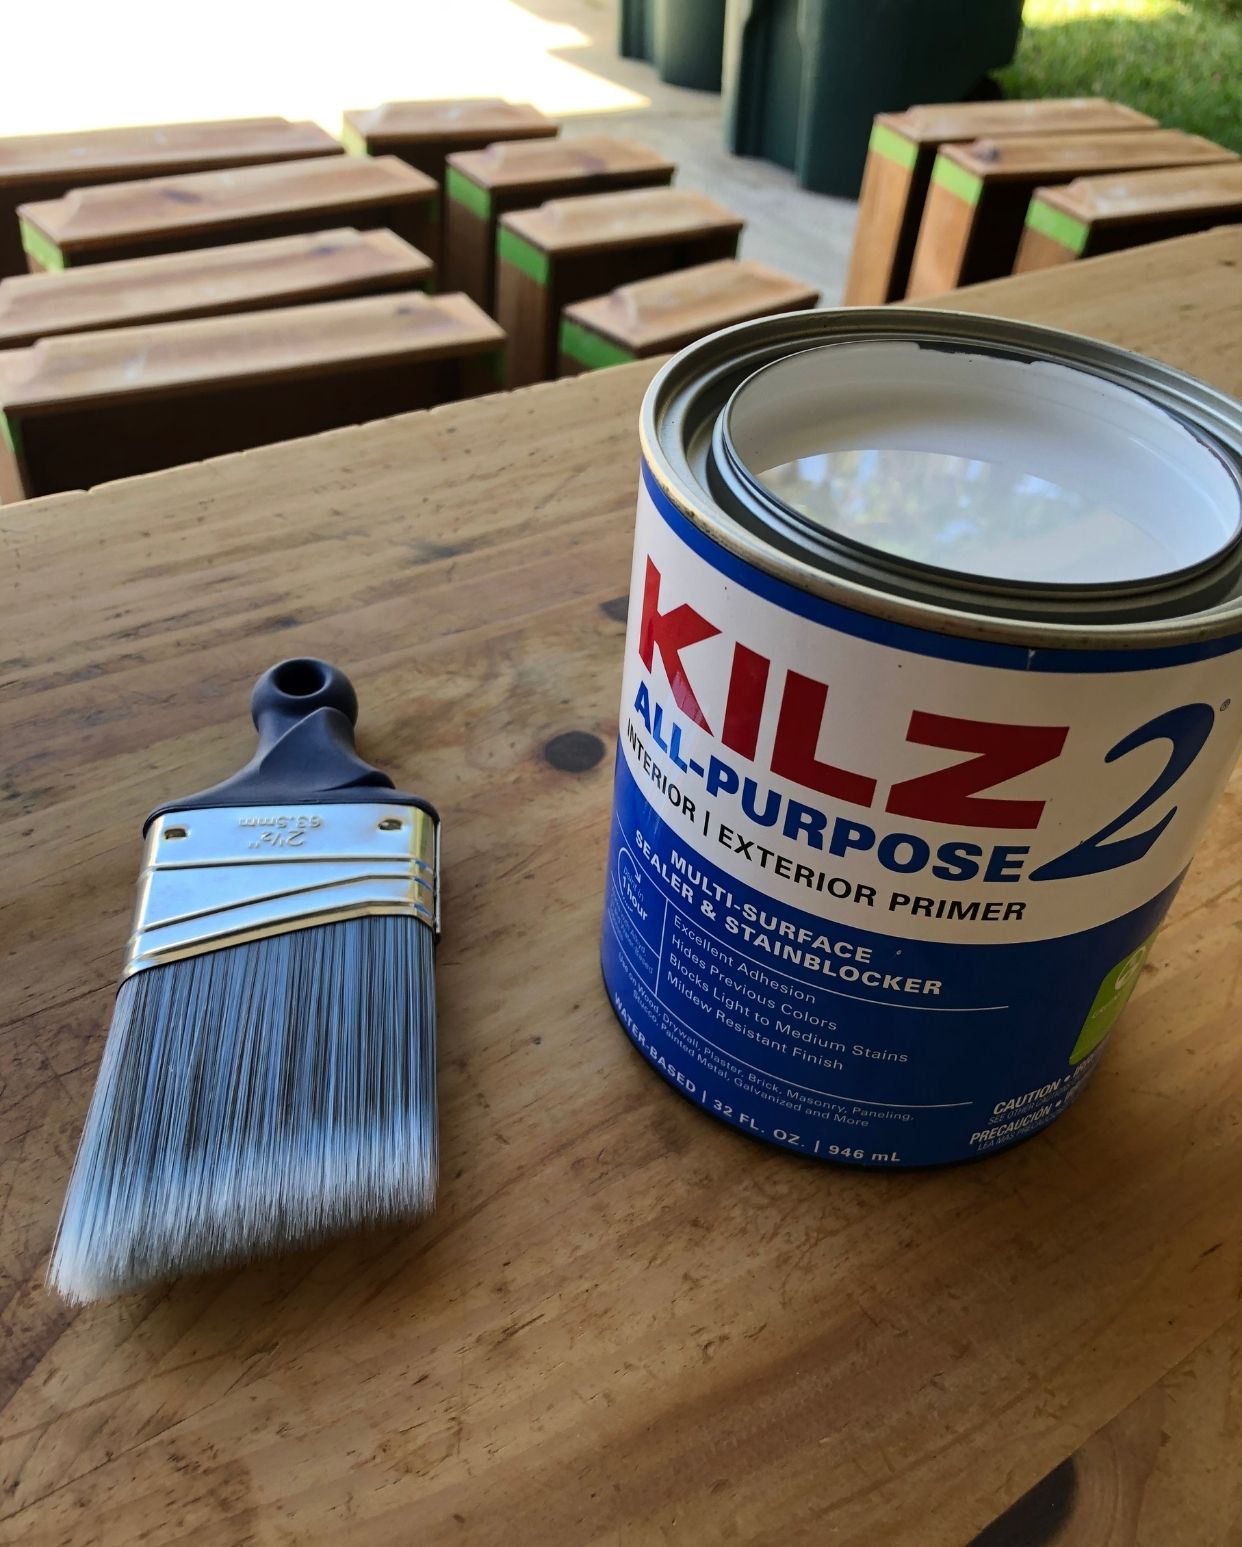
- Quart of KILZ 2® All-Purpose Primer
- 2 inch & 2.5 inch short angled paint brushes
- Goo gone & white vinegar for cleaning
- Palm sander and sandpaper in 120 and 220 grit
- Wood filler
- Clear wax and lint-free cloths for application
I purchased the paint and primer from my local Ace Hardware store, and Mike gave me tips on which grit sandpaper to use while he mixed the paint which was much appreciated! With all my supplies in order, I got to work full of enthusiasm...
STEP ONE: PREP WORK
This was by far the worst and most time consuming part of the project, and my enthusiasm faded quickly. In order to get a good finish, I knew that prepping the piece was important...but it was very tedious! There were several stickers on the drawers, and a piece of gum welded to the back. The inside of the drawers were stained with I-don't-know-what, so I doused the whole thing with vinegar for good measure and let it dry out in the sunshine.
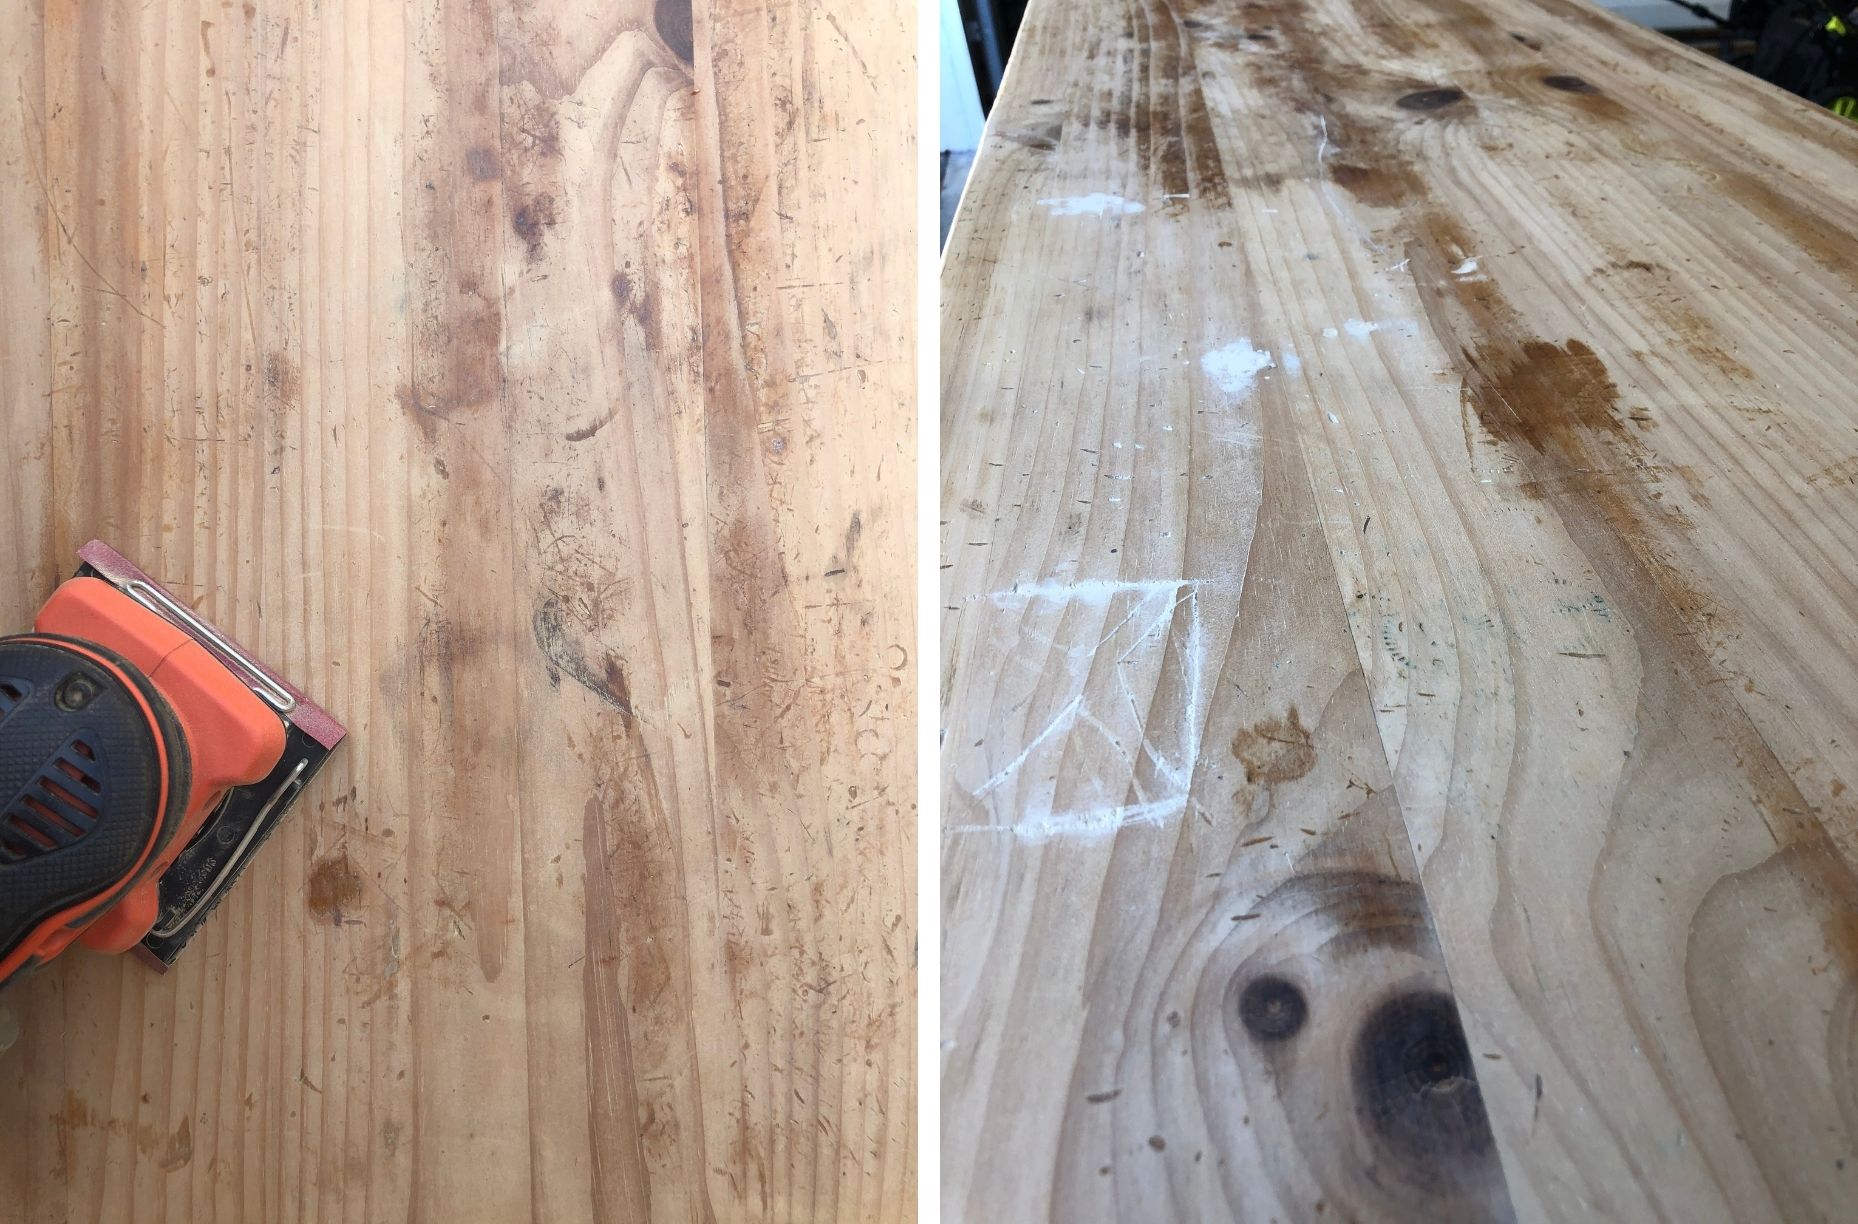
Once it was cleaned up, I used my palm sander with 120 grit sandpaper to start, then used 220 grit to smooth it off a little. The wood had some kind of varnish on it, so I wanted to try and get the worst of it off, plus smooth out some of worst scratches and dents in the wood. There were some areas which had etchings carved in, so I used some wood filler on those parts.
STEP TWO: PRIMER
With the dresser as clean as I could get it, I applied the primer using a short angled paint brush. I did the insides of the drawers as well because they were in such bad shape...sealing them with KILZ Primer gave me more confidence that it was safe to use for storage! I could see a couple of areas on the top where I hadn't quite sanded the lacquer off properly, so I used a couple of coats of KILZ Primer in those spots. For the rest of the piece, one coat was sufficient.
STEP THREE: CHALK PAINT
This was definitely the fun part! This chalk paint goes on so easily and it made satisfying work after a slow start to the project. The beauty of chalk paint is that it has great texture, which helps blend all the nicks and dents in the wood. (Note: If you are wanting a smoother finish, you can sand in between coats and before applying wax using 400 grit sandpaper.) I ended up doing three coats of paint on the dresser top, and two everywhere else.
STEP FOUR: TOUCH UPS & WAX
At this stage, we picked up the dresser from my friend's garage where I had been working on it (thanks Megan!) and moved it to our apartment. Once we got the dresser in place (thank goodness for the elevator—this thing is HEAVY) I noticed a couple of spots that needed a touch up. Magnolia home chalk style paint is low odor and low VOC so it was fine to use it in the girls' bedroom.
To finish the project, I gave it a couple of thin coats of clear wax applied with an old t-shirt. The trick with wax is to go easy (don't apply it too thickly) and buff with a clean rag. The finish should be smooth and soft, not tacky.
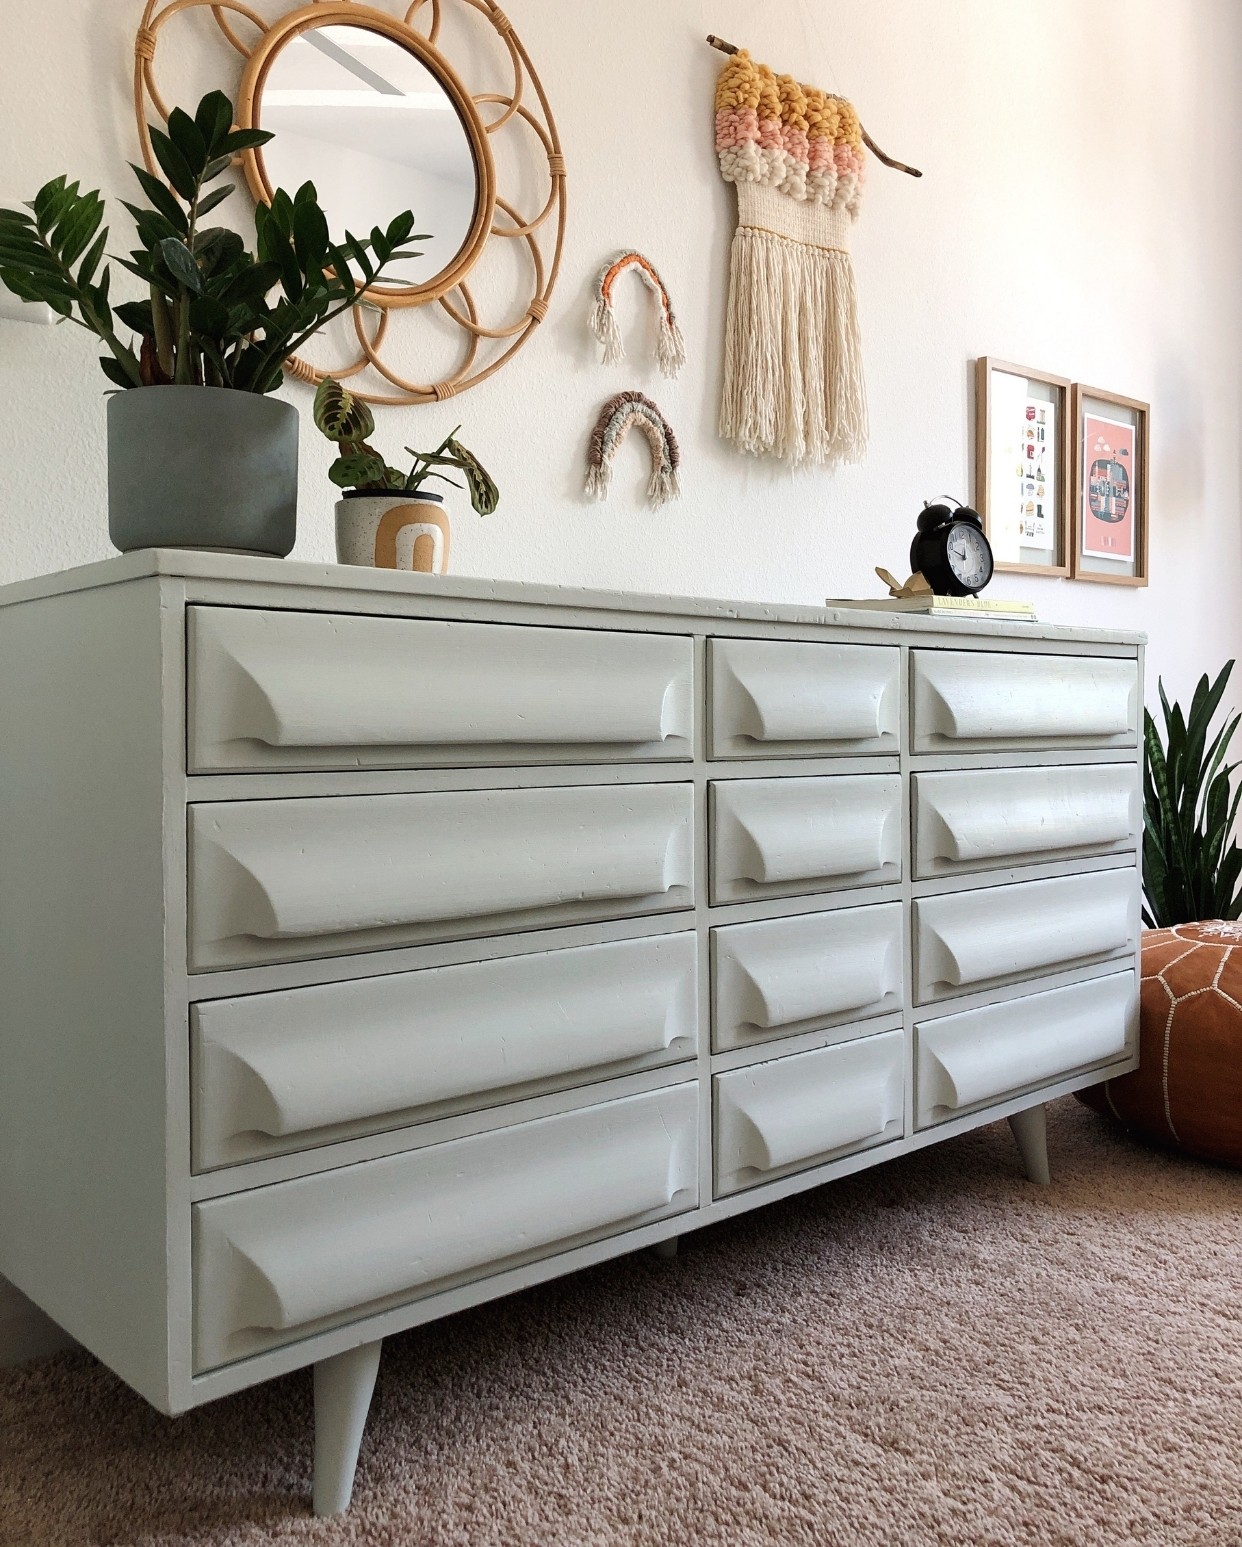
I am so thrilled with the result of this project! I have to say, it turned out SO much better than I was expecting when I first saw the sad state of the dresser, and I love that the chalk paint finish has given it a timeless, vintage feel which will work beautifully with the aesthetic of our new "old" house.
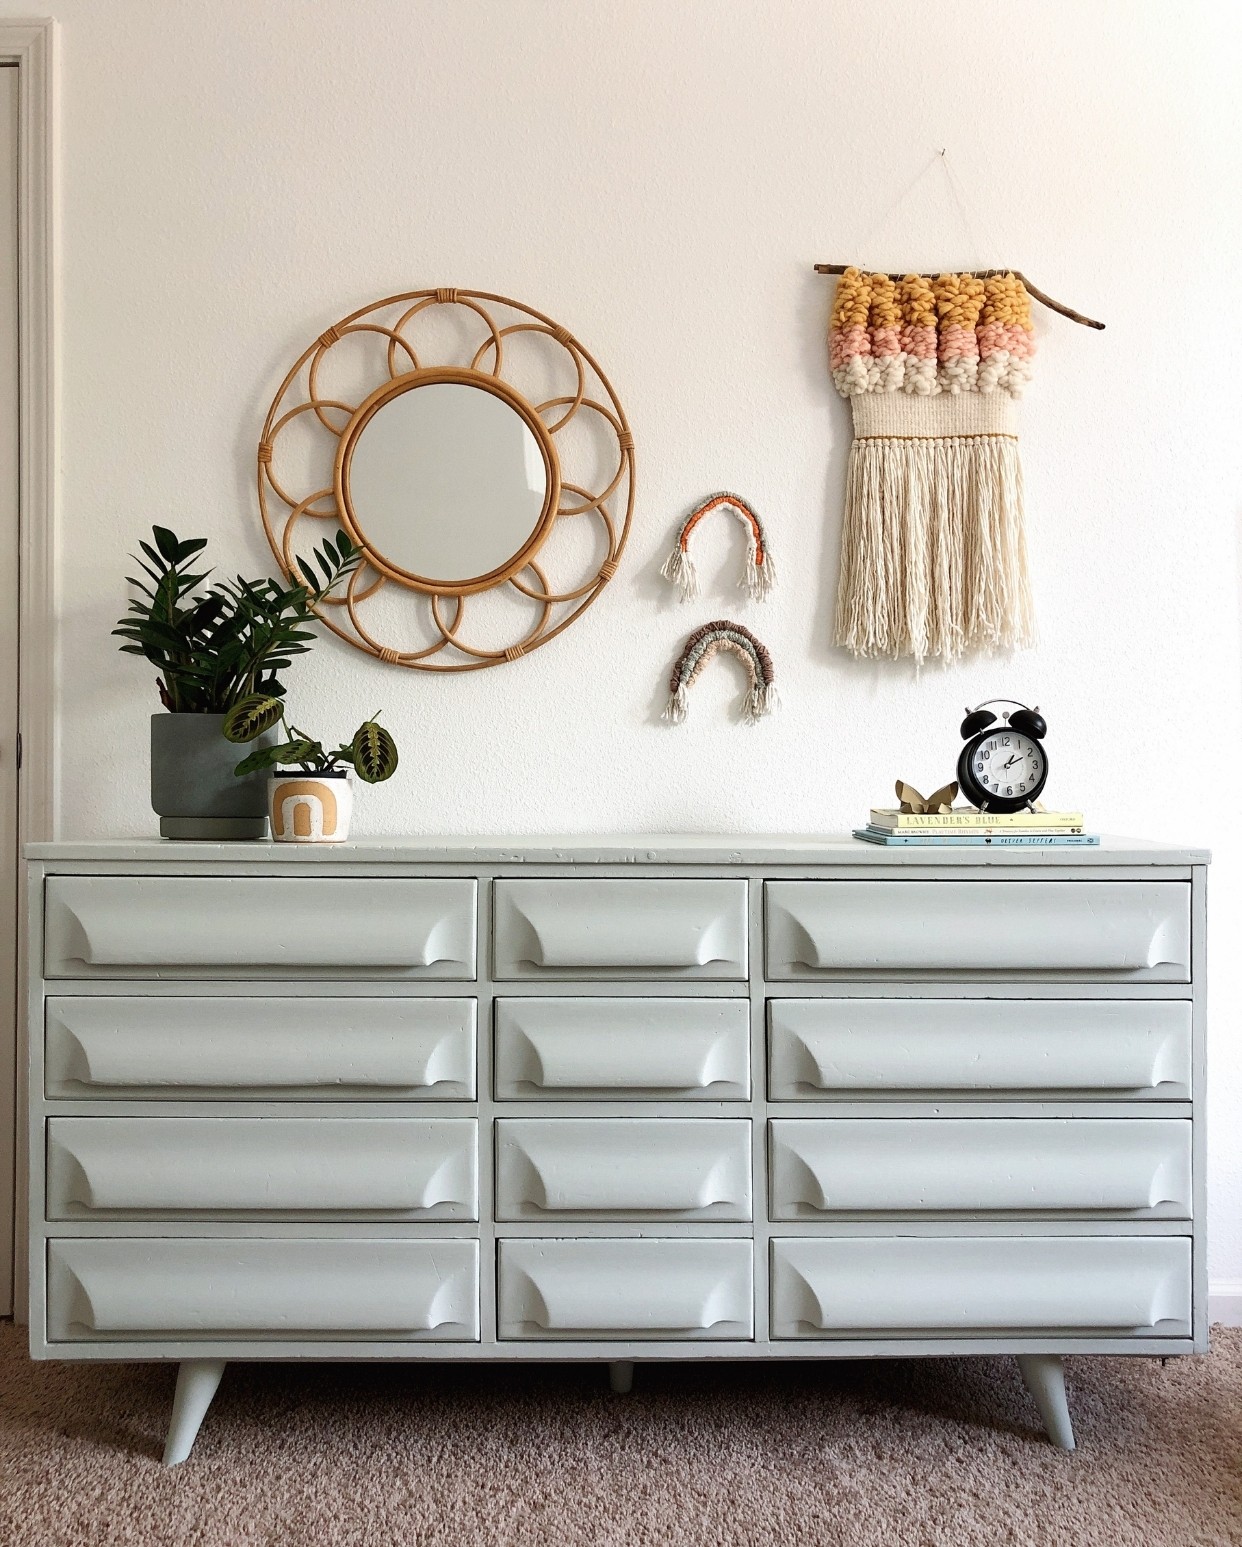
I can't wait to share more details of Immy's room design over the next few months—as you can tell from her paint color choice, she has great taste and it's going to be fun to collaborate with her on it.
Thank you to KILZ® for helping us with this project. If you have a paint project in the pipeline, I highly recommend checking out the Magnolia Home by Joanna Gaines paint line.