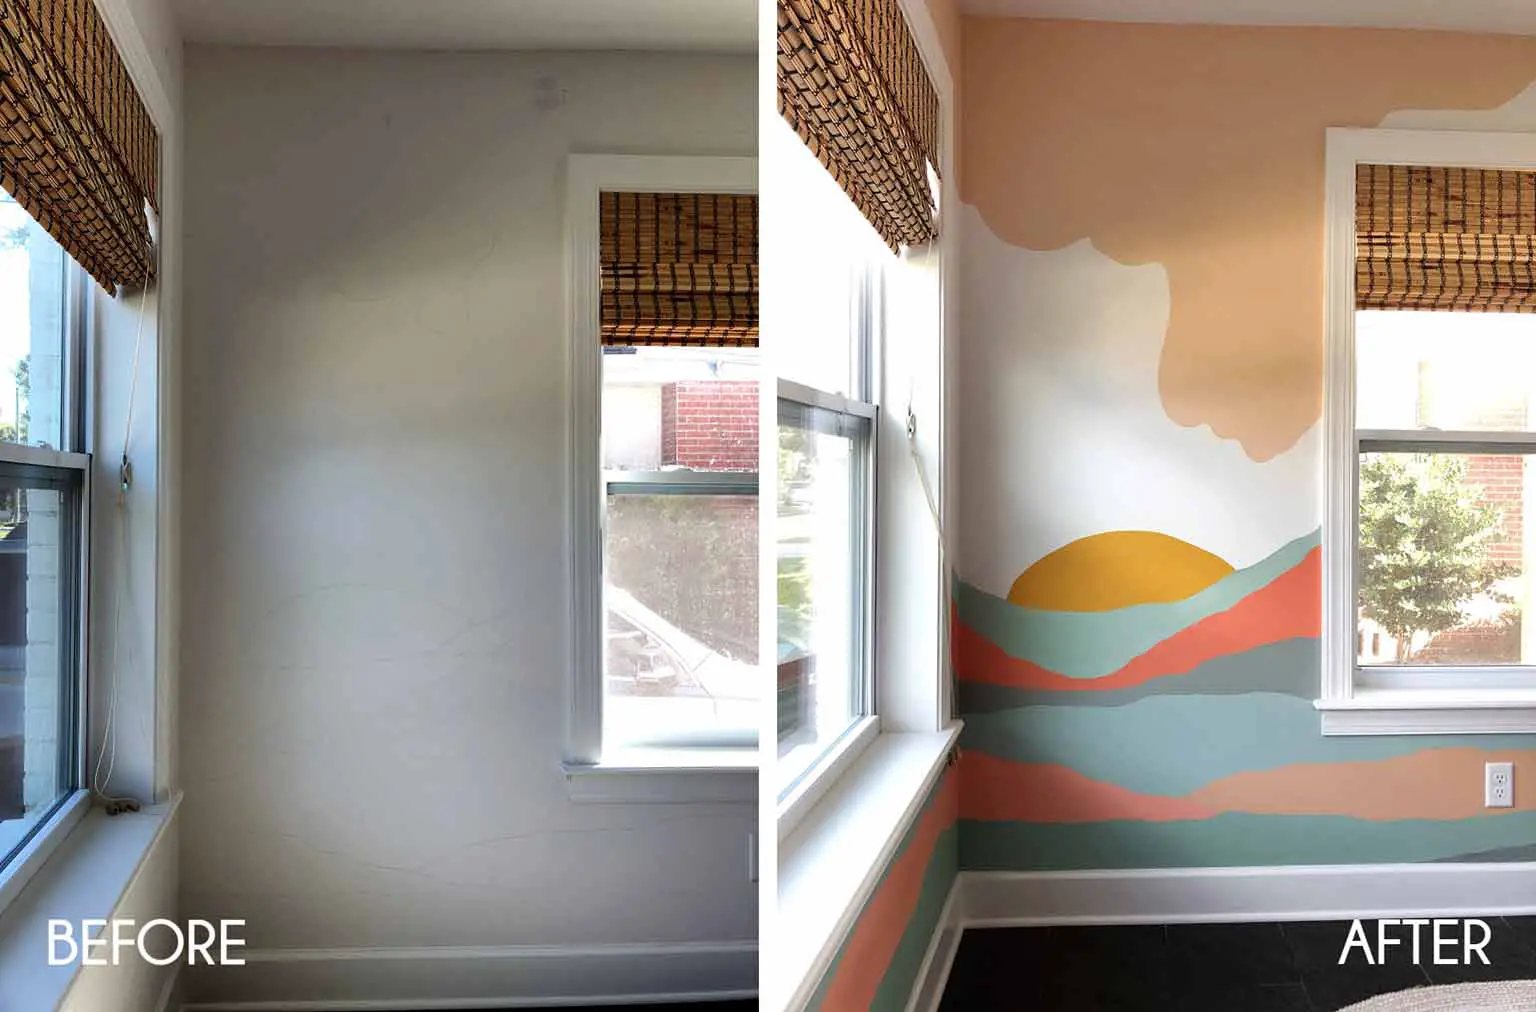
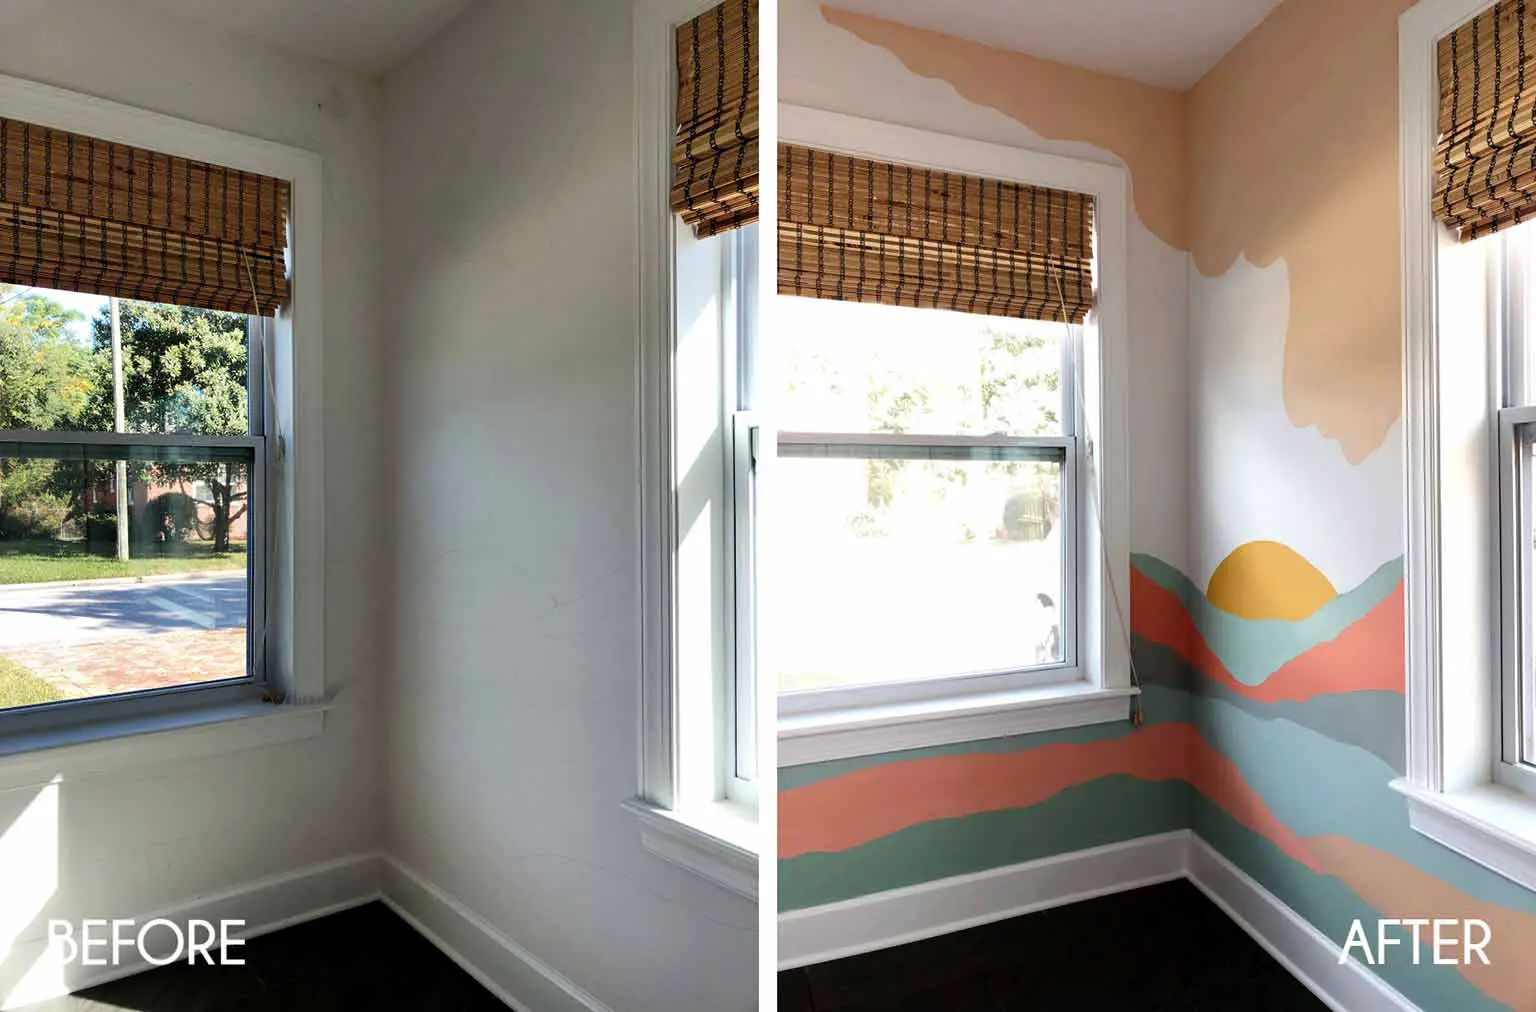
Have you ever seen something on Pinterest or Instagram that you just had to try out yourself? When inspiration strikes, sometimes the best time to go for it is RIGHT NOW, before you overthink it. I worked on a really fun and spontaneous mural project this week in our playroom and I'm absolutely thrilled with the results! My body is aching from all the painting but it was totally worth every brushstroke.
The inspiration for this project came from this stunning bathroom mural by Vintage Revivals, which was designed by the incredible talented Minnesota-based artist, Colleen Elizabeth.
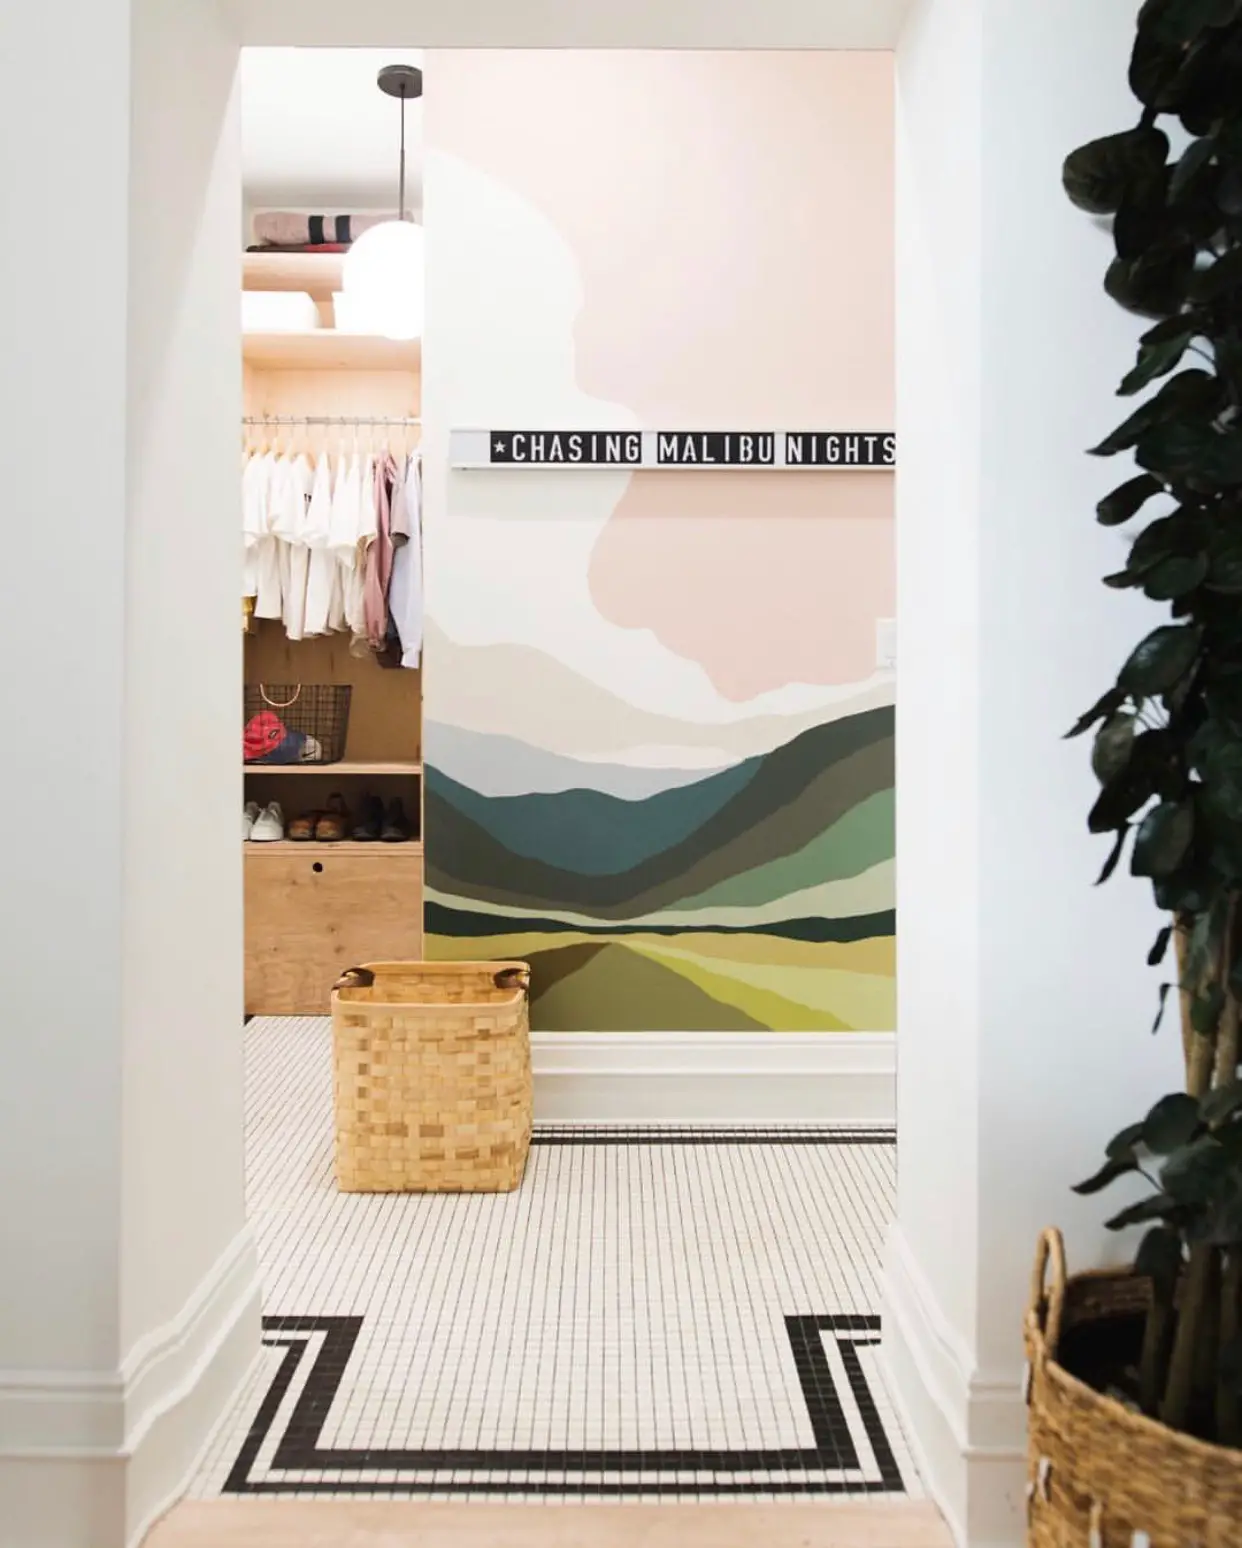
Now, I don't consider myself an artist in the traditional sense, but seeing the process broken down gave me the confidence to go for it. I also figured that if everything went lopsided, I could just paint right over it.
So why the mural?
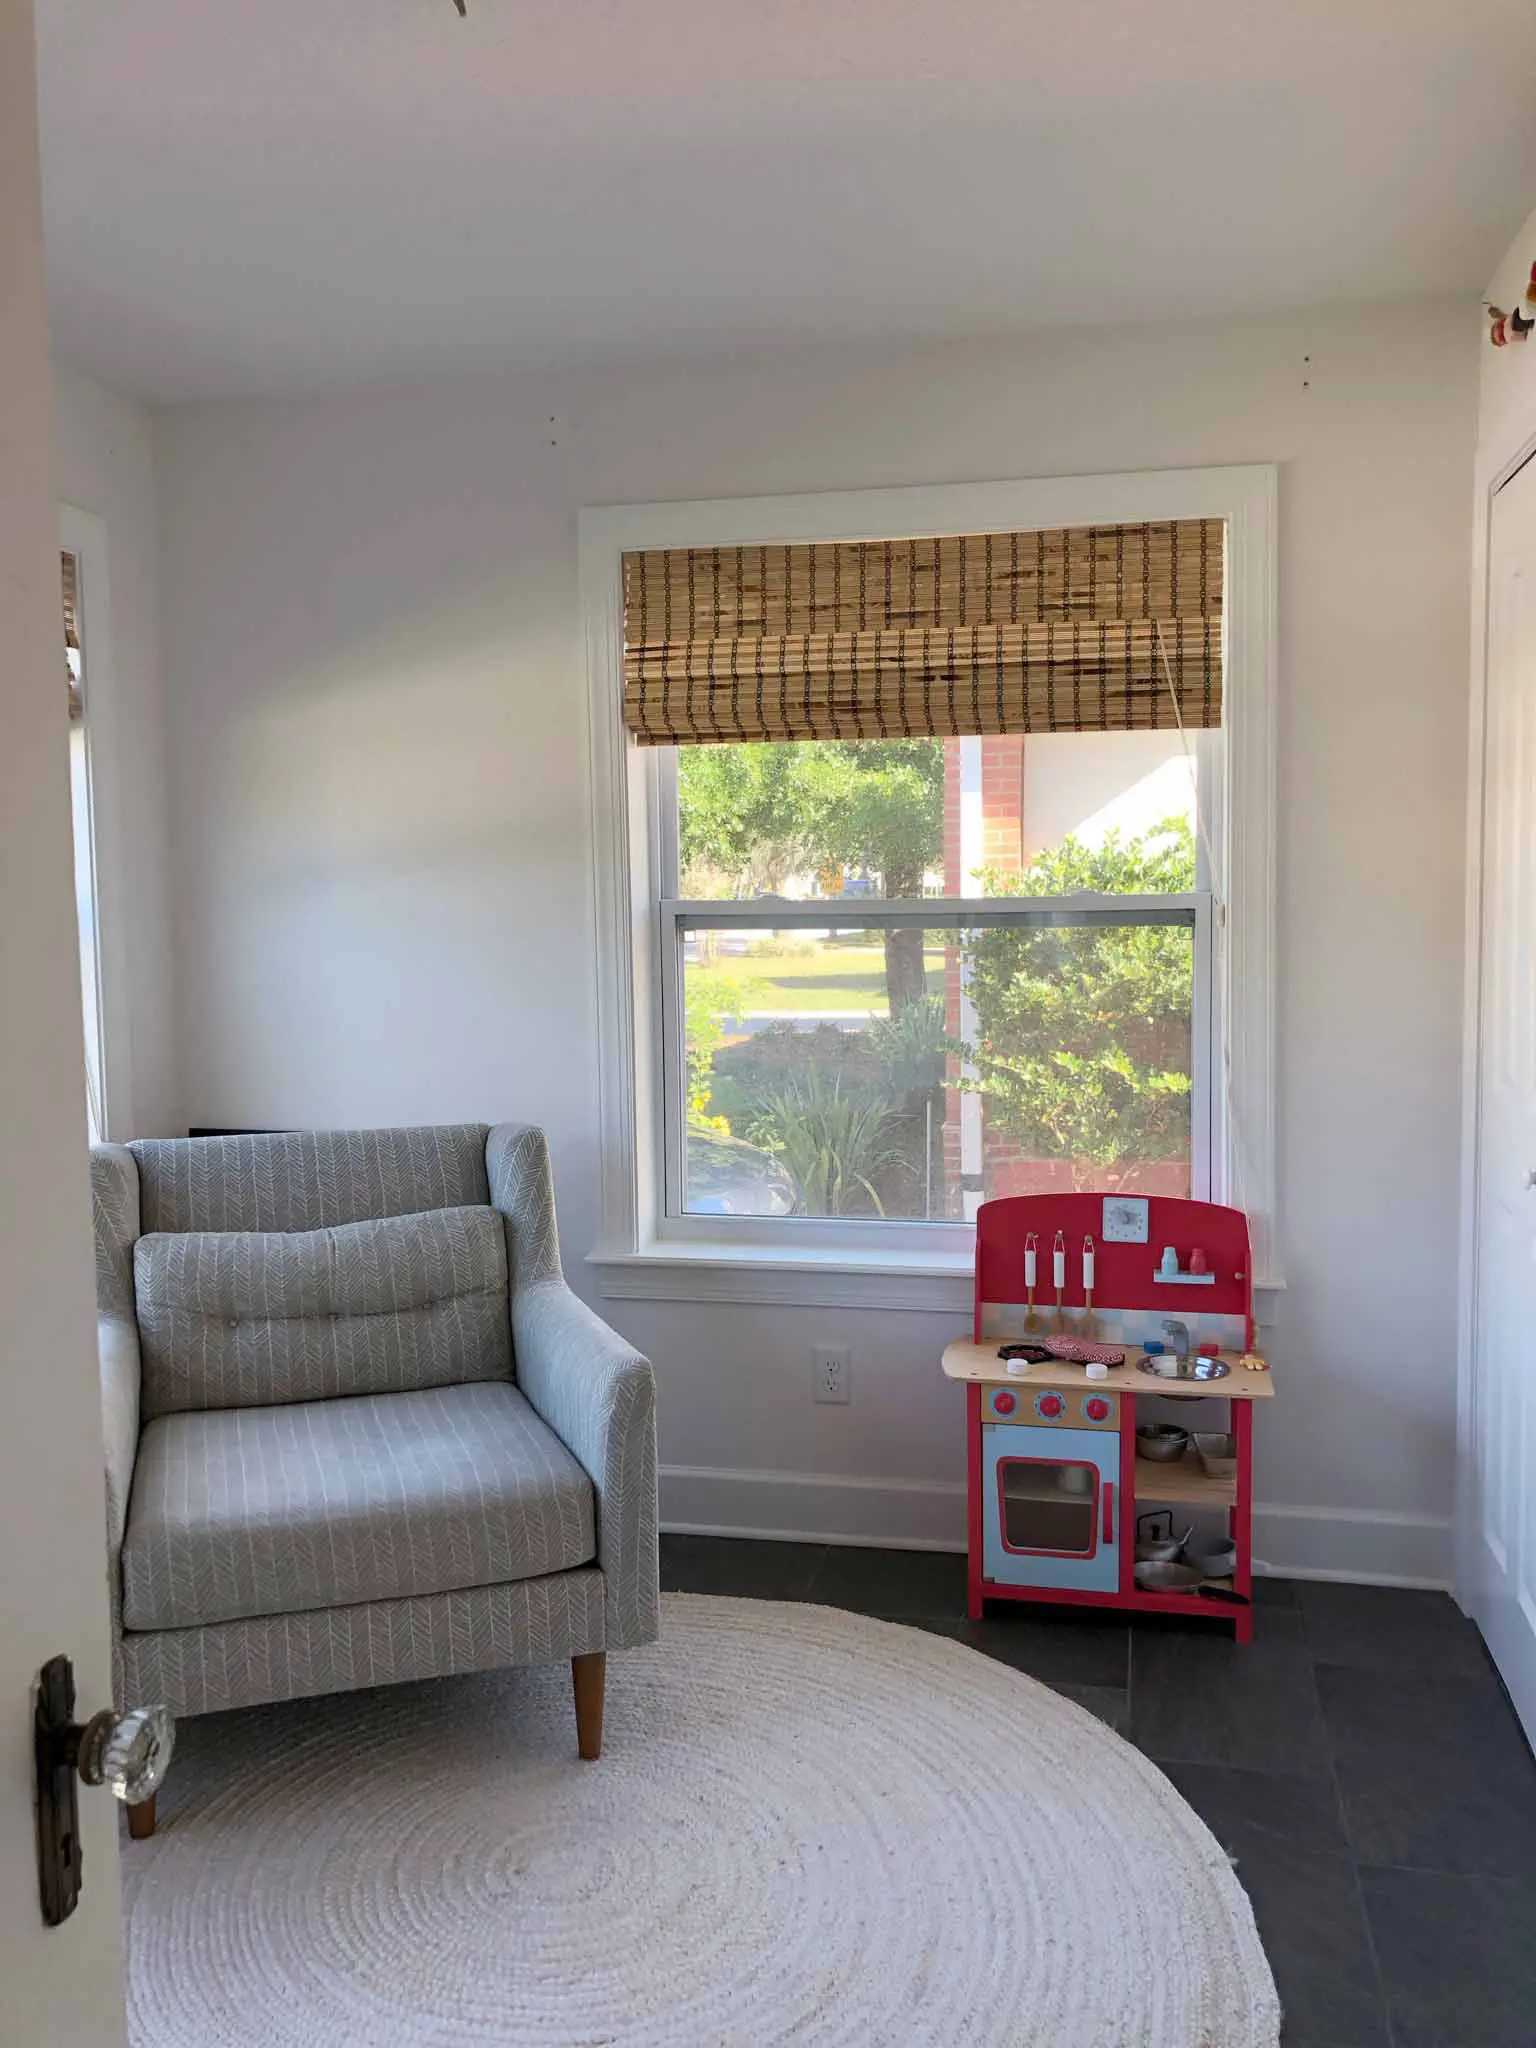
Our playroom has been lacking in something ever since I took down the curtains. They were constantly getting yanked and pulled by the kids, and so I decided to remove them completely. Plus it's a small room and curtains were just feeling a bit too fussy for my liking. My tastes have definitely become more minimalist over the last year or so.
But with no curtains, we were essentially left with white walls, and they needed something.
Related: A Playroom Update with IKEA's SKÅDIS Series
A wall mural seemed like the perfect way to add color to the space without clutter, and so I decided to go for it! I'll say at this point that if you feel intimidated by the thought of a mural, then don't be! It's actually a very forgiving project. This was my very first attempt and I thoroughly enjoyed the process. Also—it's just paint.
Now the pep talk is over, I'll share the steps I took to create this mural, and some tips I picked up along the way.
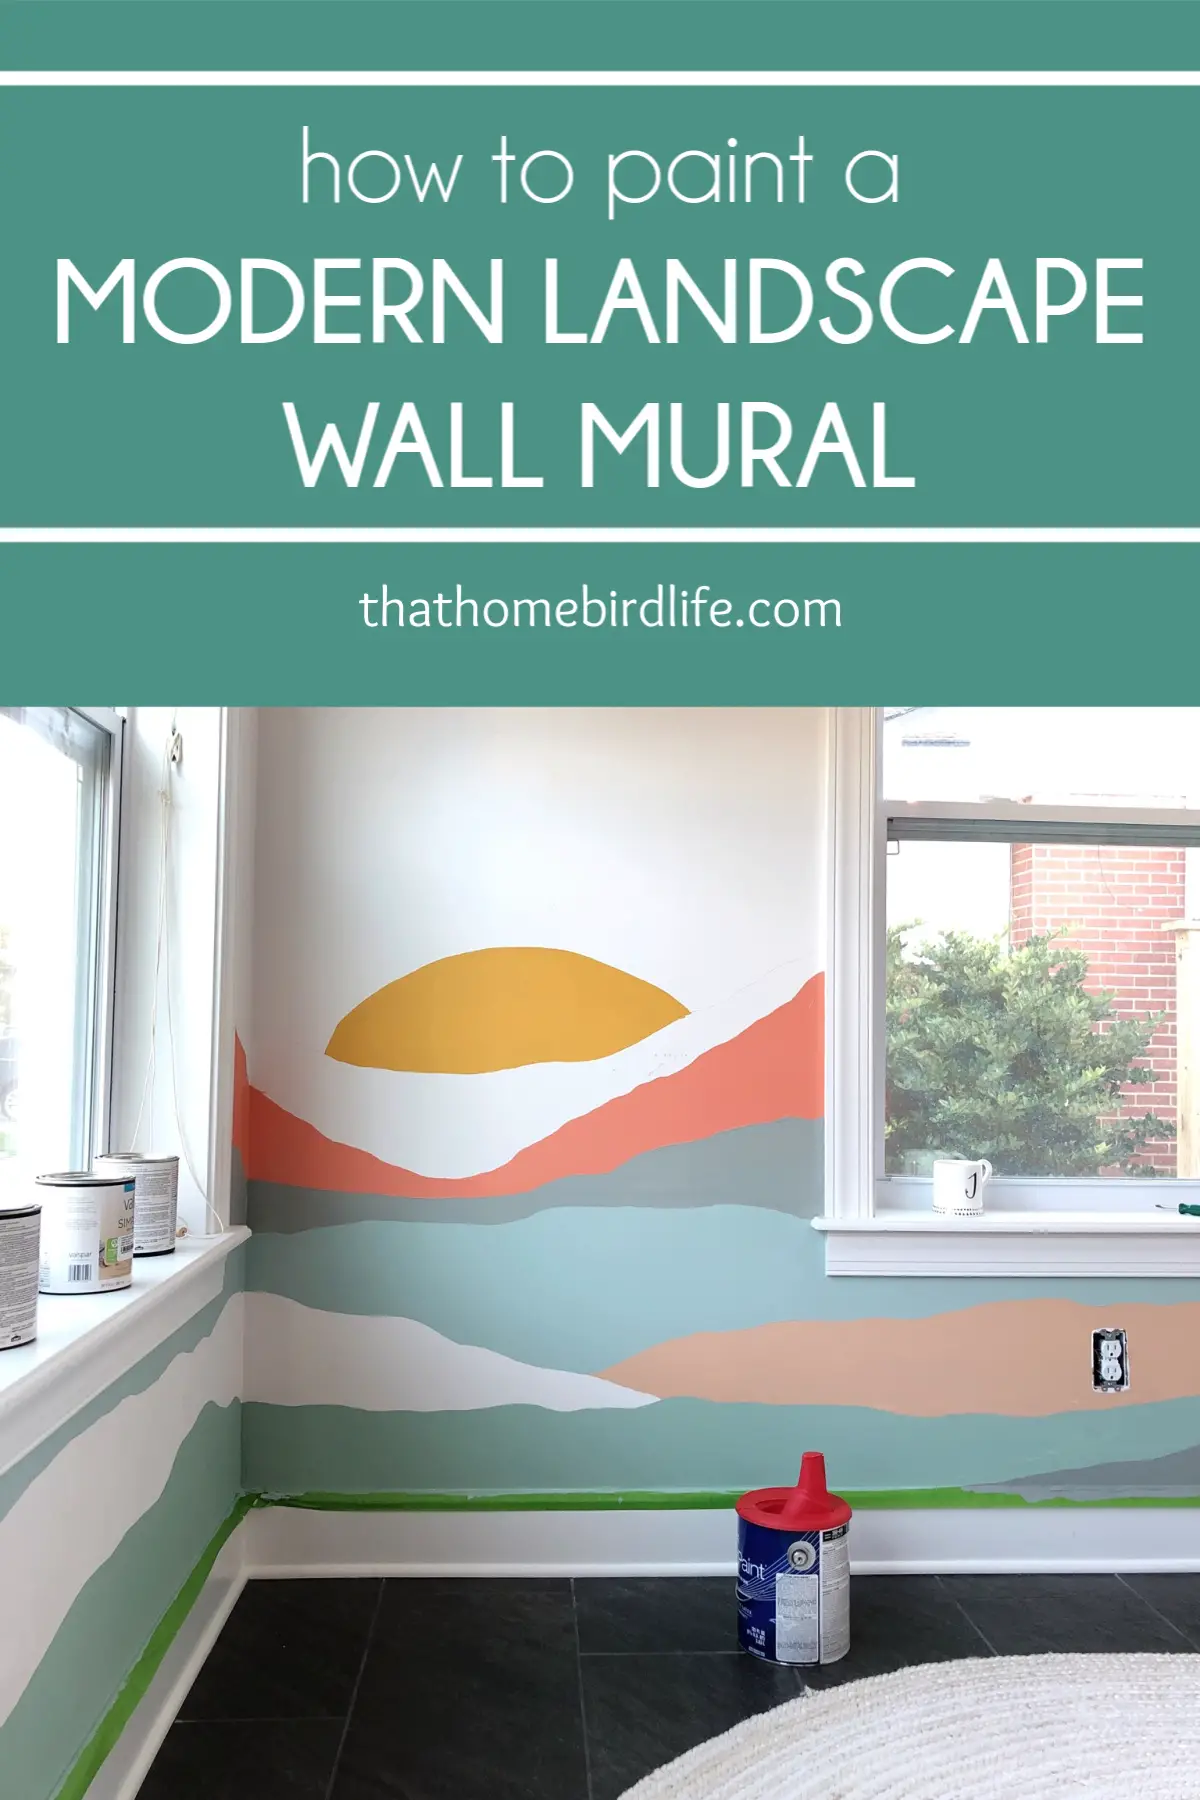
How to Paint a Modern Landscape Wall Mural
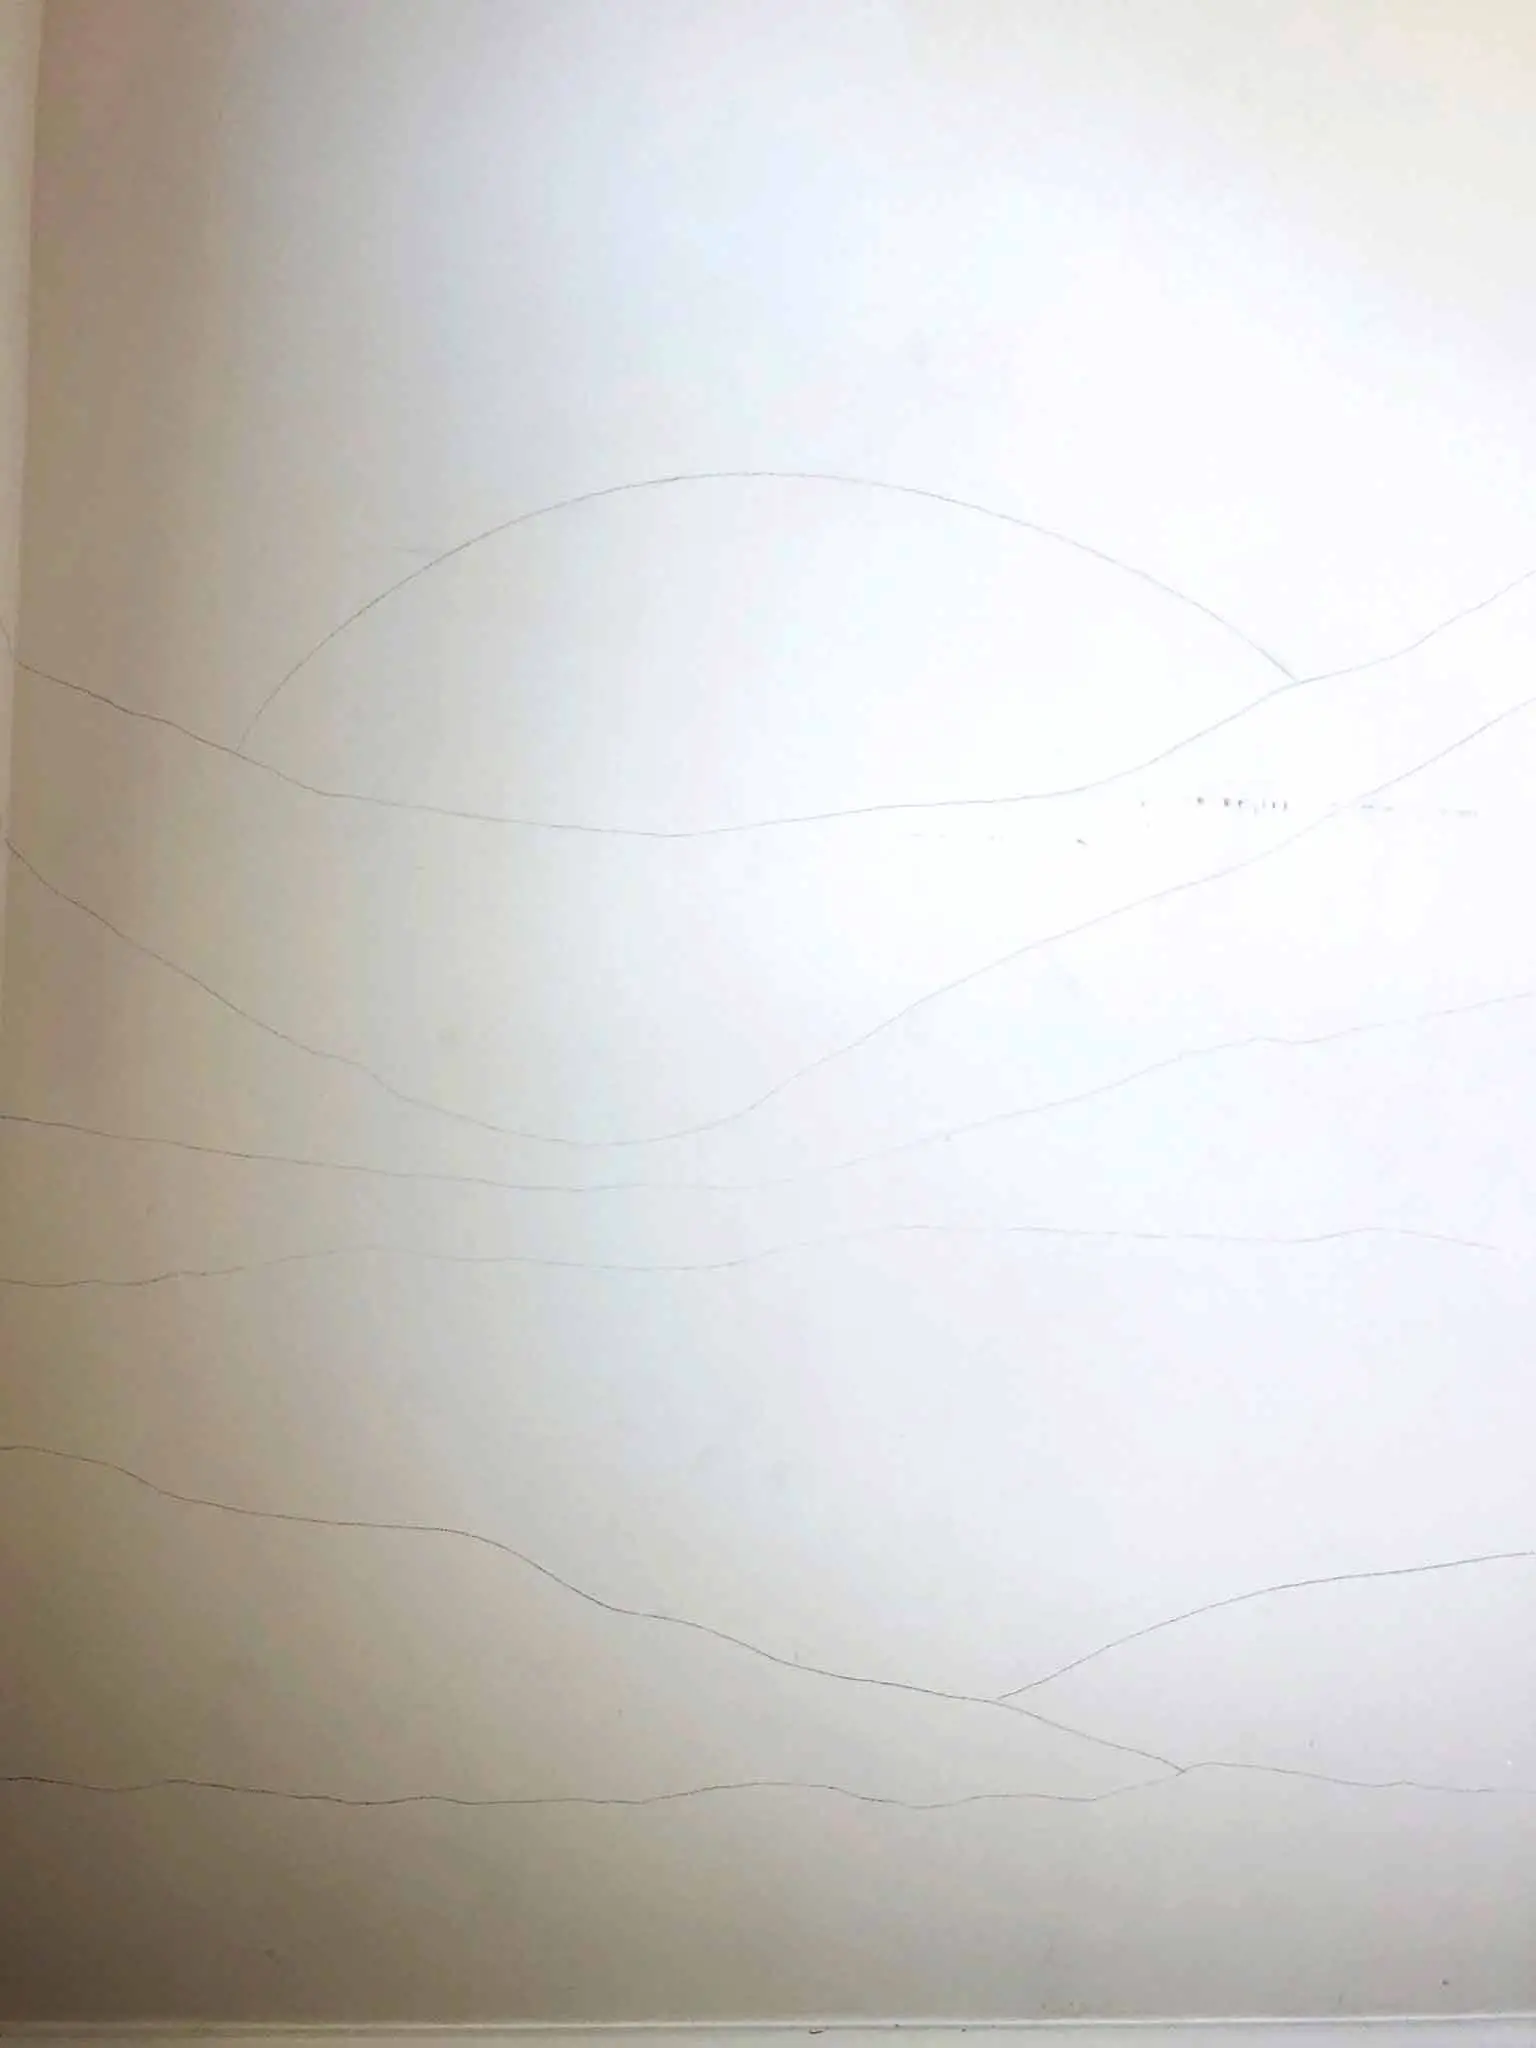
SKETCH YOUR DESIGN
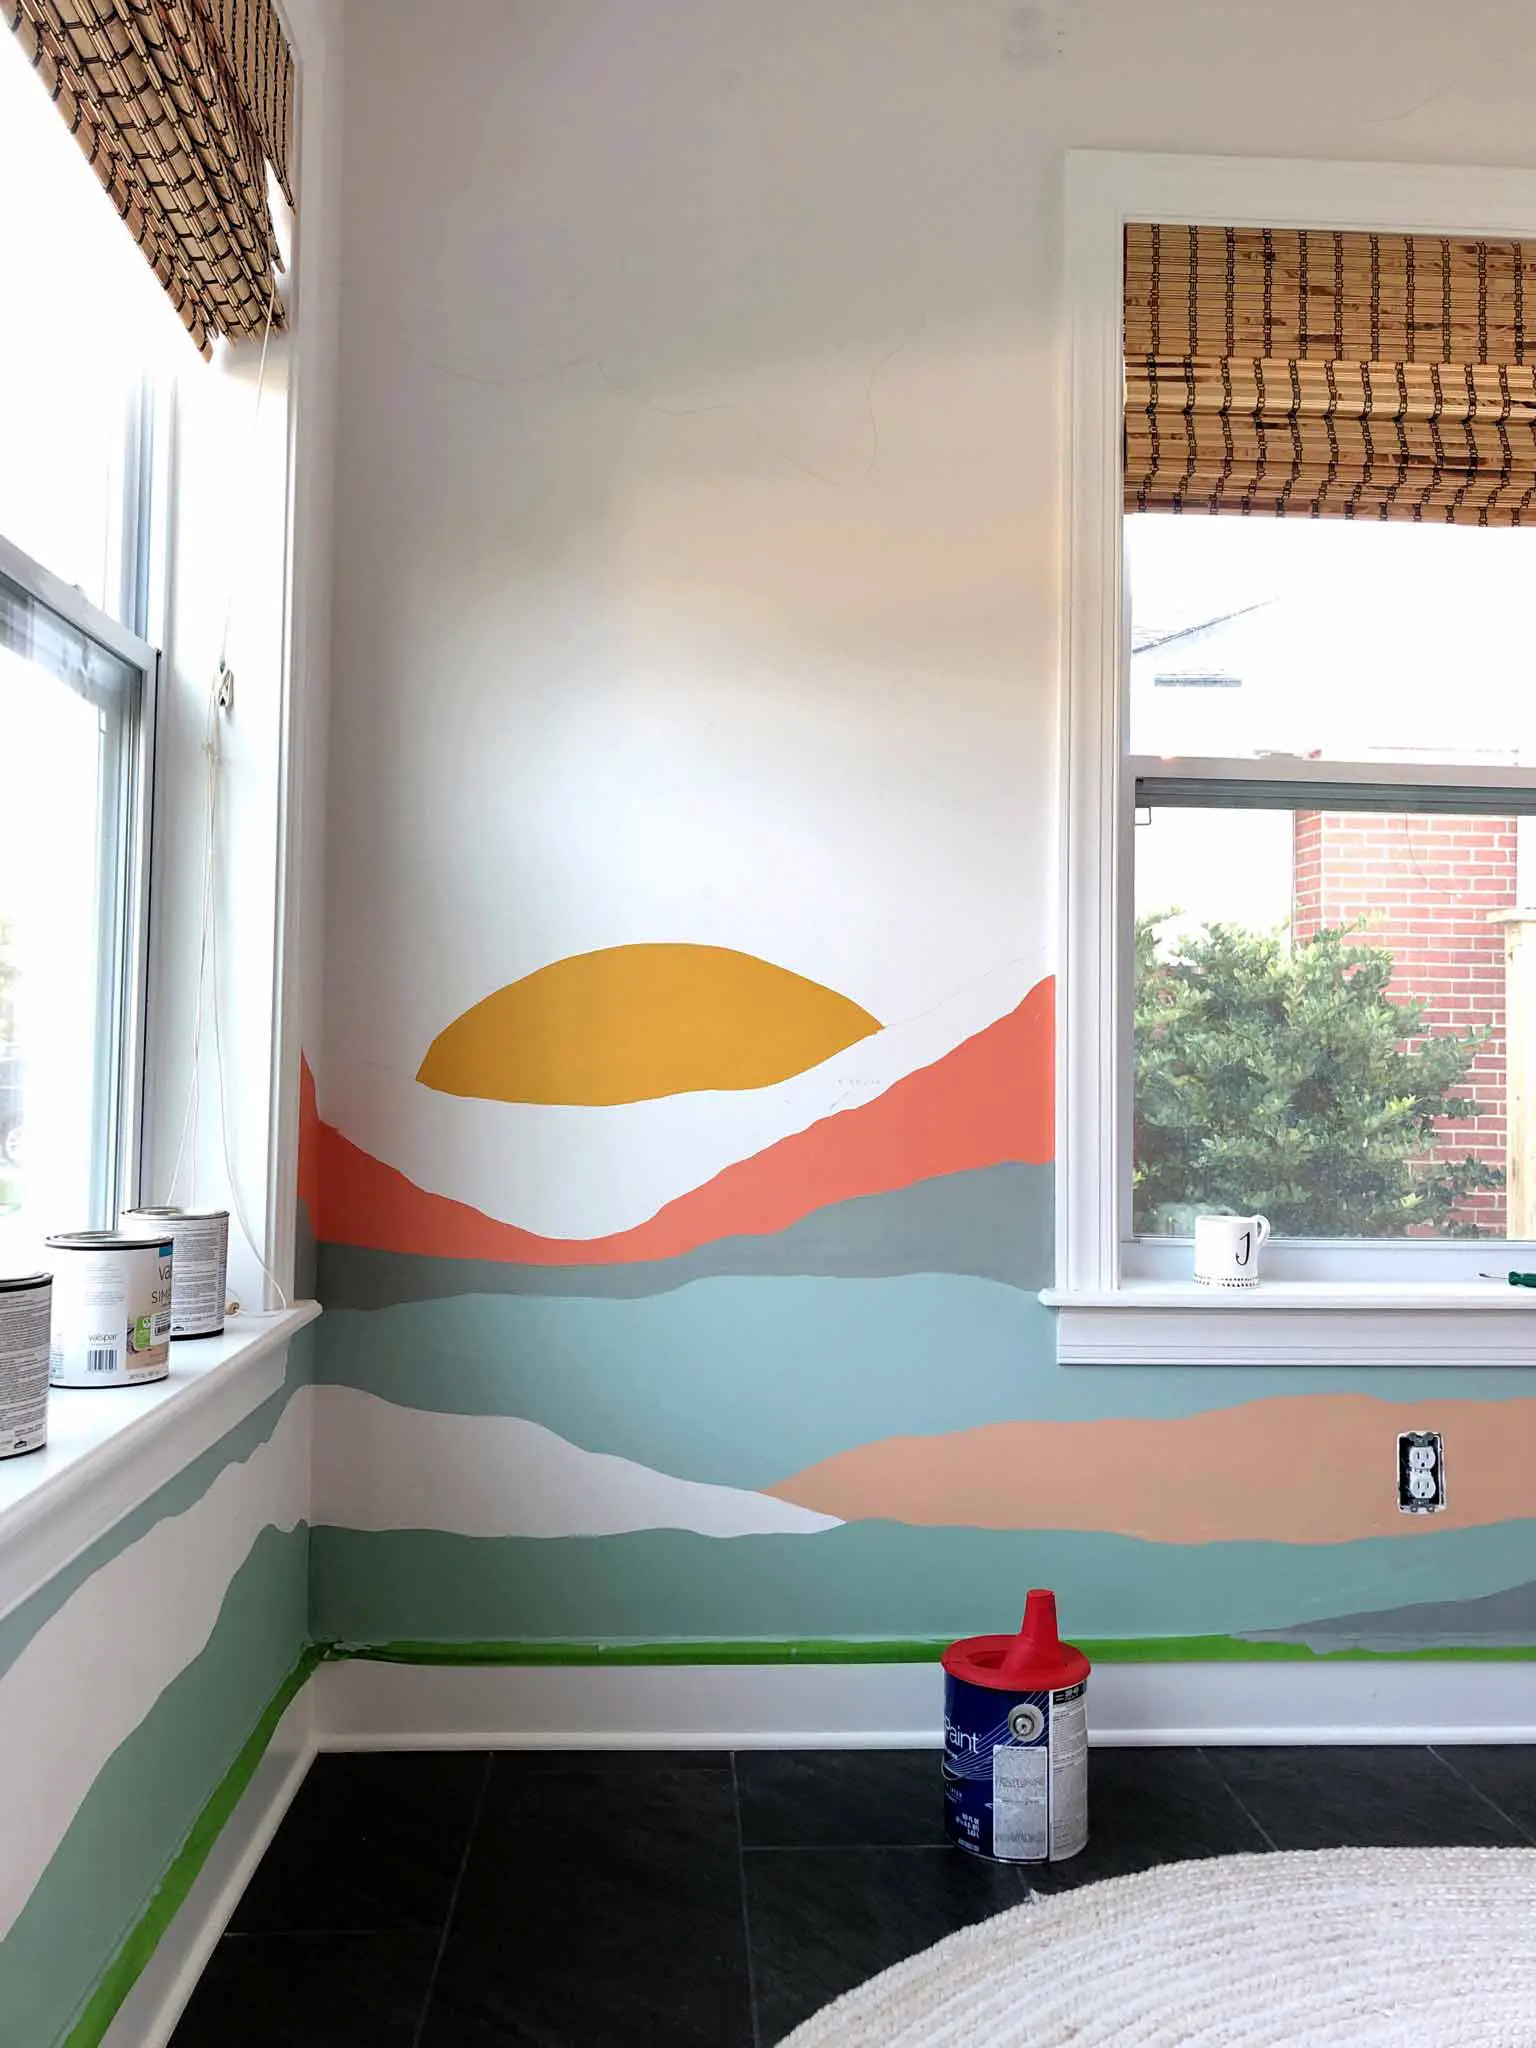
I did lots of sketches of ideas before even thinking about touching the walls. I studied my inspiration picture and looked at how it would translate onto my walls, and made adjustments accordingly. I decided to bring my design out further to cover two walls, but limited the main focus of the design to one section of wall.
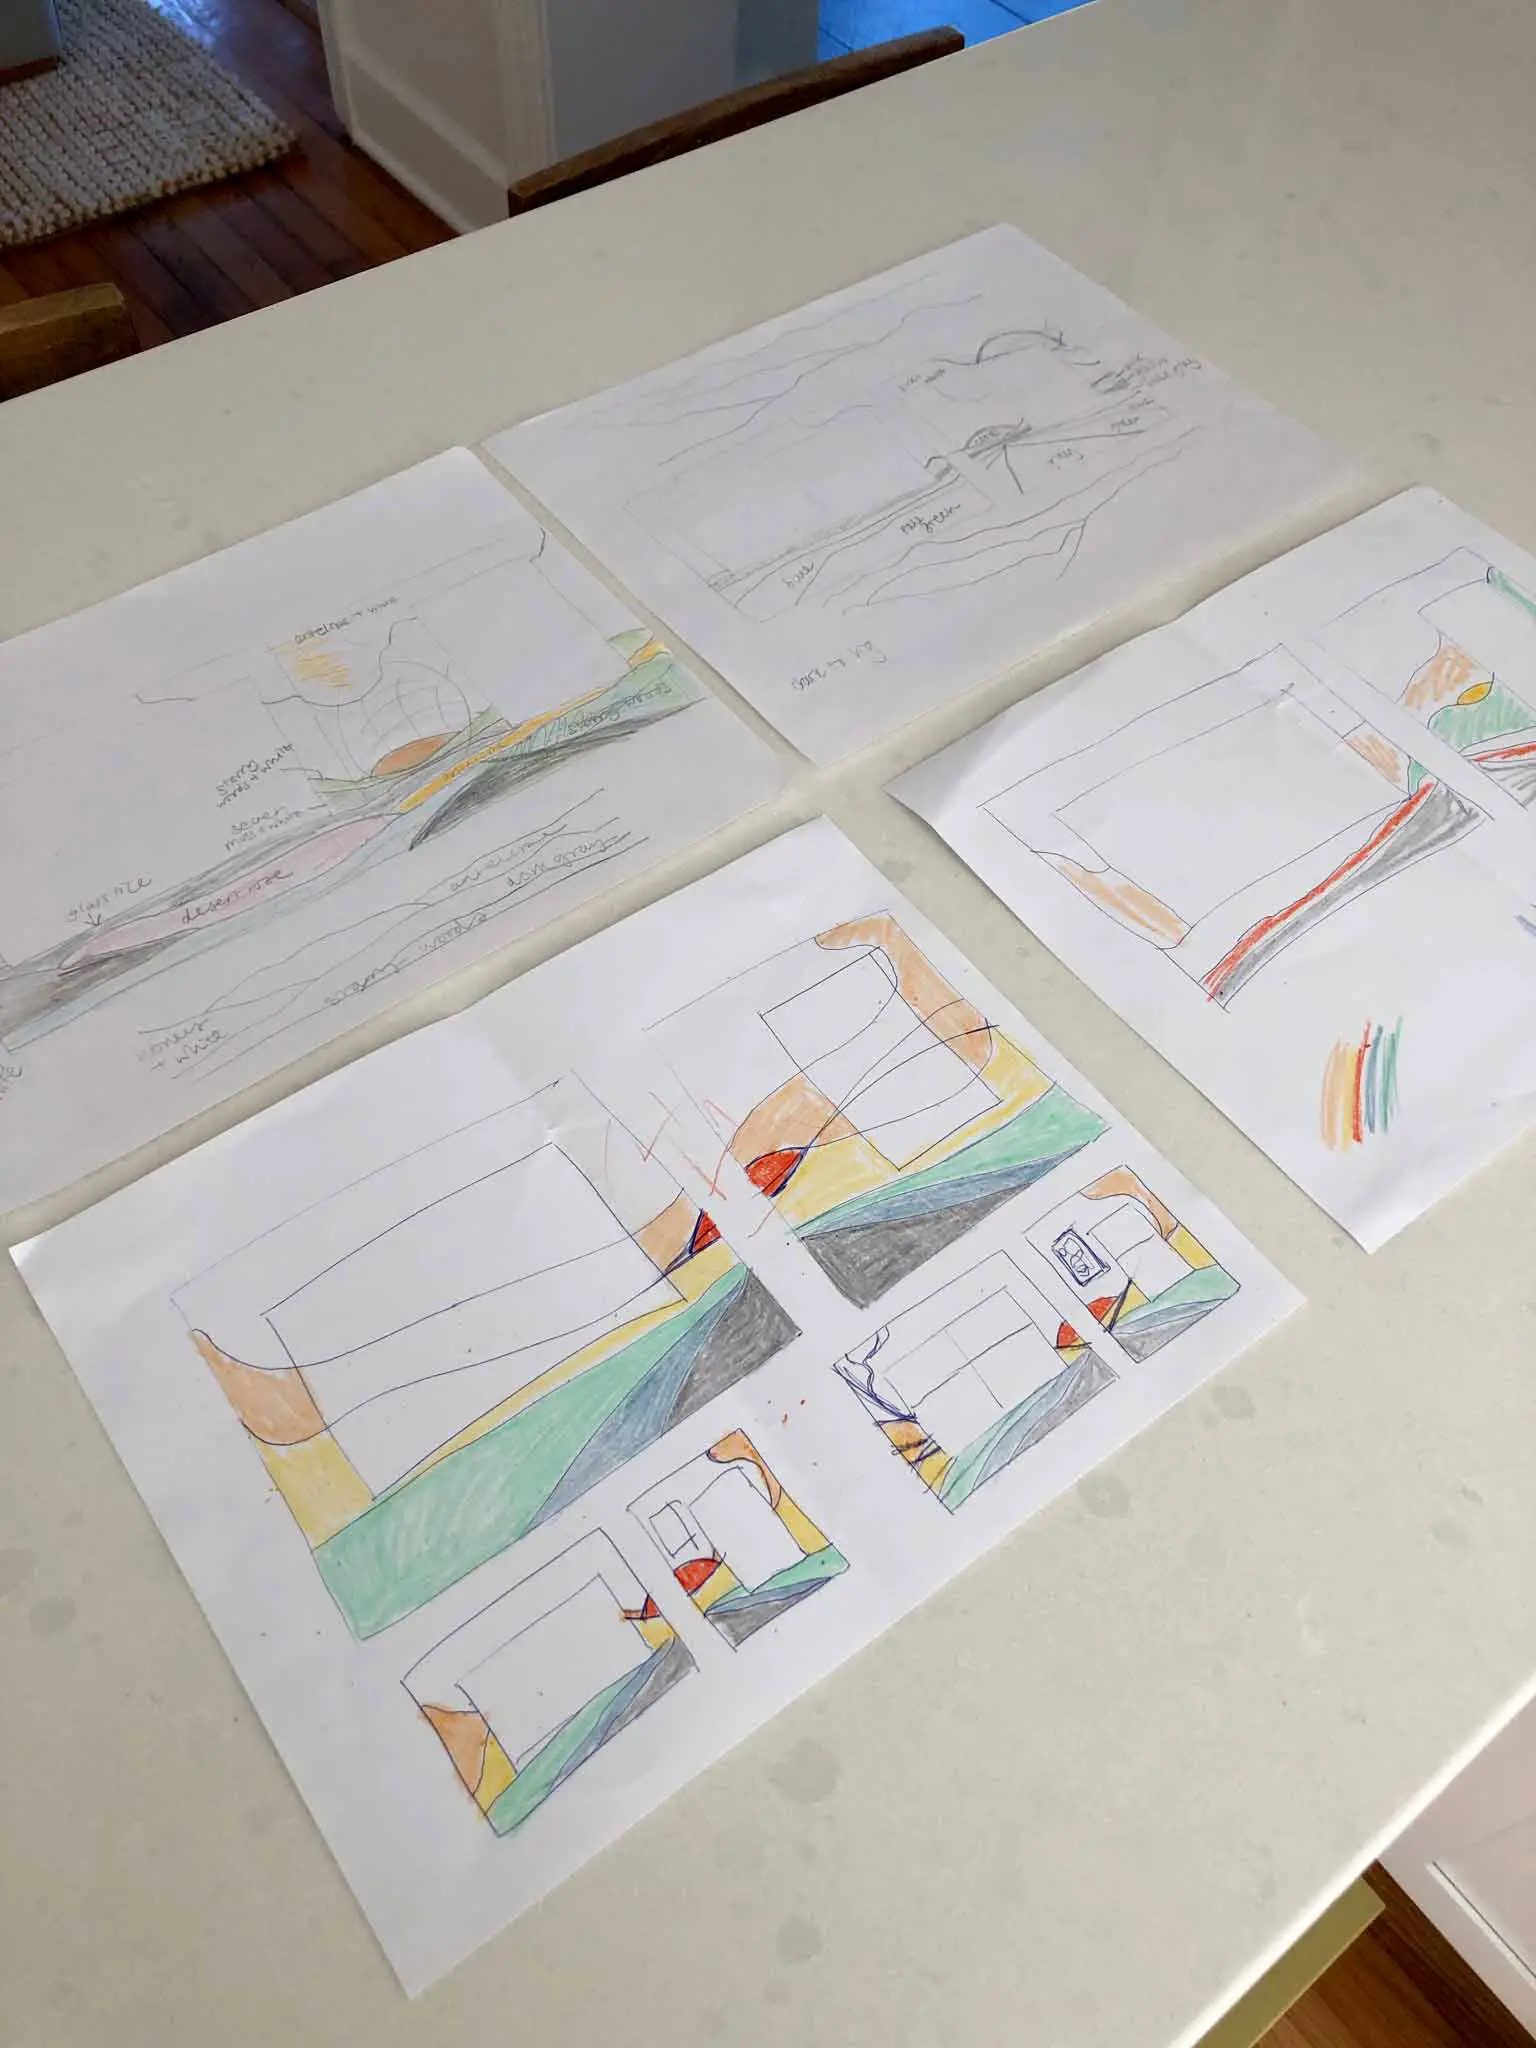
PICK OUT COLORS
Before hitting the paint store, I borrowed my kids' pencil crayons to play with color ideas. This was surpisingly therapeutic! We have a lot of colors going on in this room, and so I wanted my landscape to incorporate the full spectrum to tie everything together.
The colors I chose were all by Valspar, and are listed as follows:
- Gray: Secret Moss 5005-2A
- Blue: Glass Tile CI184
- Green: Starry Woods 5005-5C
- Coral: Desert Rose 2004-3C
- Blush: Antelope 2005-6A
- Yellow: Caramel Honey 3003-3B
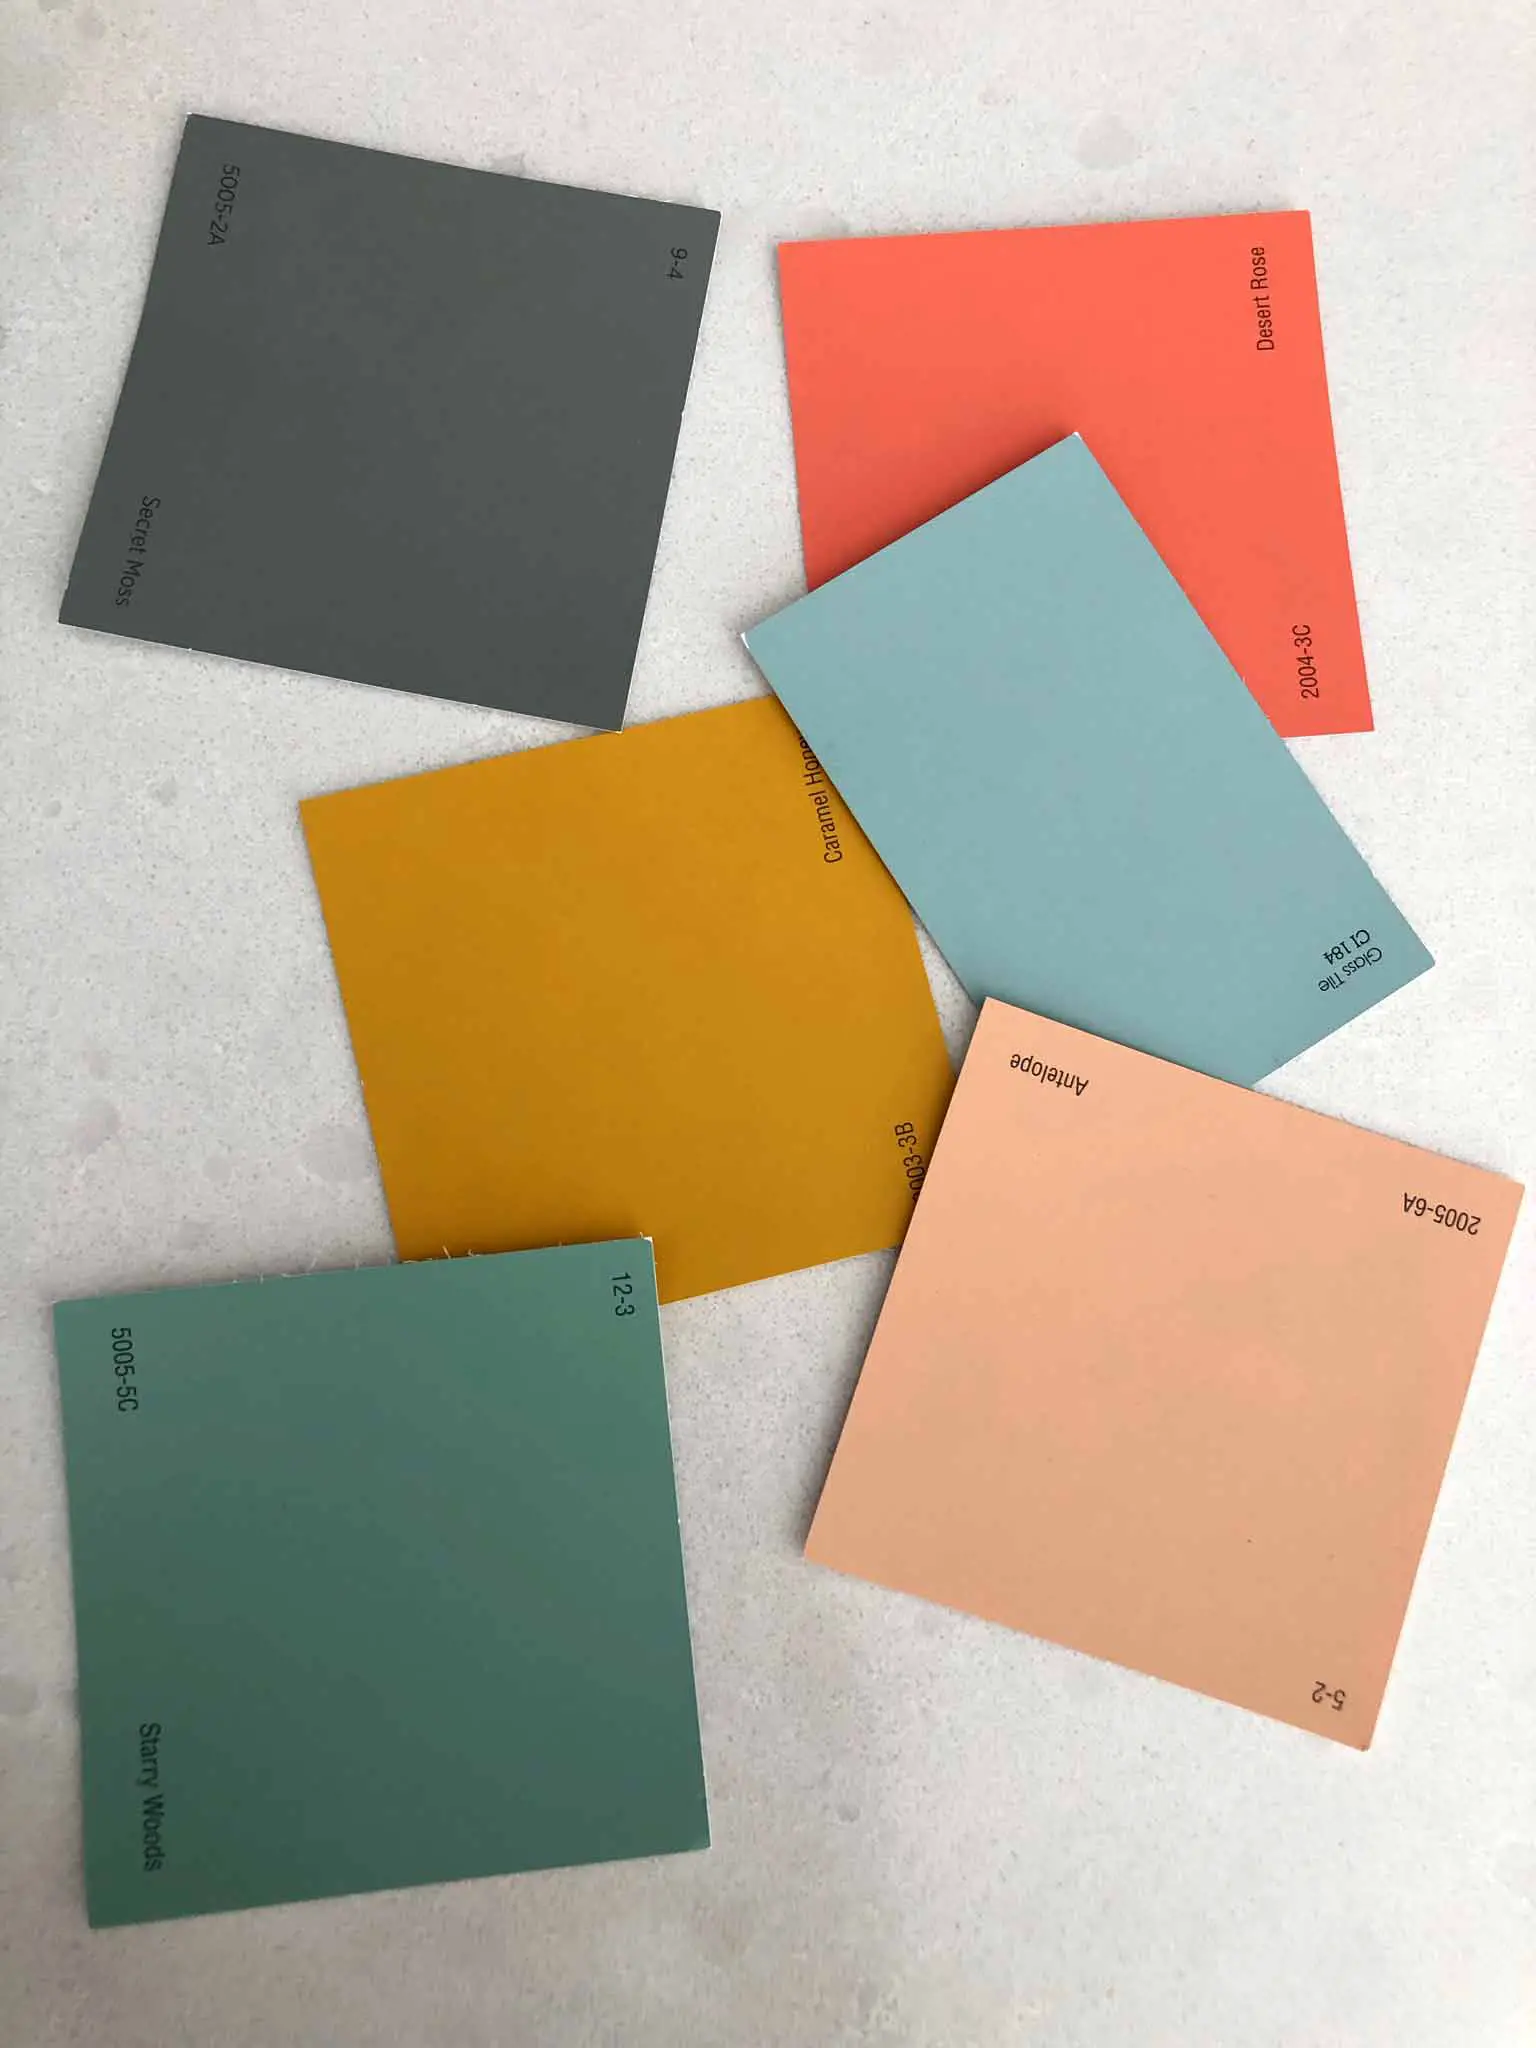
I also used the white wall paint (SW Snowbound) and added it to each of these to create paler shades to give myself a wider range of shades without having to buy umpteen cans of paint.
DON'T SCRIMP ON SUPPLIES
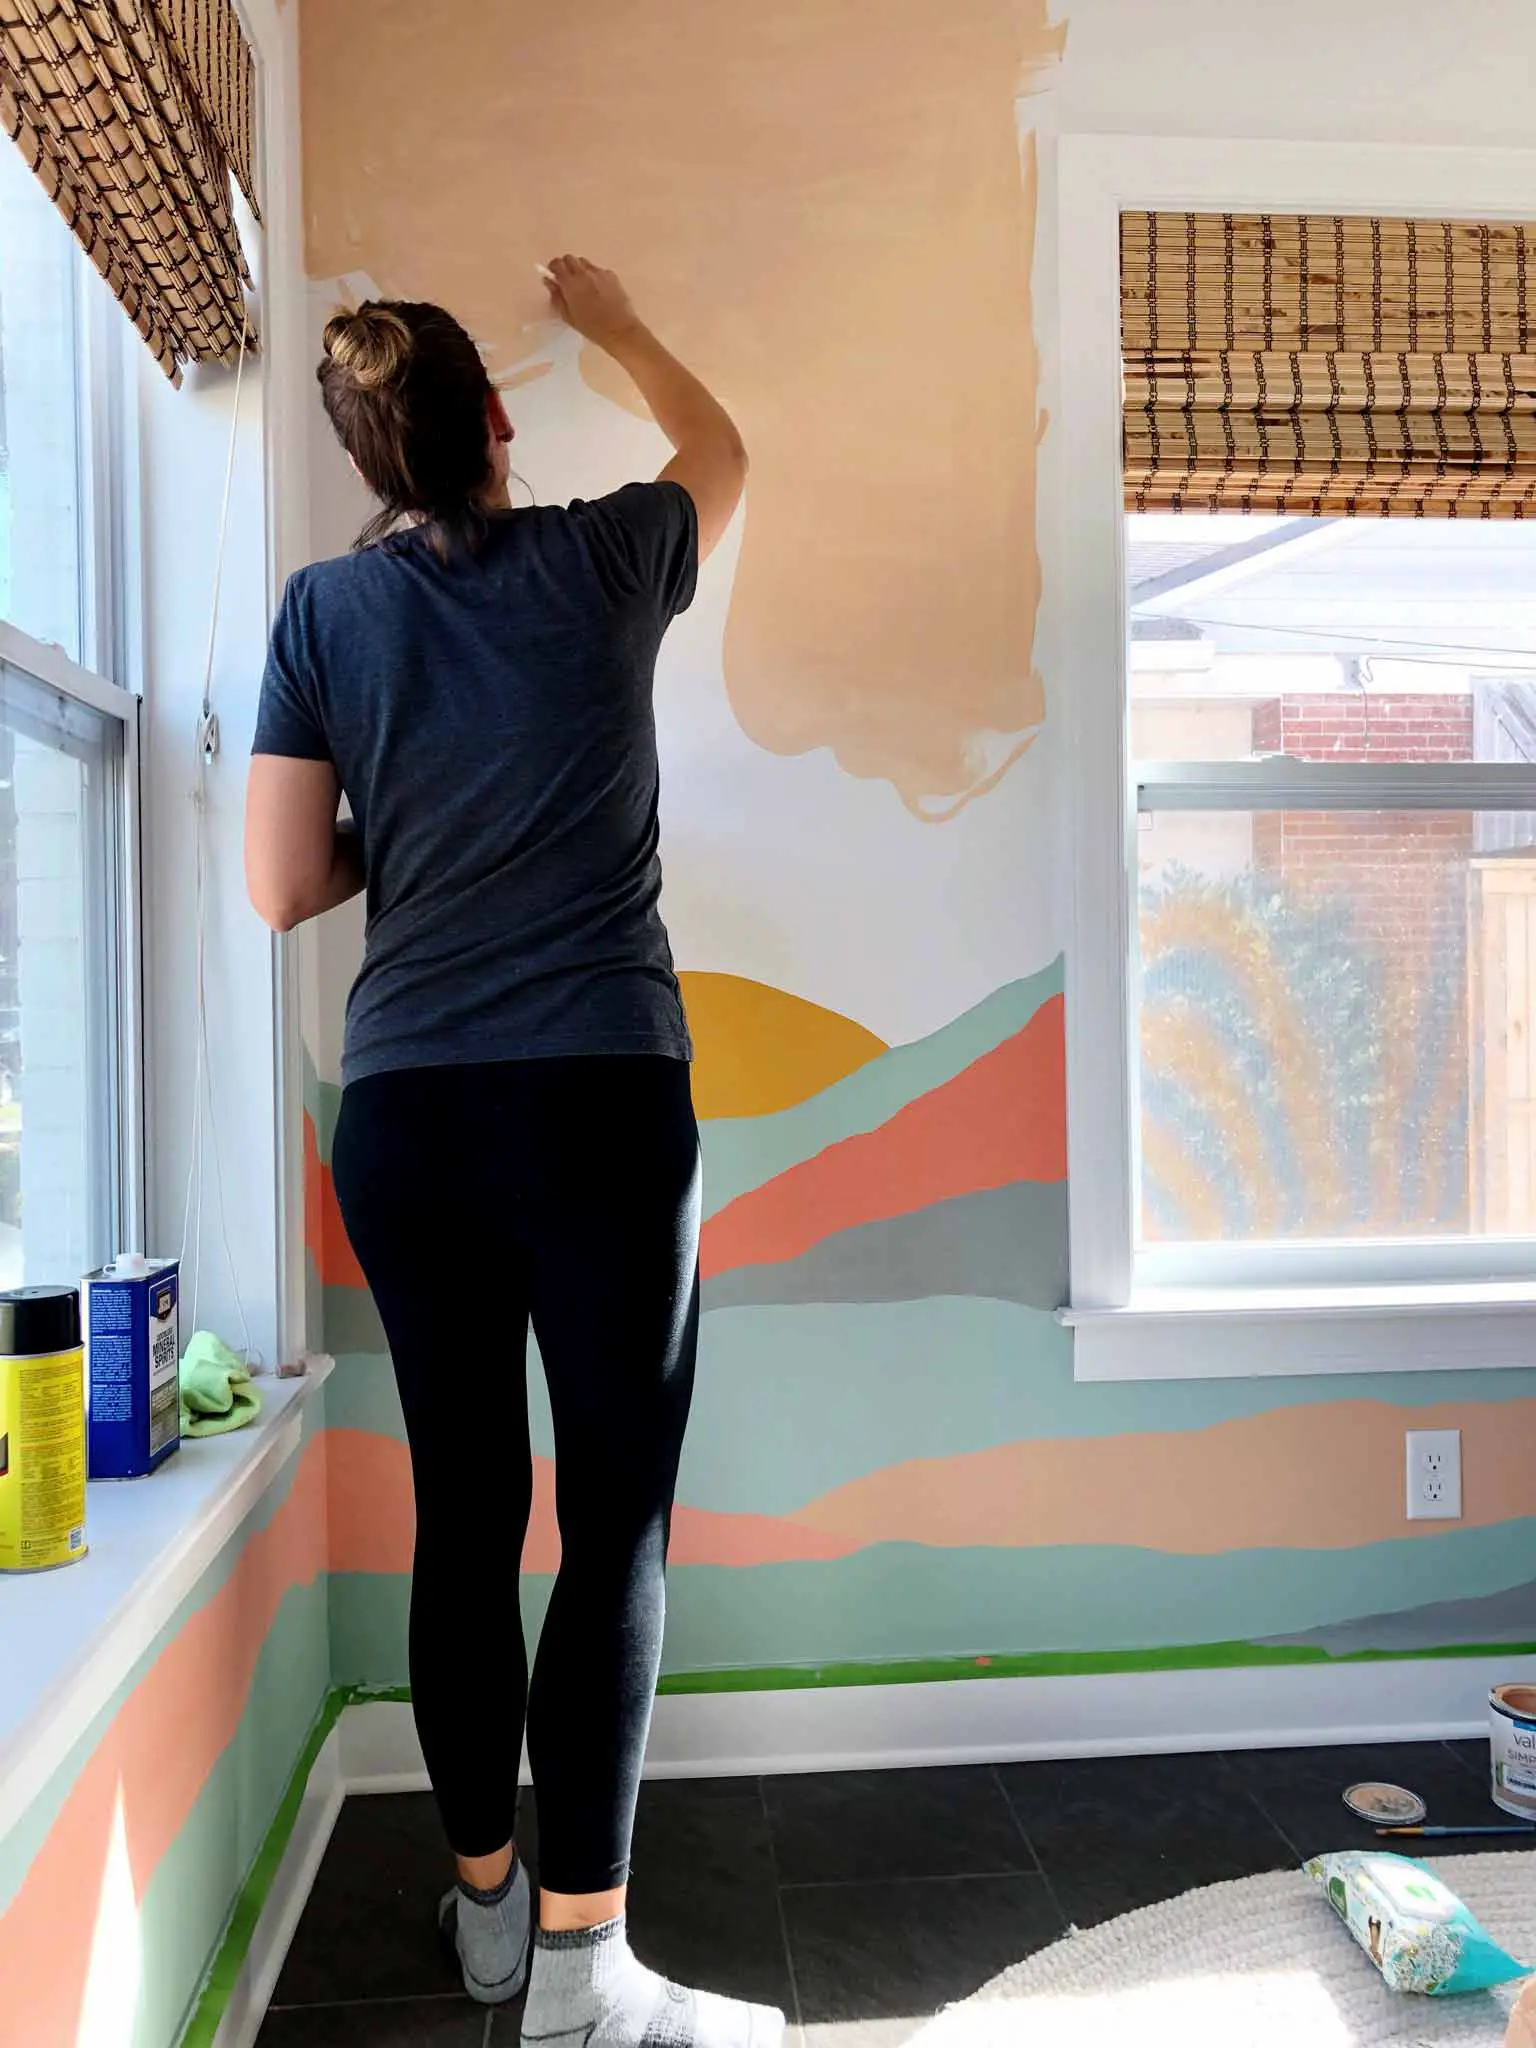
I never knew I would be the type of person to have a favorite paint brush, but after this project, I do. These foam brushes are the BEST—the paint goes on oh-so-smoothly and they are very durable. Unfortunately I only had one of them which was frustrating as I had to keep washing it out. I would recommend buying a few of them for this project!
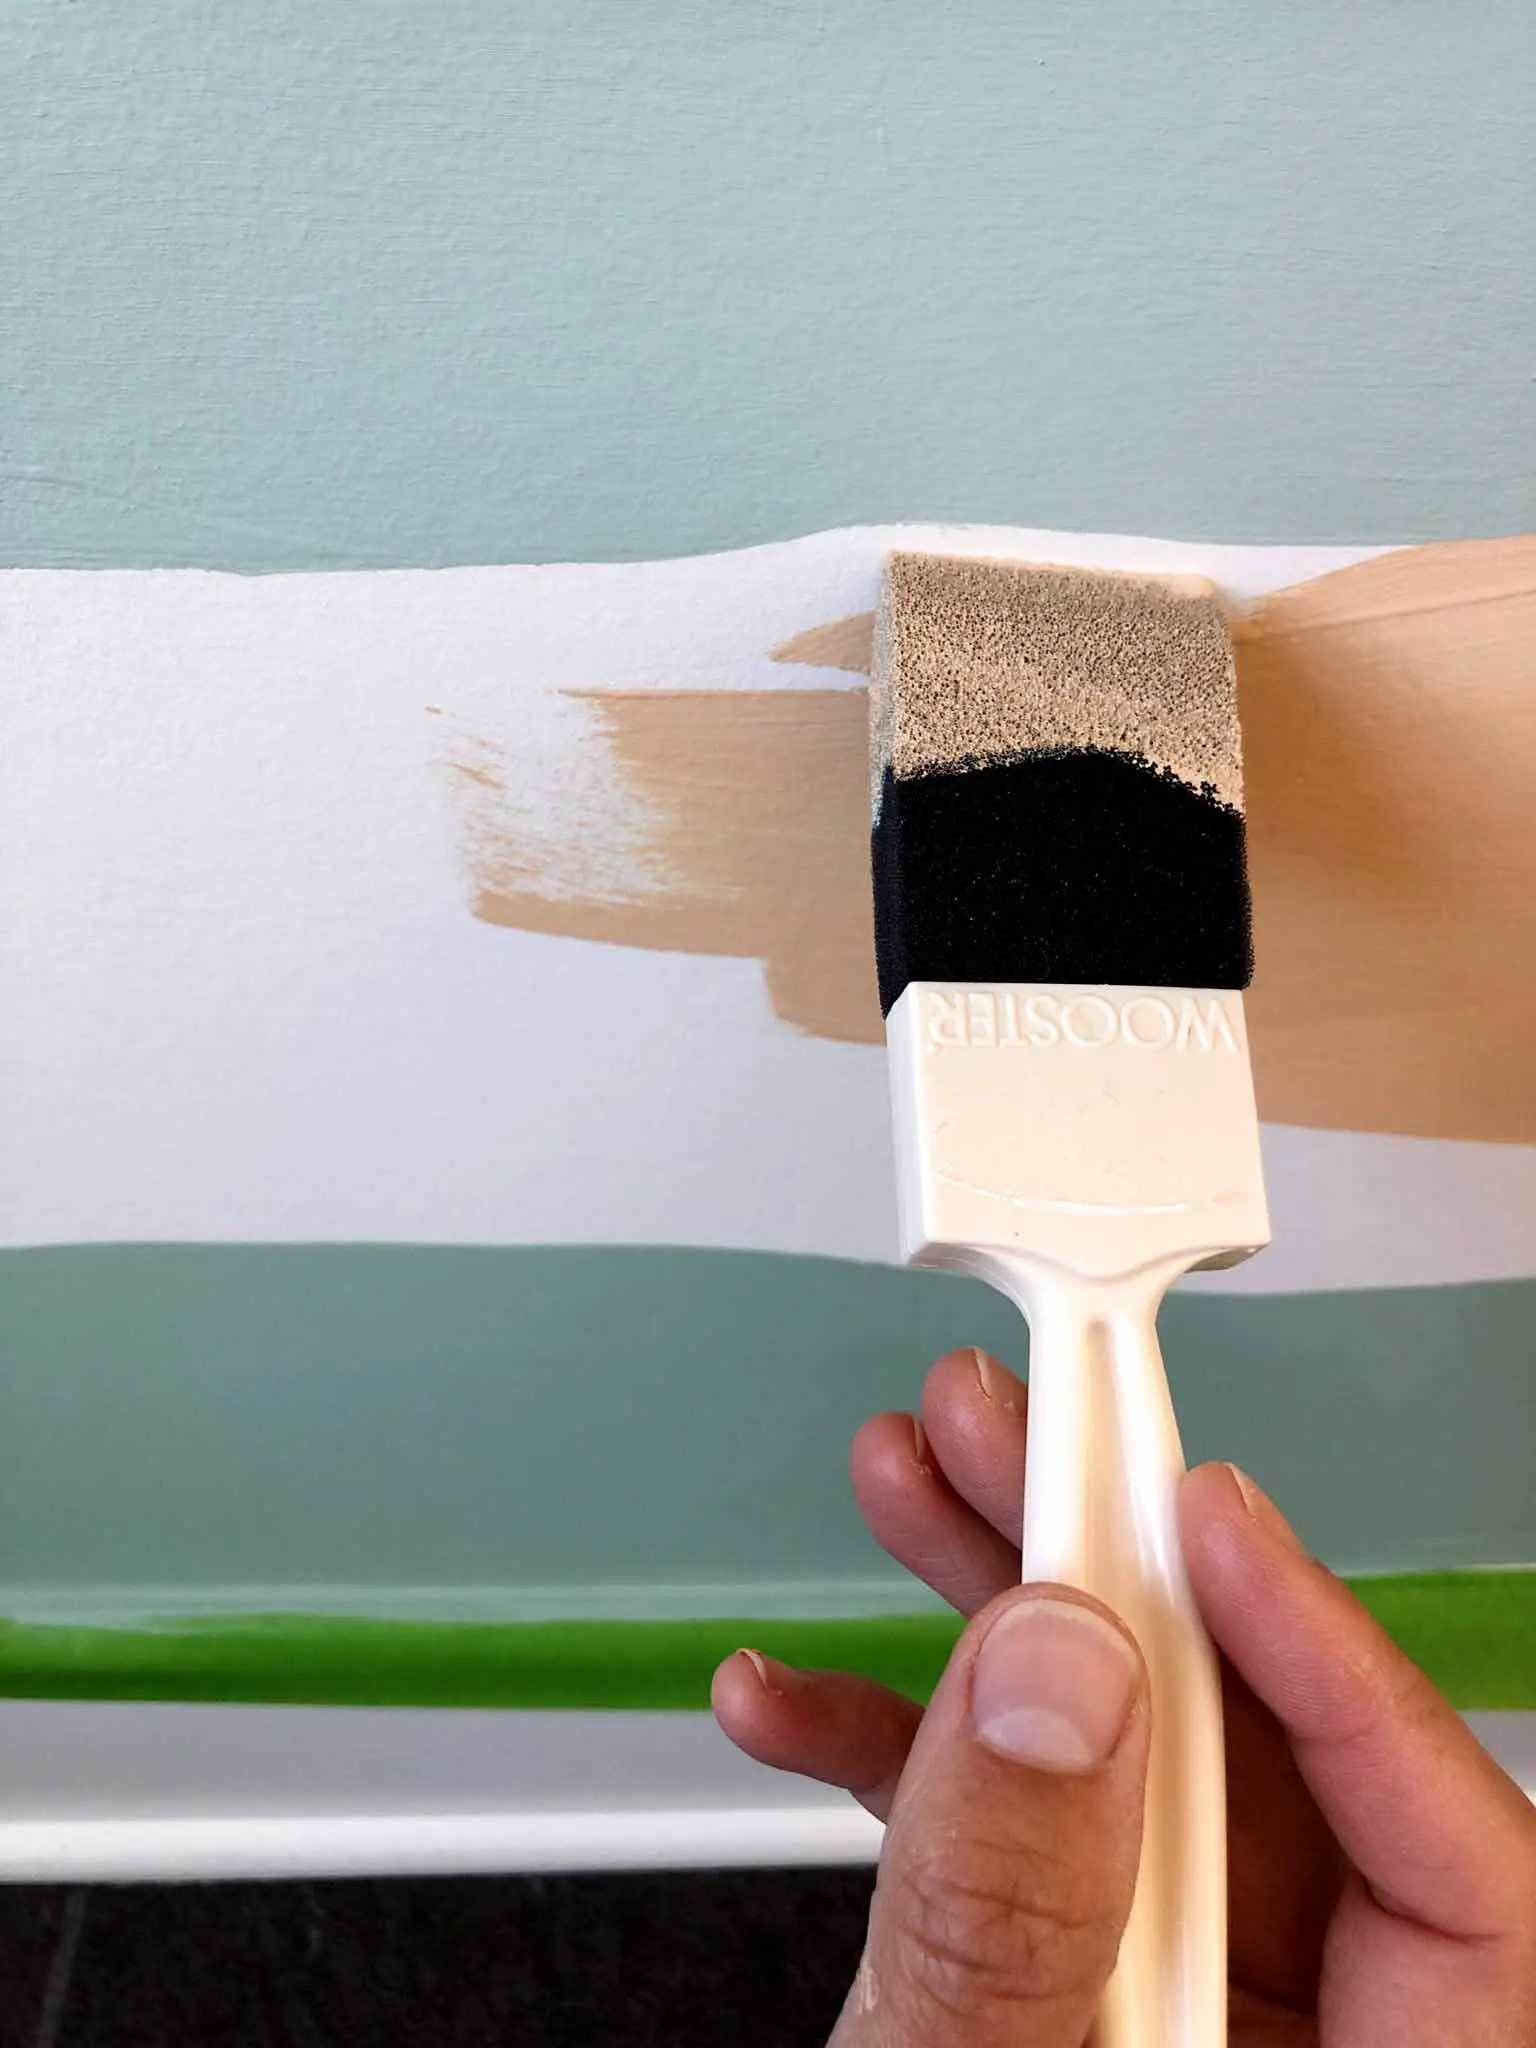
I also splashed out and bought Frog Tape rather than using the cheap stuff. I think it made a difference and my edges are extra crisp.
DRAW YOUR DESIGN
Once you have all your supplies and your sketch ready to go, you can grab a pencil and draw your design on the wall! Take you time during this part, as it's better to get it how you want it before you bust out the paint. Stand back and squint a little—it helps.
PAINT SECTION BY SECTION
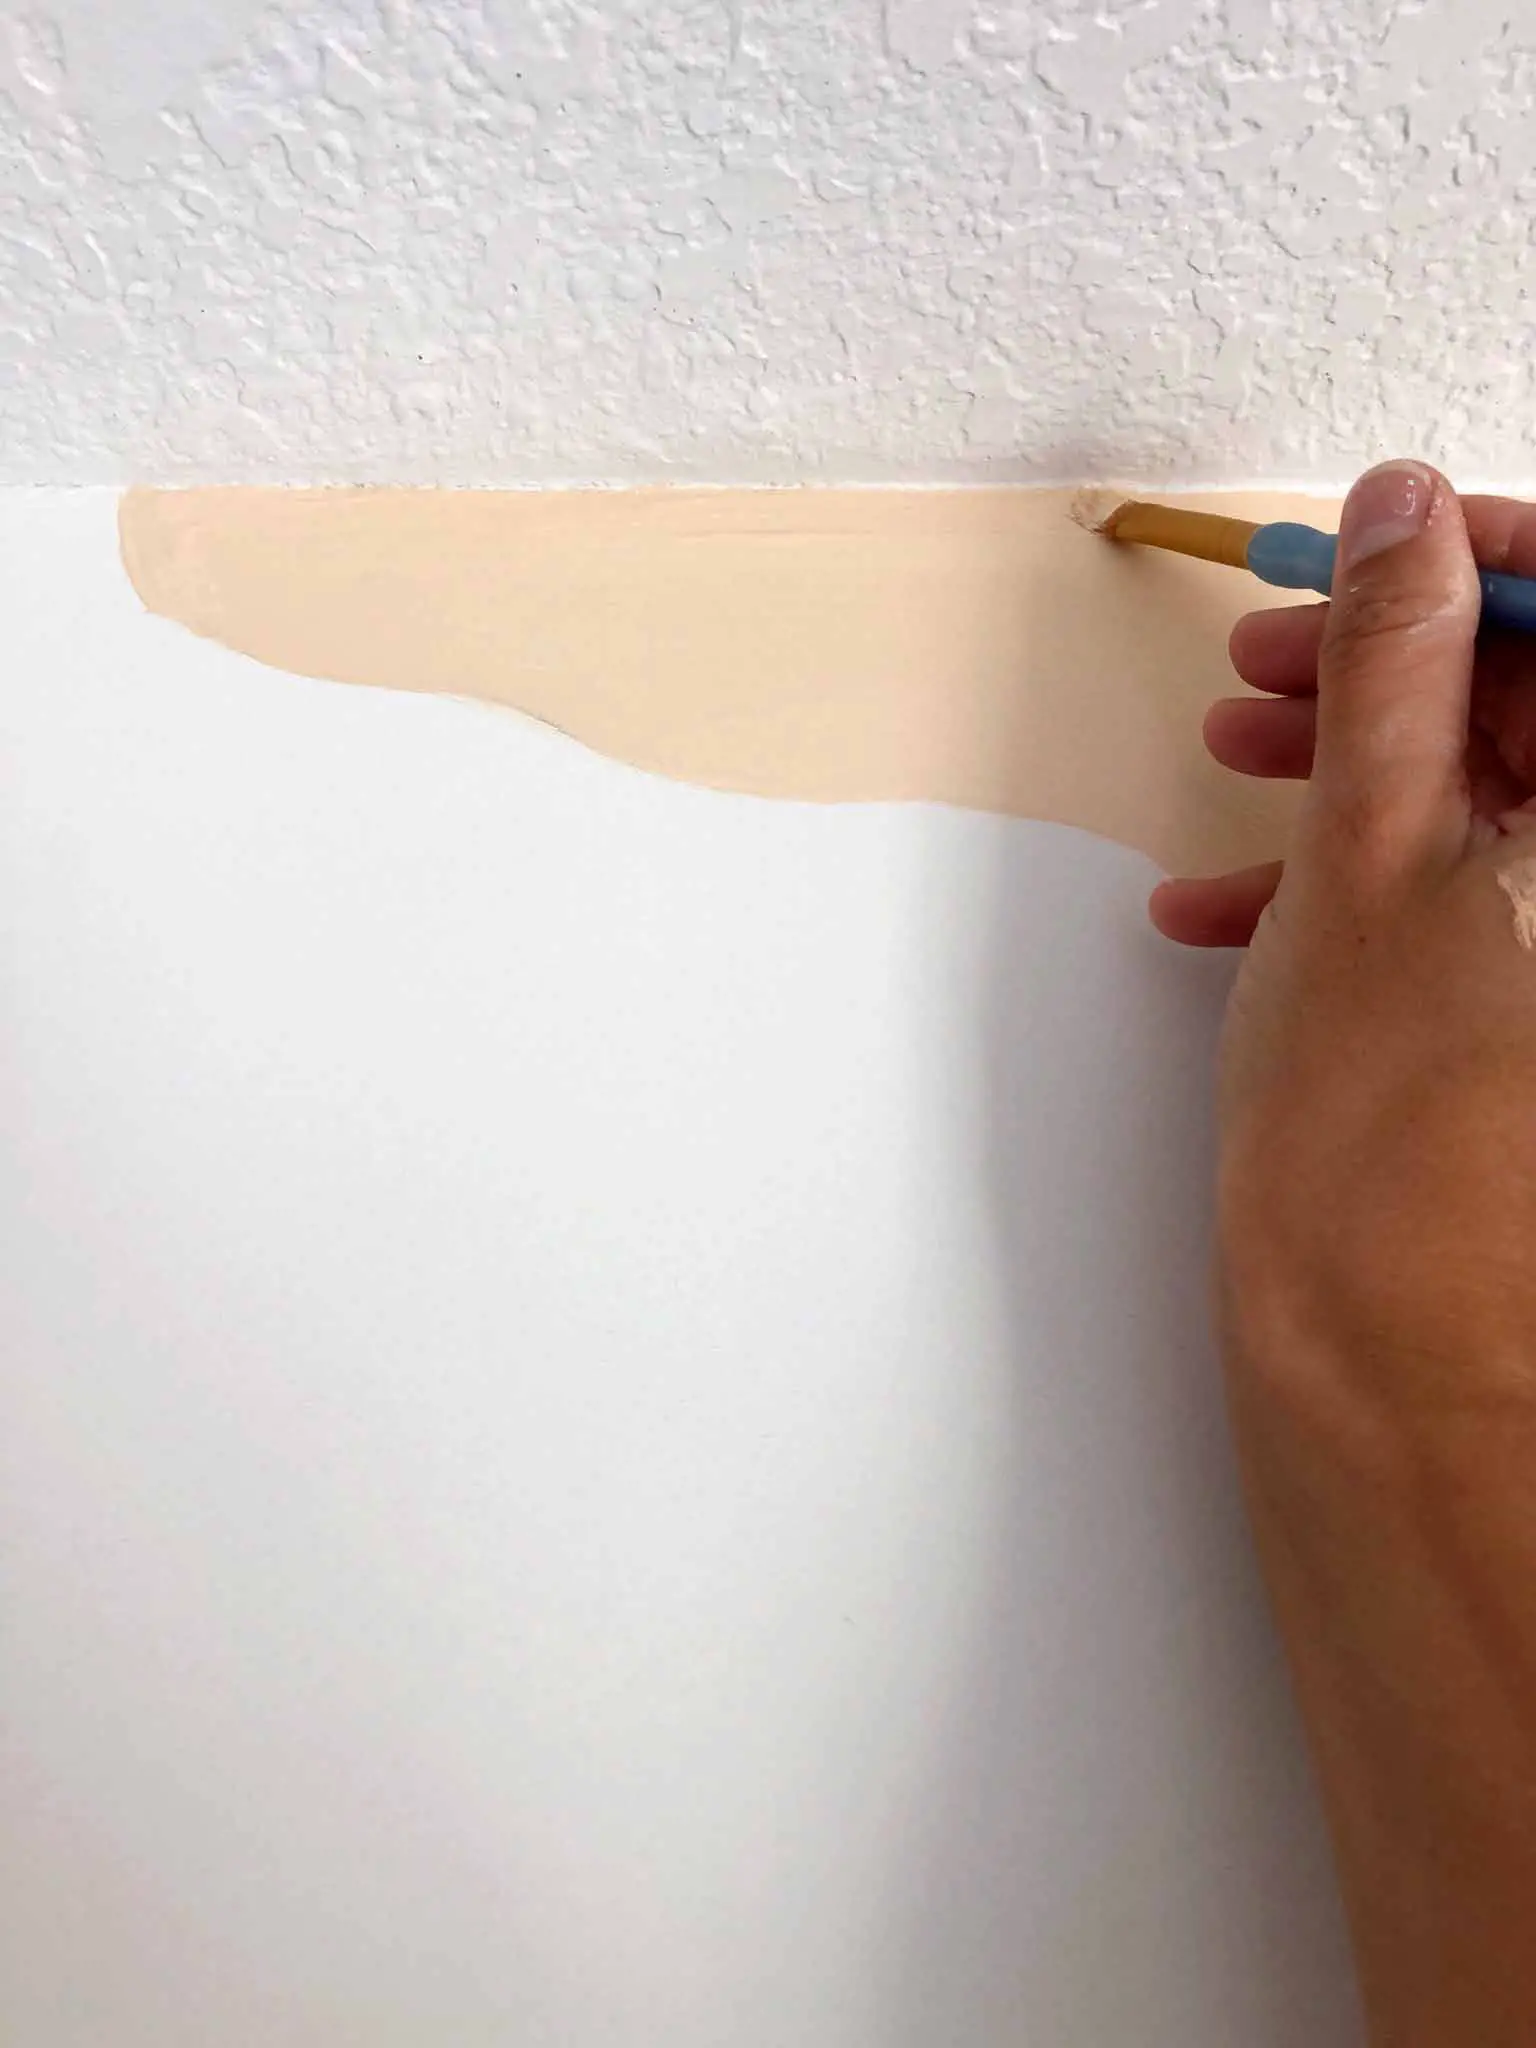
Once you have your design on the wall, you can mark with a pencil which colors are going to go where. Depending on your palette, you could either do a gradiant of tones, or you can go for a more contrasting look like I did. Tape off your baseboards, and begin painting alternate sections. (The paint needs to dry properly before you paint an adjoining section with a different color.) I used a small kids paintbrush to do the edges, and did two coats of each color. Keep some baby wipes on hand for easy clean up of little spills!
TAKE YOUR TIME
Slow and steady wins the race. Every time I tried to rush through sections to get them finished before X or Y, I made mistakes and had to do extra touch ups. This is a fun and creative project, so enjoy the process! I probably spent around 12 hours total on it, which I broke up over a few days.
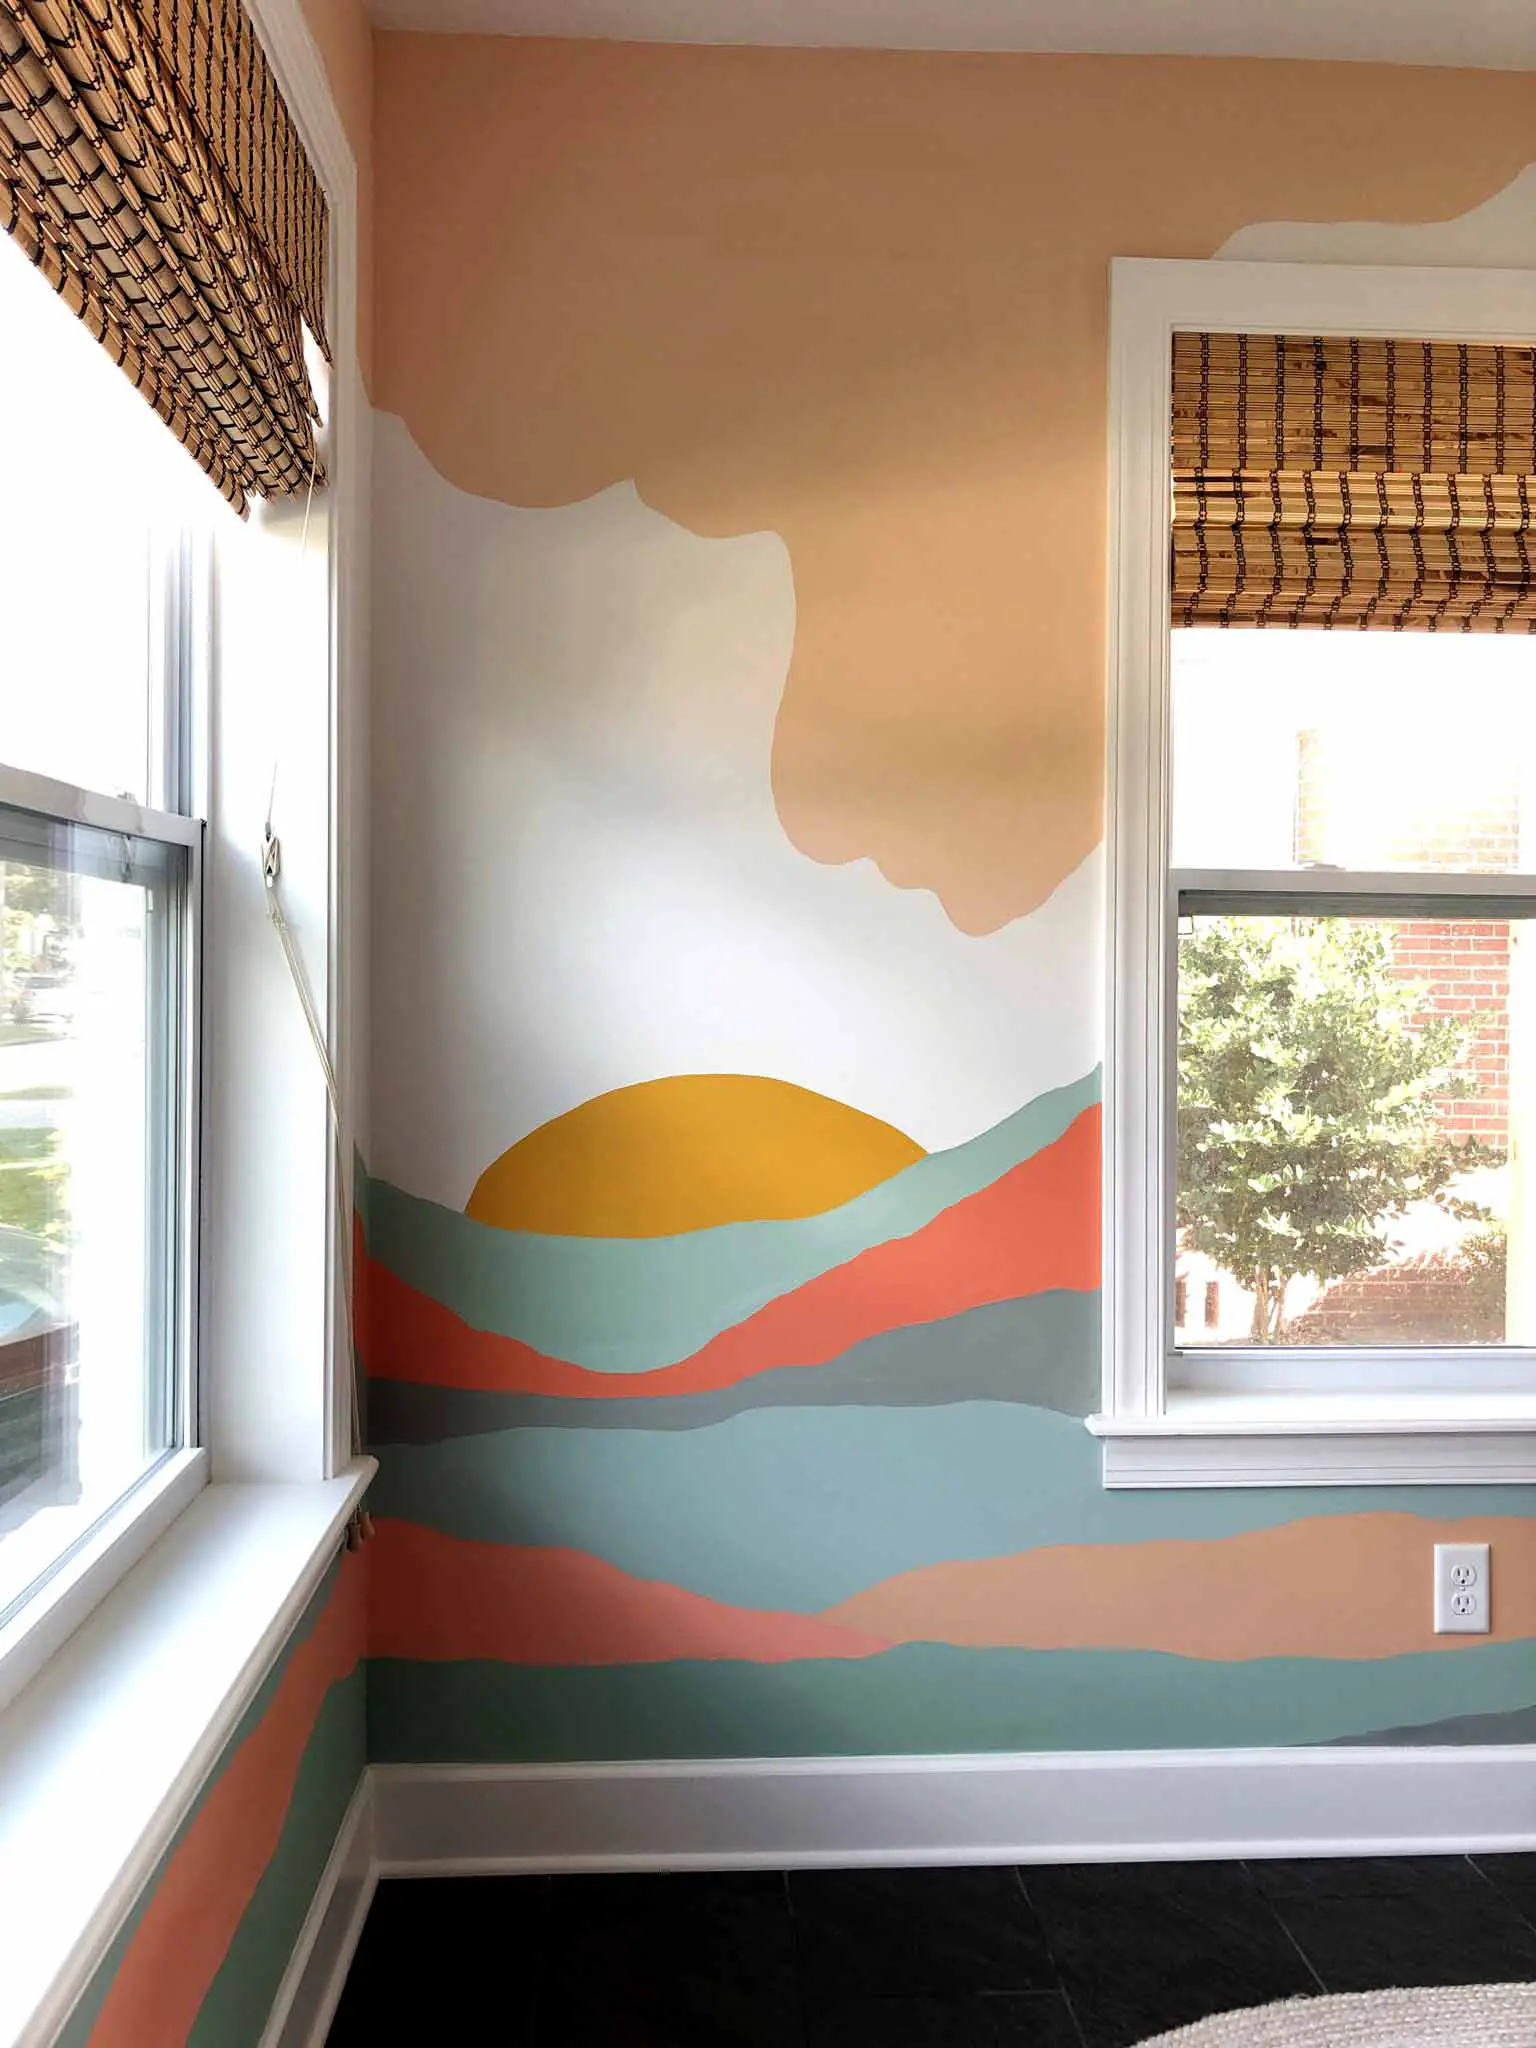
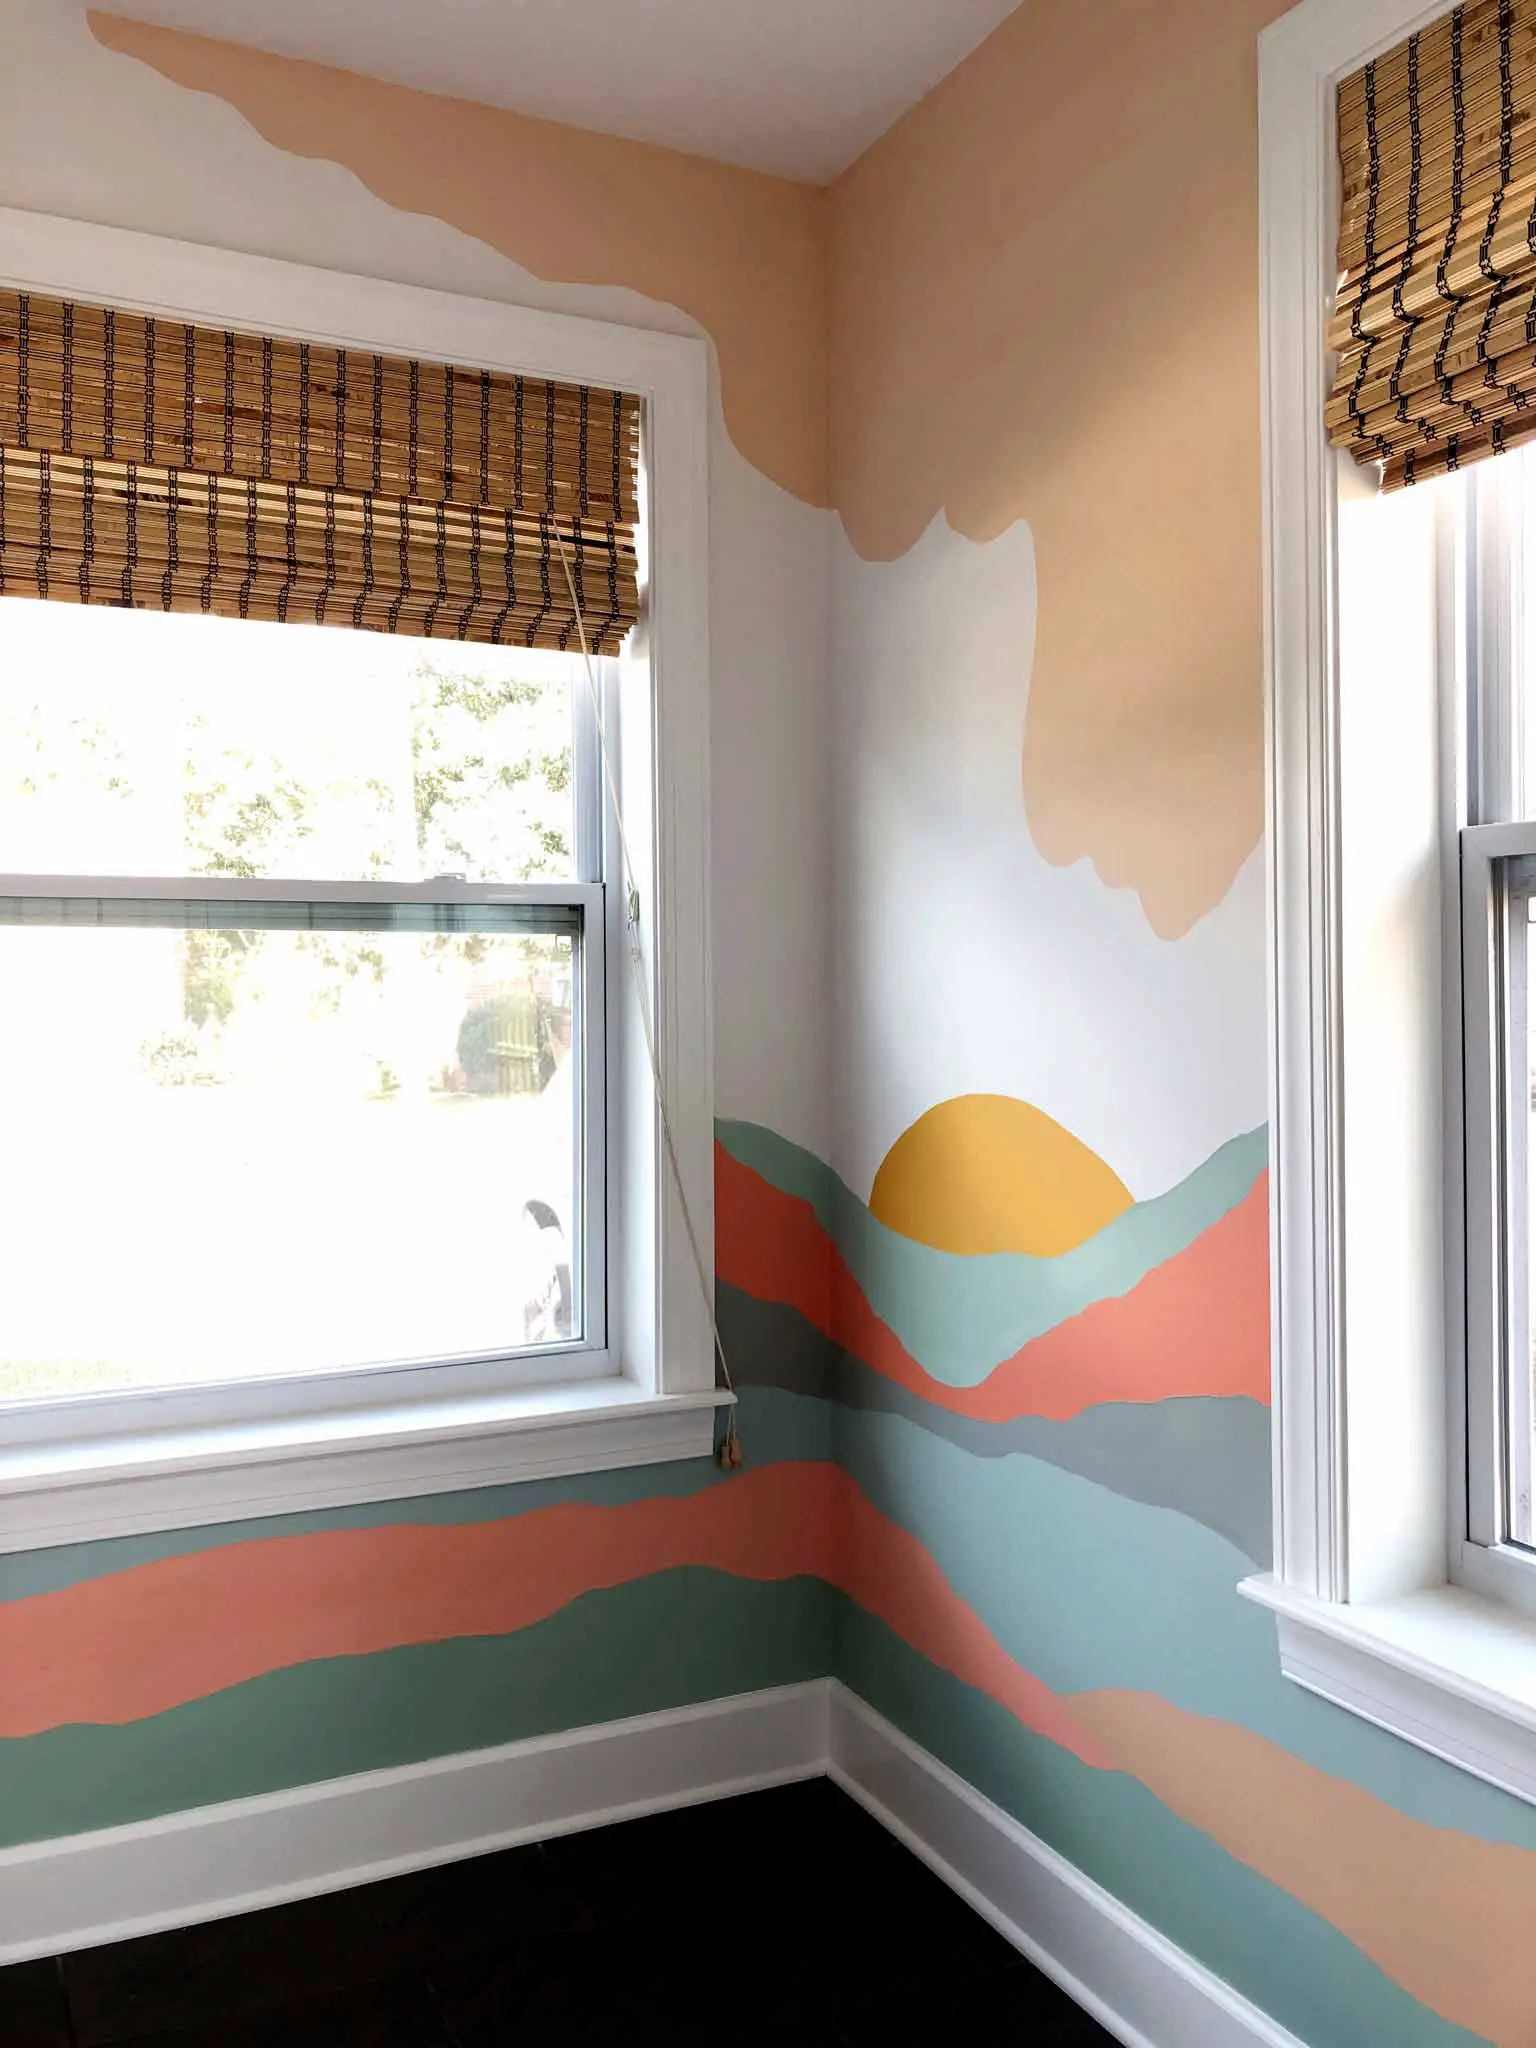
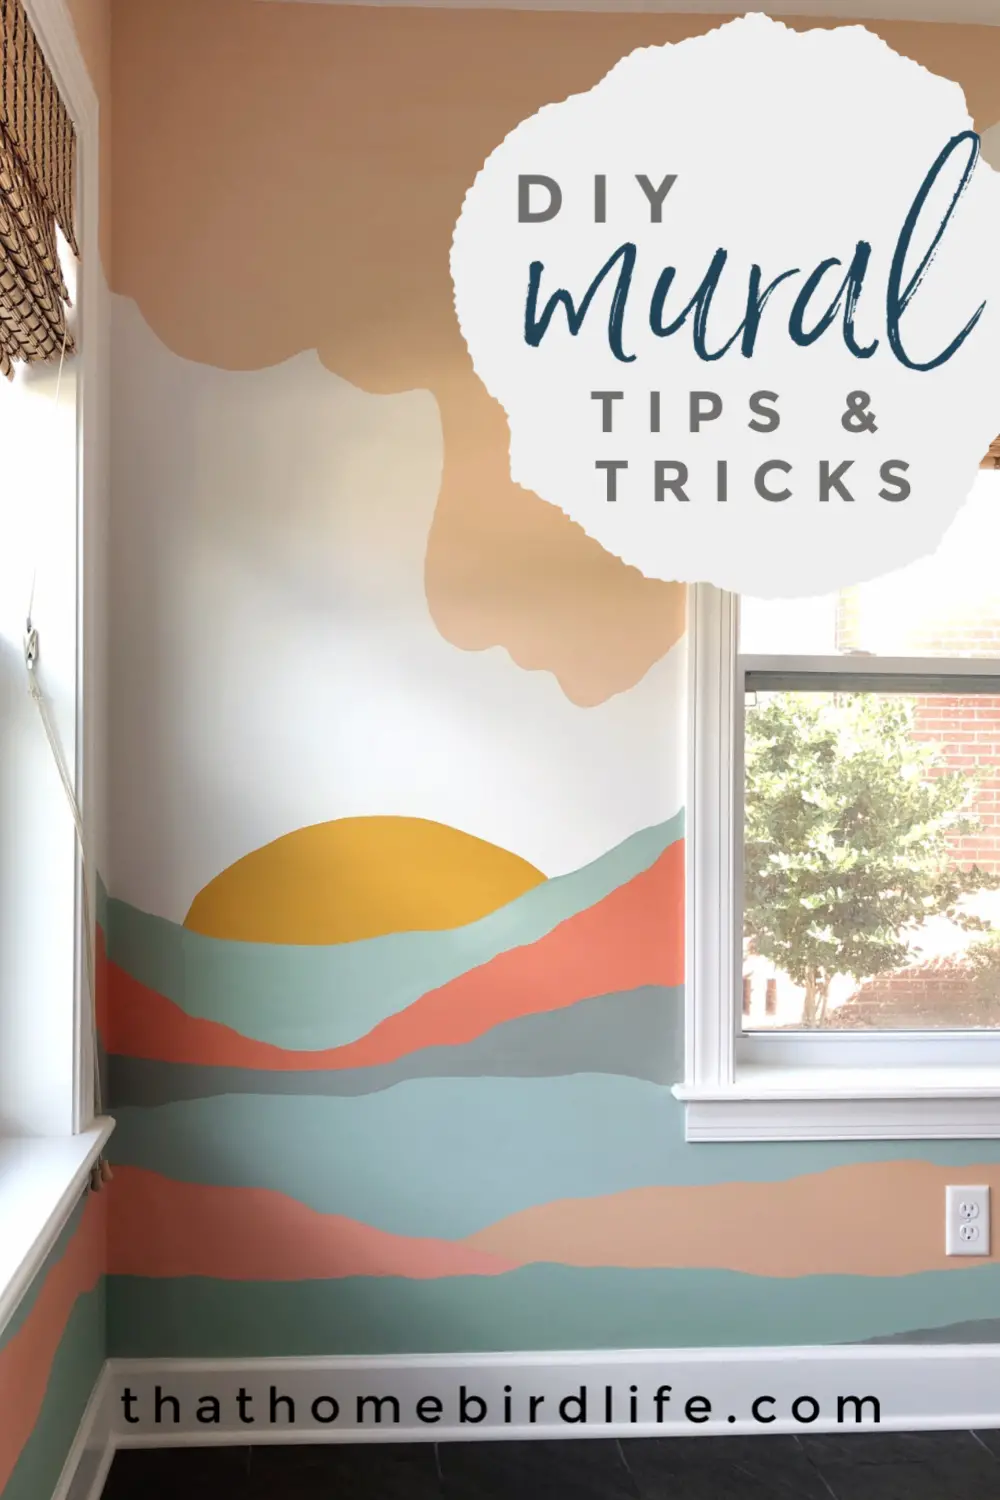
Drumroll please...here's my finished mural:
To finish this space, I have a very special furniture piece that I'm adding to the room—the mural will be the perfect backdrop and I can't wait to see how it all looks together! More details coming very soon...