When we made the decision to pull our garage down and replace it with a guest house, I knew that outdoor storage was going to be a challenge for us. Fortunately, we were able to work a narrow storage room into the plans for the guest house, so we do have a designated spot for bikes and a lawnmower and all that stuff. But it's small, and I knew that organizing the space and making it functional would be at top of my to-do list.
QUICK LINKS
This post contains affiliate links, which means that I may earn a small commission if you purchase something that I have recommended, at no cost to you. More information can be found on my disclosures page.
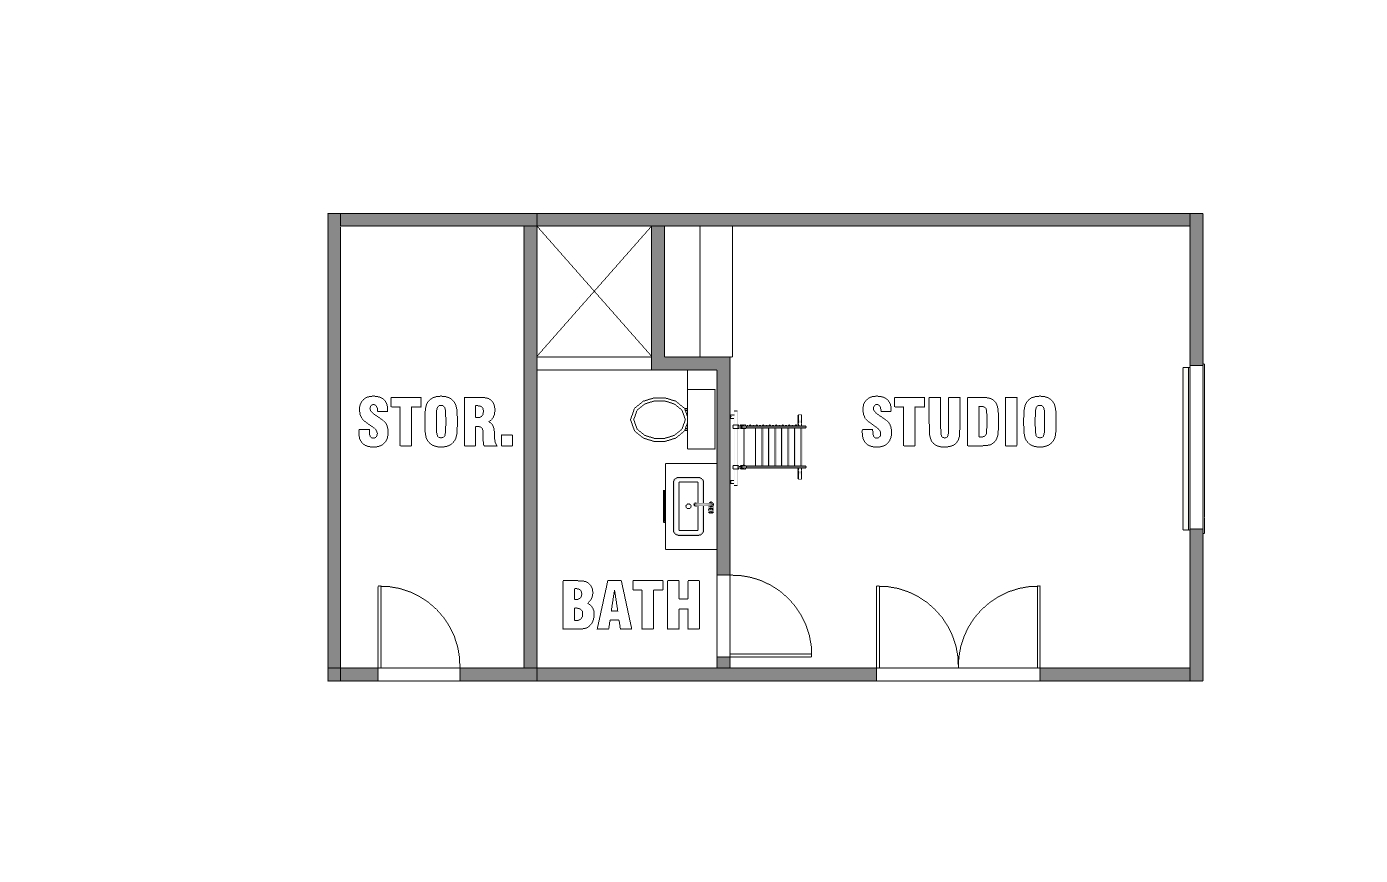
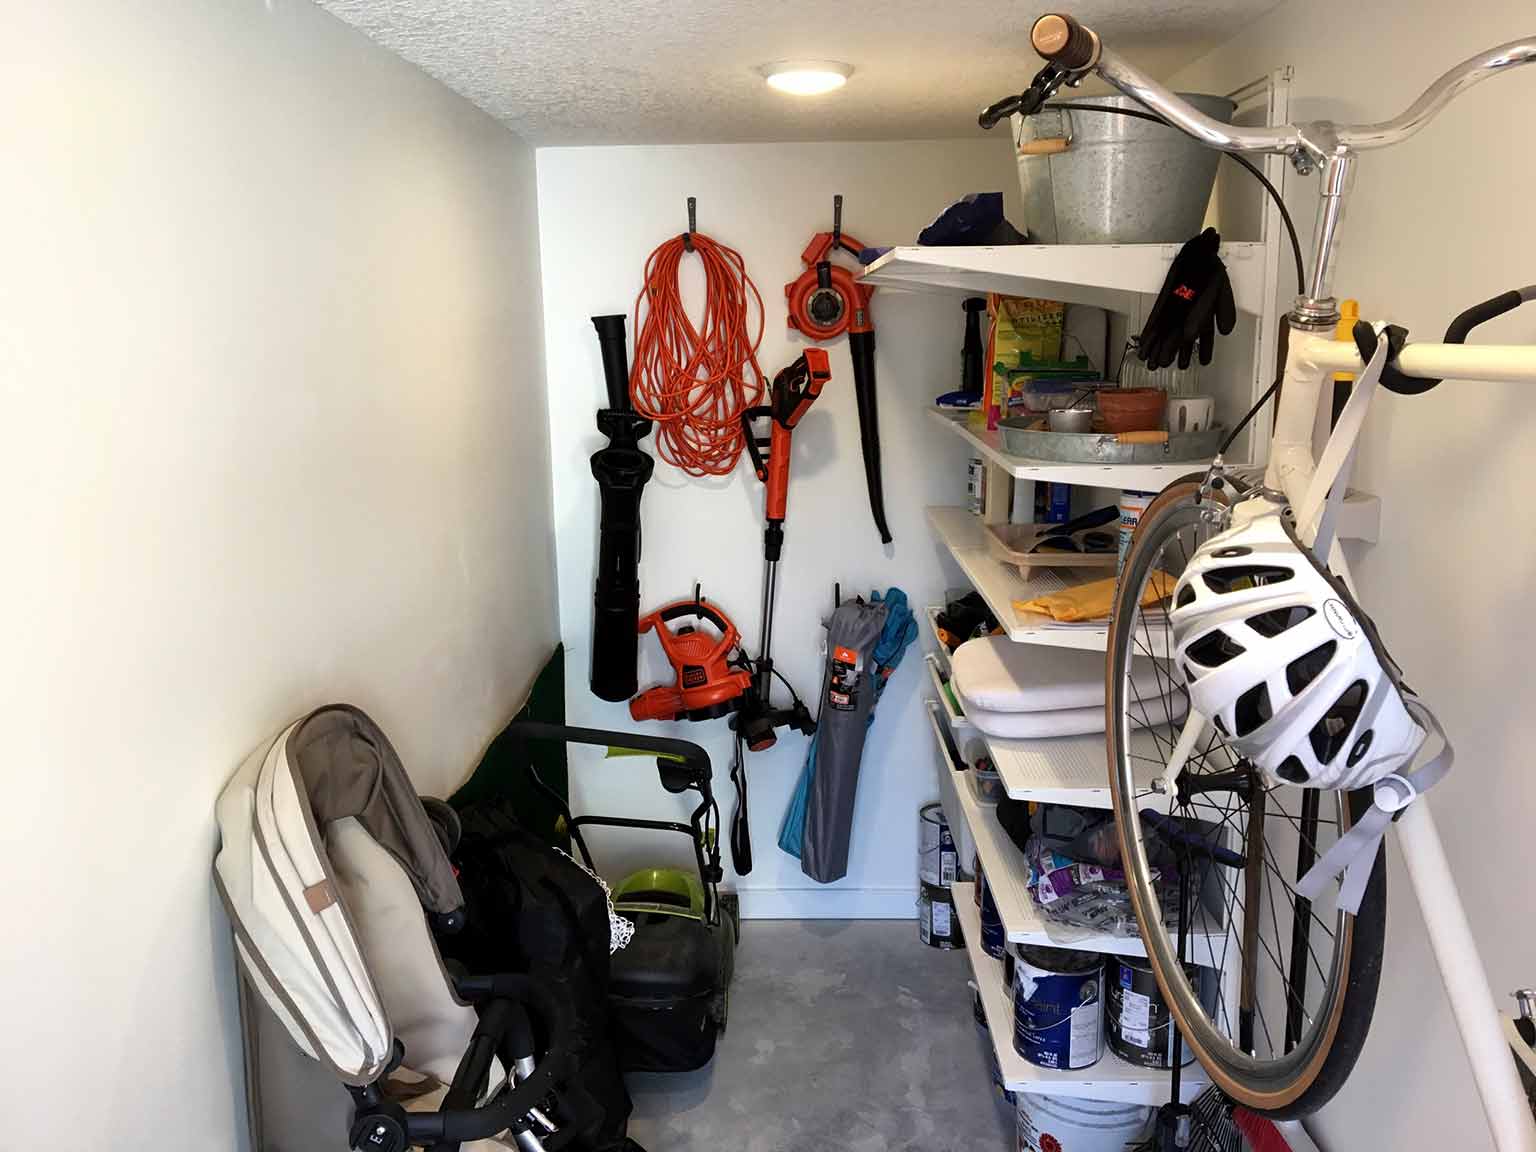
As a reminder, here's where our storage room is located in relation to the guest house. The dimensions are around 5' x 13', so it's definitely compact in comparison to the garage we had before.
I knew that I would need to make this space work extra hard for us, so I set to work planning the space. It felt overwhelming at first to have to squeeze so much into a small storage room, but I was pleasantly surprised at how satisfying it was to complete the project—even though it wasn't the most Instagram-able result. (Spoiler alert: there really is no way to make ant killer look pretty.)
So here are the steps I took—and I think they could easily apply to any outdoor storage space—whether you have a triple garage or a shed.
STEP ONE: PURGE & CLEAN
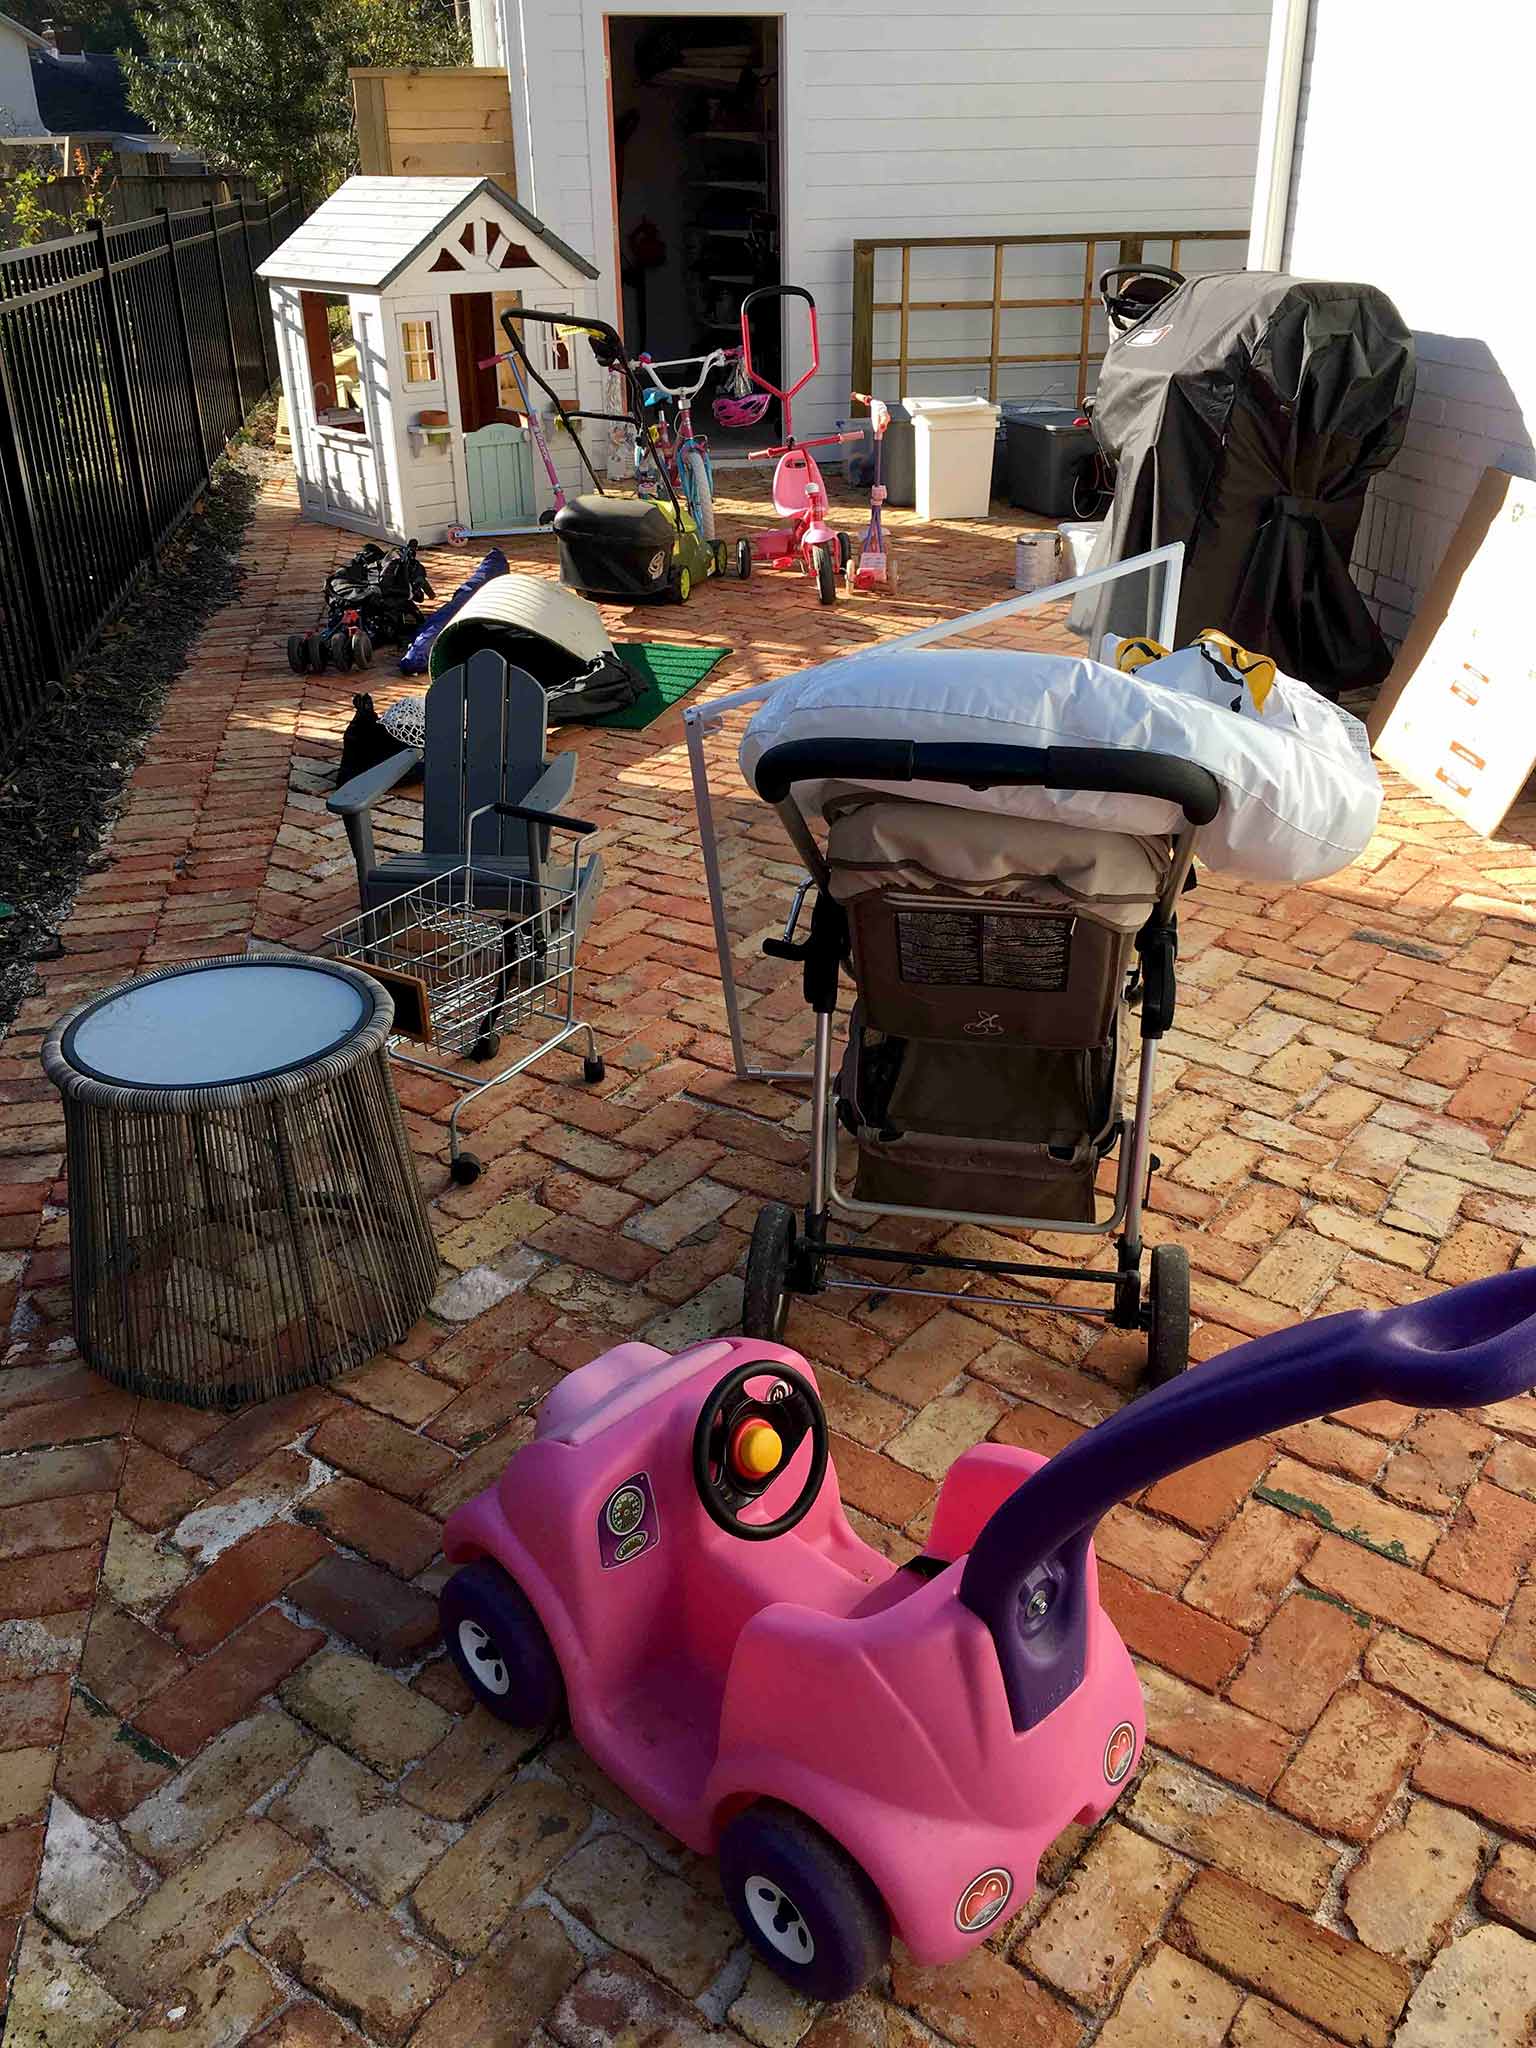
Before you start trying to organize your space, you need to know exactly what your are dealing with. I decided that we needed to be quite ruthless with our belongings as our square footage was so limited. We had already had a yard sale before starting our construction work, but I still found a good few items that were either nasty from sitting in storage for so long, or just not needed anymore. I went through all our paint cans and threw out the almost empty ones. I also donated any outdoor toys that the girls had outgrown.
Related: KonMari Part One: 10 Tips to Prepare You for KonMari Success
The best way to get started on this step is to pull everything out of the space so that you can really see what you own. Work systematically through your things and organize everything into keep/donate/trash piles. This is also a good time to give the empty space a quick sweep and wipe down if it needs it. I also hosed everything off at this point, and gave the toys a good scrub.
STEP TWO: SHELVING OPTIONS
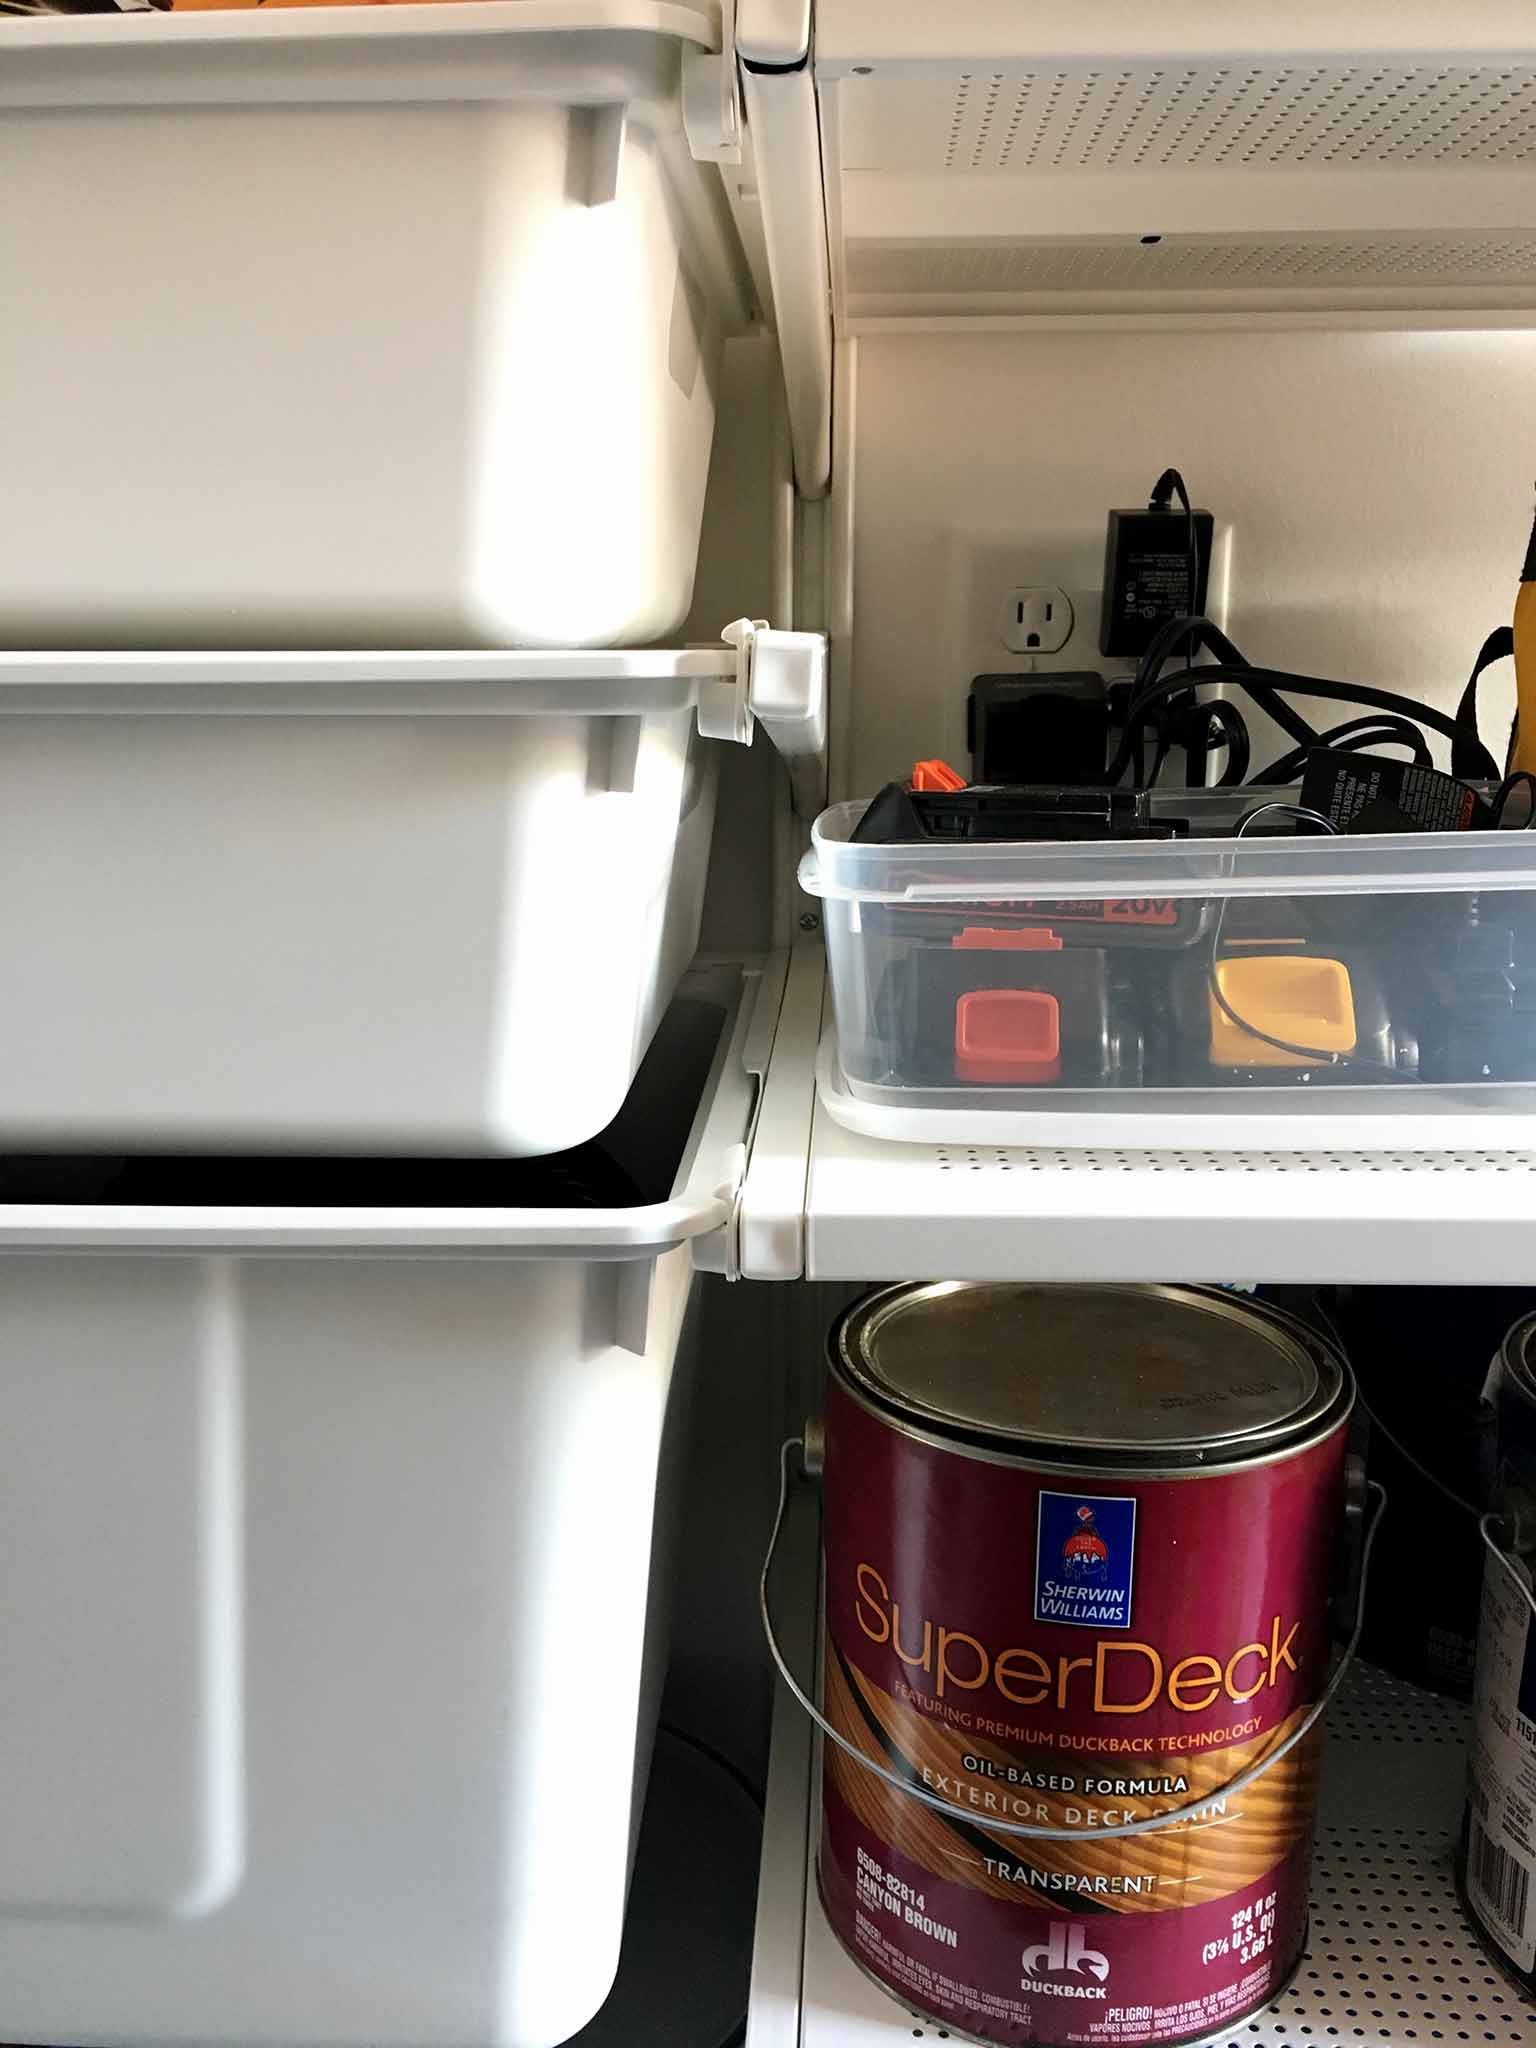
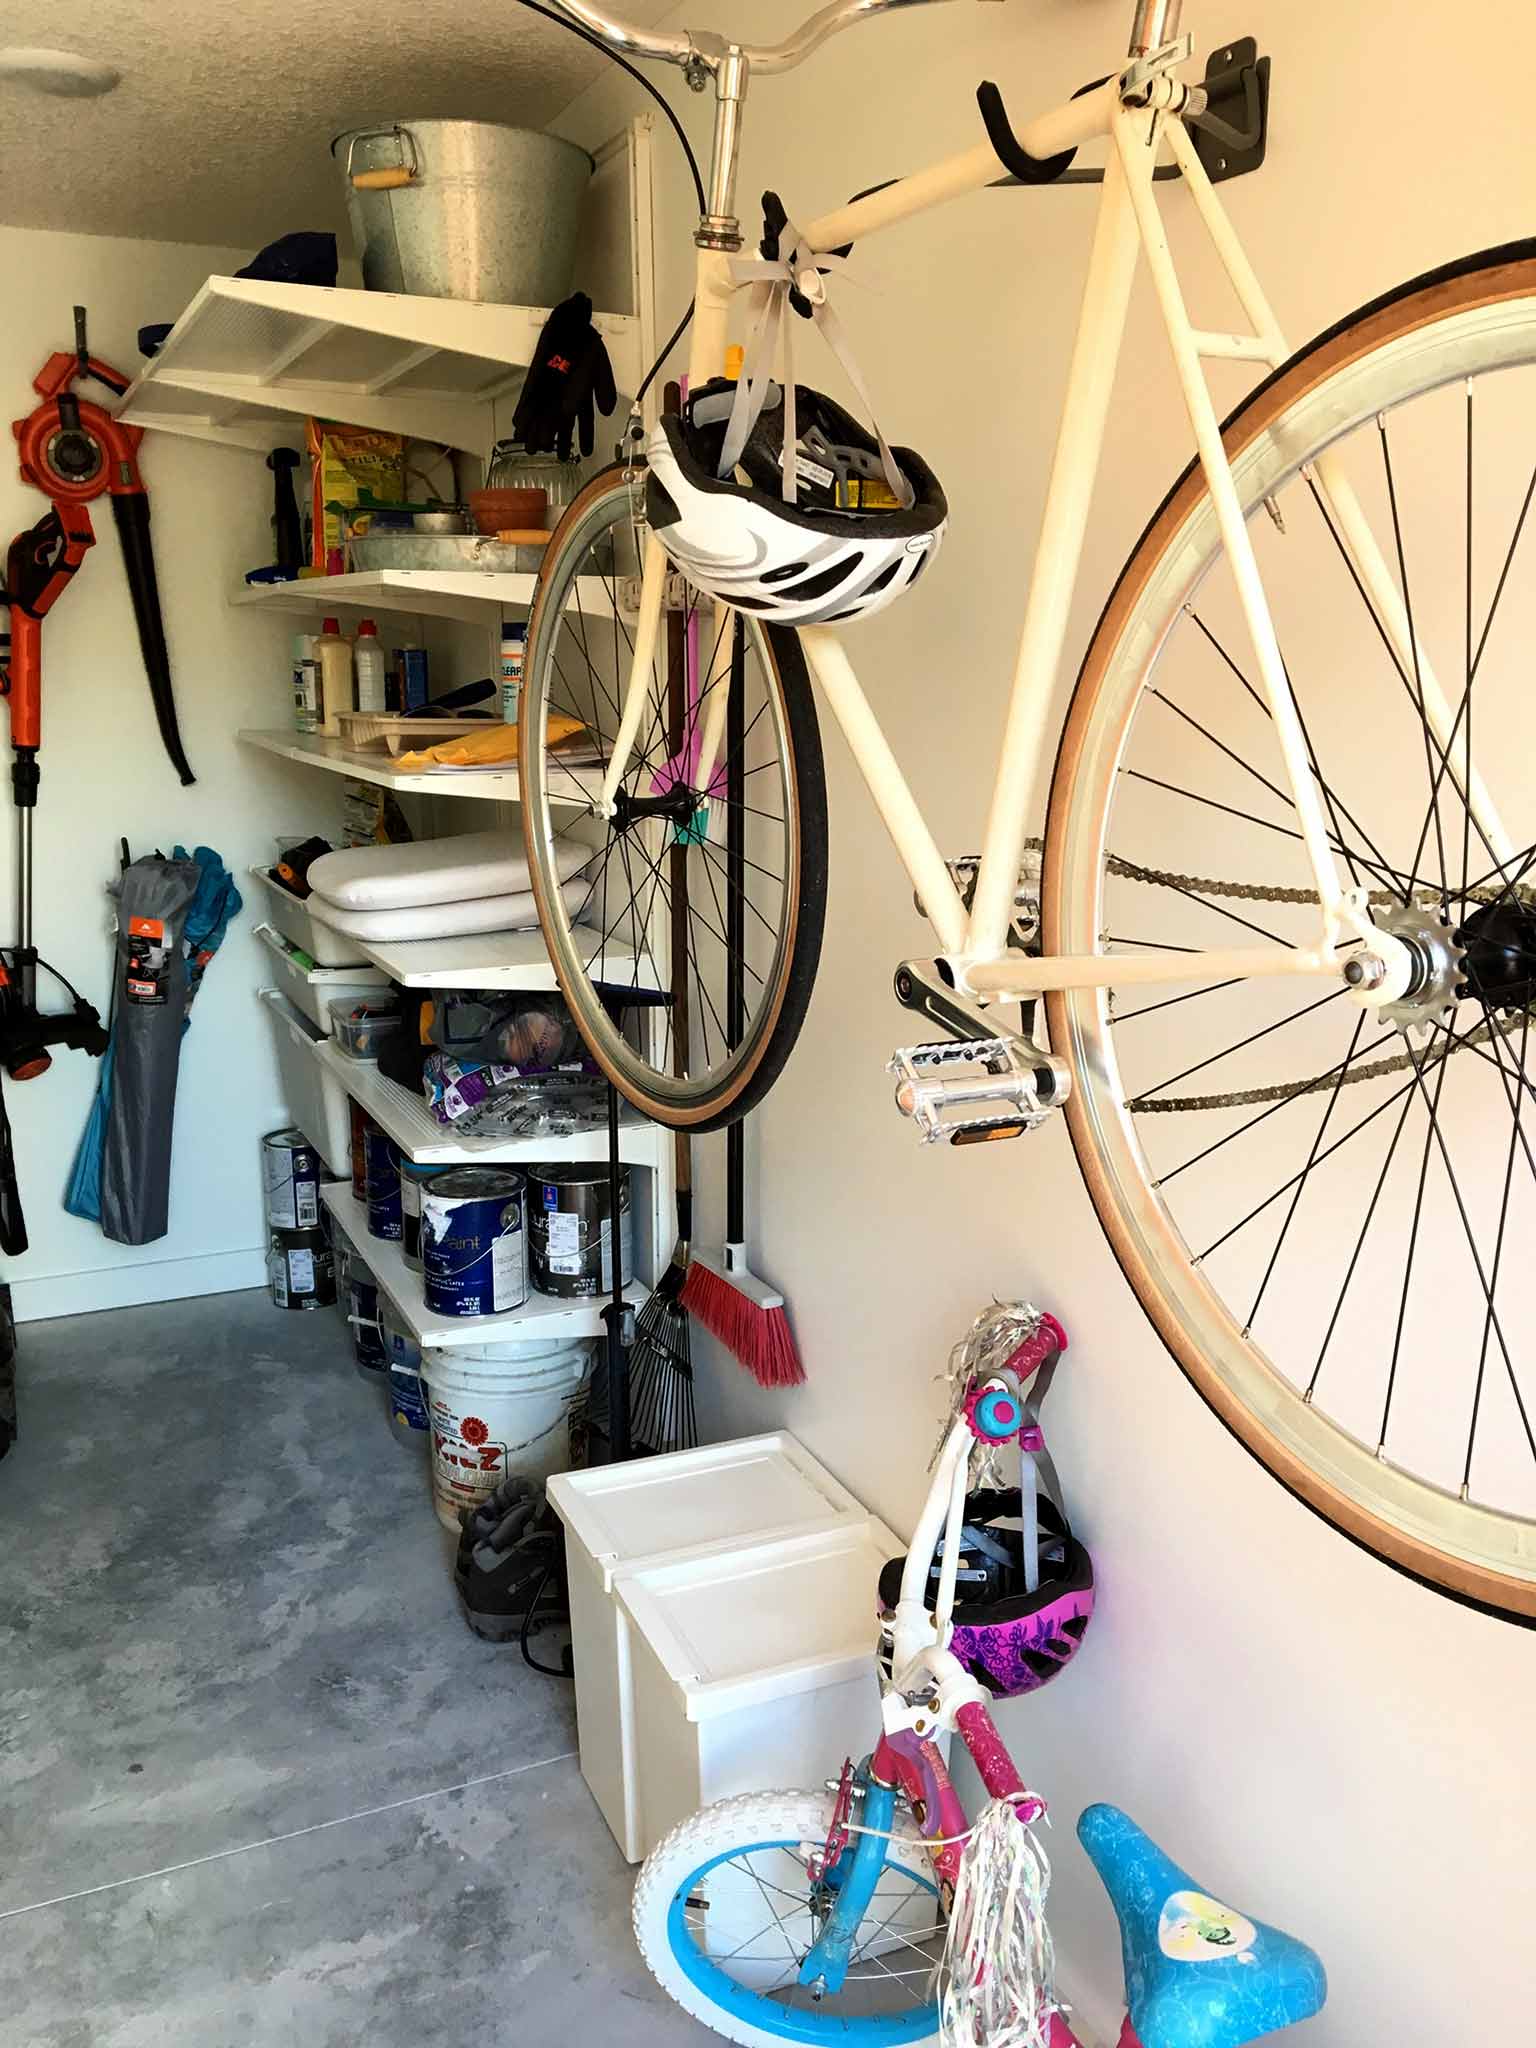
Now that you know what you actually need to store, you can decide the type of storage you need for it. Home improvement stores carry shelving units and accessories specifically designed for garages, but we actually decided to go with the ALGOT series from IKEA. I was drawn to it because it is totally modular and customizable, and you can incorporate bins as well as different depth shelves. We live close to an IKEA, so I ended up making about 3 different trips to get all the different parts we needed, but this could totally be avoided with some careful planning ahead of time!
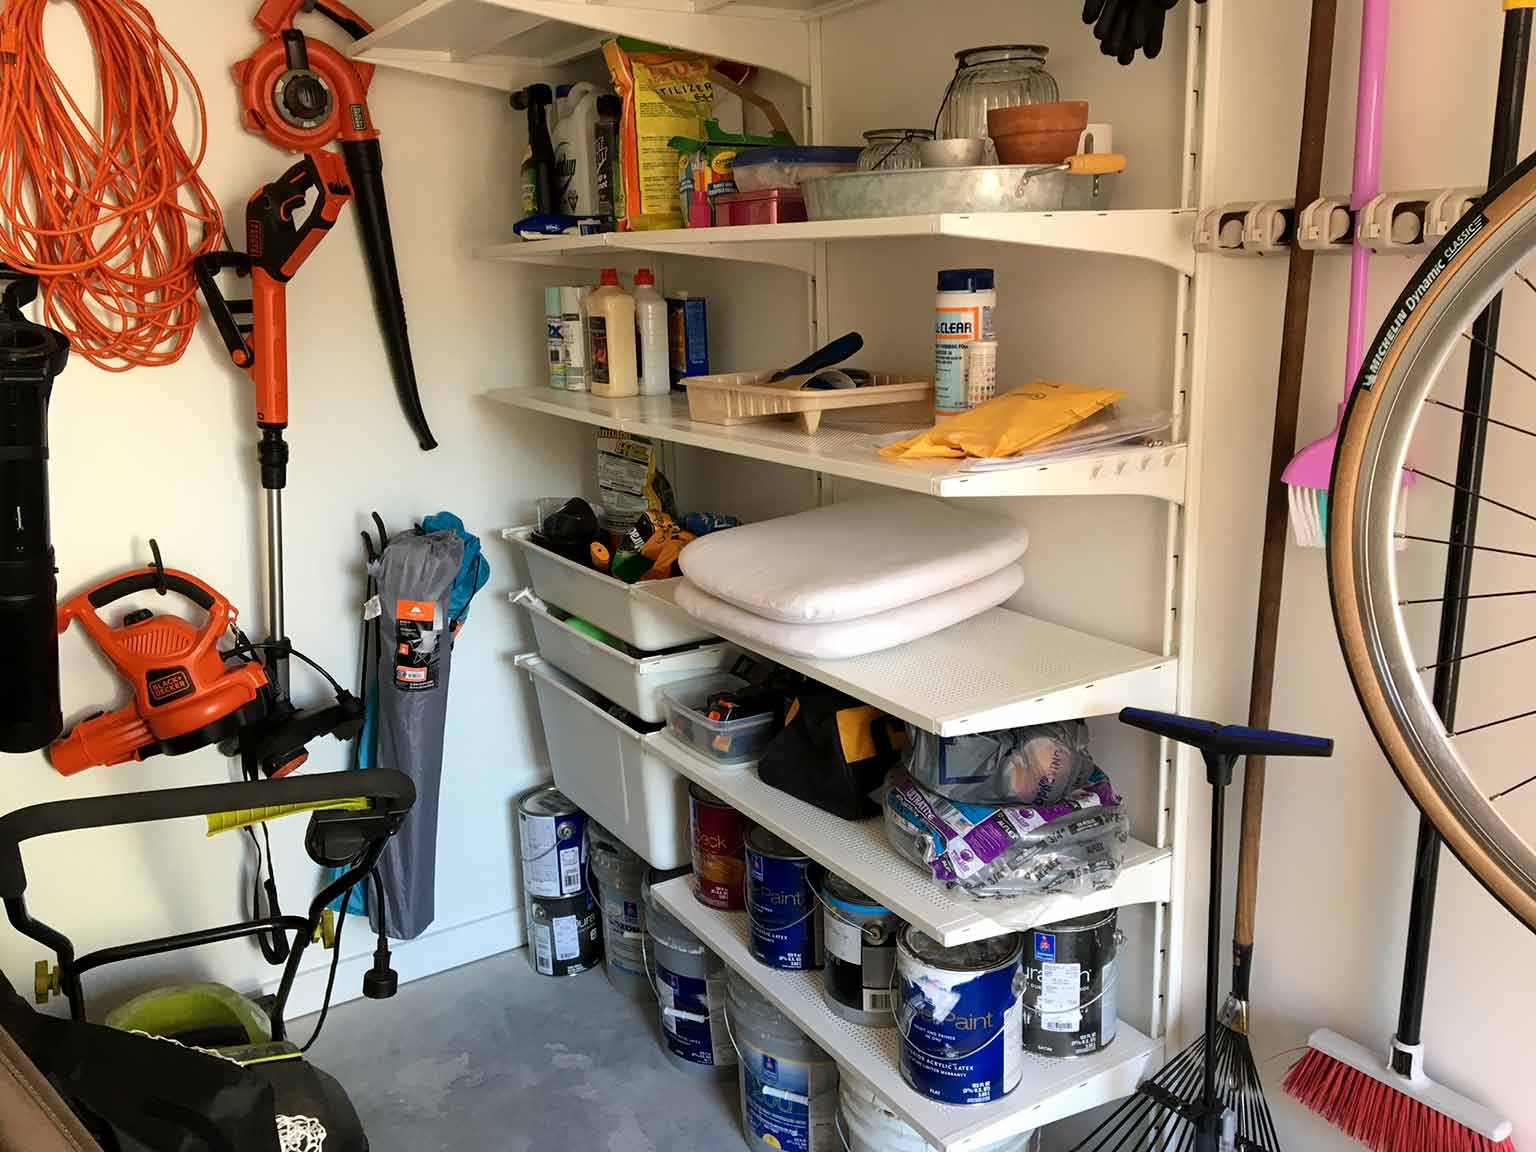
We have been so impressed with how it has worked out, and surprisingly we have a lot of spare space left on the shelves, which I wasn't expecting. My favorite part is that we installed a shelf right next to the outlet, and all the batteries for the lawn and DIY tools can be charged up in one spot.
STEP THREE: KEEP THINGS OFF THE FLOOR
As well as shelves, I wanted to have plenty of hooks on the walls to maximize the wall space. We started with a few heavy duty utility hooks from Lowes for the lawn tools, and then decided to add a bike hanger for my husband's bike. We placed it as high up on the wall as we could, so that there was space underneath on the floor for more storage.
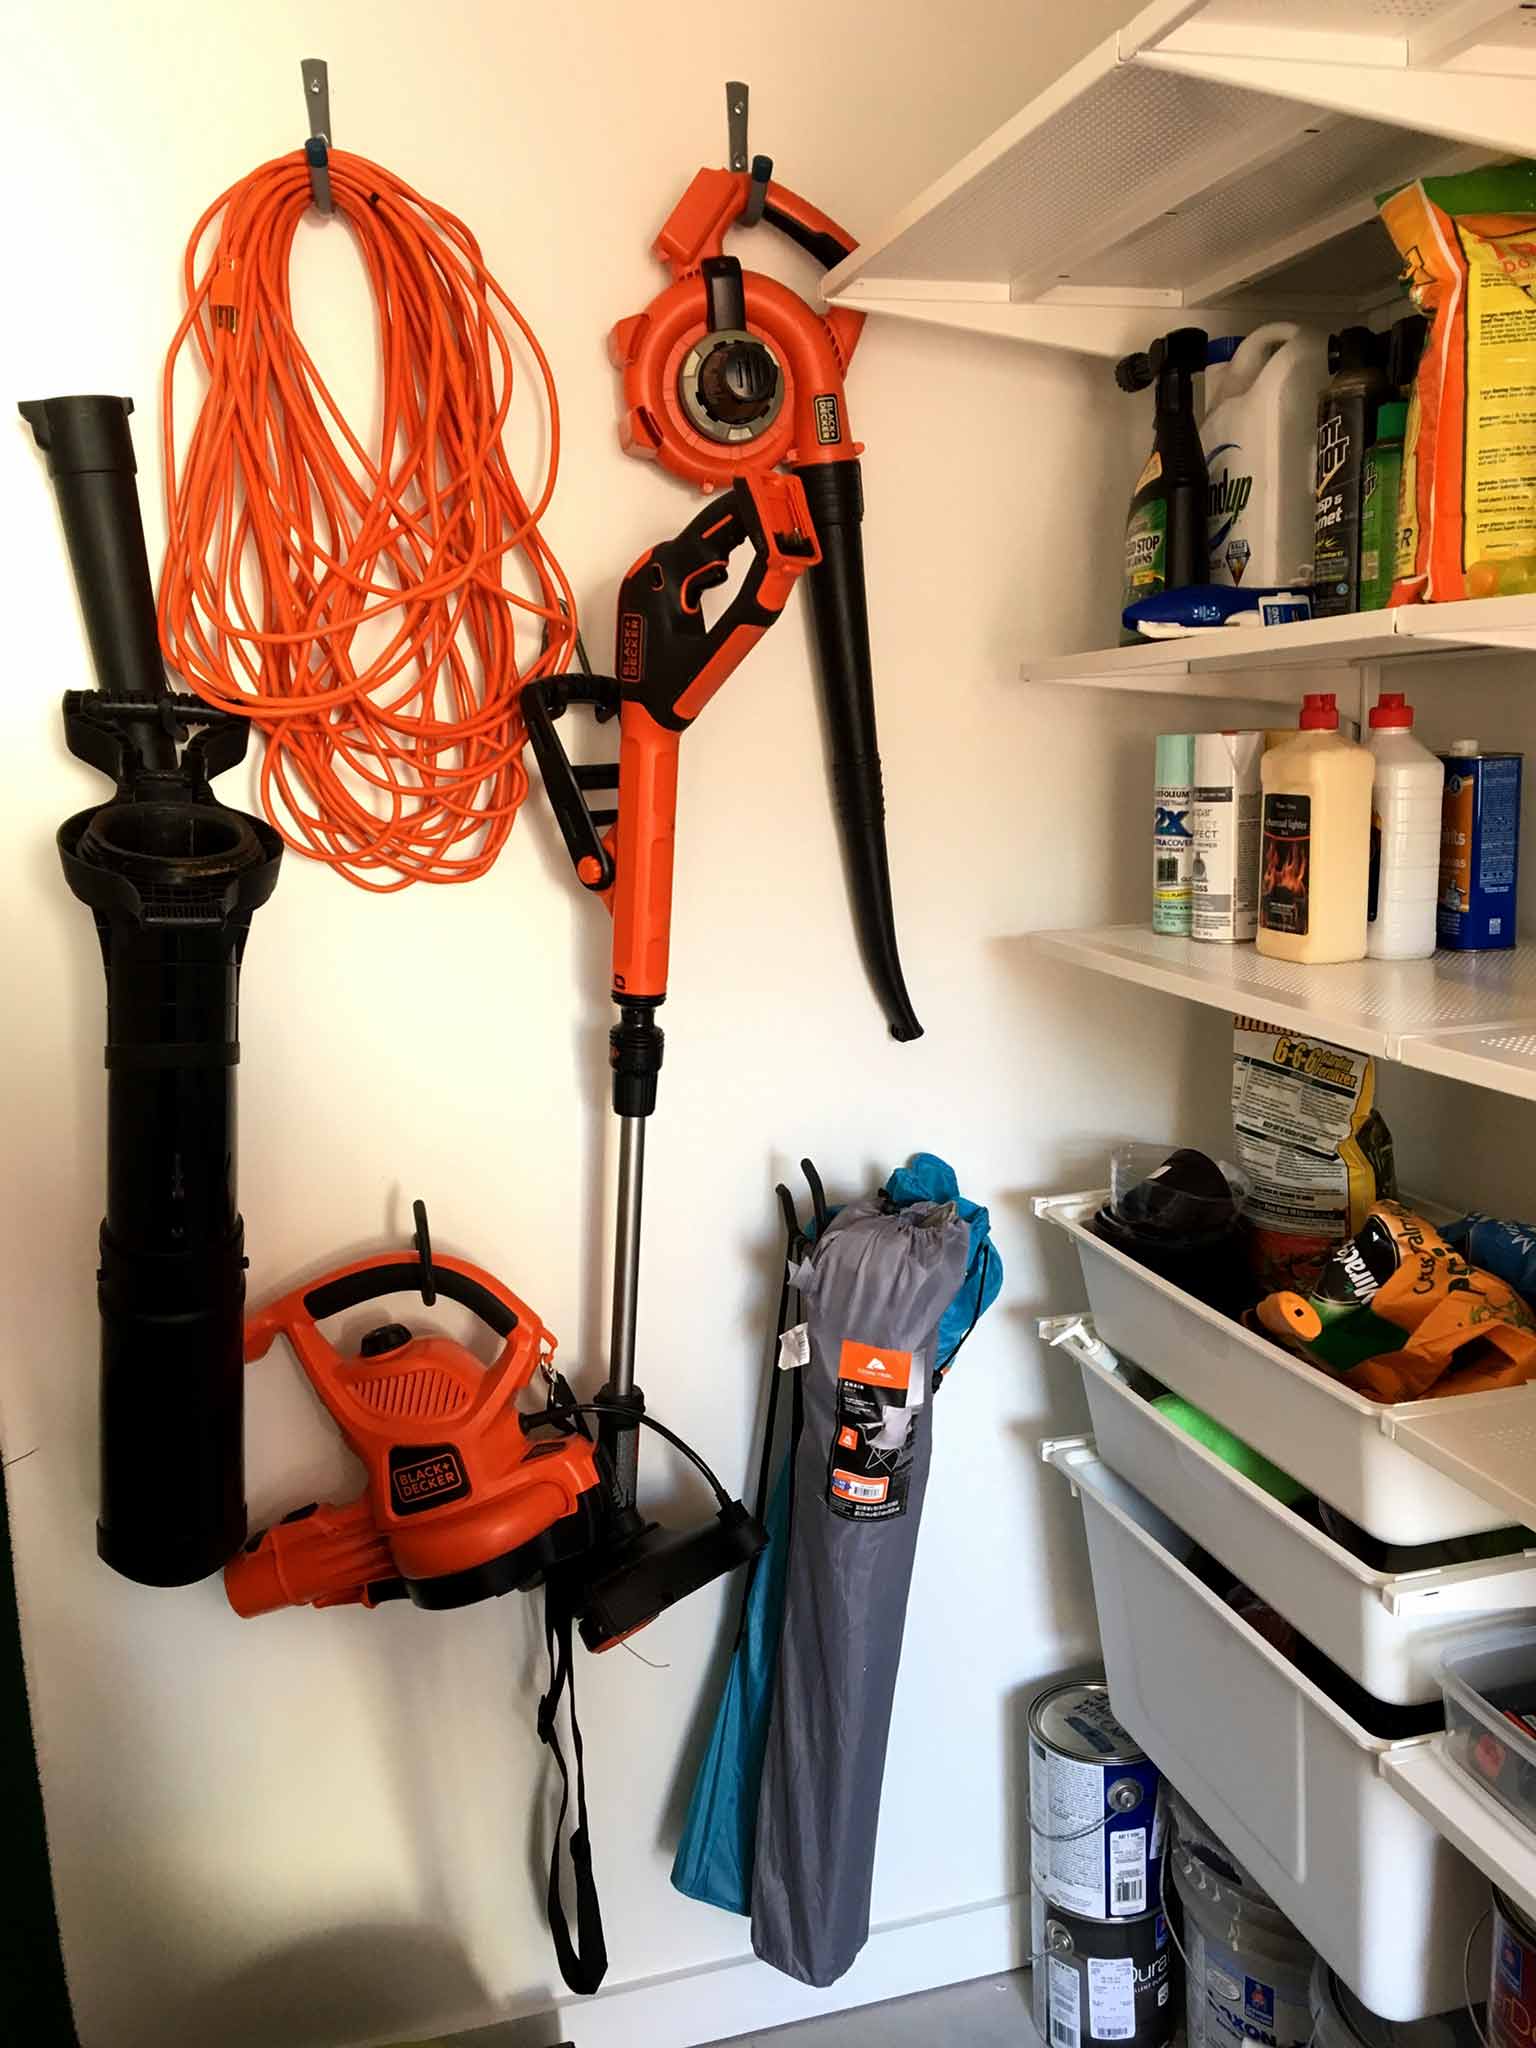
The extra advantage here is that there is no way our kids can knock the bike over by accident, and so it's been a great solution all around.
Lastly, we added a multi-tool hanger for brooms and garden tools.
STEP FOUR: GROUP LIKE WITH LIKE
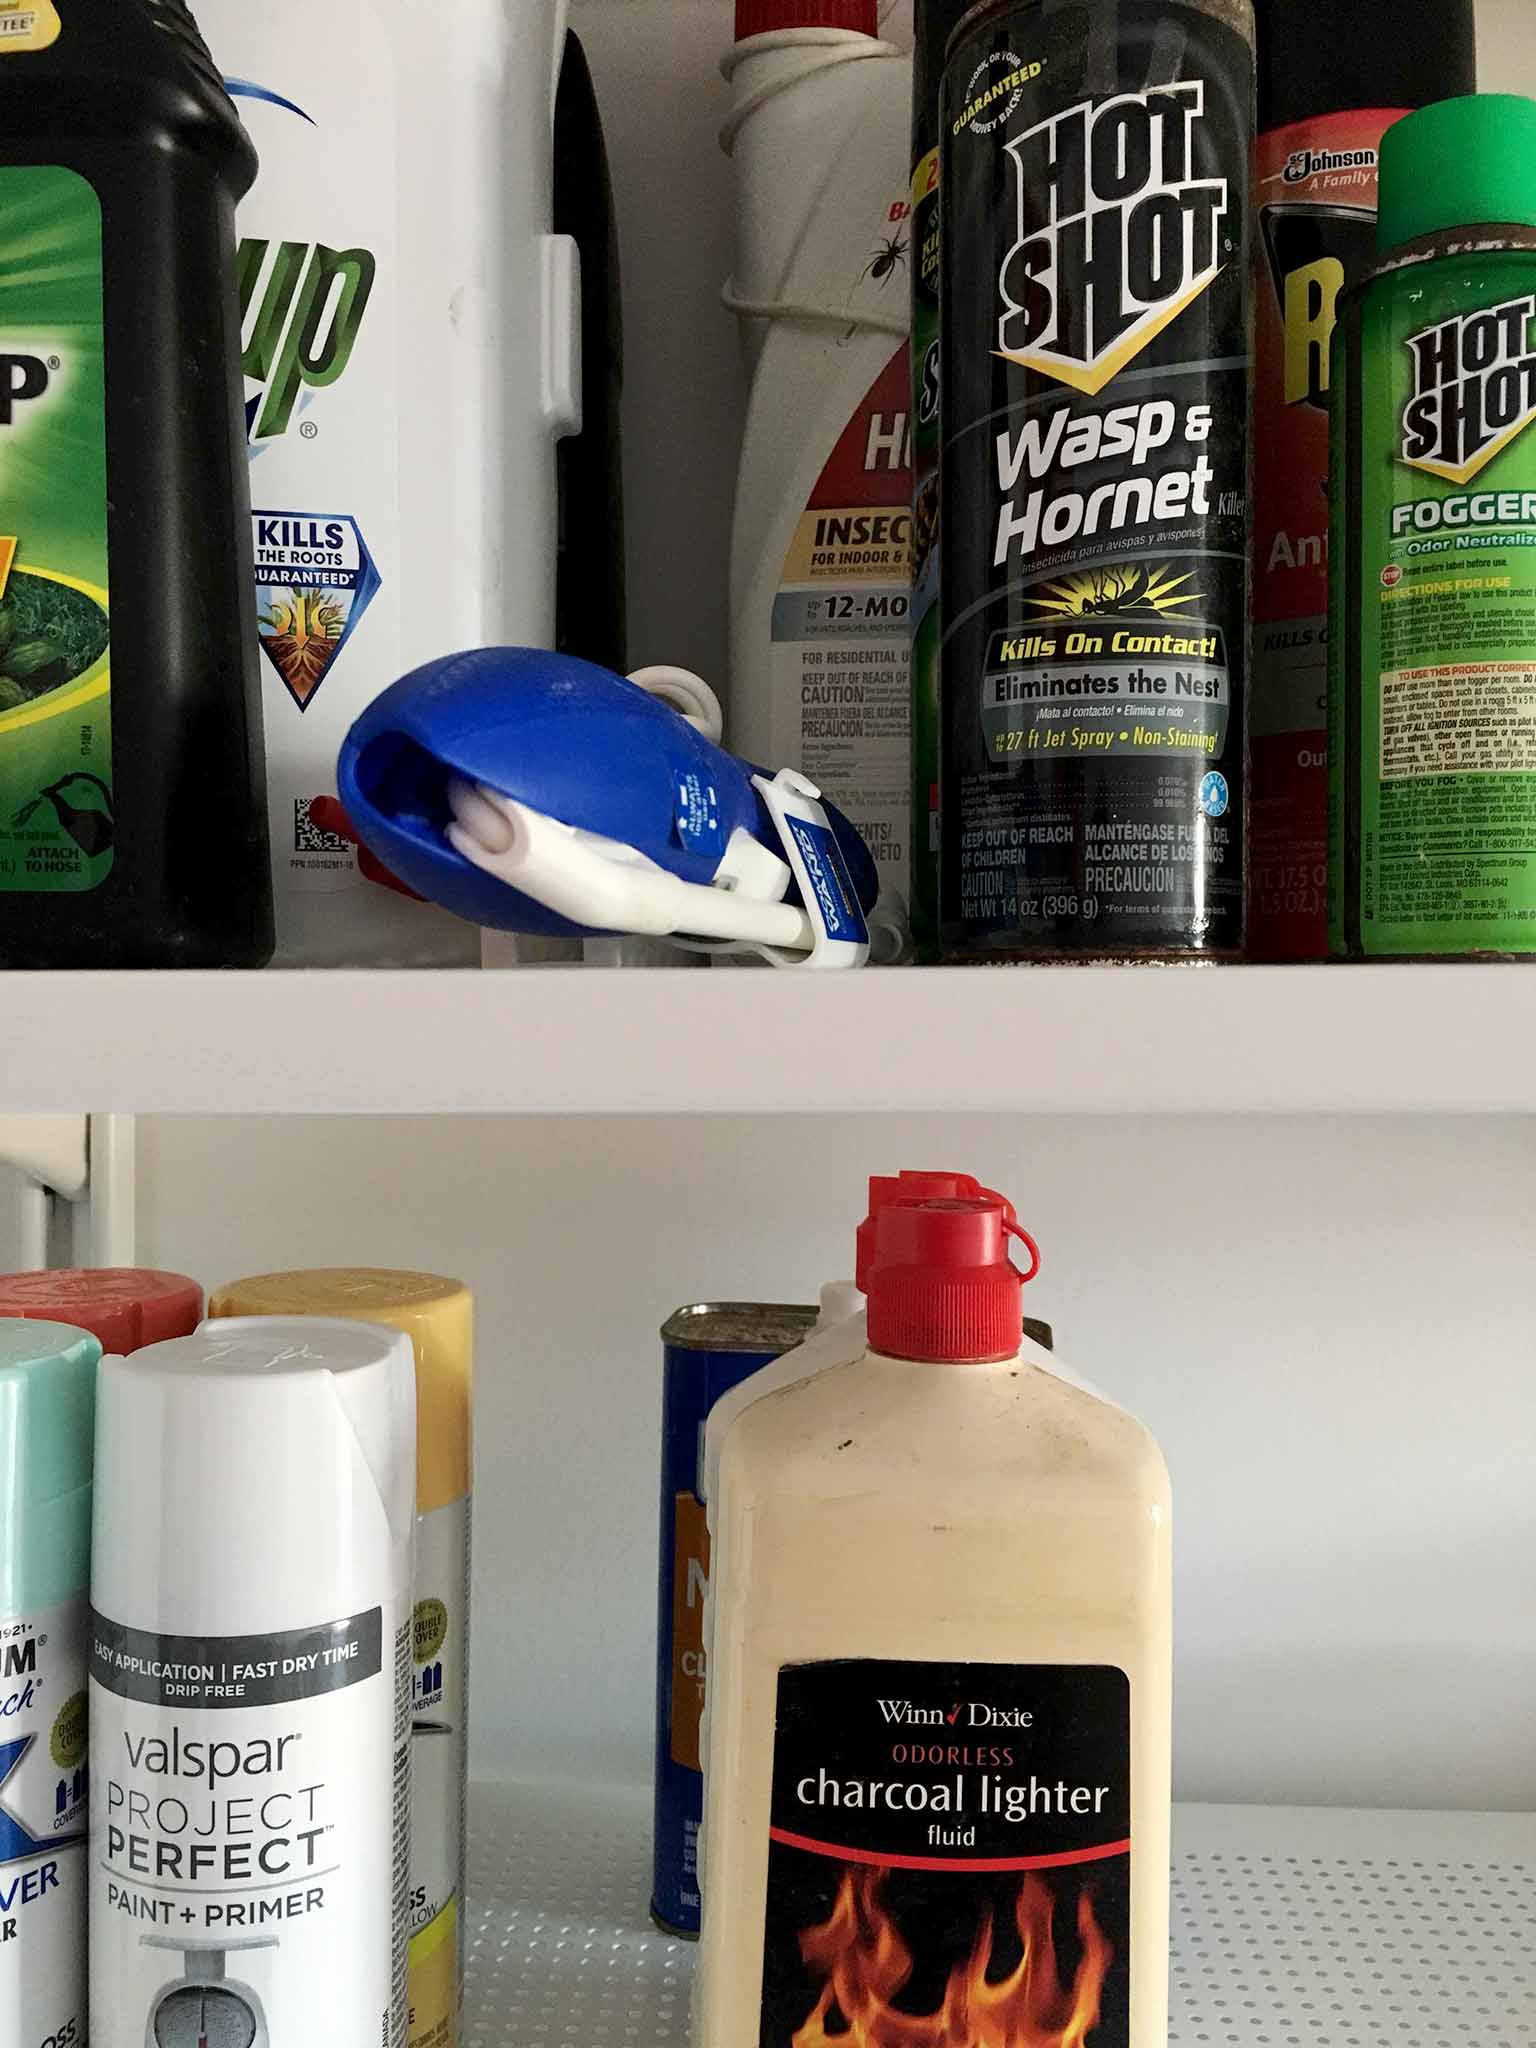
Before putting your things back in the space, group them together into similar categories. This may be an obvious tip, but it's a great way to get the ball rolling with any organizing project, as it helps you see how much storage space you may need for certain items. I ended up having quite a few different categories: paint, bug killers, lawn tools and plant care, DIY tools, outdoor cushions, grill equipment, golf clubs, strollers, toys, and bikes. I grouped them together outside, and then made a rough plan in my head of where each group might go inside the room.
STEP FIVE: A HOME FOR EVERYTHING
Start with your least used items, and put them in the least accessible spots. (I should also say that any dangerous chemicals need to go high up on the shelving away from tiny hands.) Then move through the rest of your items in that way, finishing with your most often used items—for us this was the stroller, the kids' bikes, and the seat cushions for our hanging chairs.
I also made a point of putting the kids' toys in bins on the floor that they could easily grab and put back themselves without needing to go to far into the room. Finding a home for everything is the best part of the process, and it makes it so much easier to keep clean if everything has a spot!
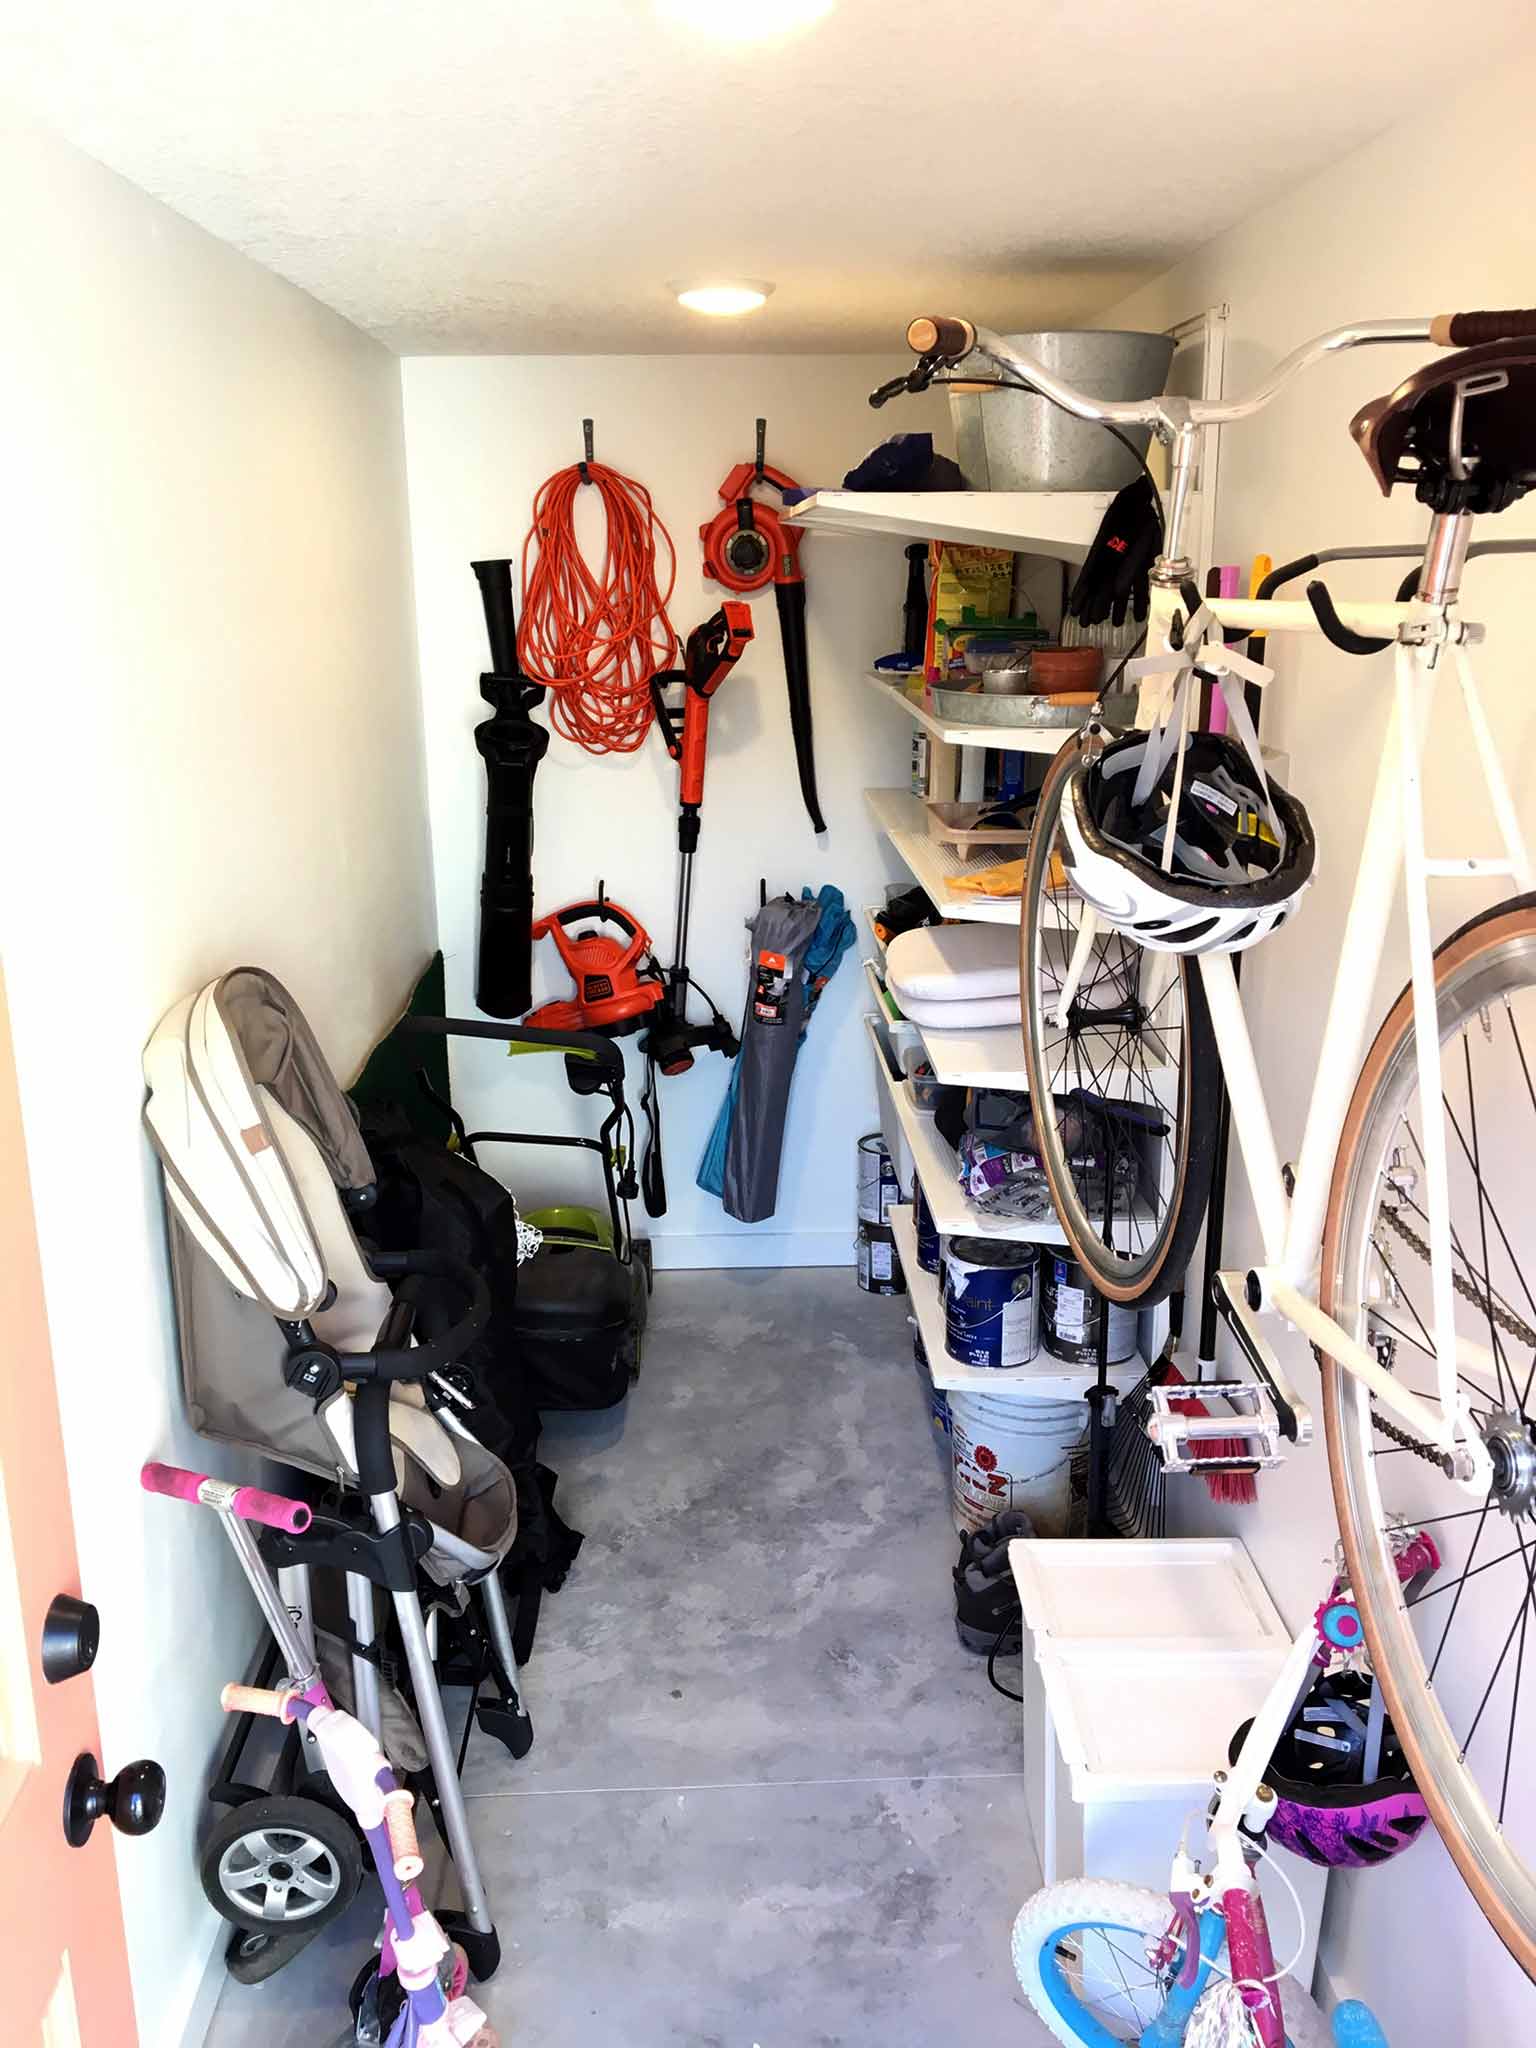
Honestly—when I saw all of our stuff out on the driveway I didn't think there would be any way we would get it all in the tiny storage room. But by utilizing every inch of the room, we made it work—with a little bit of room to spare! We still need to paint the floor to finish it completely, but for now it is at least clean and organized.
It was a project that I wasn't looking forward to tackling, but I actually really enjoyed the process of creating order out of so much mess. Plus it has made our yard feel so much more accessible—we no longer have to fight to get out the kids bikes every time they want to play, and that has been great motivation to get outside and play more often.
Don't forget to check out my must-haves for organizing a garage or outdoor storage space!
APRIL 2020 UPDATE
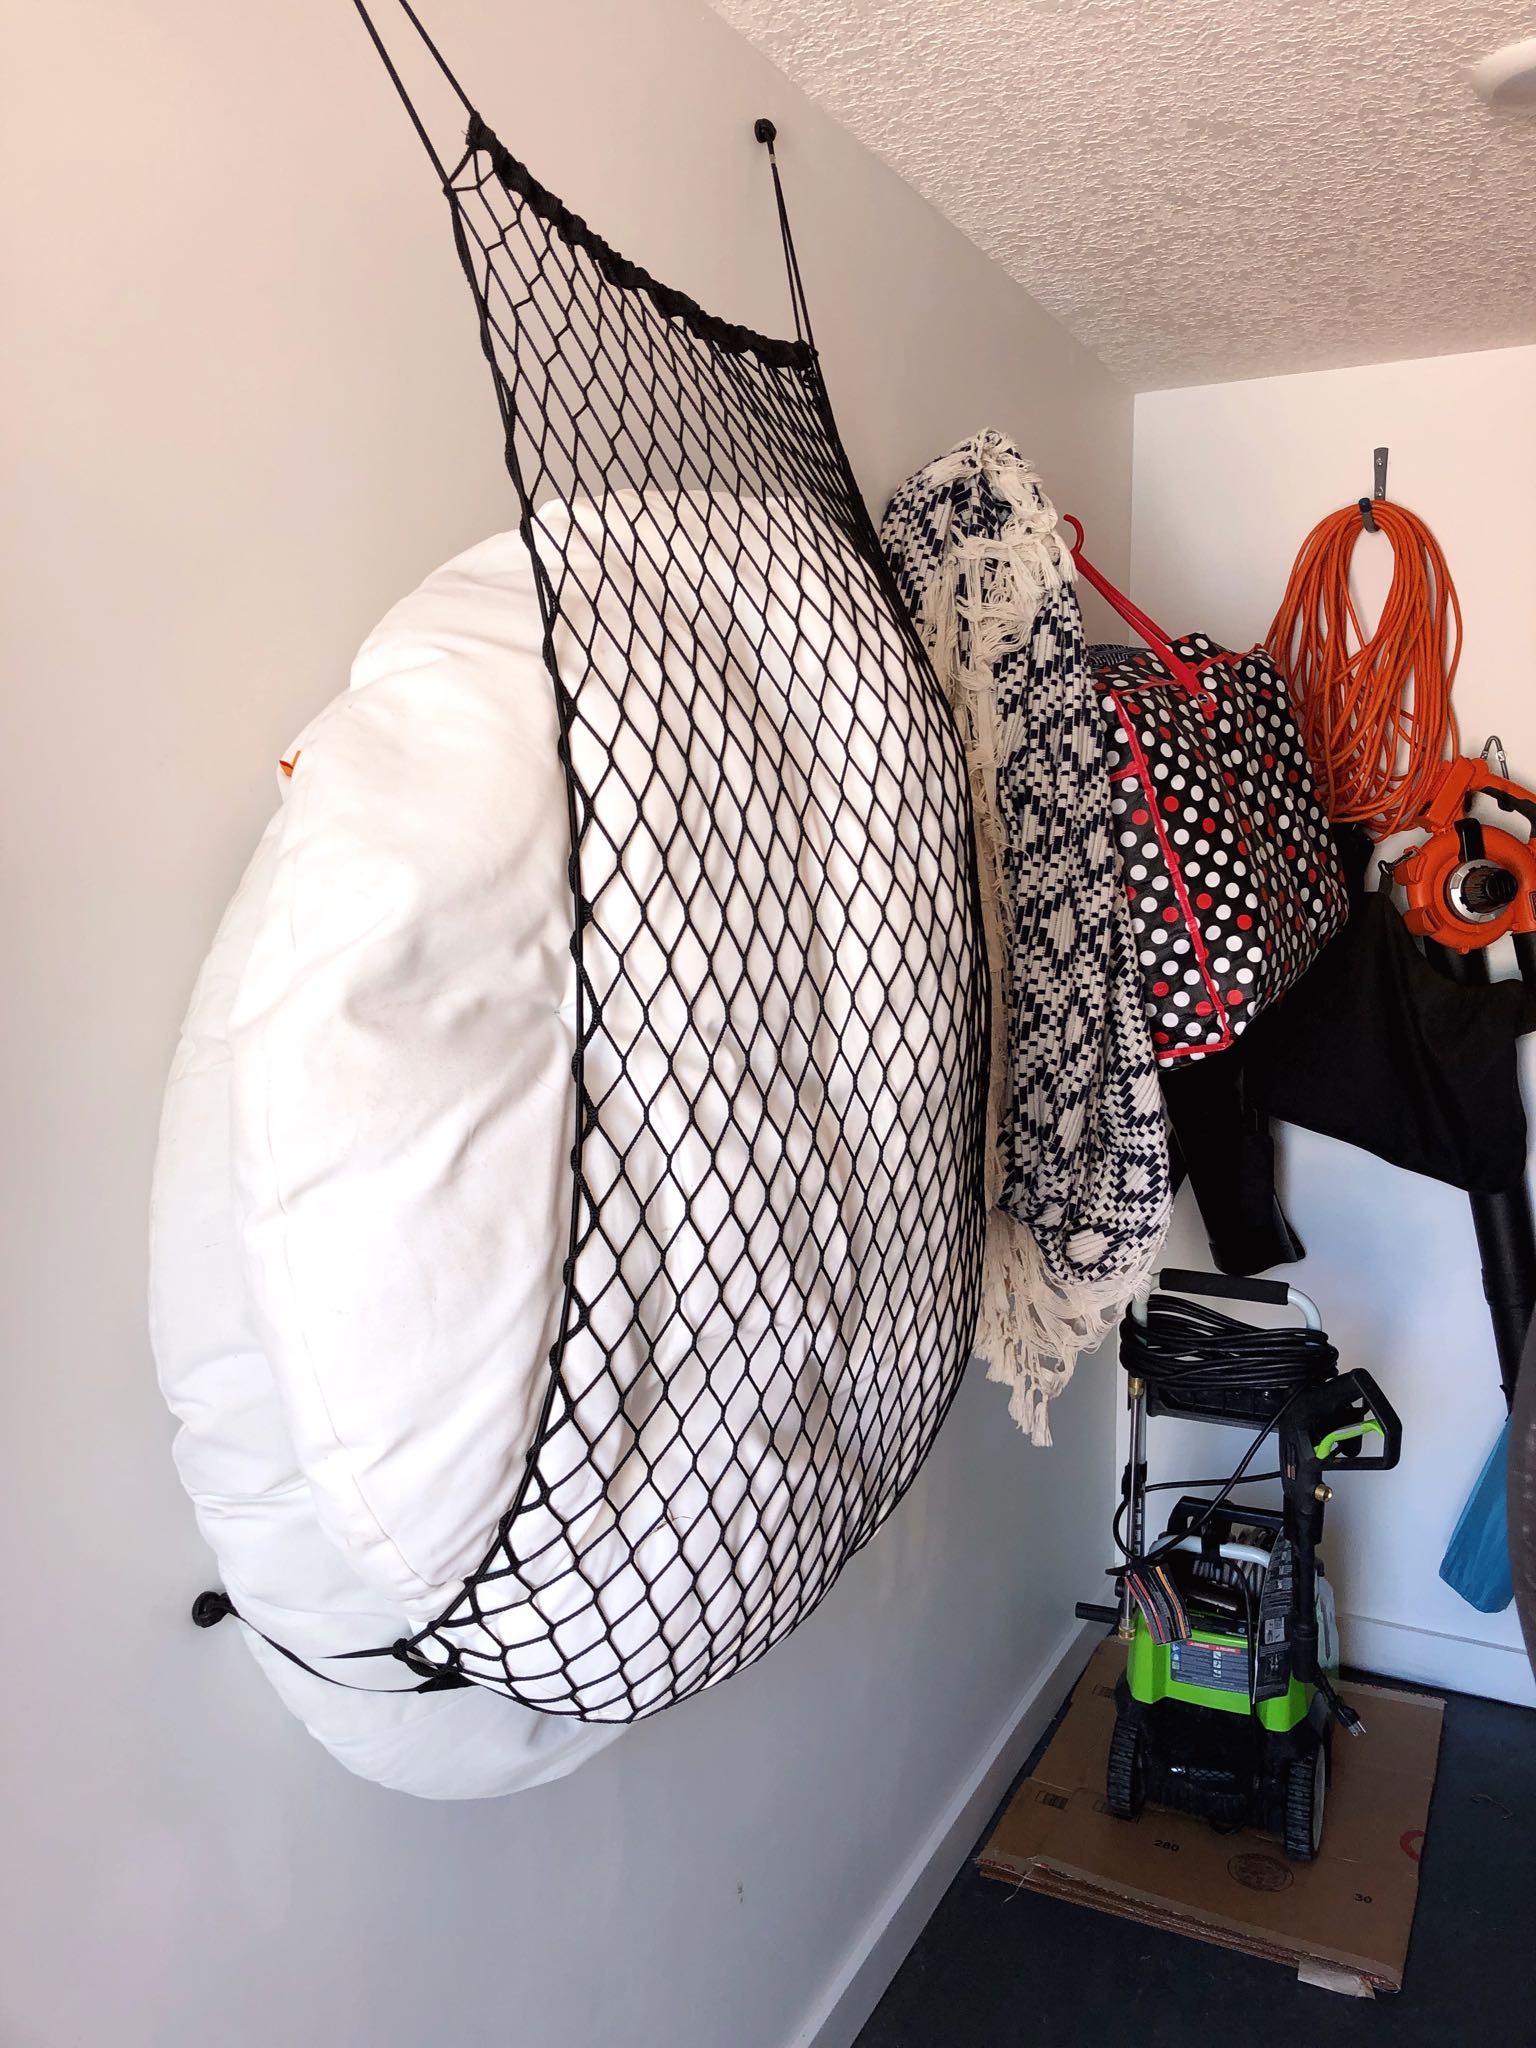
Two years later and our hard-working storage space is still in good shape. We've spruced up the floor by painting it with a special concrete paint, and added more hooks and a cargo net on the left wall to keep our big cushions and hammock off the floor. It's a tight space, but by using the entire wall and making sure we declutter every year or so, we've been making it work for us. We still love the ALGOT shelving, and it's provided all the shelving we need for our DIY and yard supplies.