This post is sponsored by Spacekit but the content and opinions expressed here are my own.
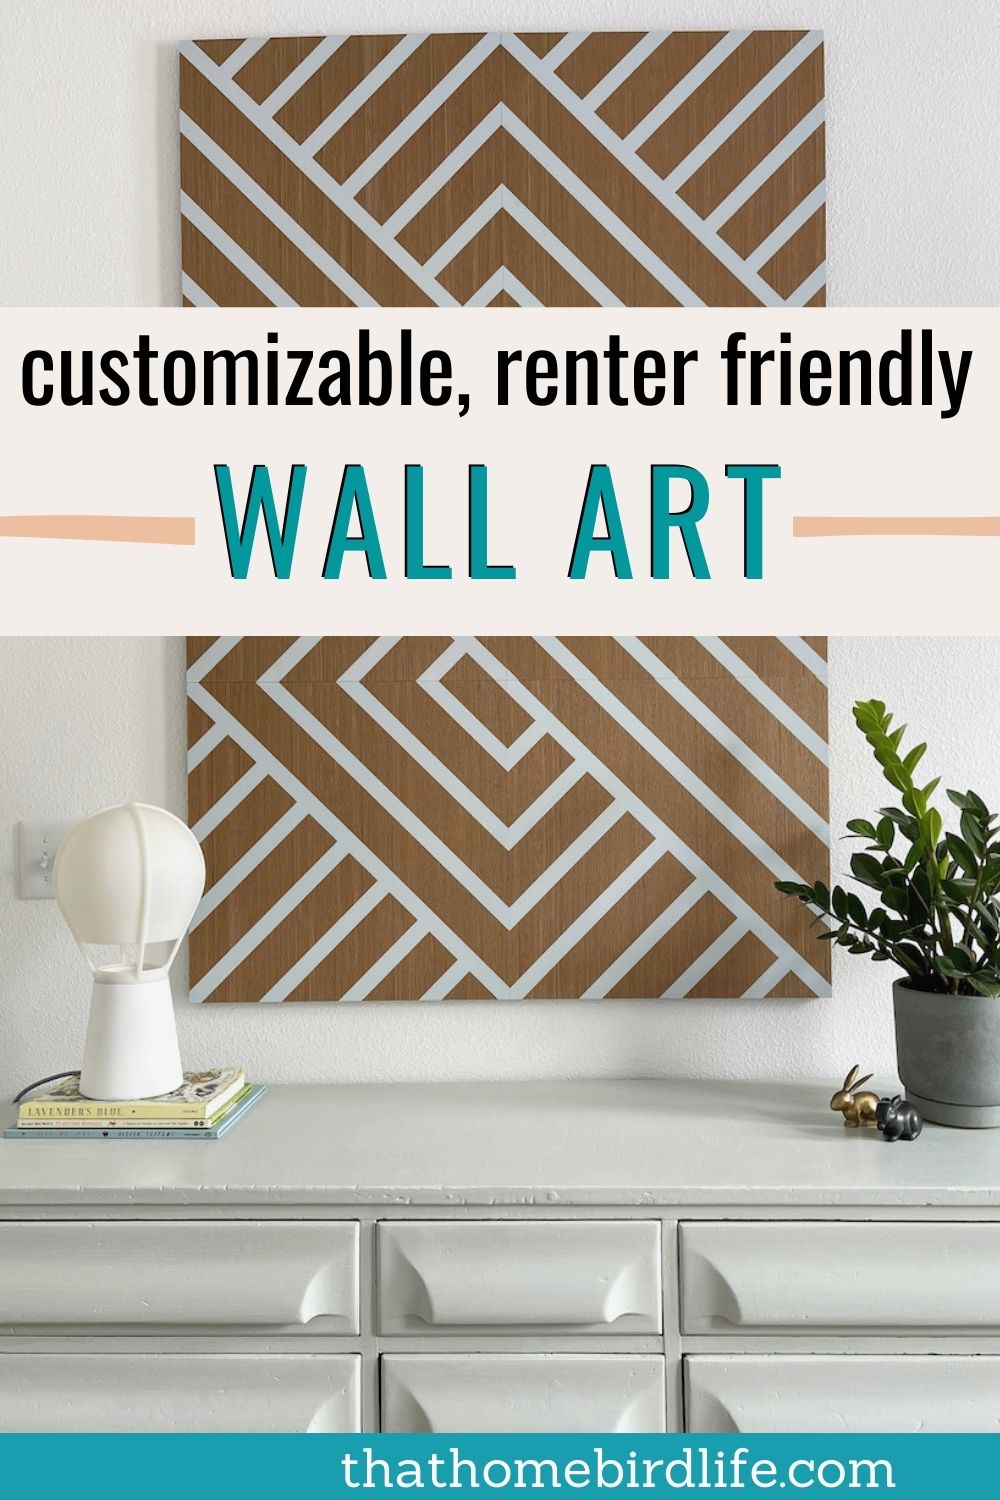
We've been living in the apartment for eight months now! The girls actually have a bigger bedroom here than in the last house since we gave them the primary suite in the apartment. I've been trying out different wall decor in there, but everything I hang seems to get a little lost since there is a lot of wall space to fill.
When Spacekit reached out and asked if I'd like to try their modular wall art system, I knew this would be a great fit for their bedroom. Spacekit is renter friendly and quick to install, so it's something I can easily take with us to the house when it's finally built, plus no nail holes to fill when we move—that's a win!
HOW DOES SPACEKIT WORK?
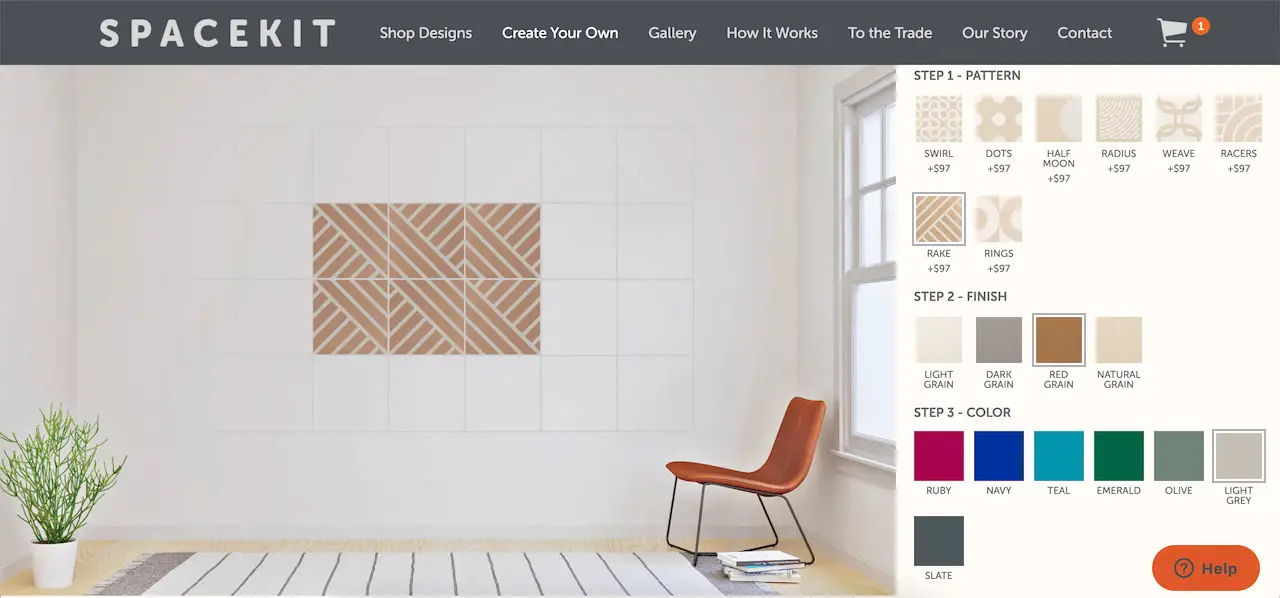
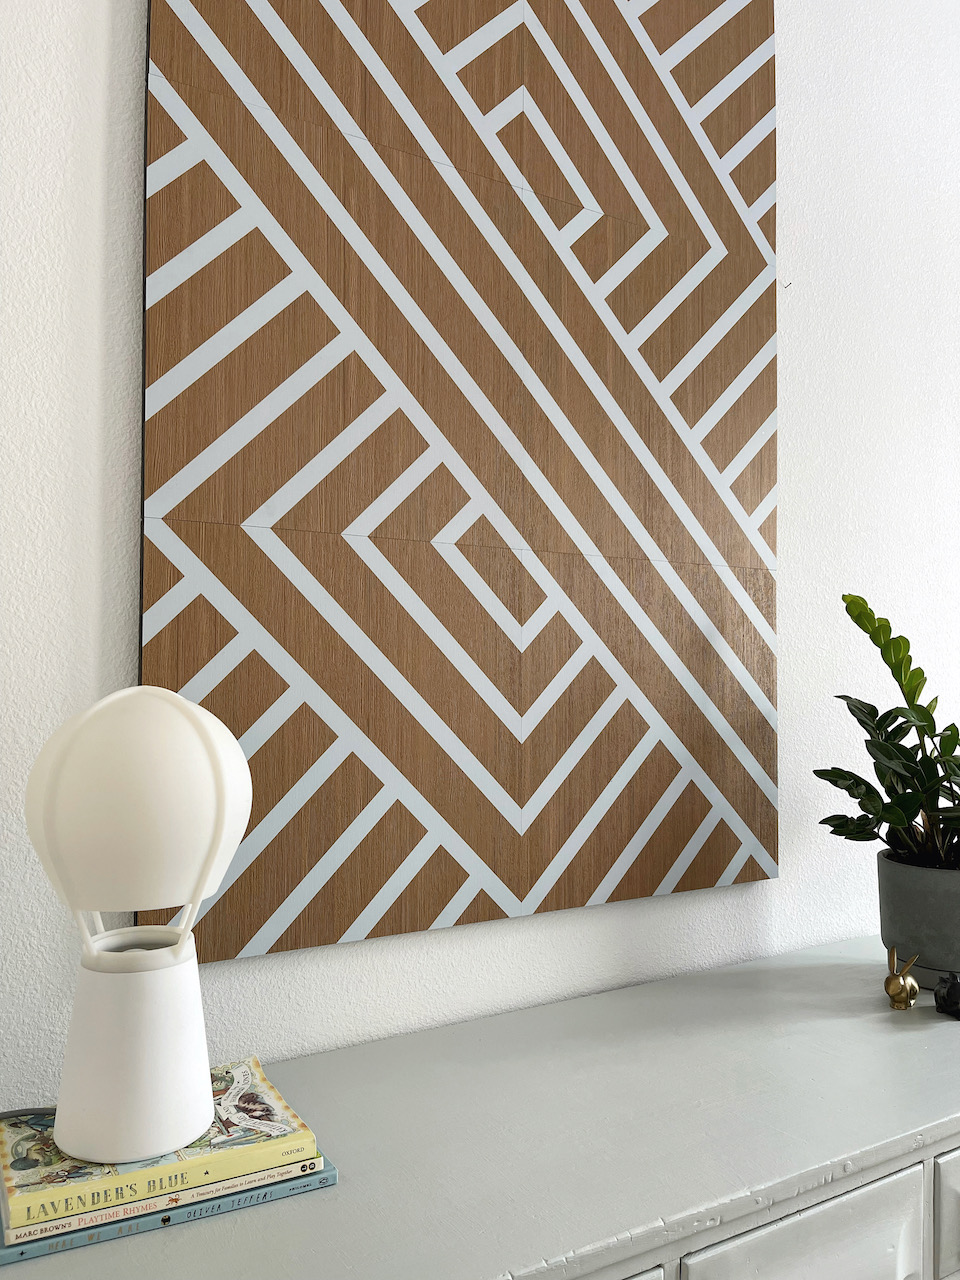
Spacekit is a versatile 2-part wall art system consisting of frames which attach to the wall with adhesive strips, and textured wood-look panels with painted designs. There are designer curated kits available, or you can customize your own kit–which is what I did. Since it is a modular system the possibilities are pretty endless: you can decide on everything from the color, wood grain and pattern to the size, spacing and orientation of the art. If there's something in particular you have in mind, then there are even custom design services available to create your perfect piece.
CHOOSING A DESIGN
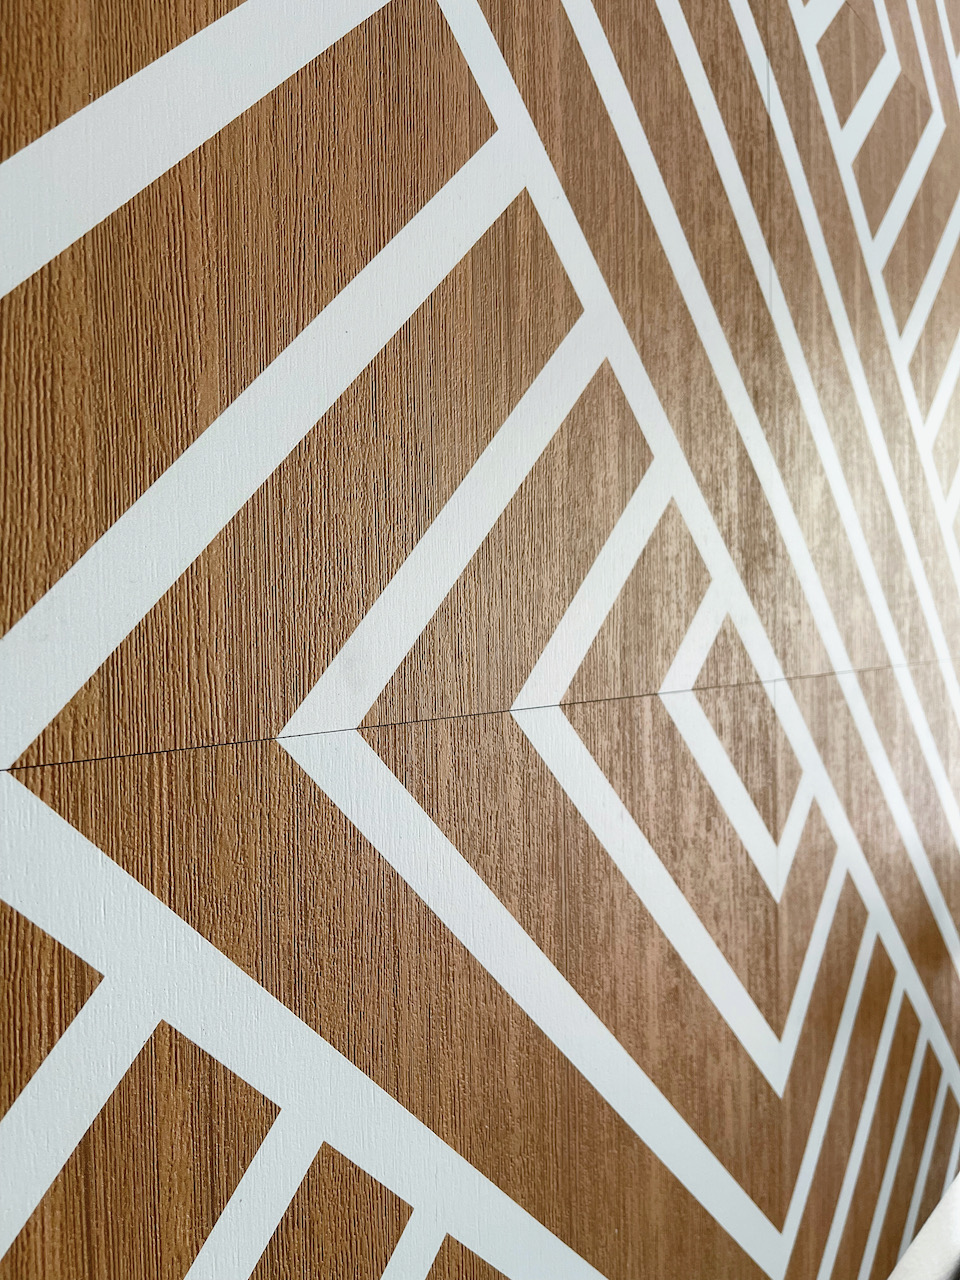
I wanted something with neutral colors that would complement the painted dresser in the girls' room, so after playing around with a few options I went with a warm red grain background and the 'rake' pattern in light grey. The design tool is very intuitive and really makes it easy to visualize the end product.
My Spacekit arrived within a few days, and it was packaged really well so that there was no chance of any of the panels getting scratched or damaged in transit—in fact, my kids are still making good use out of the cardboard boxes for their own creations!
INSTALLING THE FRAMEWORK
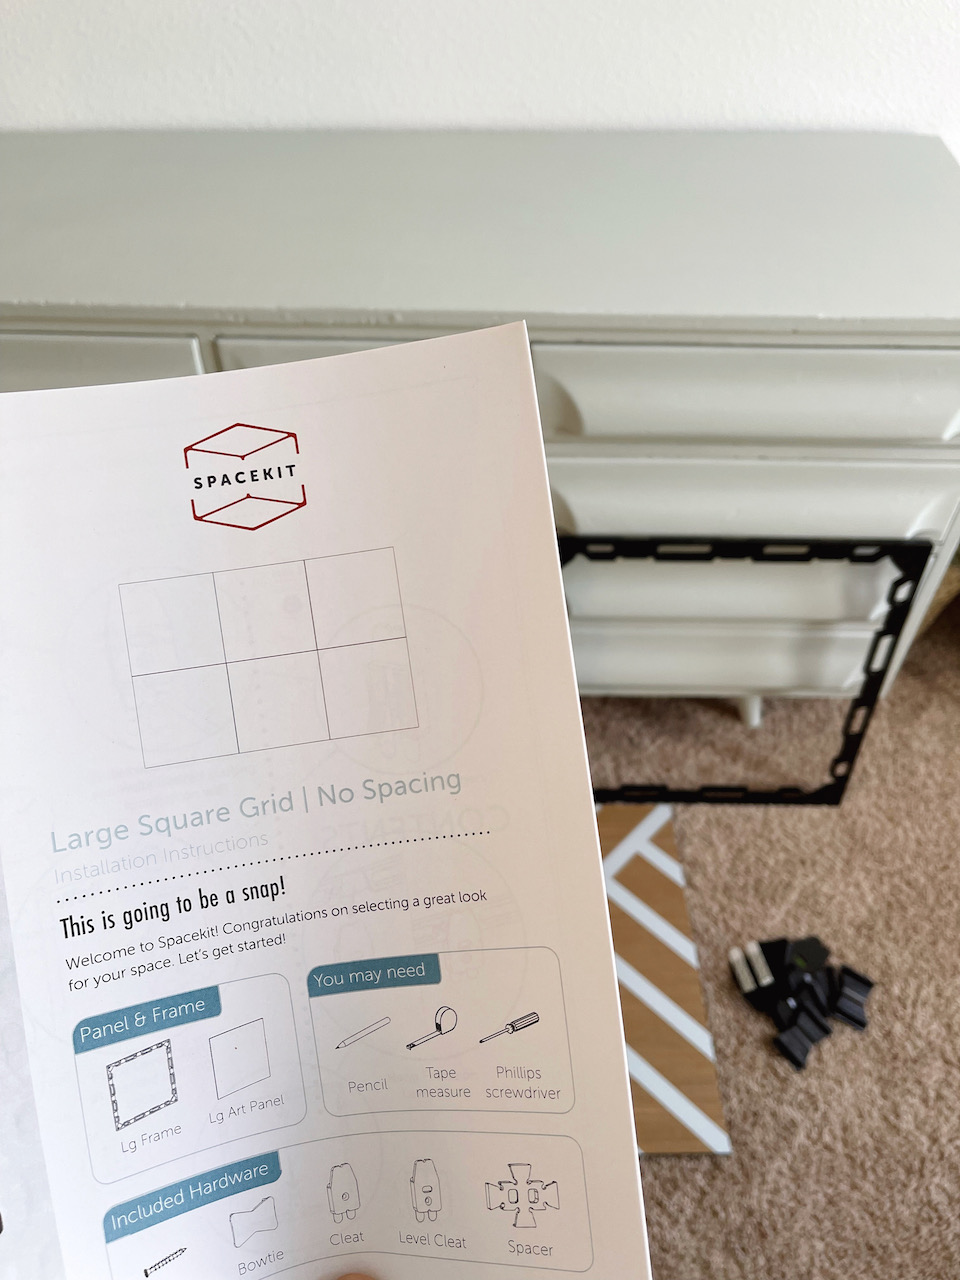
The kit arrived with very clear step-by-step instructions and the installation process was SO easy. I changed the orientation of my original design to avoid the light switch, and I'm actually really happy it worked out that way.
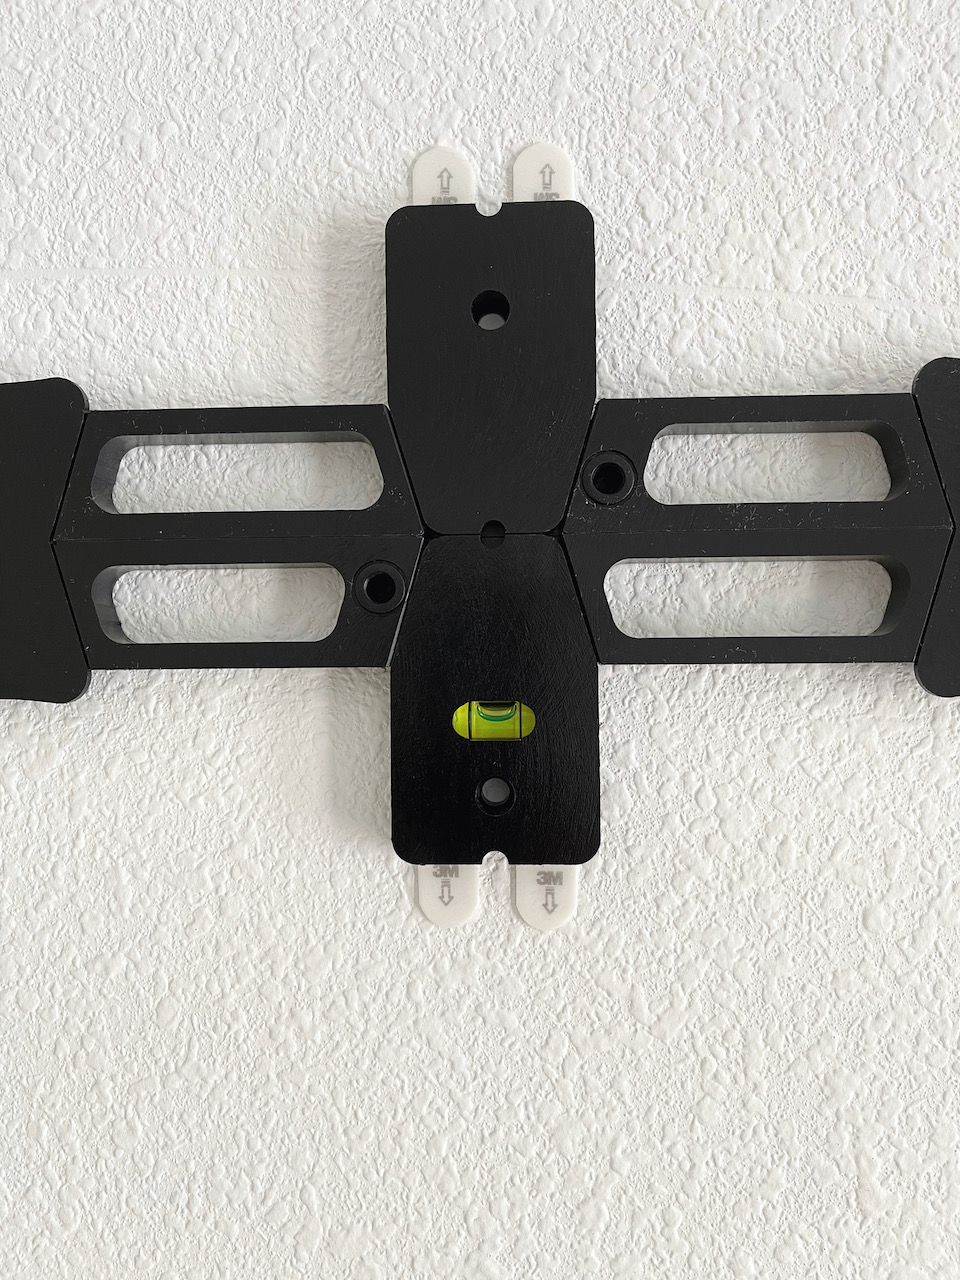
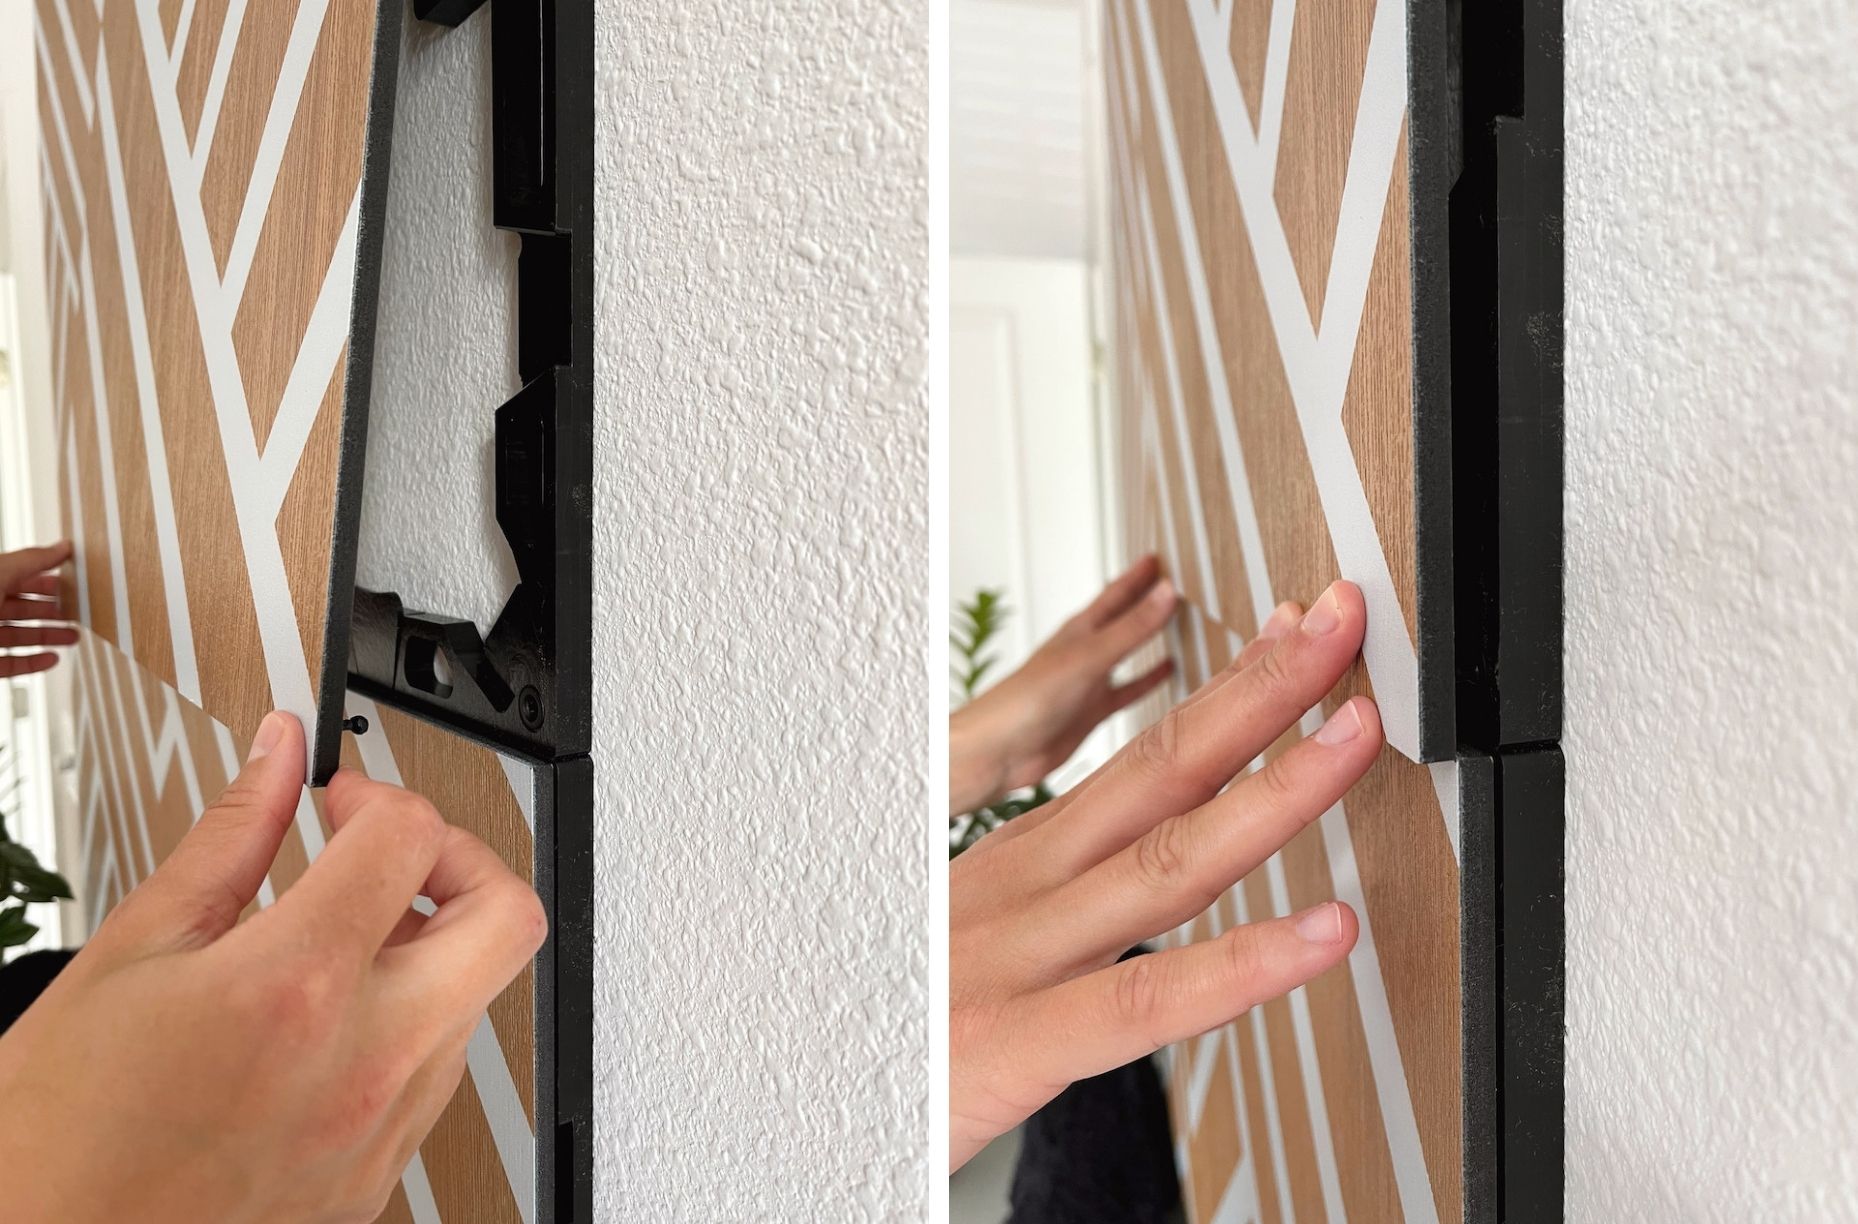
Since it was such a large piece, I was worried about not being able to line up the panels and get them level. However Spacekit really is failproof because each panel uses a cleat with a mini-spirit level integrated into it—it's such a smart system!
The mounting system is made up of the following:
- frames for the art panels to snap into
- level cleats to make sure the frames are hung straight
- regular cleats to make it extra secure
- bowties to join the frames together
The building process is extremely simple yet effective and I was able to hang the whole framework in under an hour—no tools required. If I wasn't such a perfectionist I may have installed it even faster, but I wanted to make sure that everything lined up "just so"—especially as the pattern I chose had connecting lines from panel to panel. There is the option to add screws (also included in the kit) for extra security, but I didn't feel that it was necessary in our case—it is sturdy enough as-is.

ADDING THE PANELS
After waiting an hour or so for the adhesive strips to set, I added the art panels in my chosen layout. They simply snap into the frames, and it's very easy to snap them back out again if want to rotate the panels and change up the design.
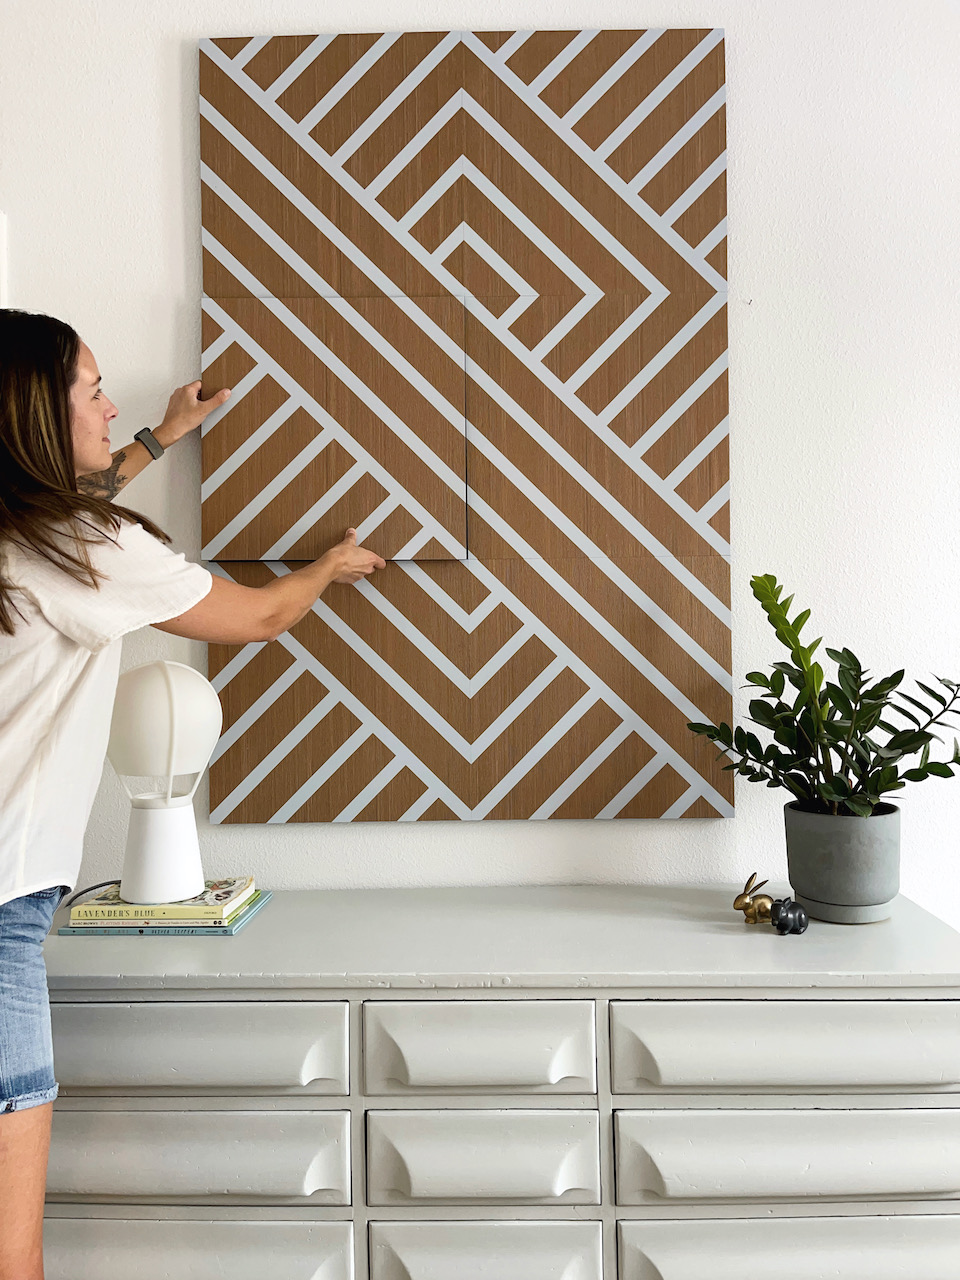
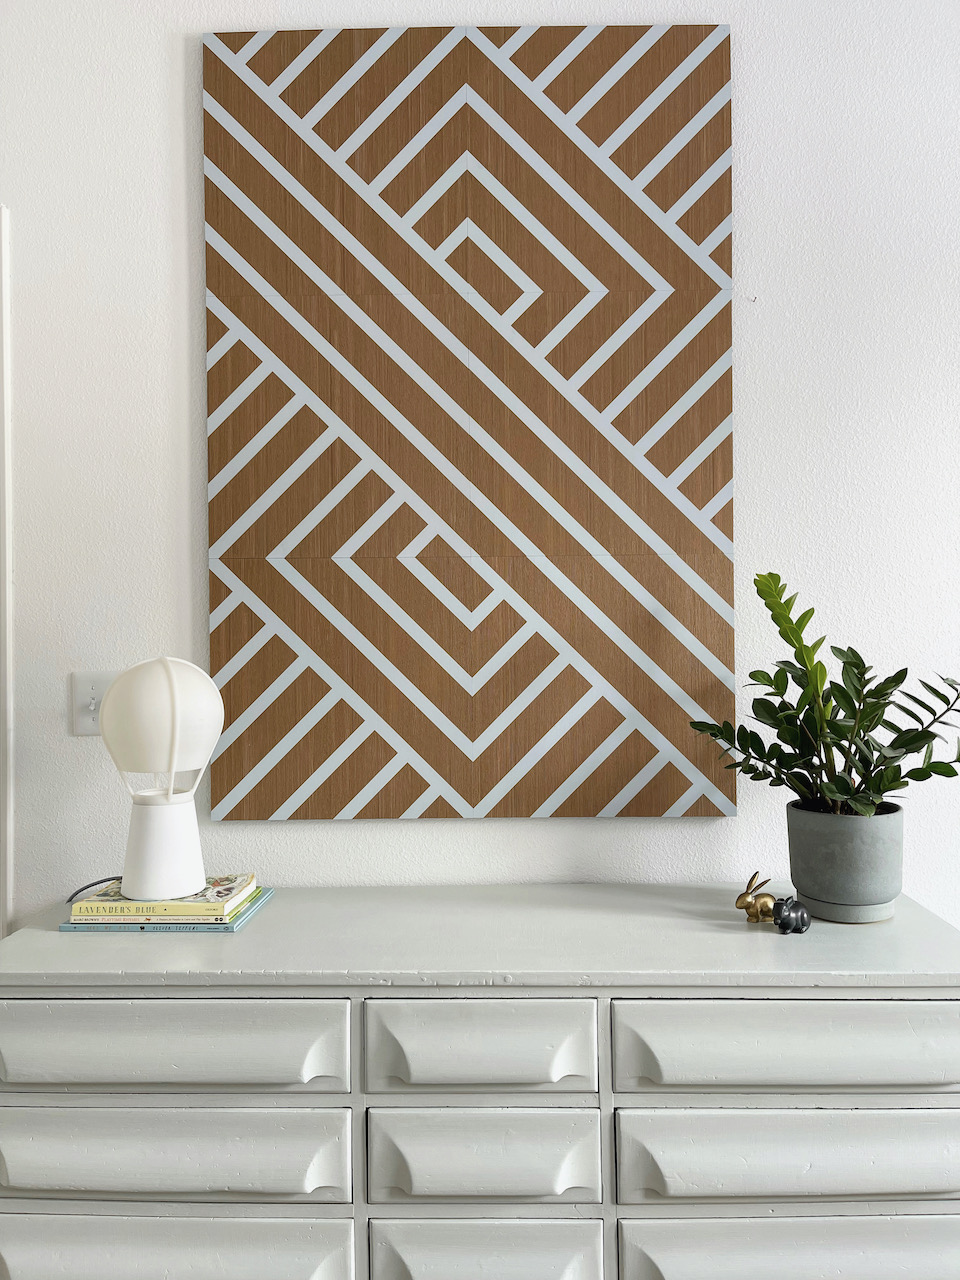
I love the texture of the piece. The panels are made from ACRE™ which is a eco-friendly wood alternative made from upcycled rice hulls. It certainly adds a lot of warmth to our white walls which was exactly what I was hoping for.
We love our new wall art, and I'm already thinking about where we'll install it in the new house. It's a fantastic way to add a pop of personality to a blank wall. Head on over to Spacekit to start designing your own piece!