The slab for the guest house has been poured and our contractor is framing out the building this week. I can hardly believe that we are almost at this stage after all the uncertainty we've had during our renovation process! And now—the fun part: making those all important design decisions.
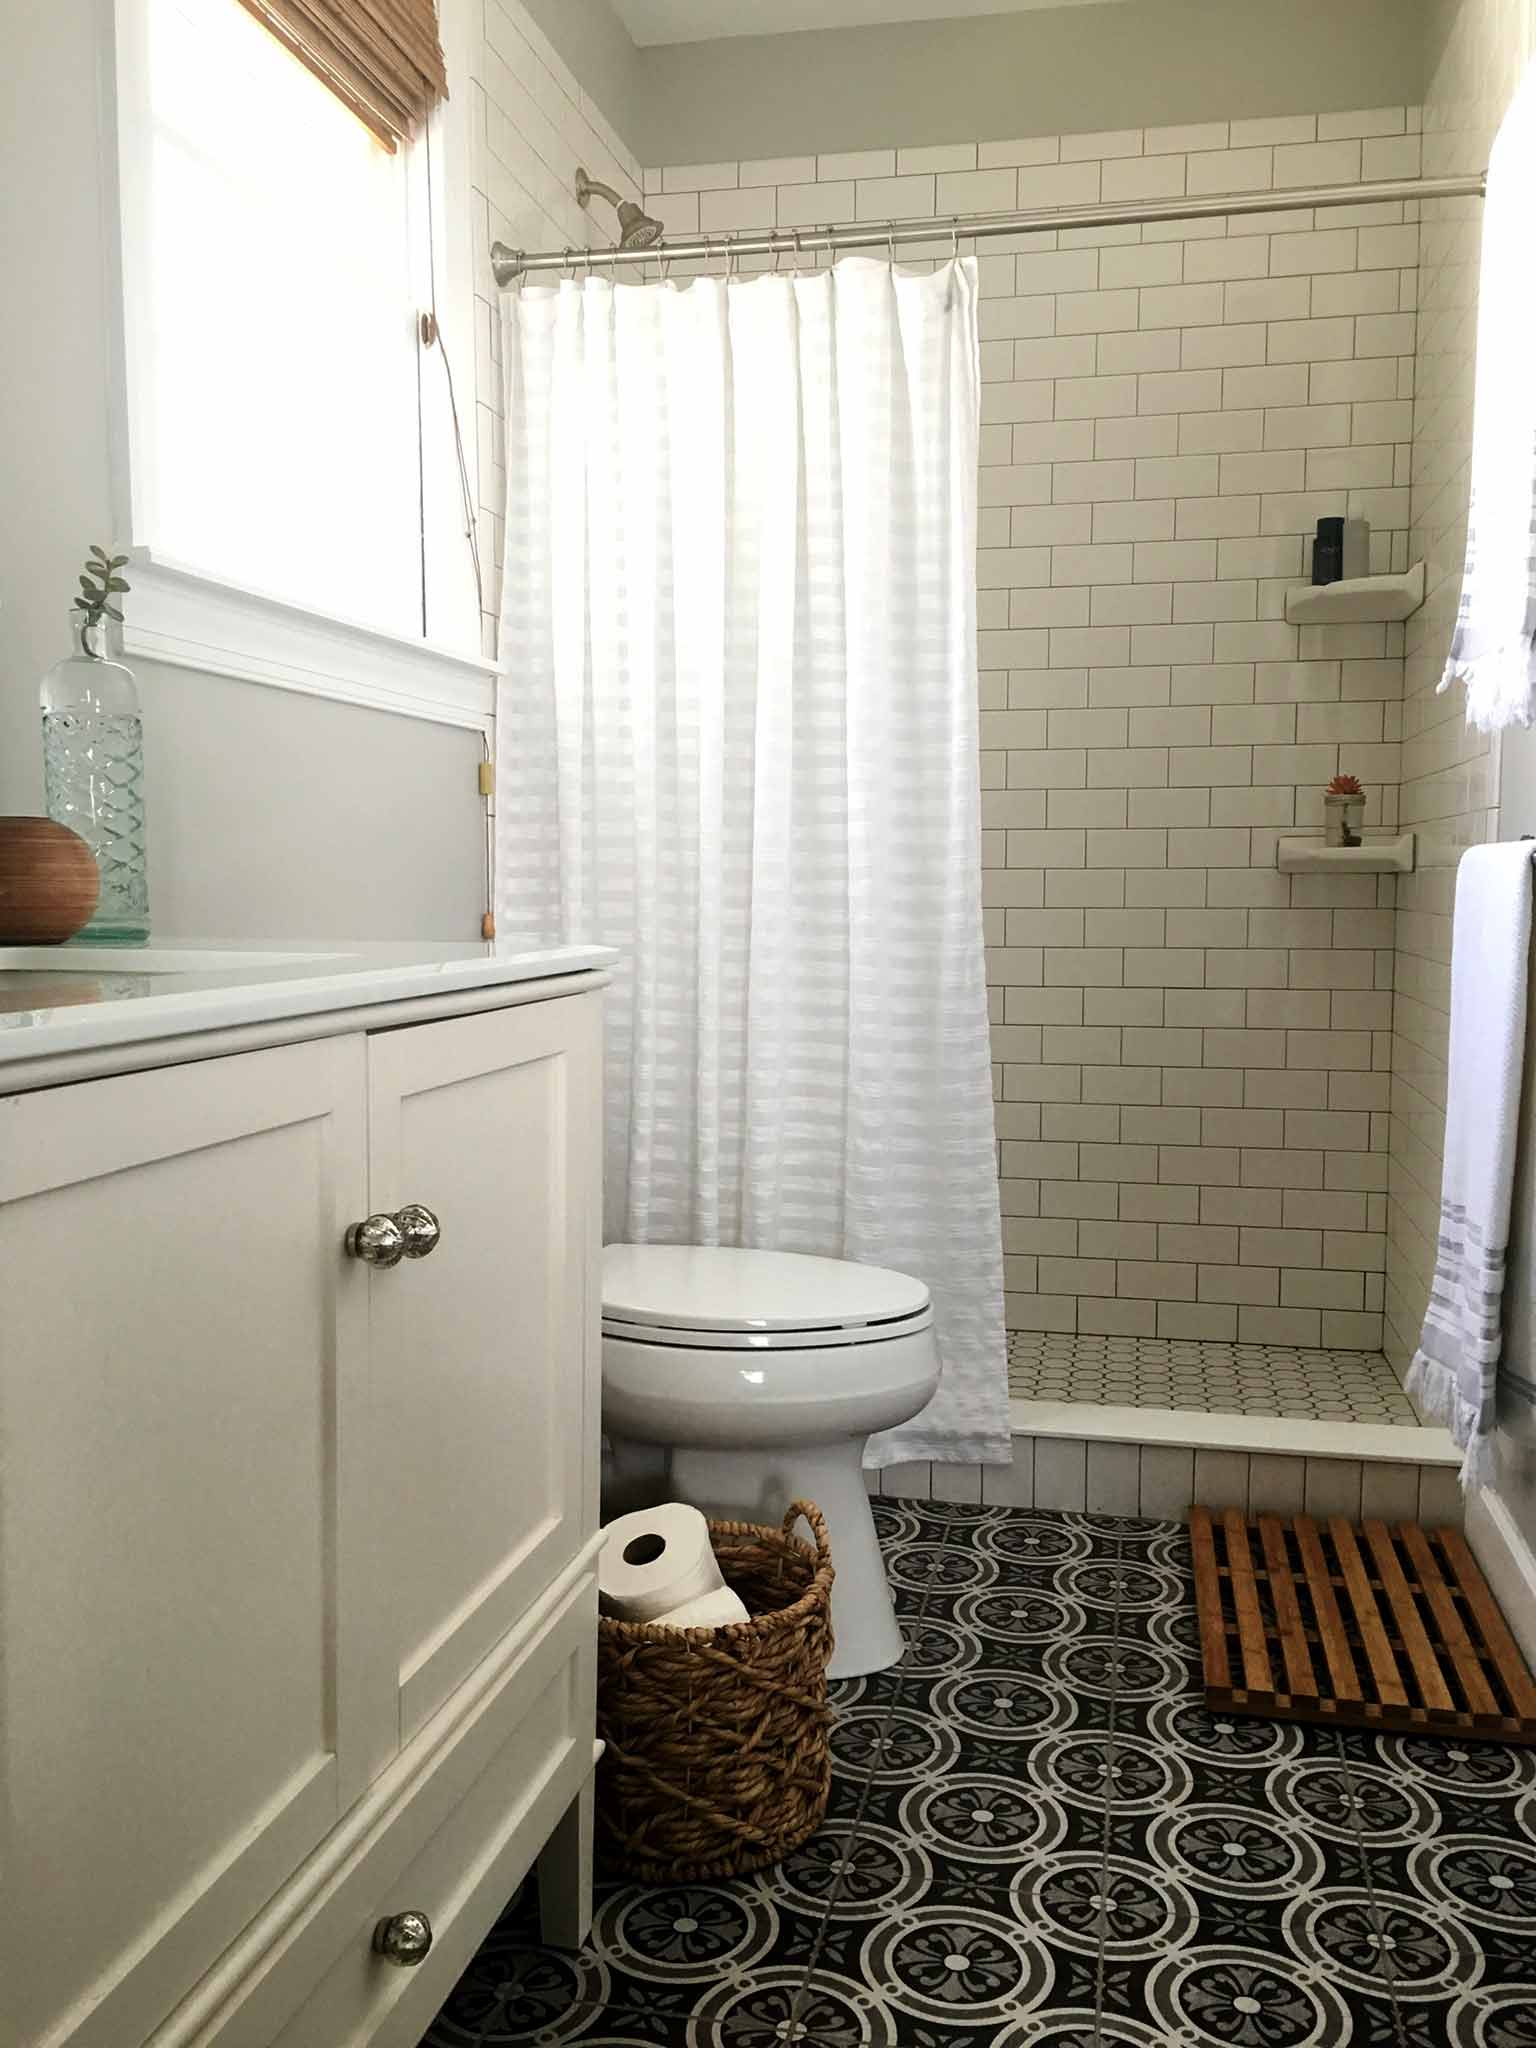
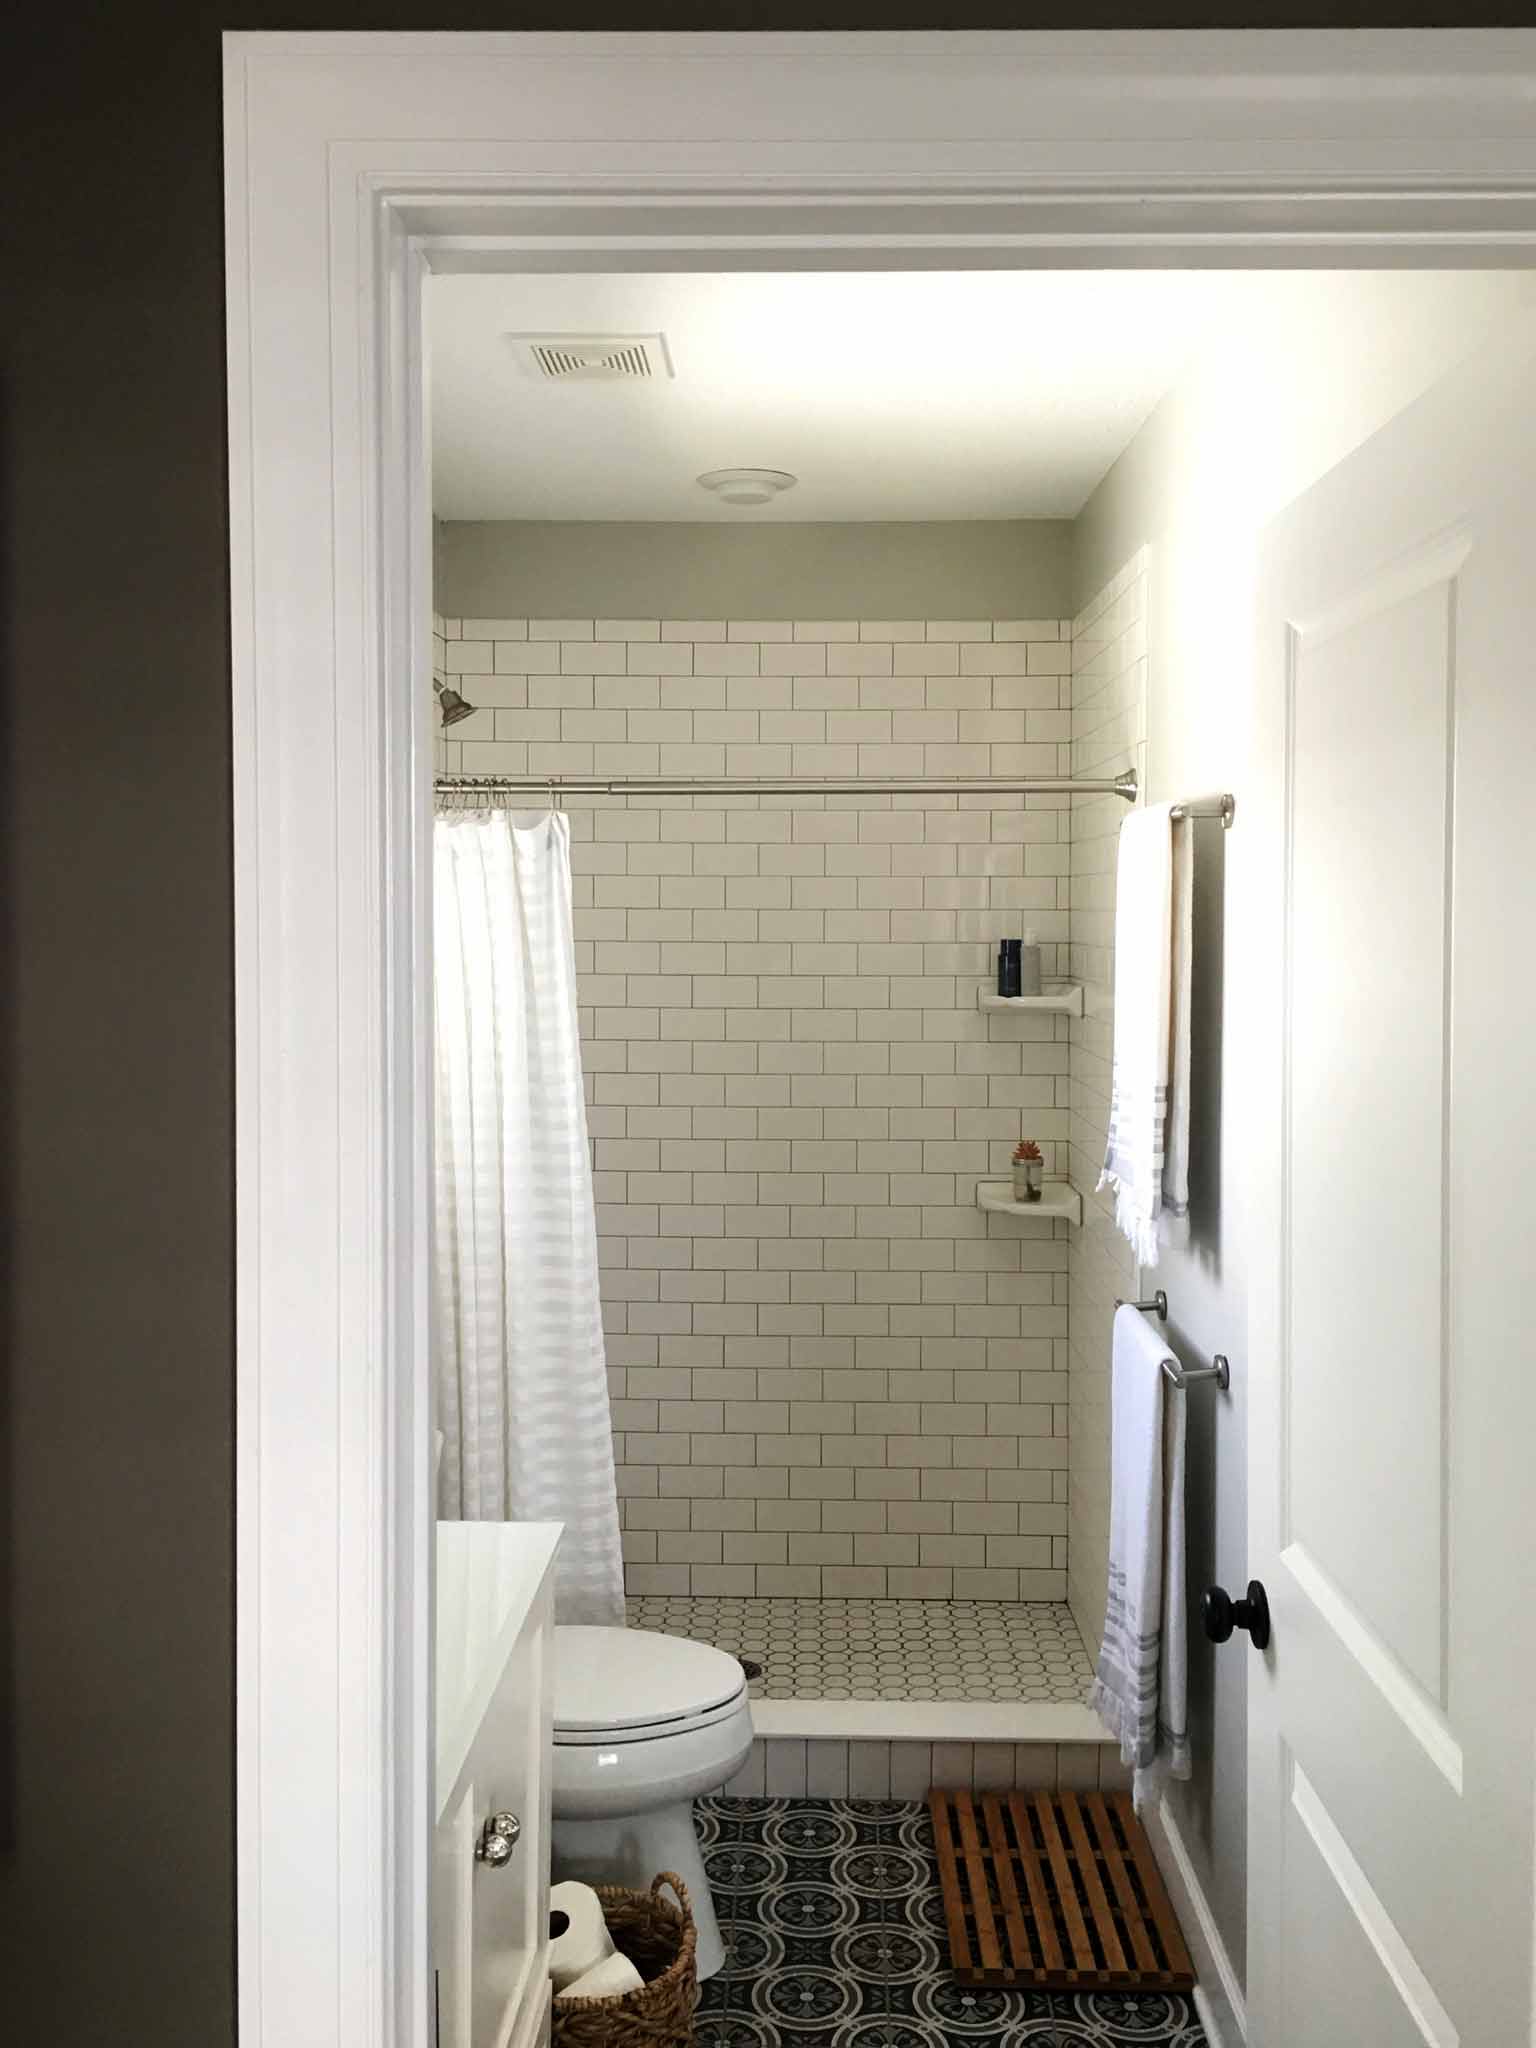
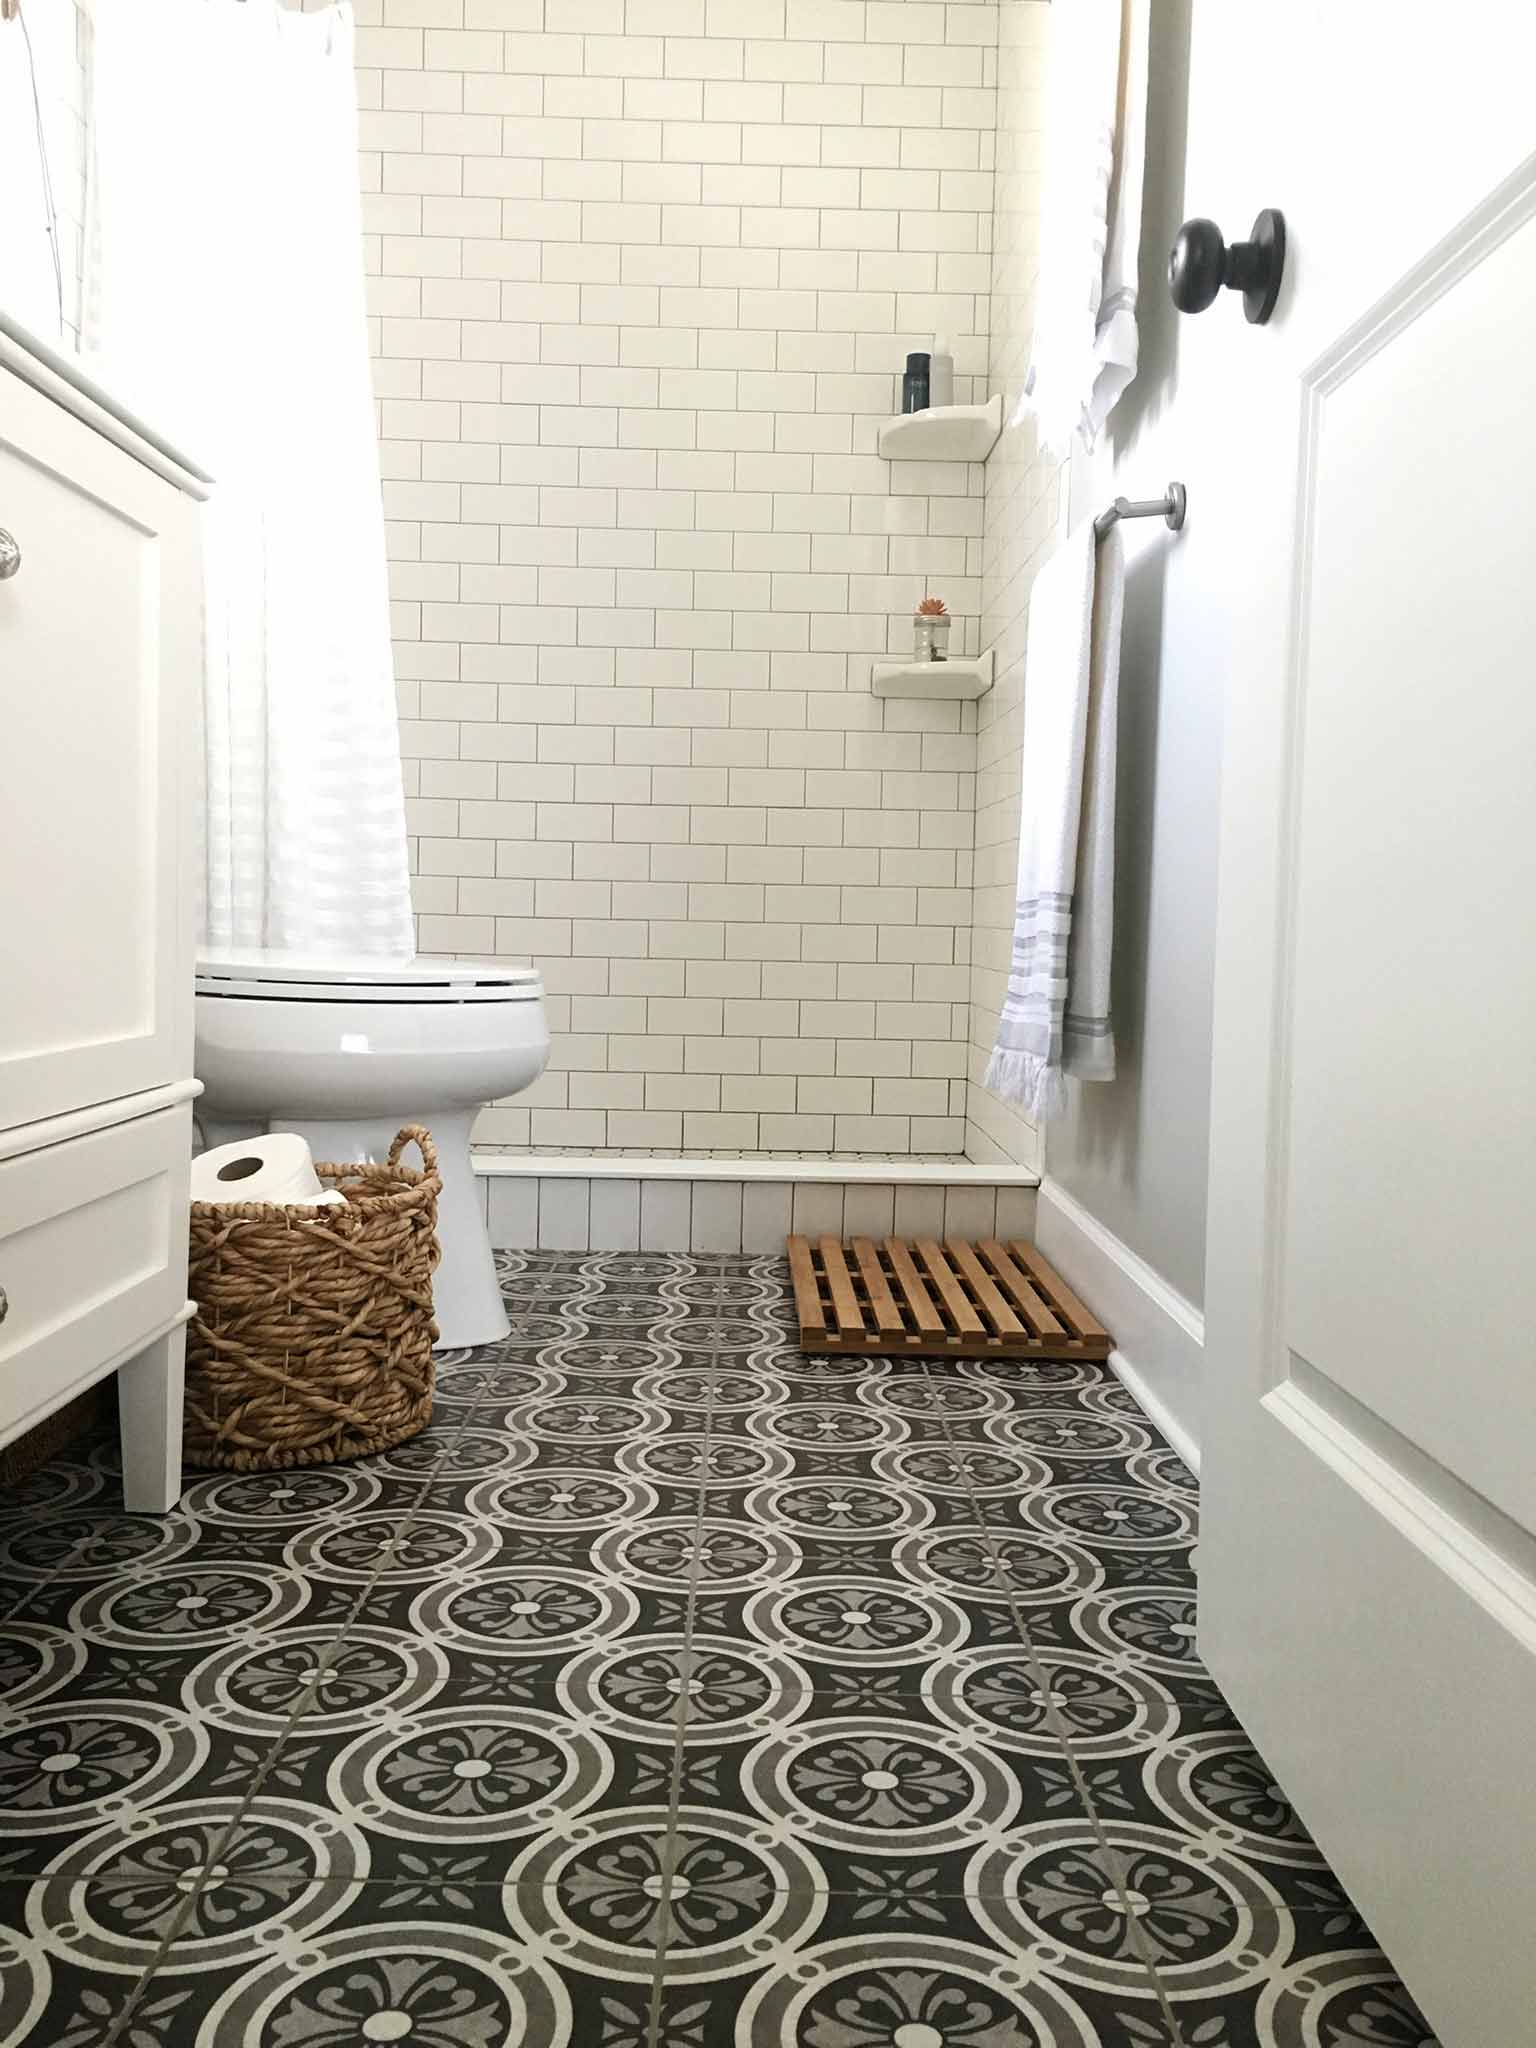
I'm really excited about getting the opportunity to pick out materials for another bathroom. When it came to designing our master and guest bathrooms during phase one of our renovation, I made some very quick and, in hindsight, thoughtless decisions. Luckily, I think it all turned out great, but I want to be more intentional in the planning process now I have a little more knowledge and prior experience in doing this.
However, deciding on materials for a bathroom can be hugely overwhelming, especially if you are like me and LOVE ALL THE PRETTY TILE. There are just so many beautiful, cost-effective options out there, and this can easily lead to decision paralysis.
So, I thought it would be helpful to put together a guide for anyone else who may be struggling with honing down all the possible options into one coherent design.
This is based on my own experience and what worked for me. You may need to tweak this to fit your own approach, but hopefully this should give you a place to start. Also—I am purely focusing on choosing design finishes, as we have already decided on the floor plan of the bathroom with our architects.
Here we go!
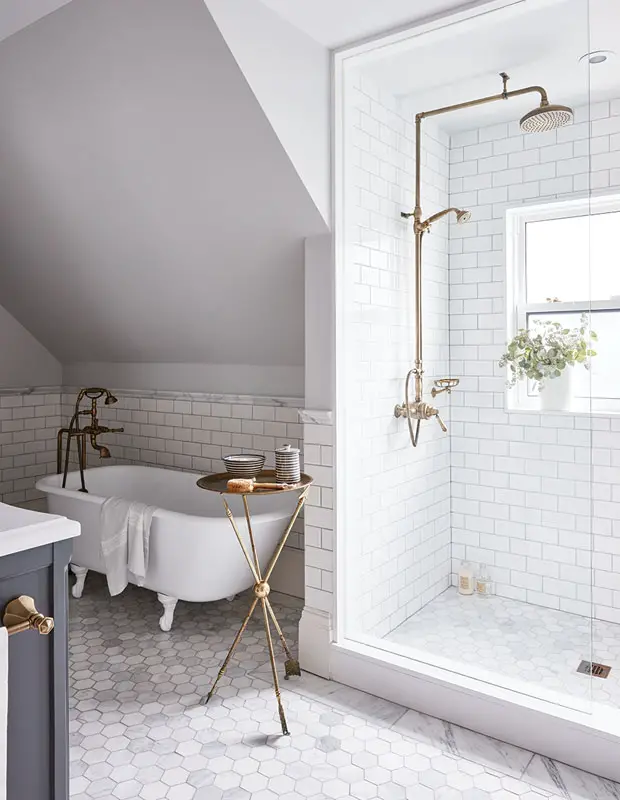
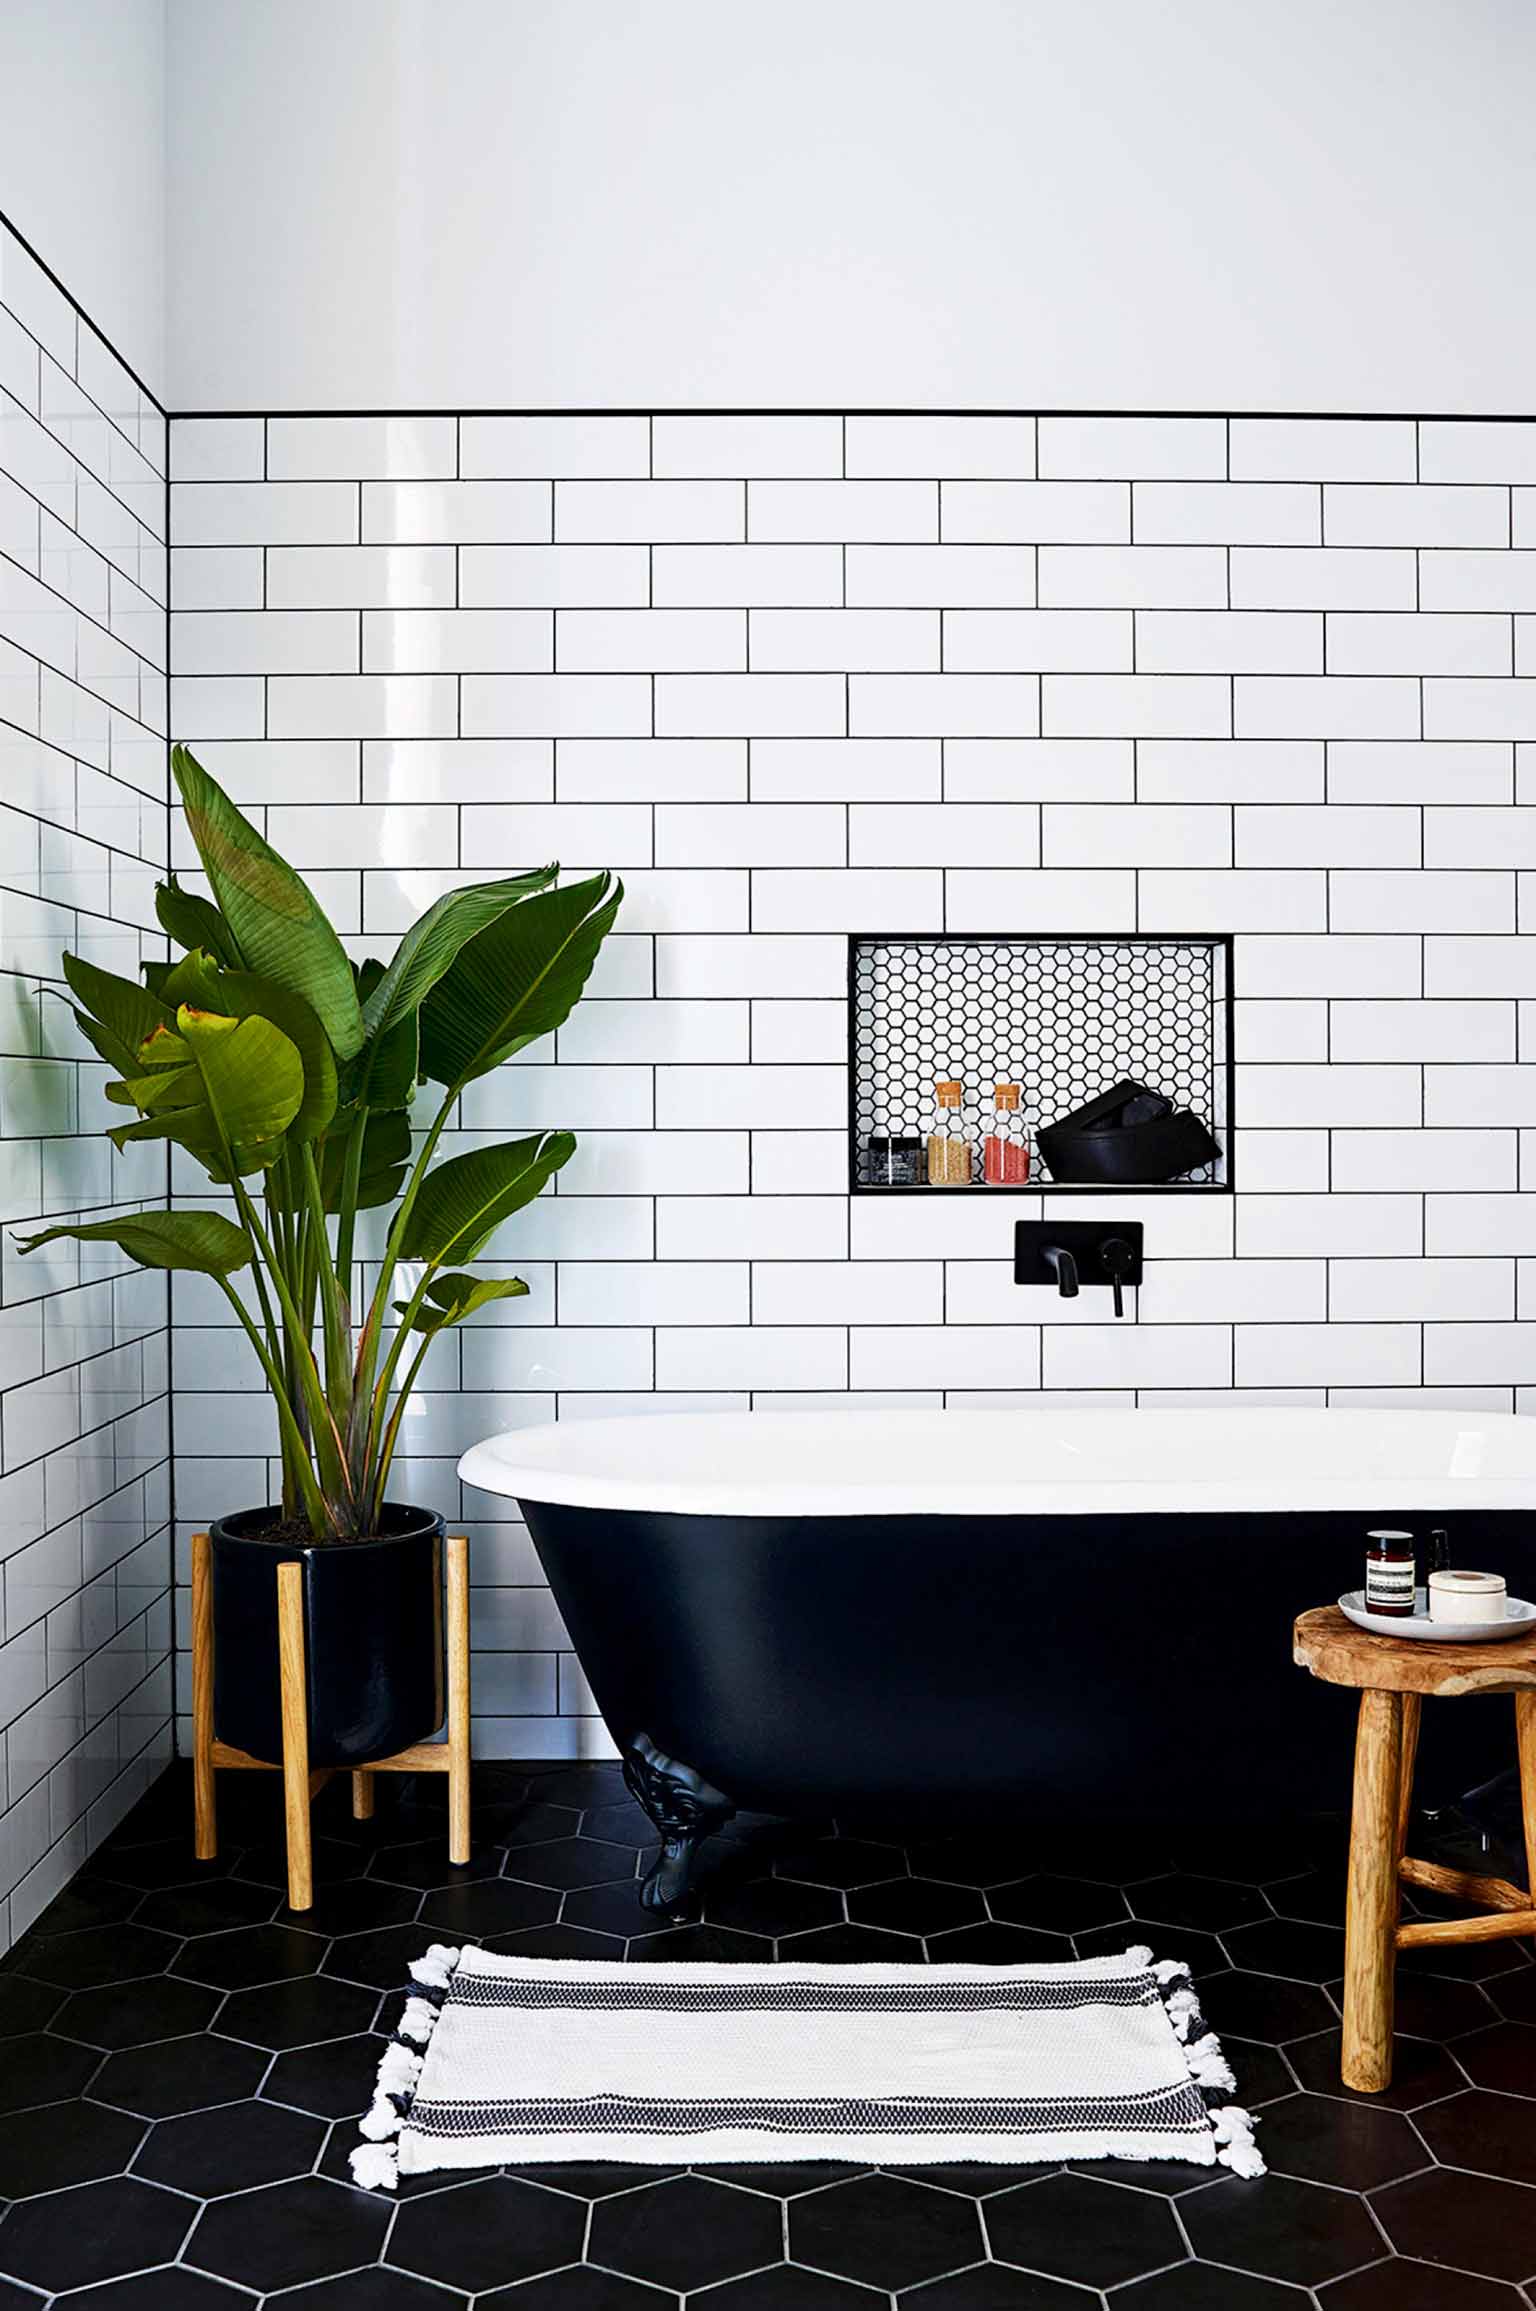
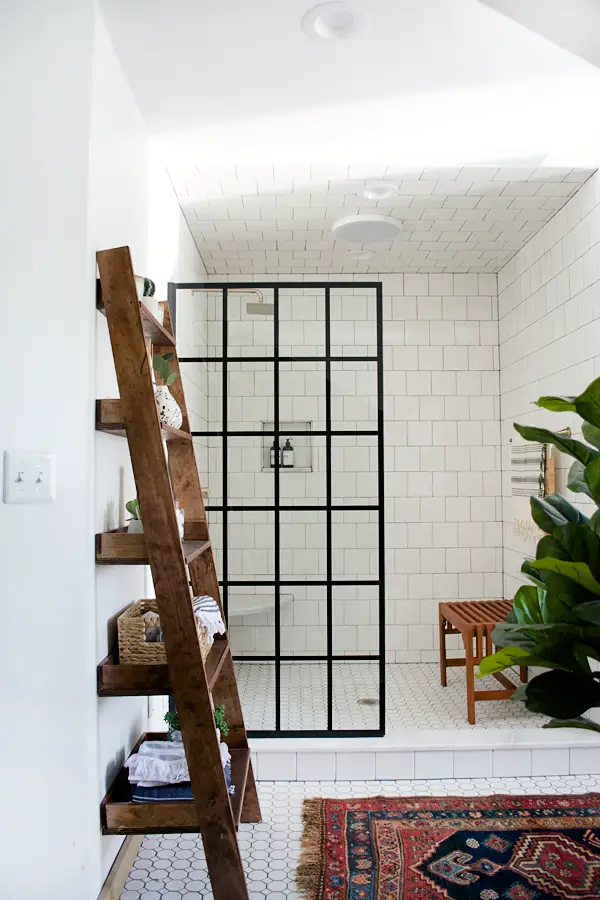
STEP ONE: GATHER INSPIRATION
This is the easiest part. Get yourself on Pinterest and dedicate a board to bathrooms. Pin everything that grabs your attention. Don't worry about budget or practicality at this point—pin away! You can also ask your friends (online and real life!) to point your attention towards anything they see that they think you might like. I even had one friend text me a photo from the bathroom of a local coffee shop!
STEP TWO: EVALUATE YOUR INSPIRATION IMAGES
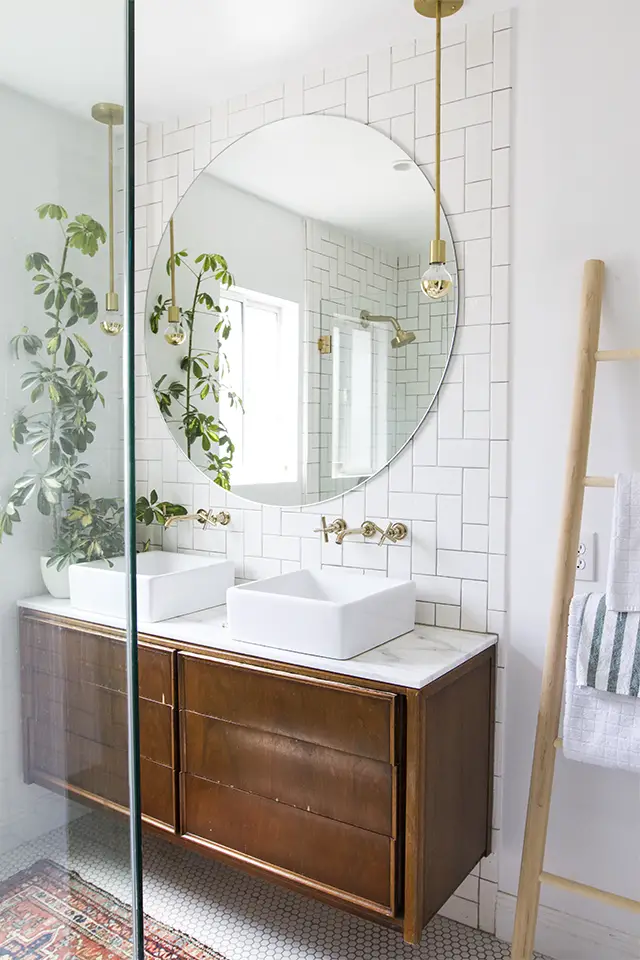
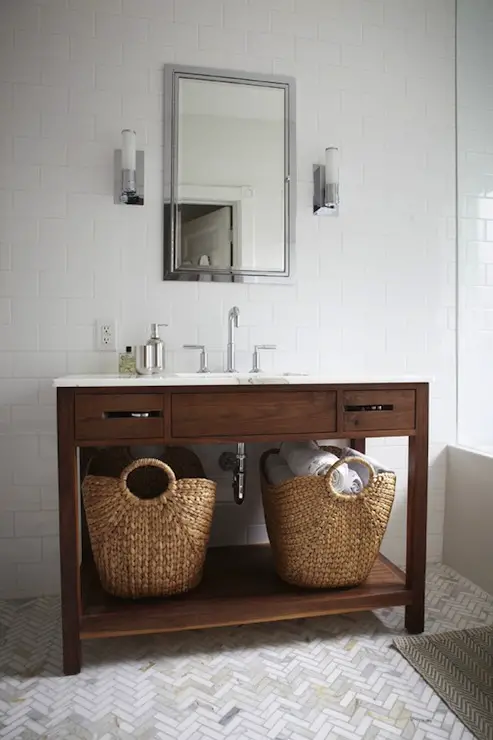
Take some time to look through your images and pick out any recurring elements. Try and narrow those down to a few of your favorite statement materials. On my Pinterest board, my favorites were marble floors, dark hexagon tile and warm brass and wood accents.
STEP THREE: MAKE YO PLAN, STAN
With inspiration under your belt, now it's time to start designing your bathroom! When I'm working through ideas, I'm a pen and paper gal through and through, so I put together this
Bathroom Design Planner printable to help pull all those important elements together.
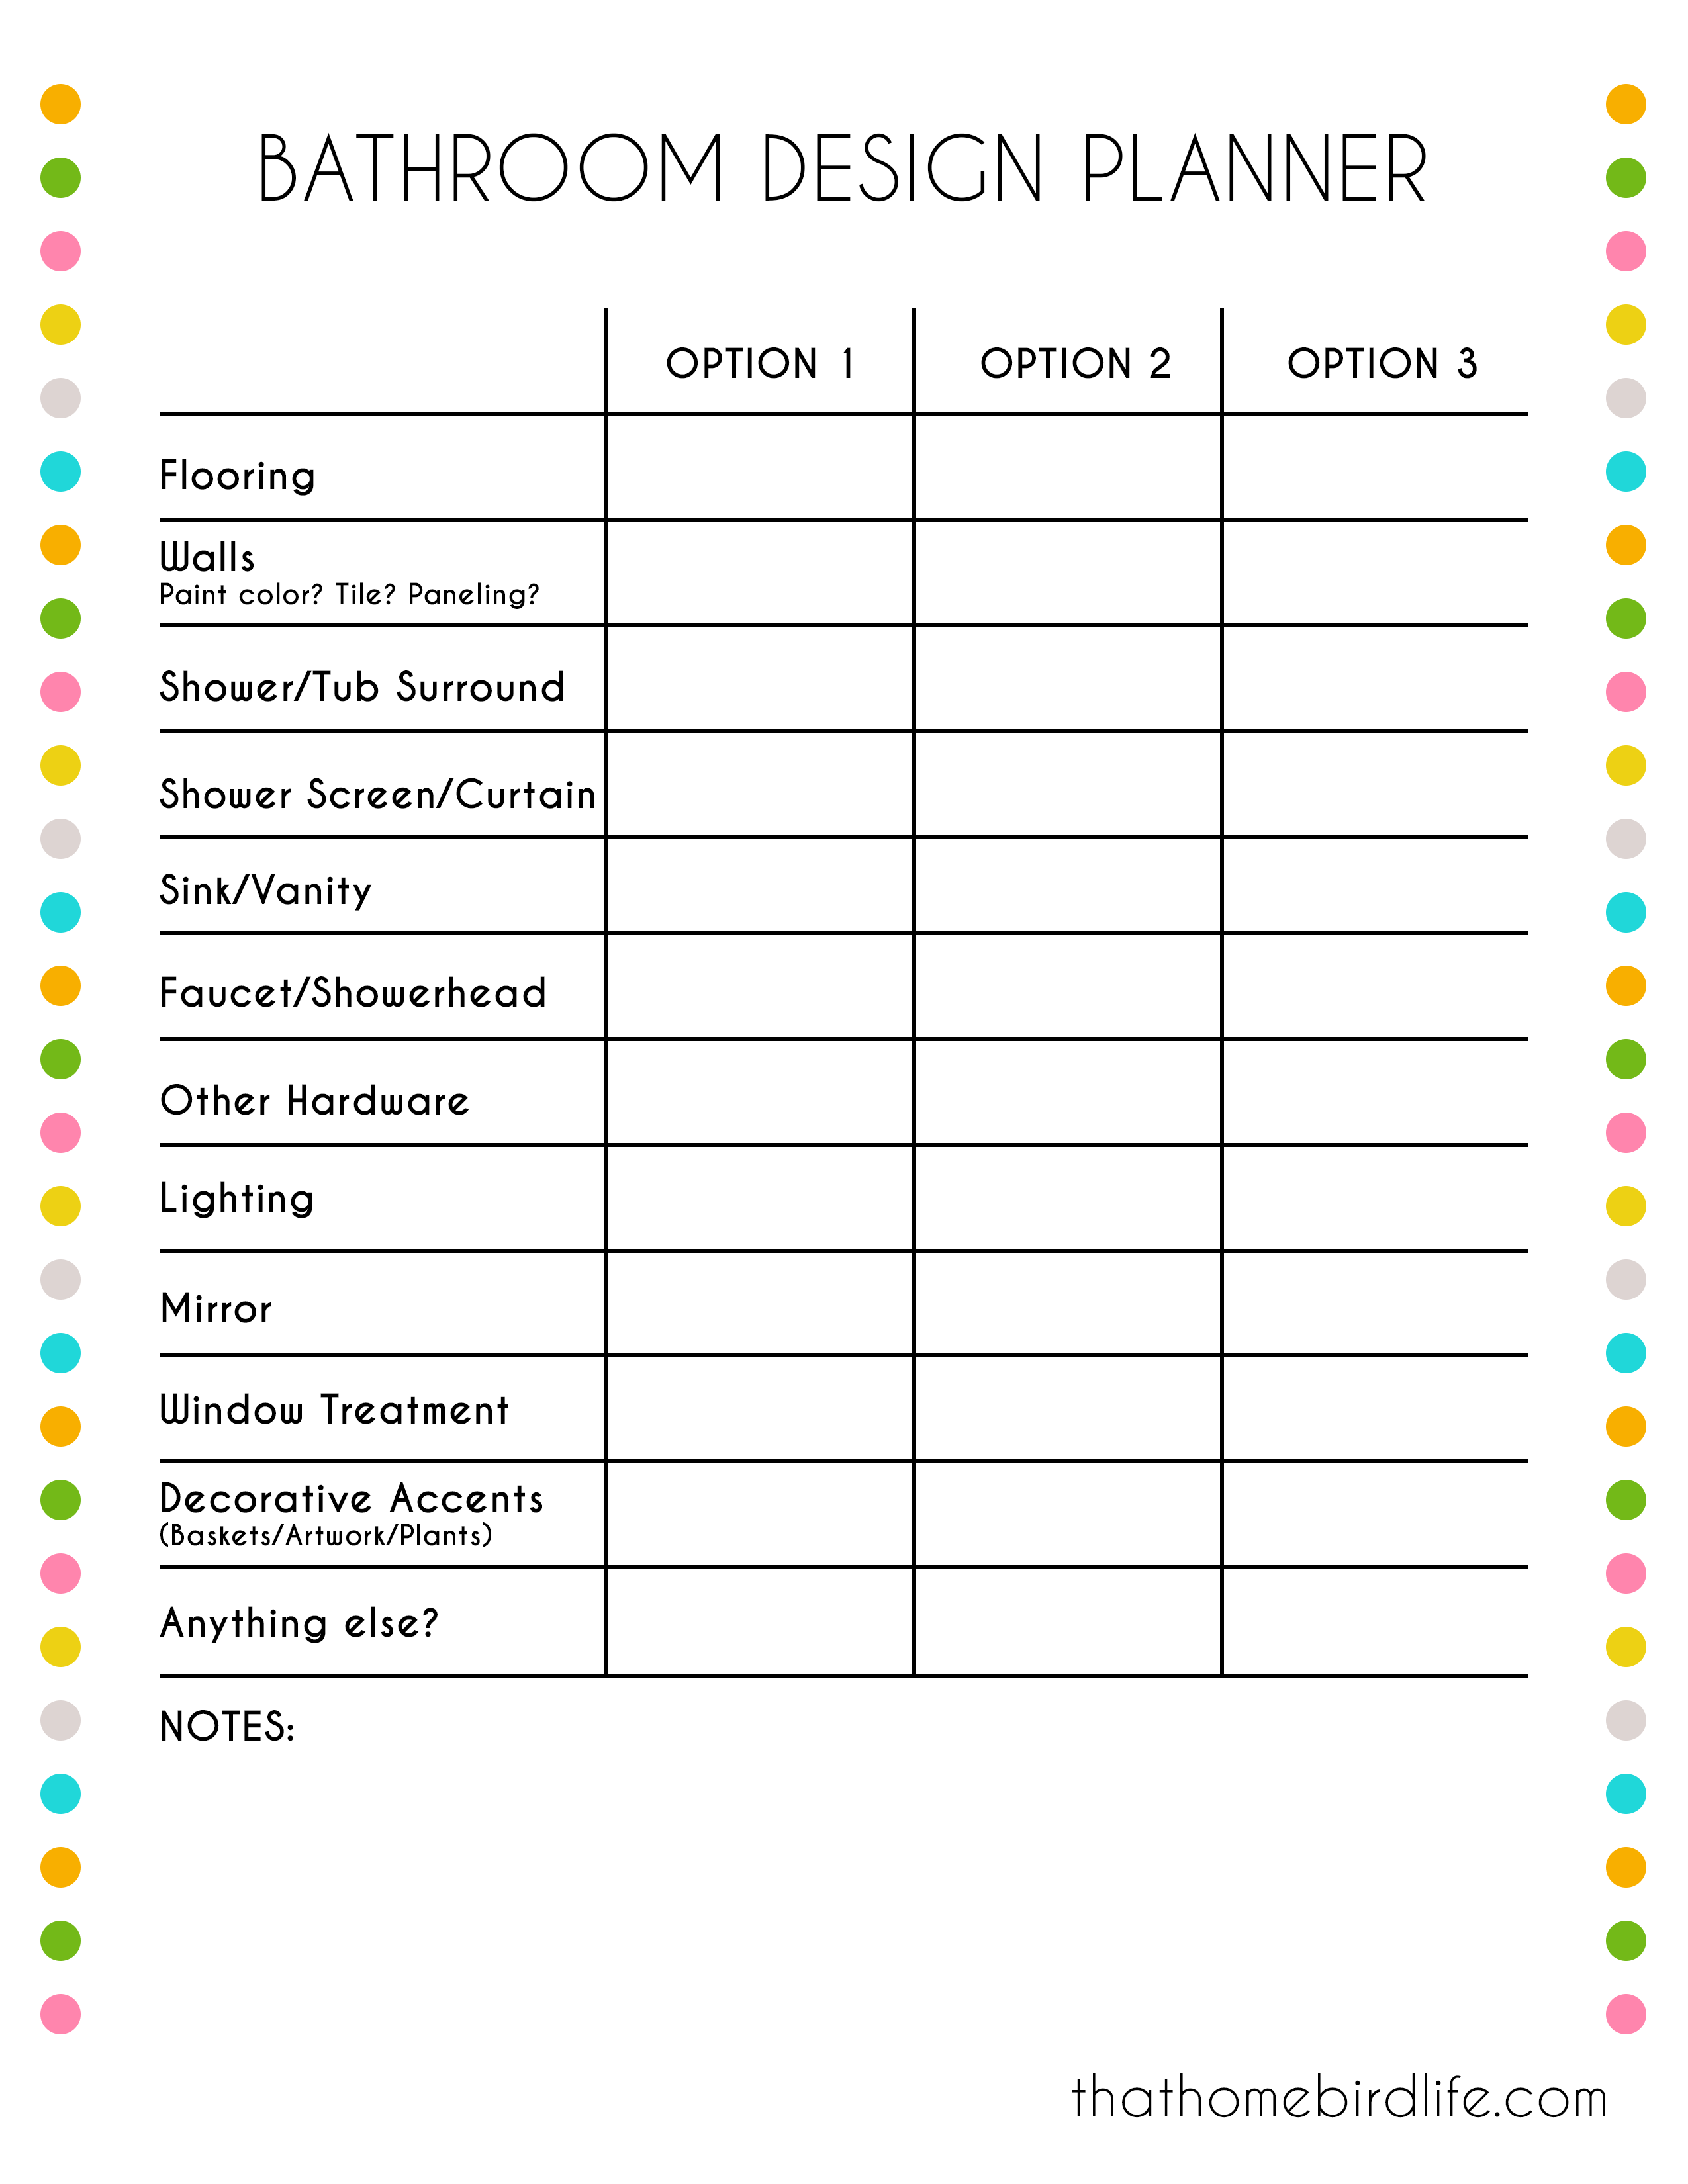
This step can feel overwhelming. So, here's how I broke it down to make it more manageable:
1. Start by filling in the things that are predetermined.
Are you keeping any elements from your existing bathroom? (For example, original tile or a vanity.) Have you already purchased something that you want to incorporate into your design?
2. Go back to your favorite materials from your inspiration images and add these to your plan.
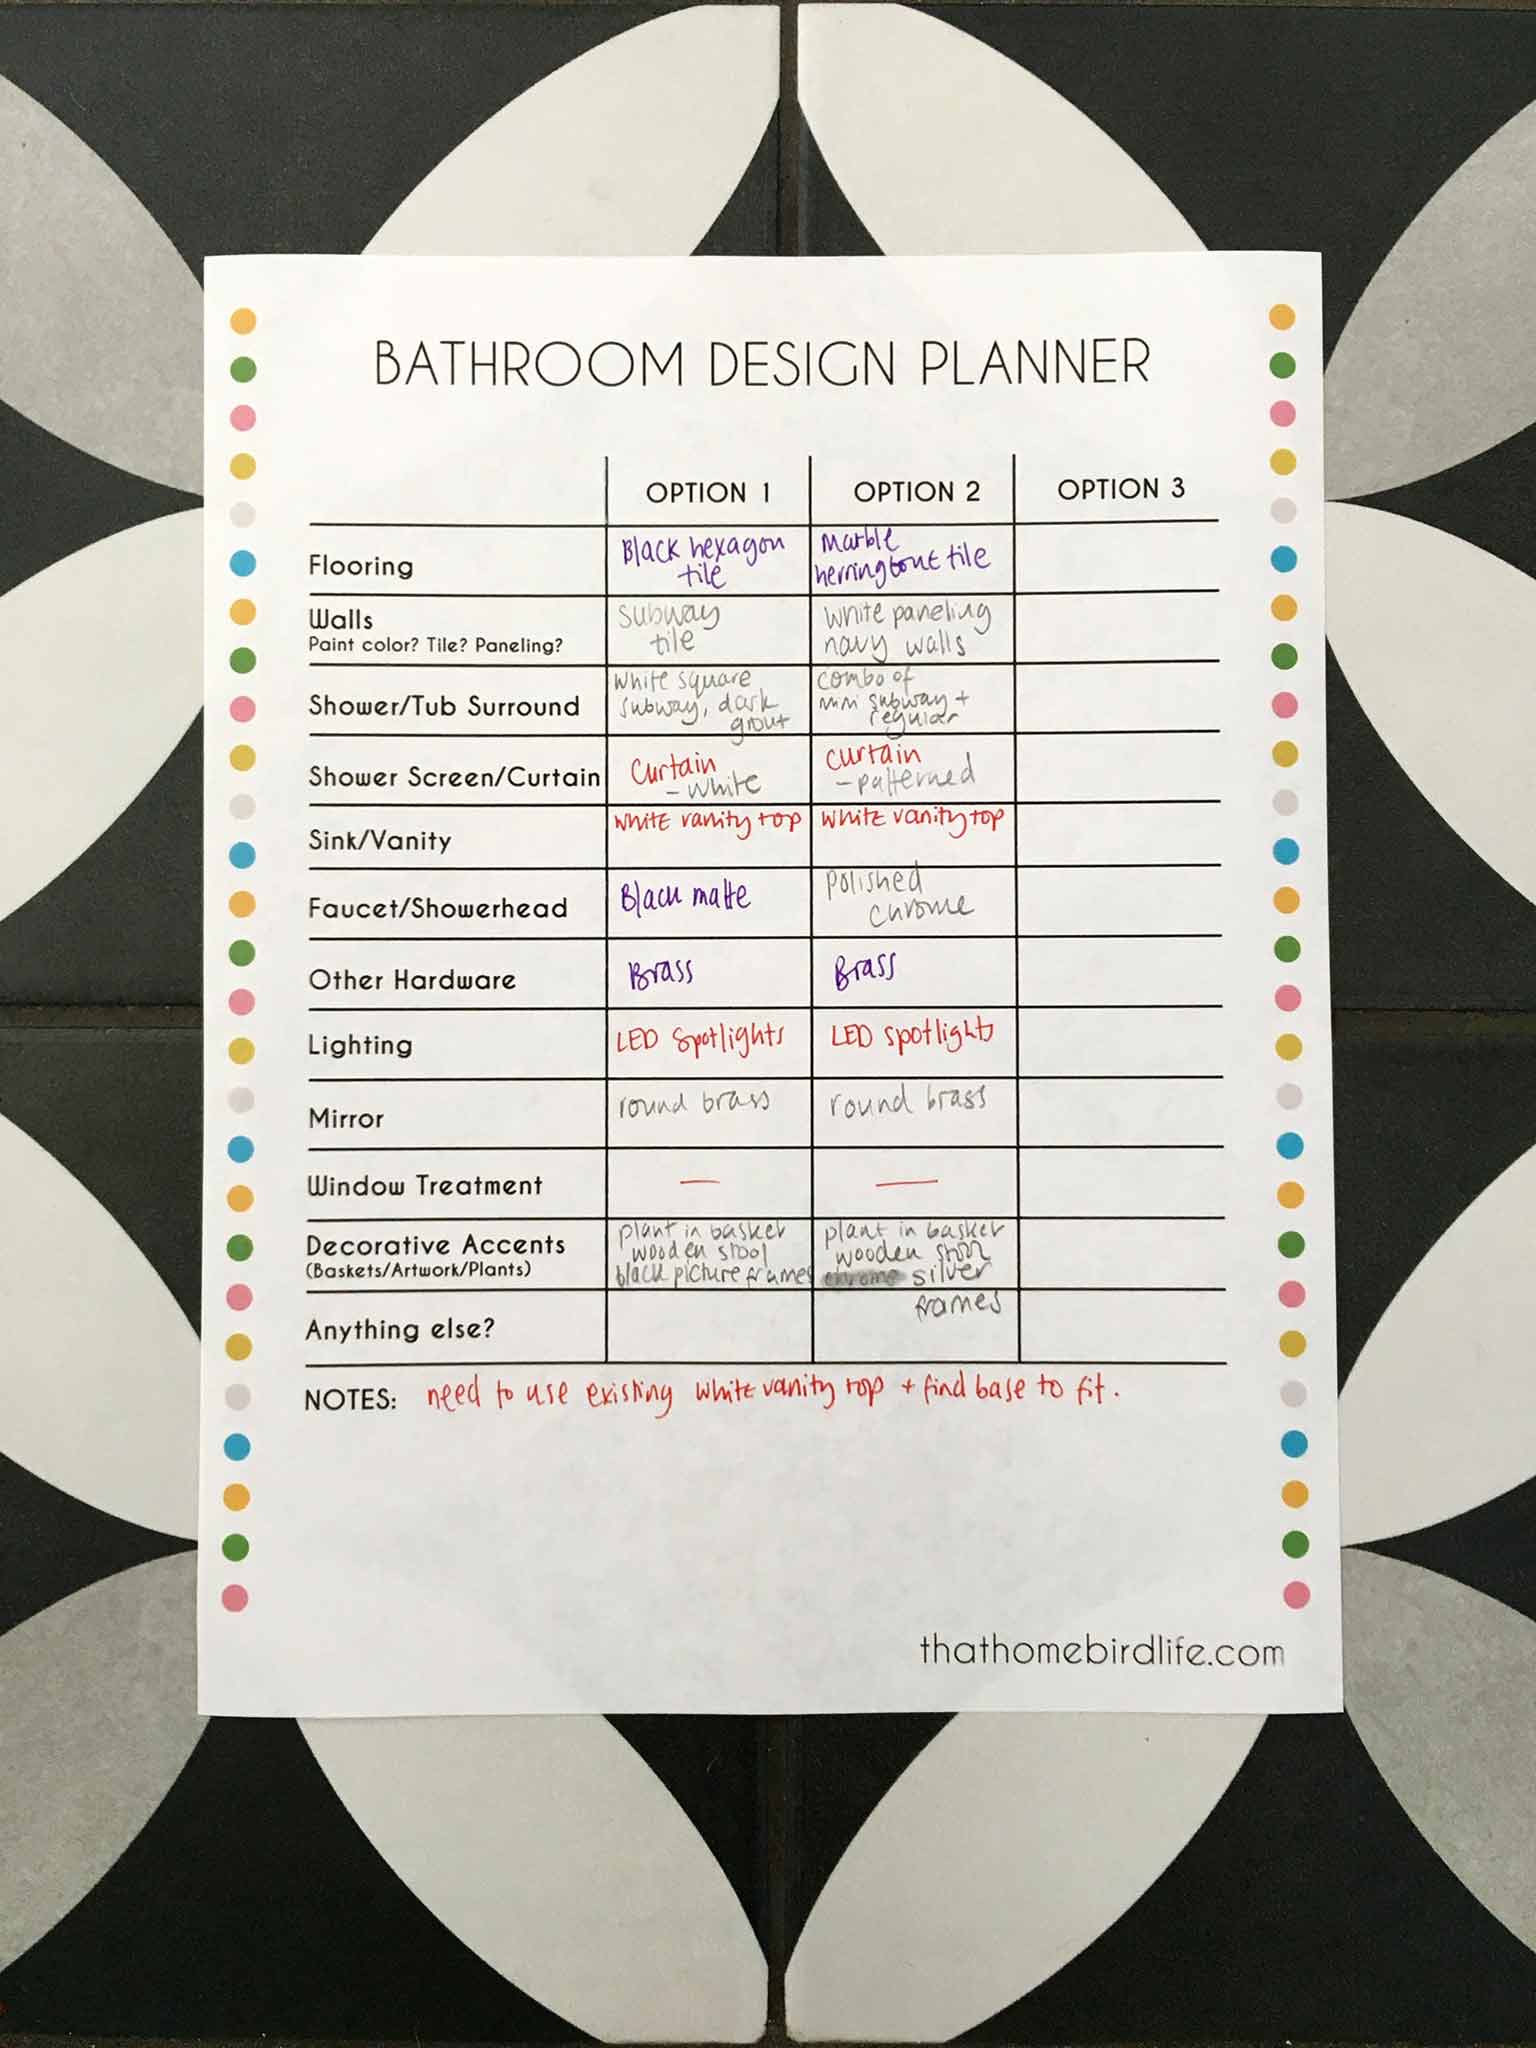
Note: if these materials do not coordinate well together, then you may need to do two or even three separate bathroom plans—so you can fill these out in the different columns. Then you can choose your favorite at the end. I had to do this myself, as a marble floor tile and dark hexagon tile combo was not sitting well with me.
3. Fill in the gaps.
It helps me to think of this stage like solving a Rubik's cube. Each element of the design needs to work by itself (eg. you need to like it) and in relation to the other materials. The way I tackle it is just to start putting different options down on paper and see how they work together. You can go back and forth as many times as you need to, so use a pencil! It can also help to include a friend in this and work through it aloud.
When you're in the middle of trying to fit everything together, it can feel like every choice you make bumps off a previous decision. But keep persevering and methodically working through it, because eventually there's this magic moment where suddenly everything feels like it fits together—trust me on this!
I'm a firm believer in doing what you love rather than sticking to rules, but if you do feel stuck, then here are a few broad guidelines that I go by:
- Tile choices. Stick to three at most, but don't worry too much about being matchy matchy. I personally adore subway tile. I keep on seeing articles debating whether it has gone out of fashion but I think it is so affordable and versatile that you really cannot go wrong. For me, it really makes those statement materials stand out and is a great neutral element to pull a design together. You can also get pretty much any shape, size, and color you like, and there are loads of different grout colors and tile pattern options, so there are definitely ways to make it feel more unique and special to you.
- Metal finishes. I would stick to two at most, unless you are feeling very bold! It's a great way to add interest and depth to your bathroom. This is something I could have done better in our master bath—I just went with brushed-nickel-everything because I couldn't decide. But the good news is that switching out towel bars and cabinet hardware is super easy to change further down the line.
- Accents. This is a really great way to pull a room design together and incorporate materials and textures that you love without spending big bucks. For example, I love natural wooden vanities but I know the kind I like will be outside of our budget. Therefore I'm looking at wooden accessories like vases, benches and planters, which will all add that same raw material into the design, without the high price tag.
- If in doubt, go back and look at your inspiration photos. If it's what you love, then there is no shame in using similar materials. It's not a competition—it's your home.
Ultimately, you need to feel happy and confident in your own decisions. This is your home, and you are the one that is going to be living in it. So go with your gut and choose what makes you smile.
STEP FOUR: MOOD BOARD YOUR CHOICES
Now you have your plan on paper, a good way to visualize your room and make sure that all your materials work well together is to create a mood board. It is also good if, like me, you have more than one design to decide between. I used Photoshop to do this, but there are other online tools you can use, like this free online mood board tool.
Here's my first option:
Hex Tile // White Square Tile // Faucet no longer available similar // Shower Trim // Stools // Towel Bar // Hex Cabinet Knobs // Round Brass Mirror // Baskets
And here's my second option:
Marble Herringbone Mosaic Tile // Classic Subway Tile // Mini Subway Tile // Shower Curtain // Hexagon Cabinet Knob // Towel Bar // Baskets // Stools // Mirror // Shower Trim // Faucet
I like both designs and think they both work, but I have never used marble in my home and so I want to branch out and go with option two. Marble is a slightly higher maintenance material, but as this is a guest bath, it will be used less often and so I think we can take the risk.
STEP FIVE: SOURCE YOUR MATERIALS
Congratulations! You have made it through the hardest part of the process! Now that you know your "ideal" design outcome, you can starting looking online and in stores for materials.
This is where budget really comes into play—there may be some adjustments to your design depending on cost of materials. For example, I originally thought about using marble subway tile, but switched it out to ceramic because it was over our budget. Remember—you can always incorporate pricier materials by using decorative accents, and stick to more cost effective base materials to keep it all in budget.
I like using Wayfair as they offer tile samples for a small cost, and I find that their prices are often very competitive. It is also worth visiting stores in person so that you can see all the materials up close and under one roof.
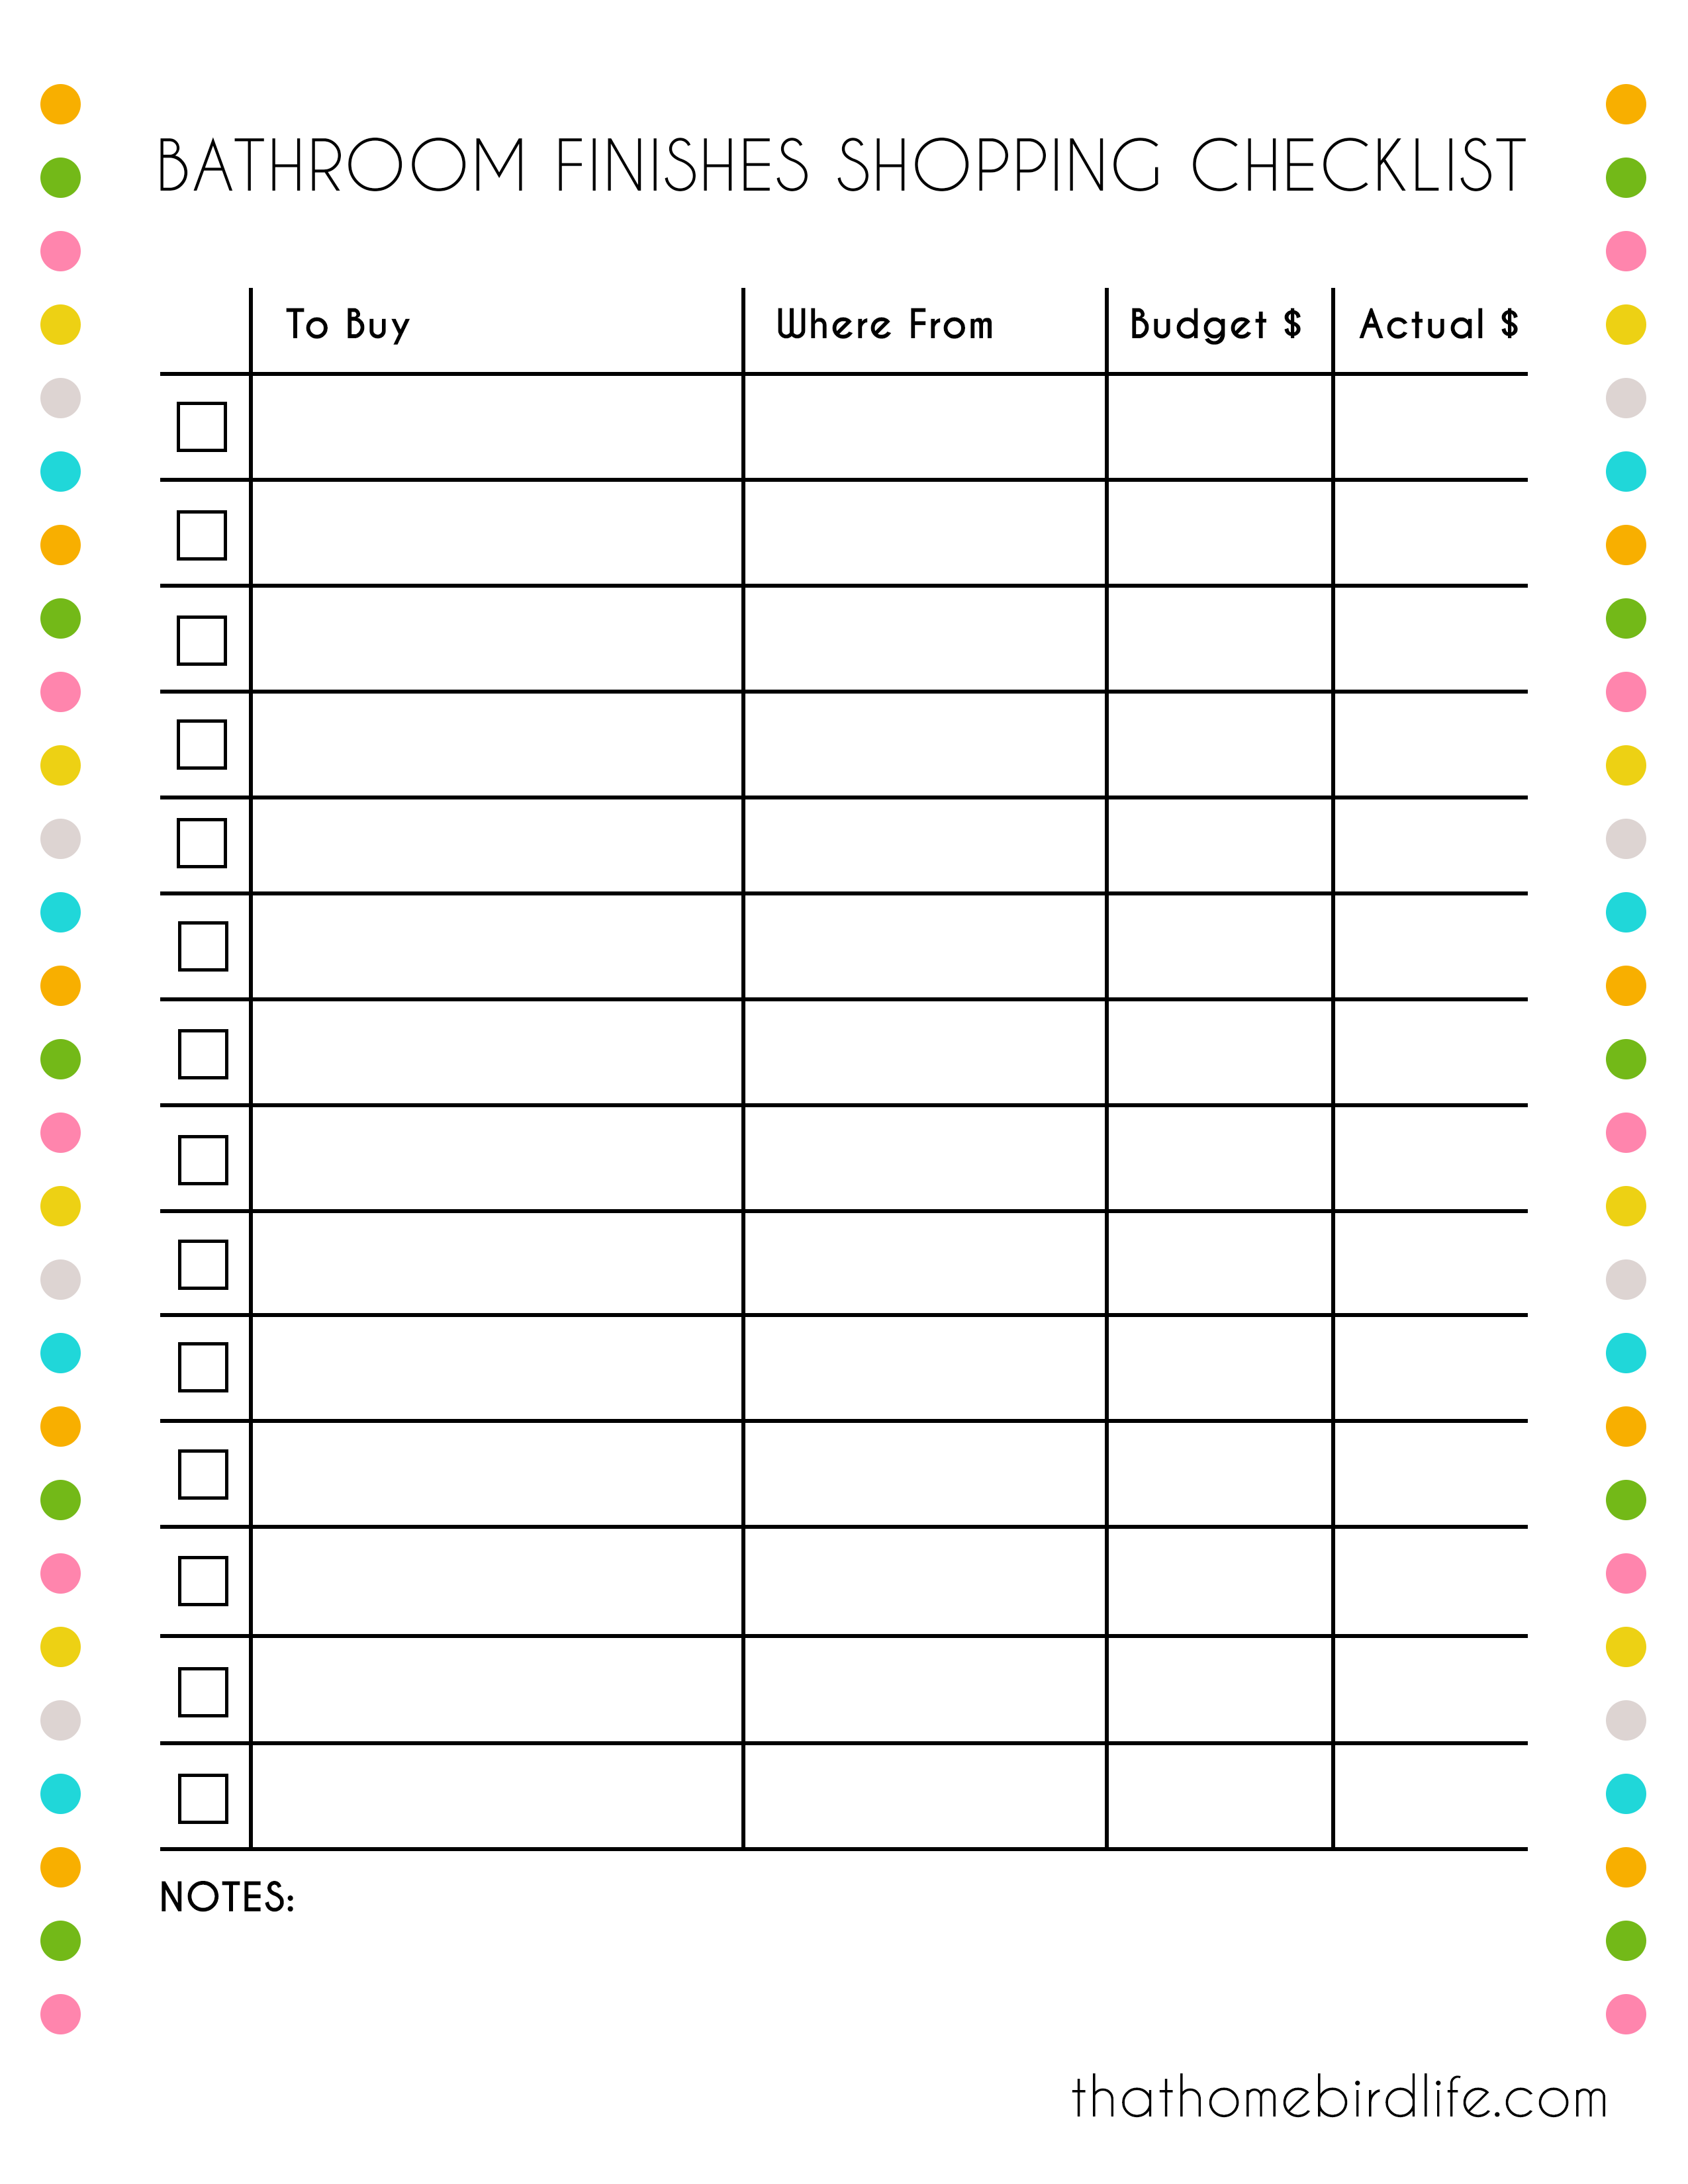
Be sure to make a detailed shopping list with square footages of the materials needed, and total budget for each item. This is also a good time to run your choices by your contractor (if you are using one) to make sure there are no problems with installing the material you have chosen.
Here's a bathroom shopping checklist that you can fill out using your design planner to make sure you have every base covered!
And there you have it! That's the way I chose my bathroom materials this time around and it really helped me focus in on what I love and build my bathroom design around those elements.
What are your thoughts on bathroom design? Do you have any tips or processes that have helped you? And what's your opinion on subway tile—is it on the way out or here to stay?? I would love to hear from you in the comments below, or you can meet me over on Instagram!