If you’ve been following my Instagram stories this week then you probably know that I’ve given my front porch a bit of a makeover this week! My friend Cynthia Harper came up with this super simple challenge: tackle a project of your choice in two days with a budget of $200. I thought it was the perfect opportunity to refresh our front porch for fall and I jumped right in!
Our whole outside space needs a complete overhaul, but by starting off with something bitesize and manageable I was hoping to kickstart the rest of the project!
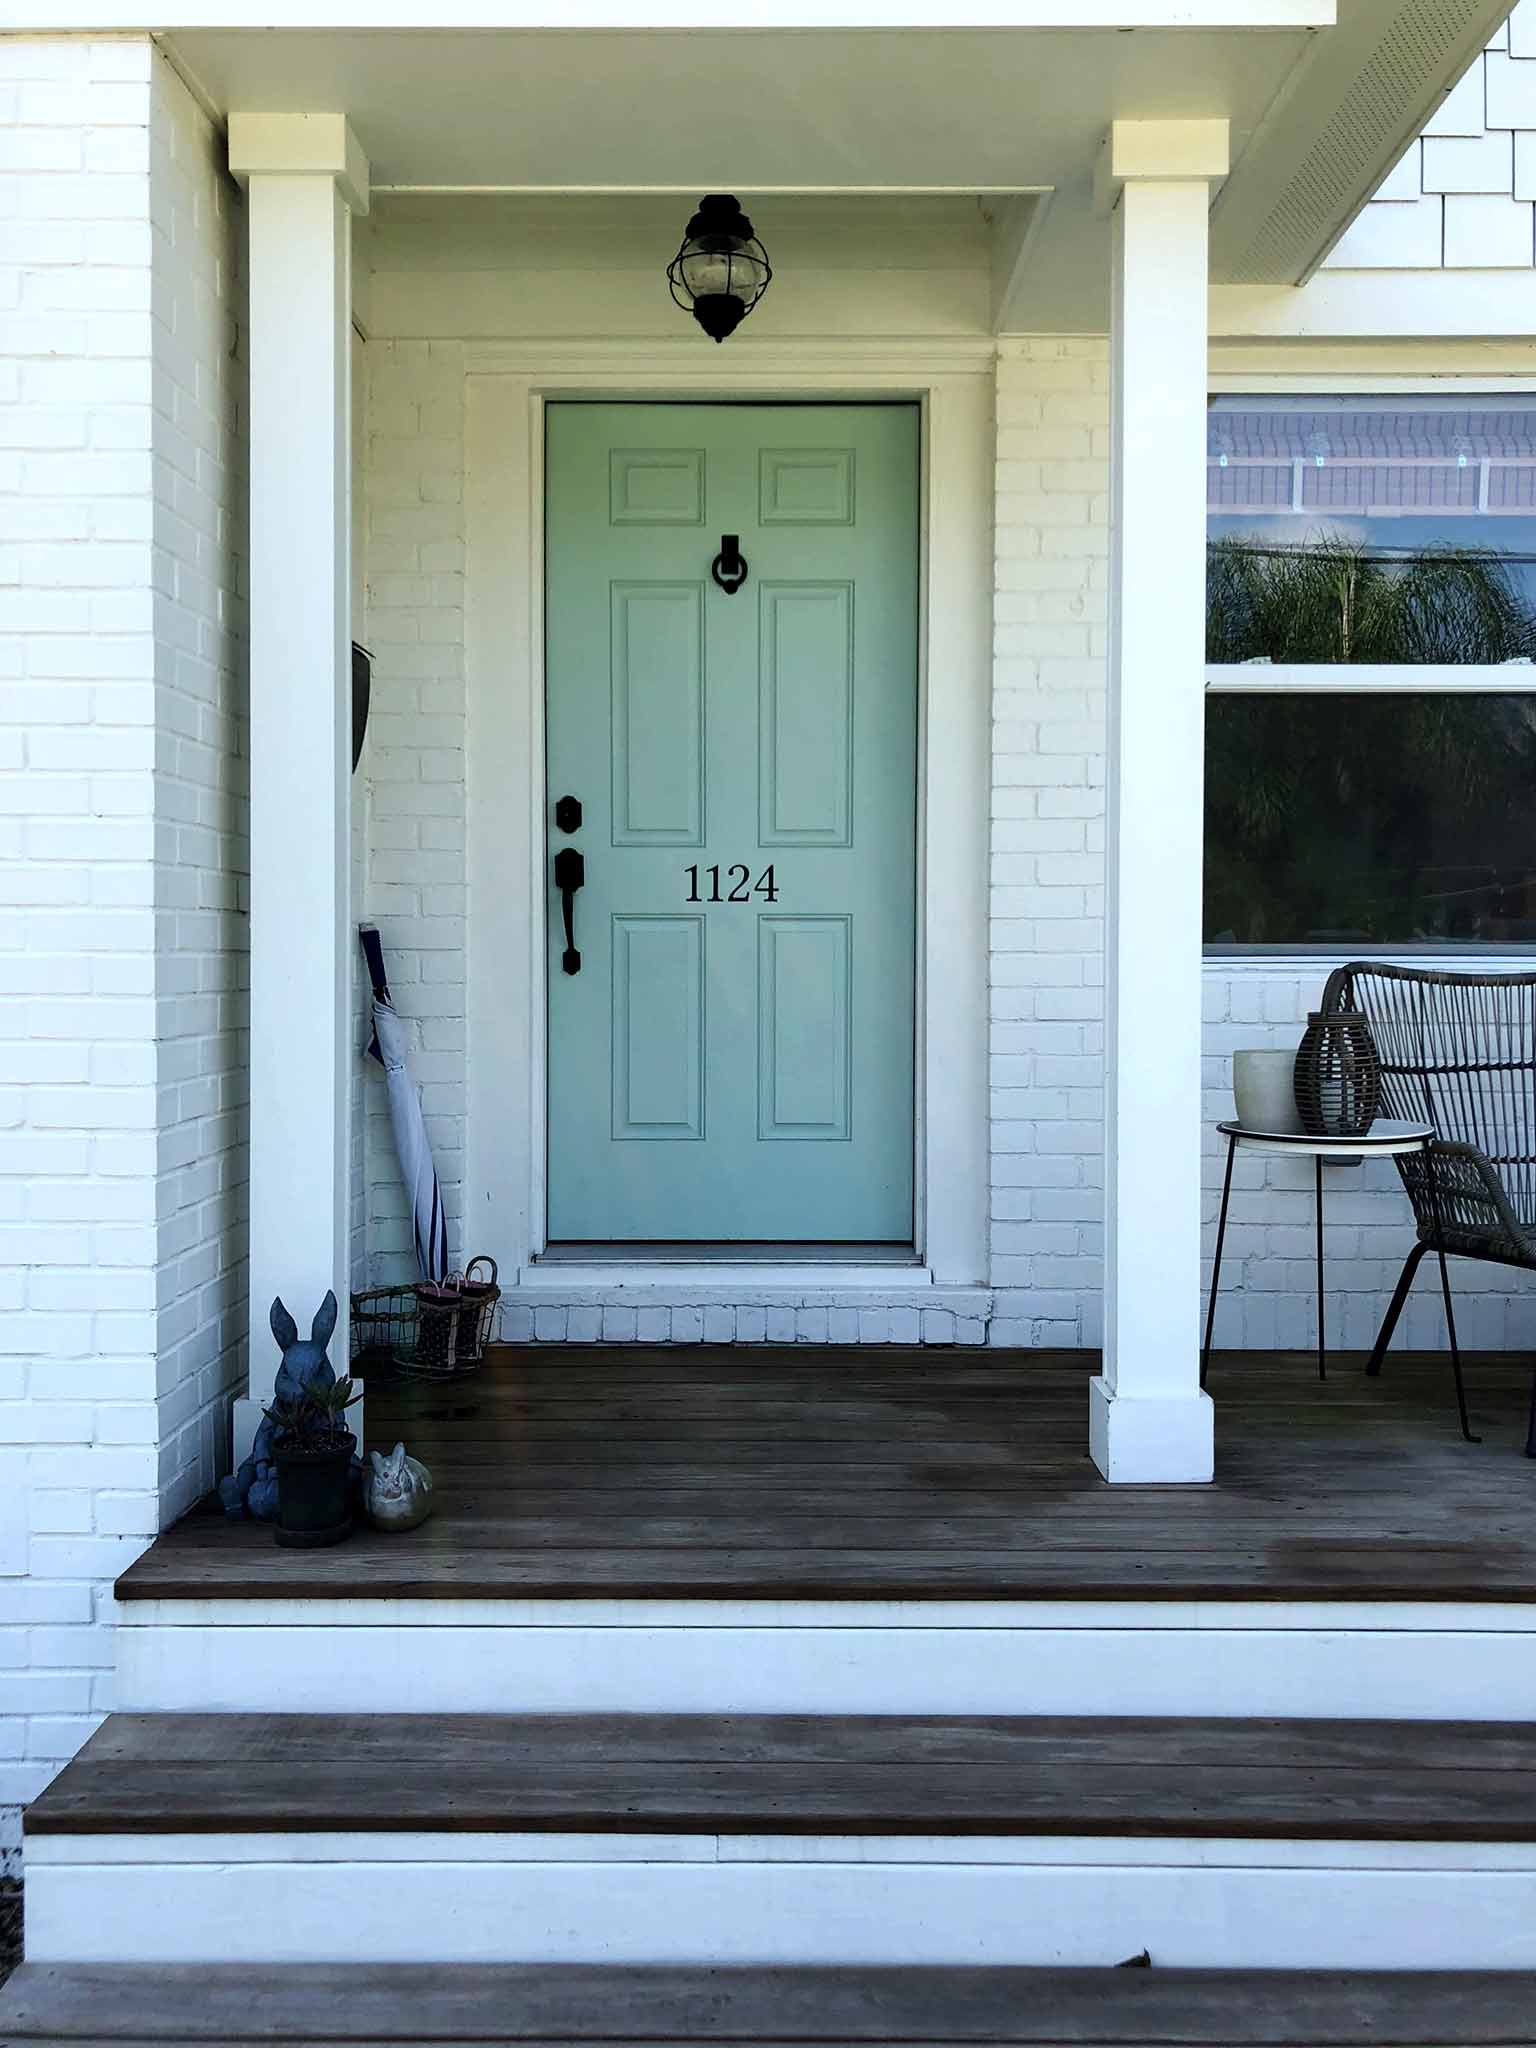
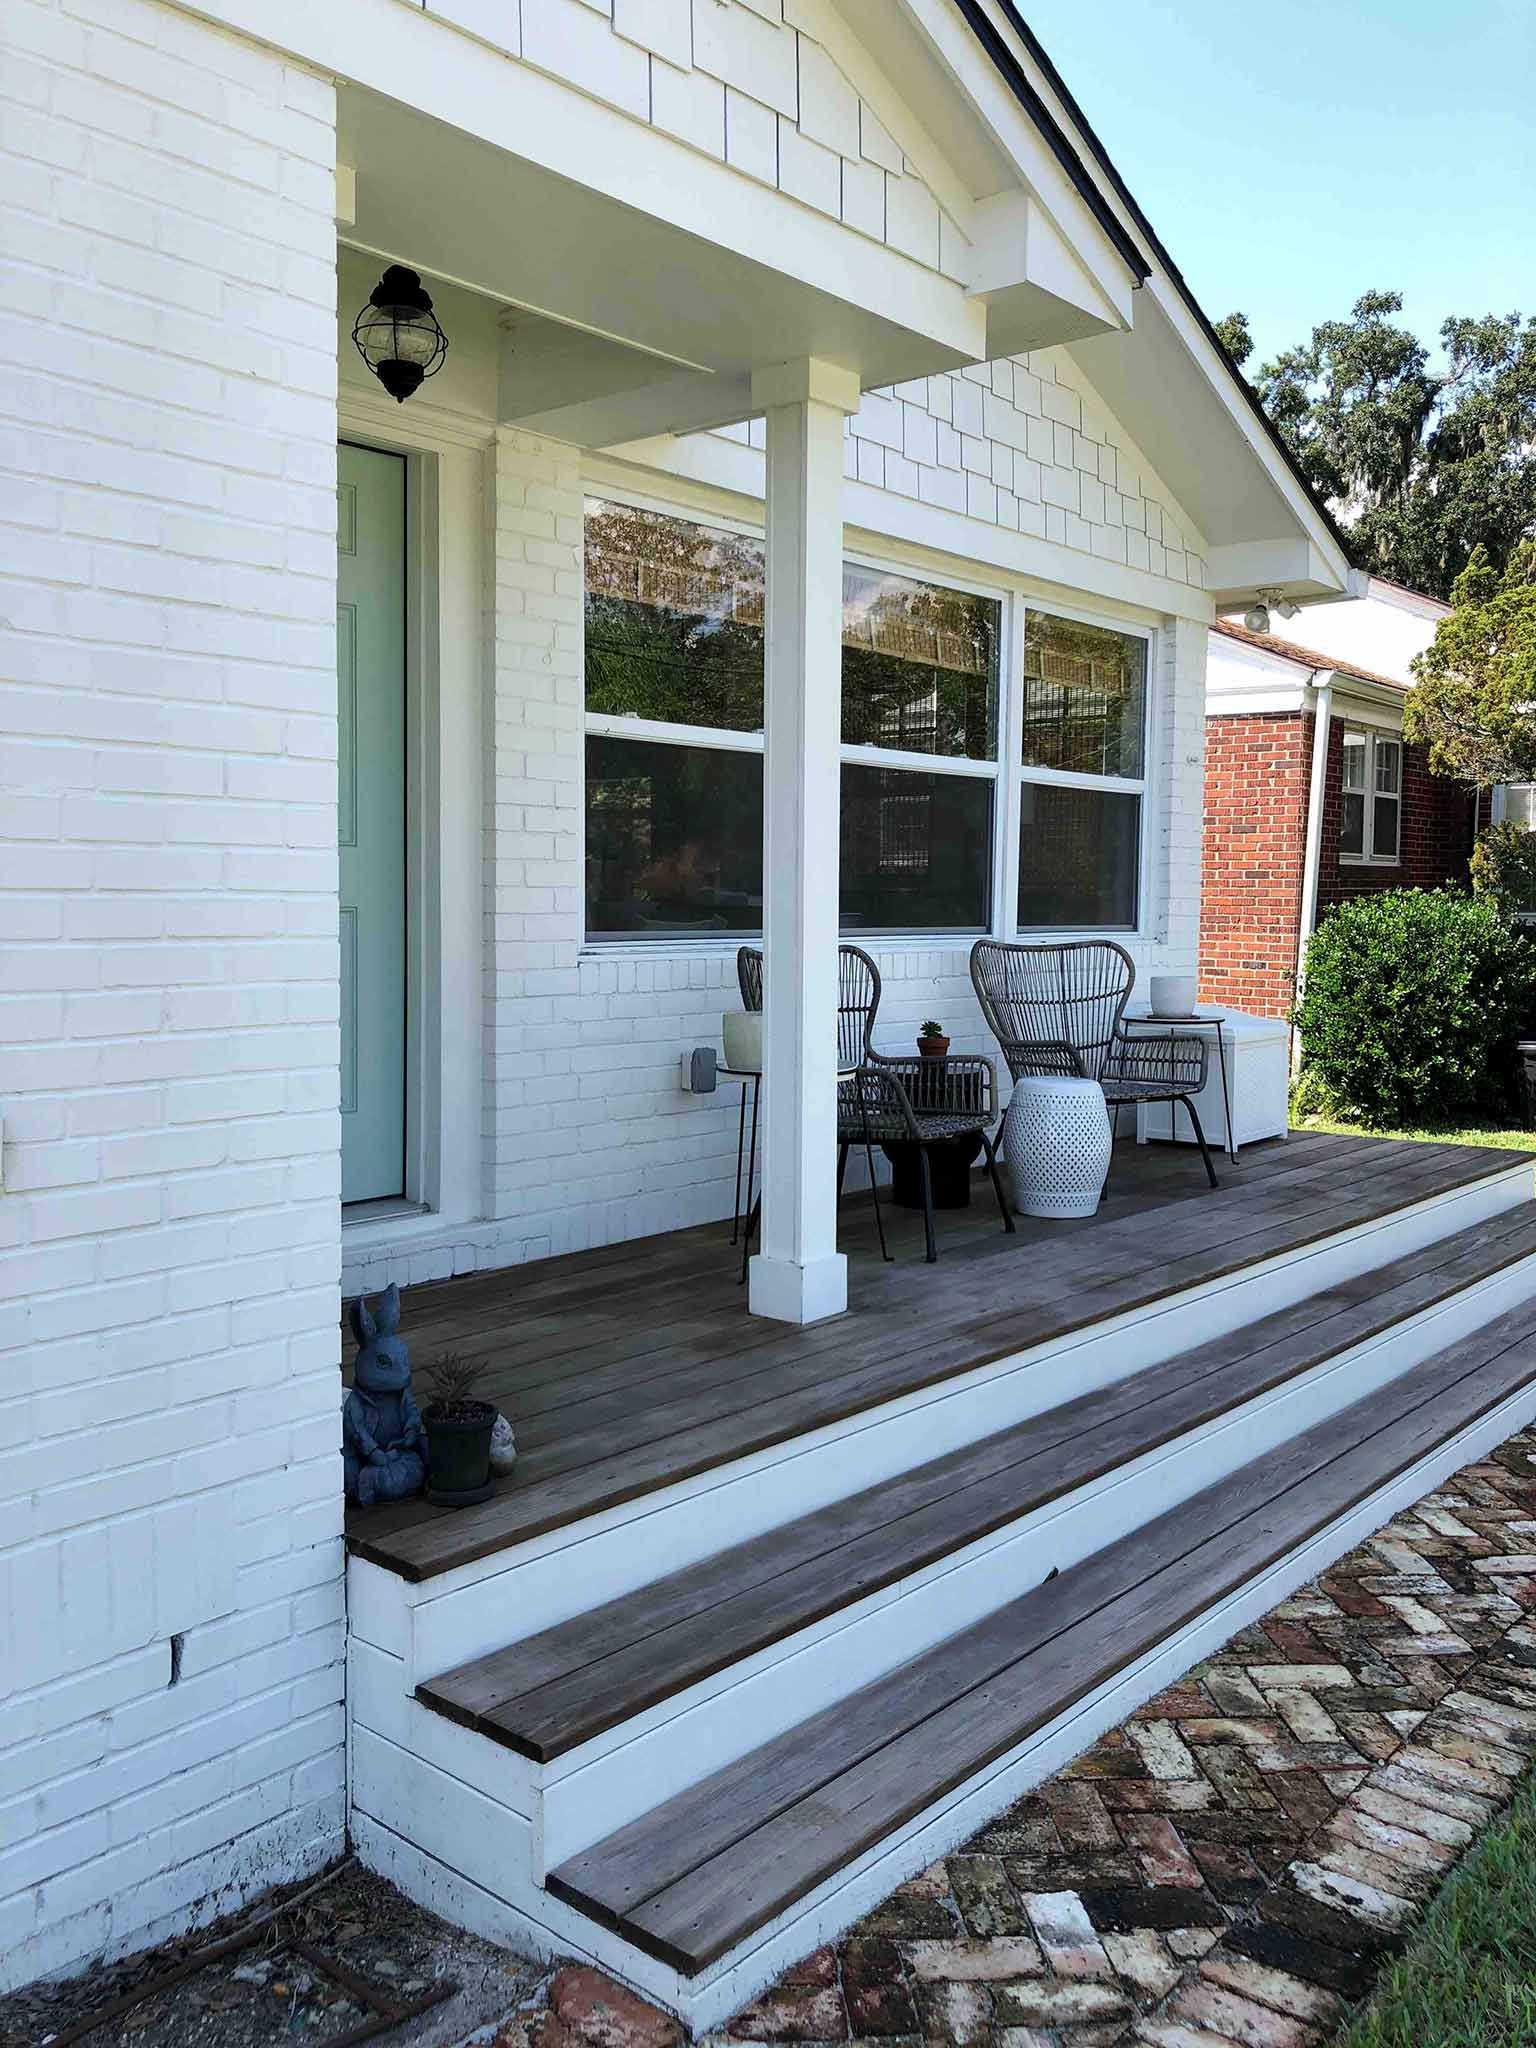
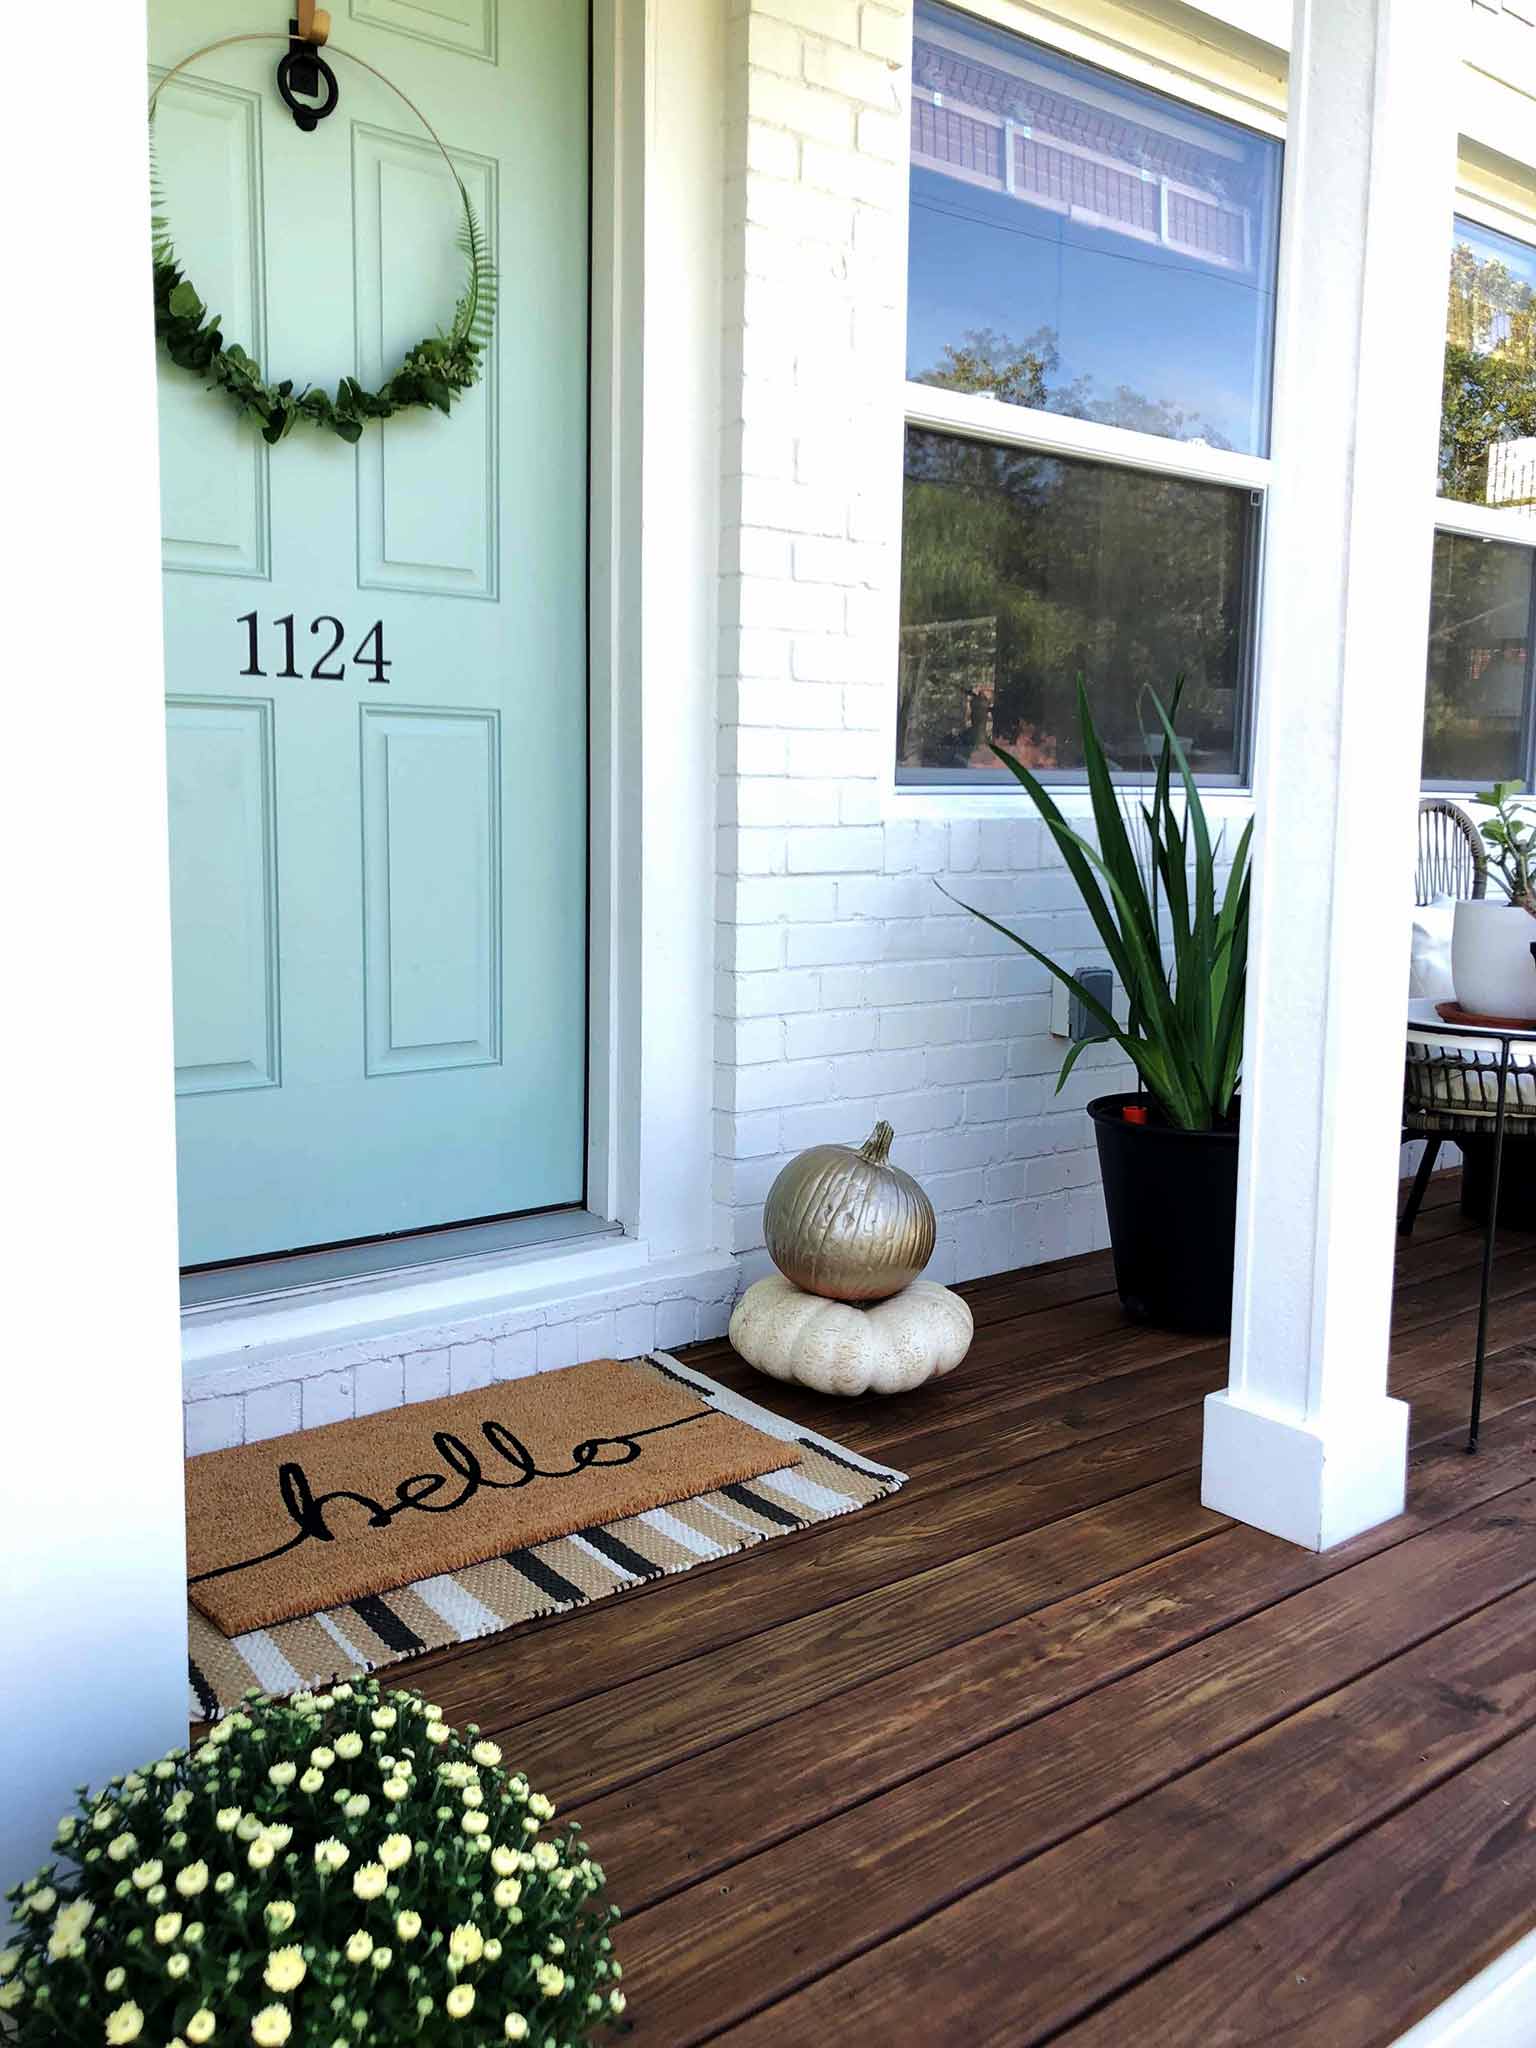
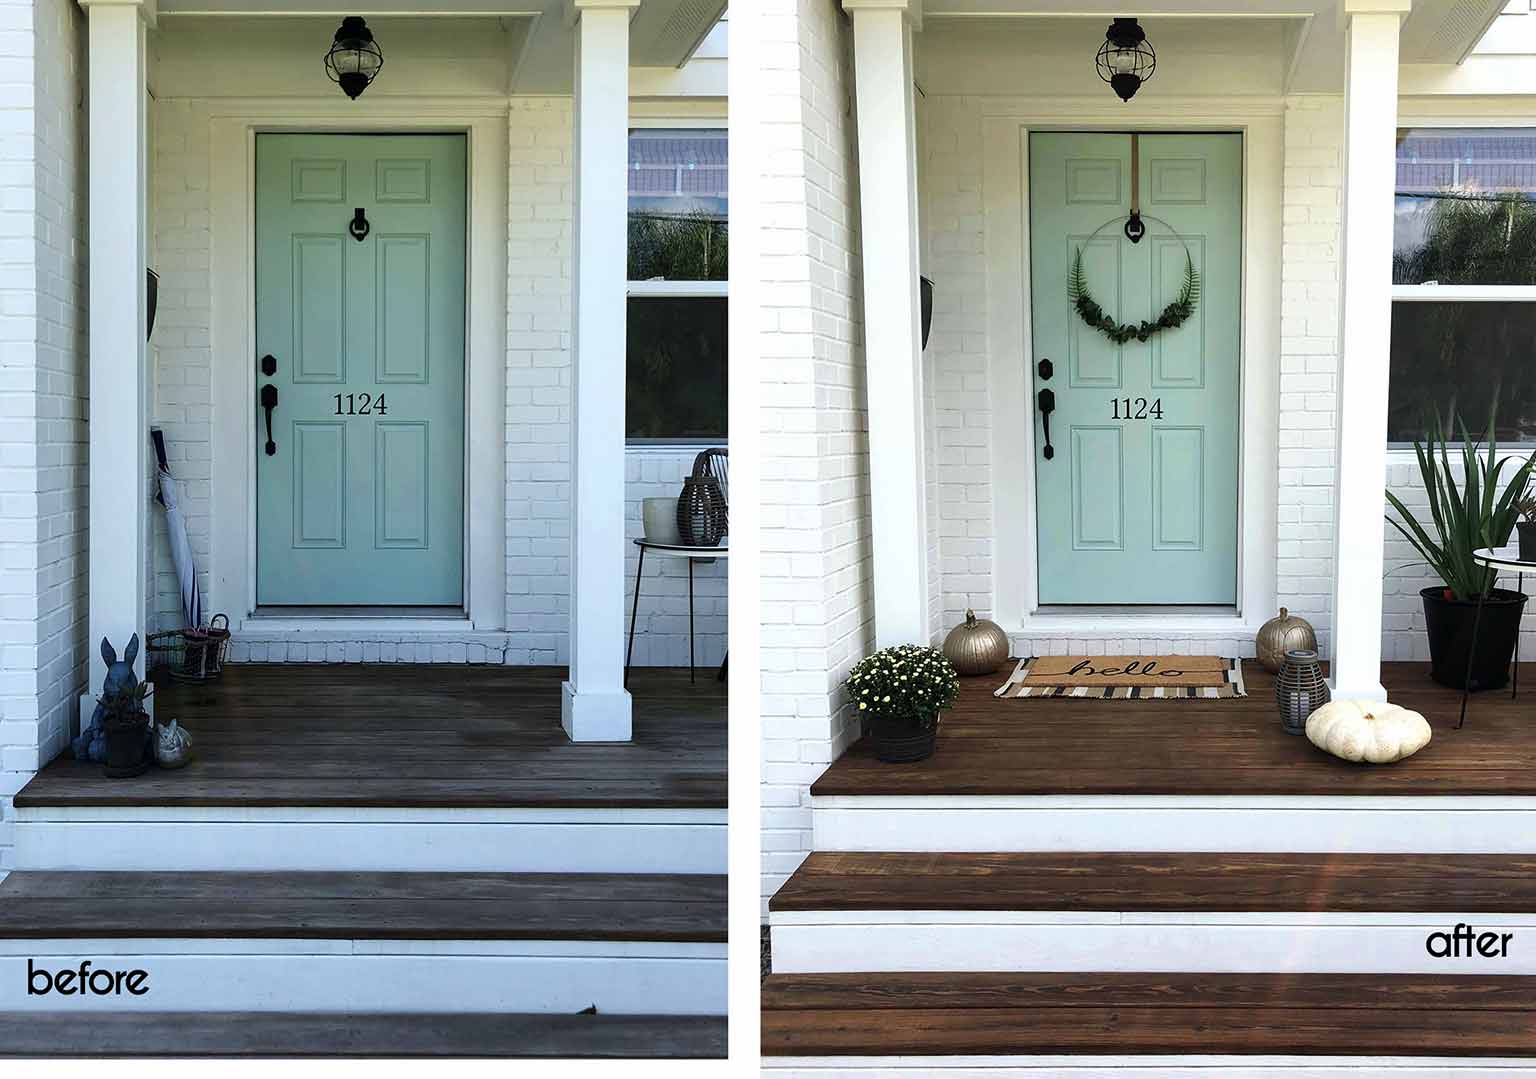
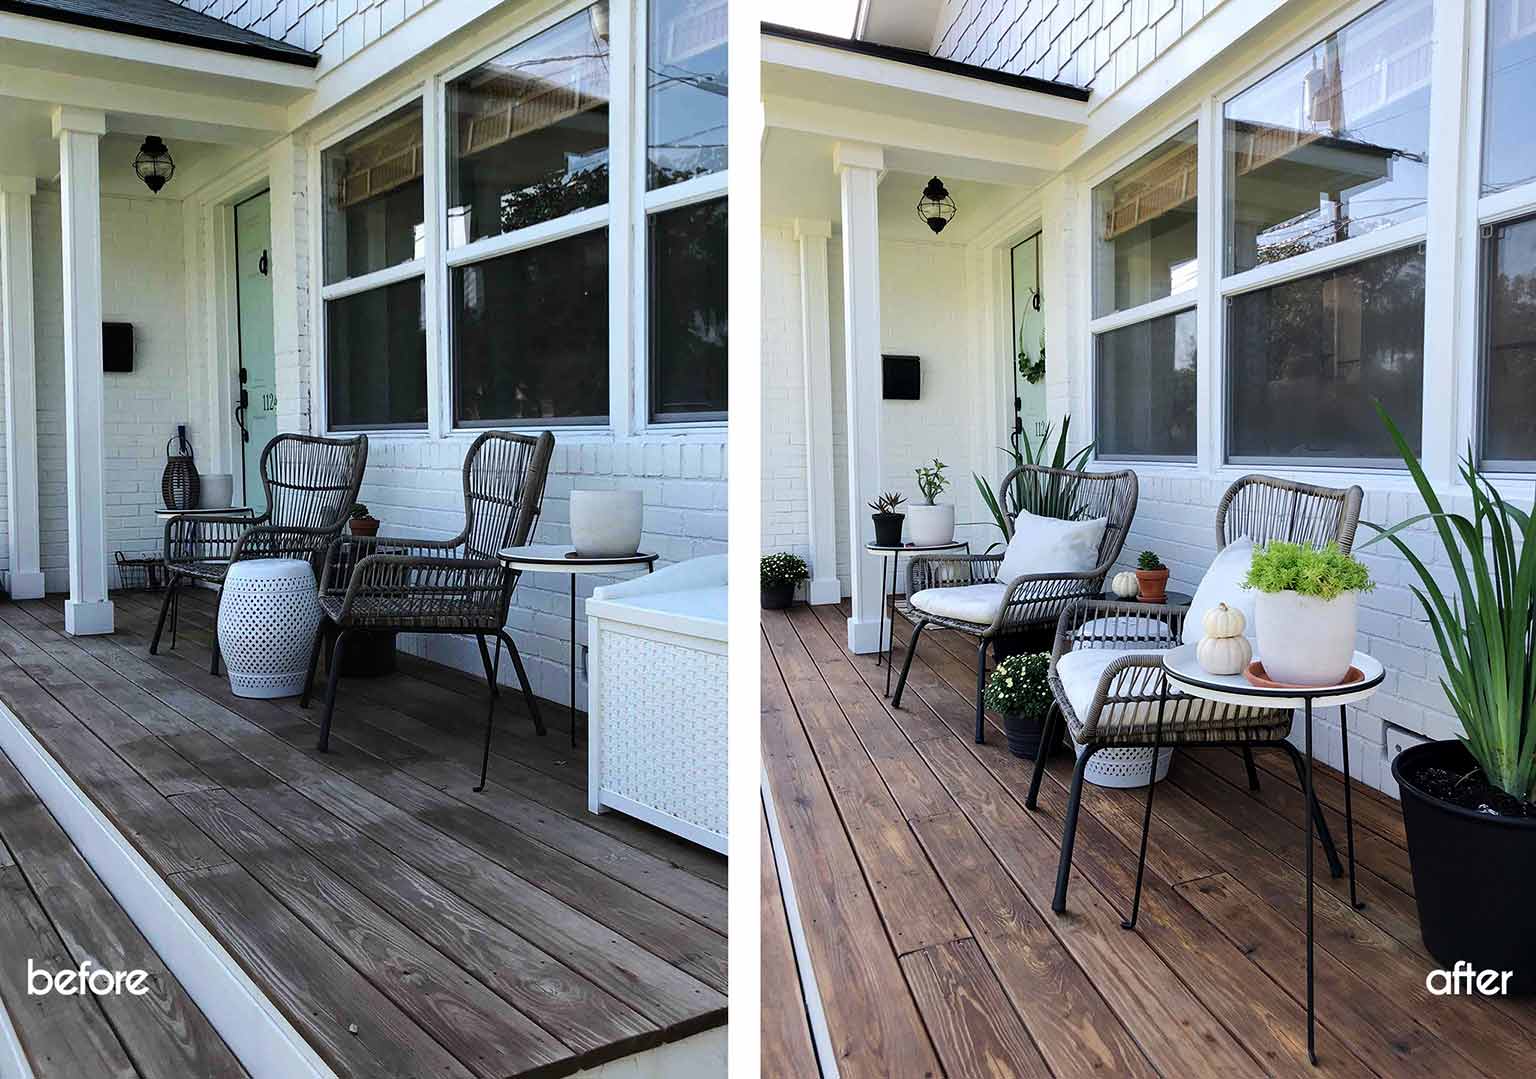
This is how our porch started off at the beginning of the week:
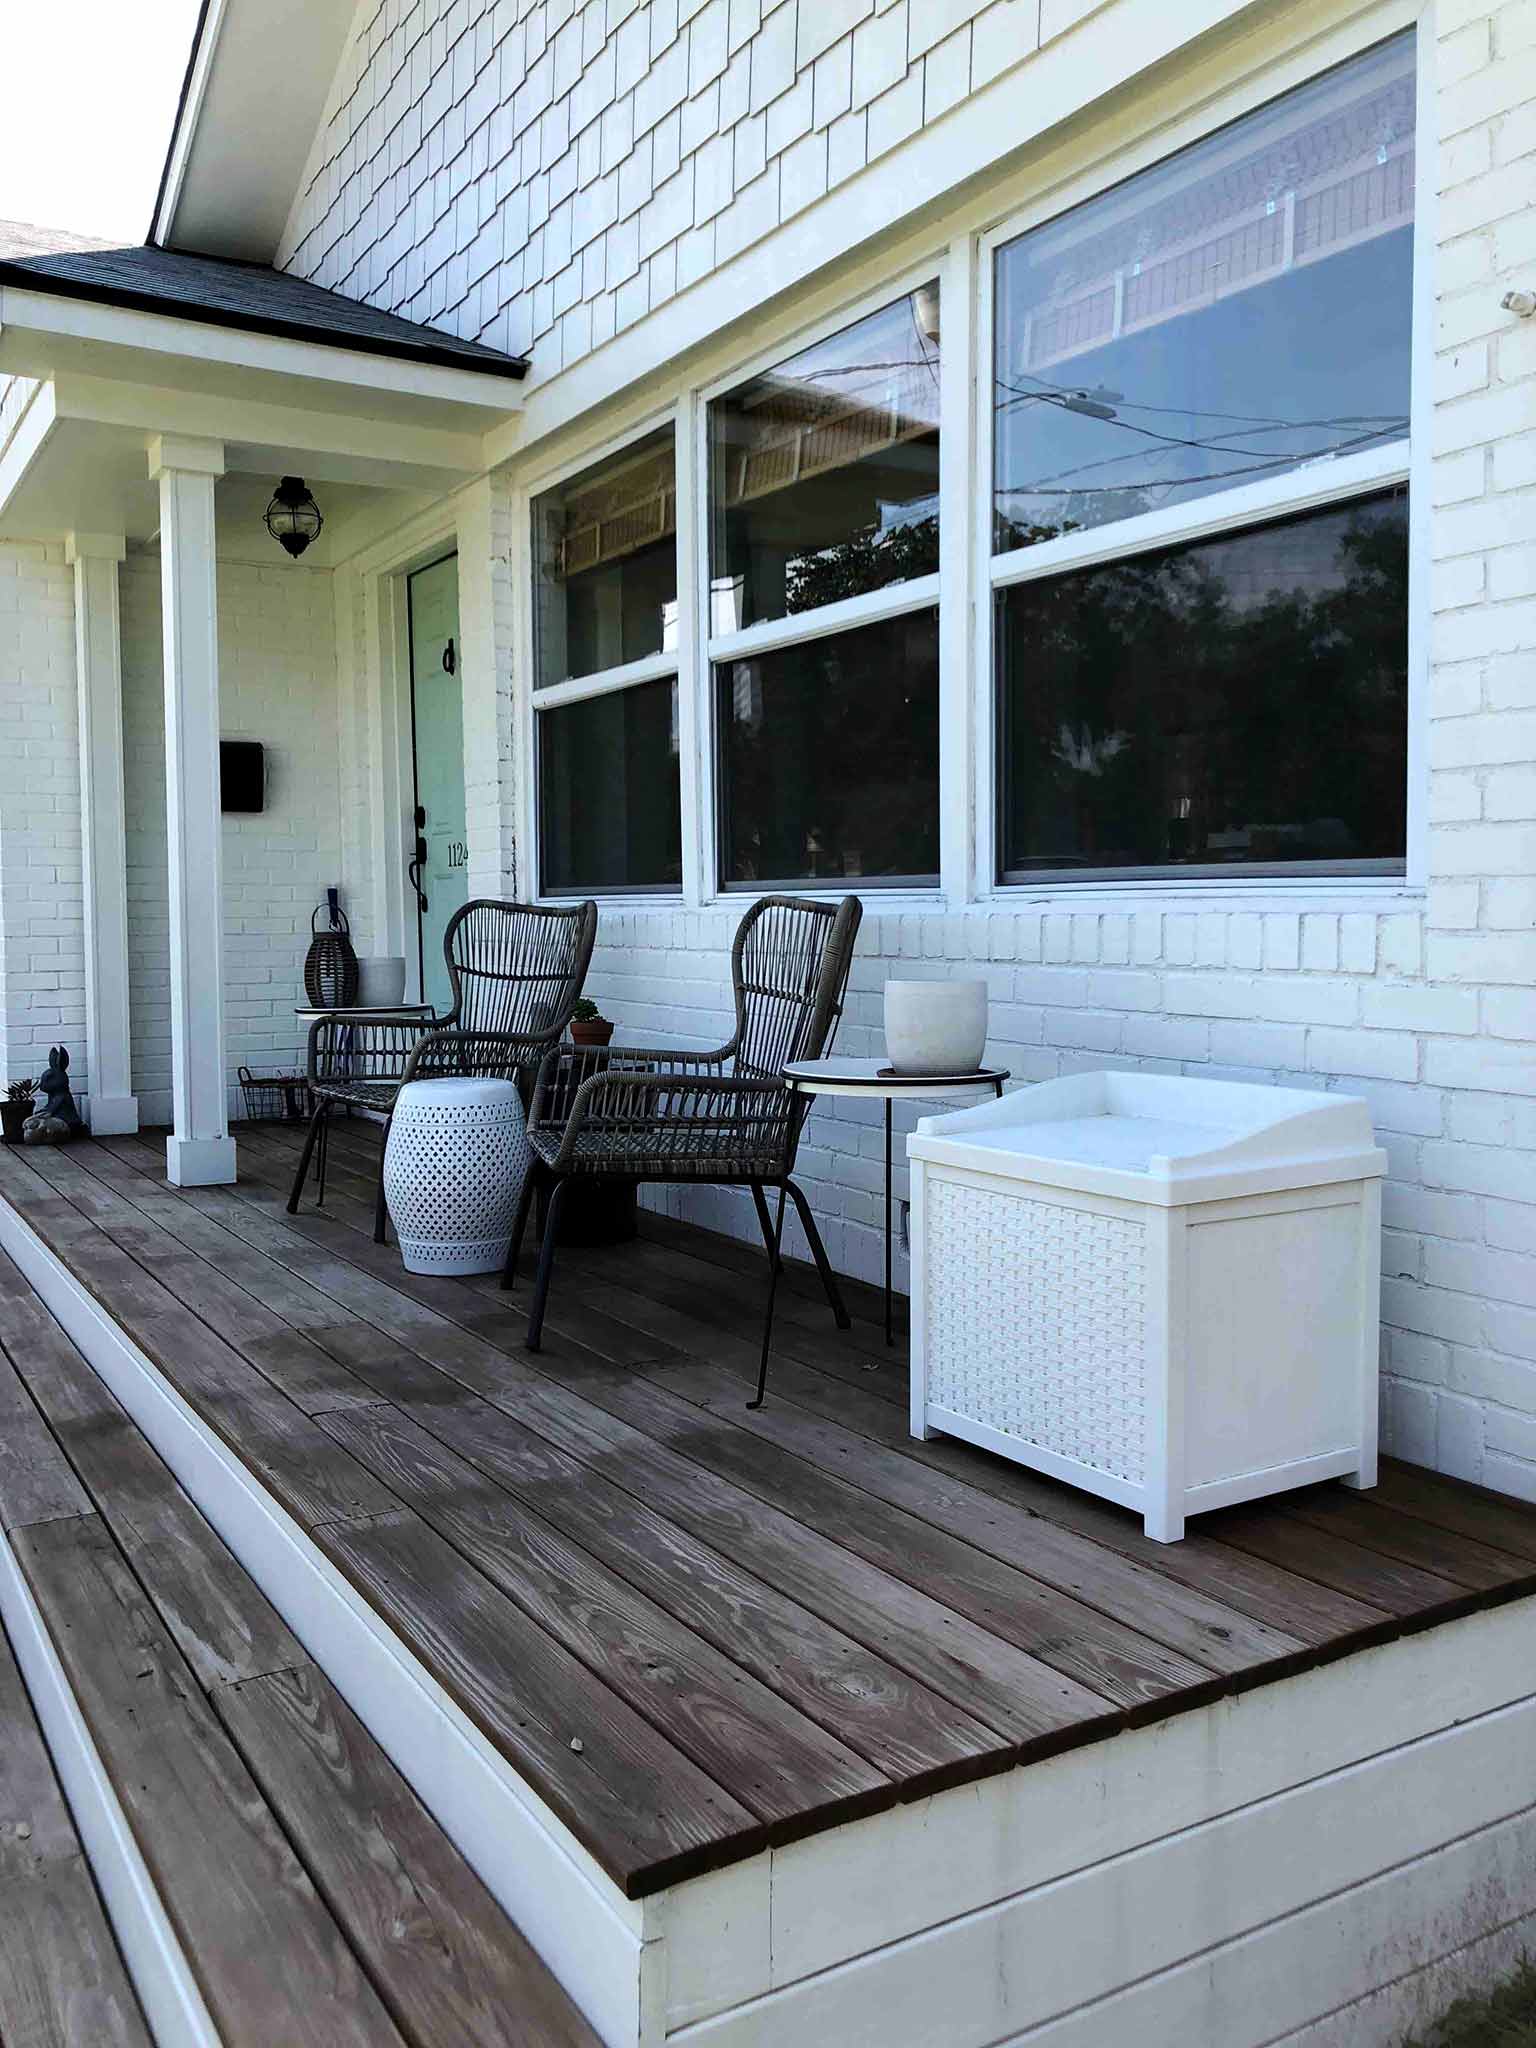
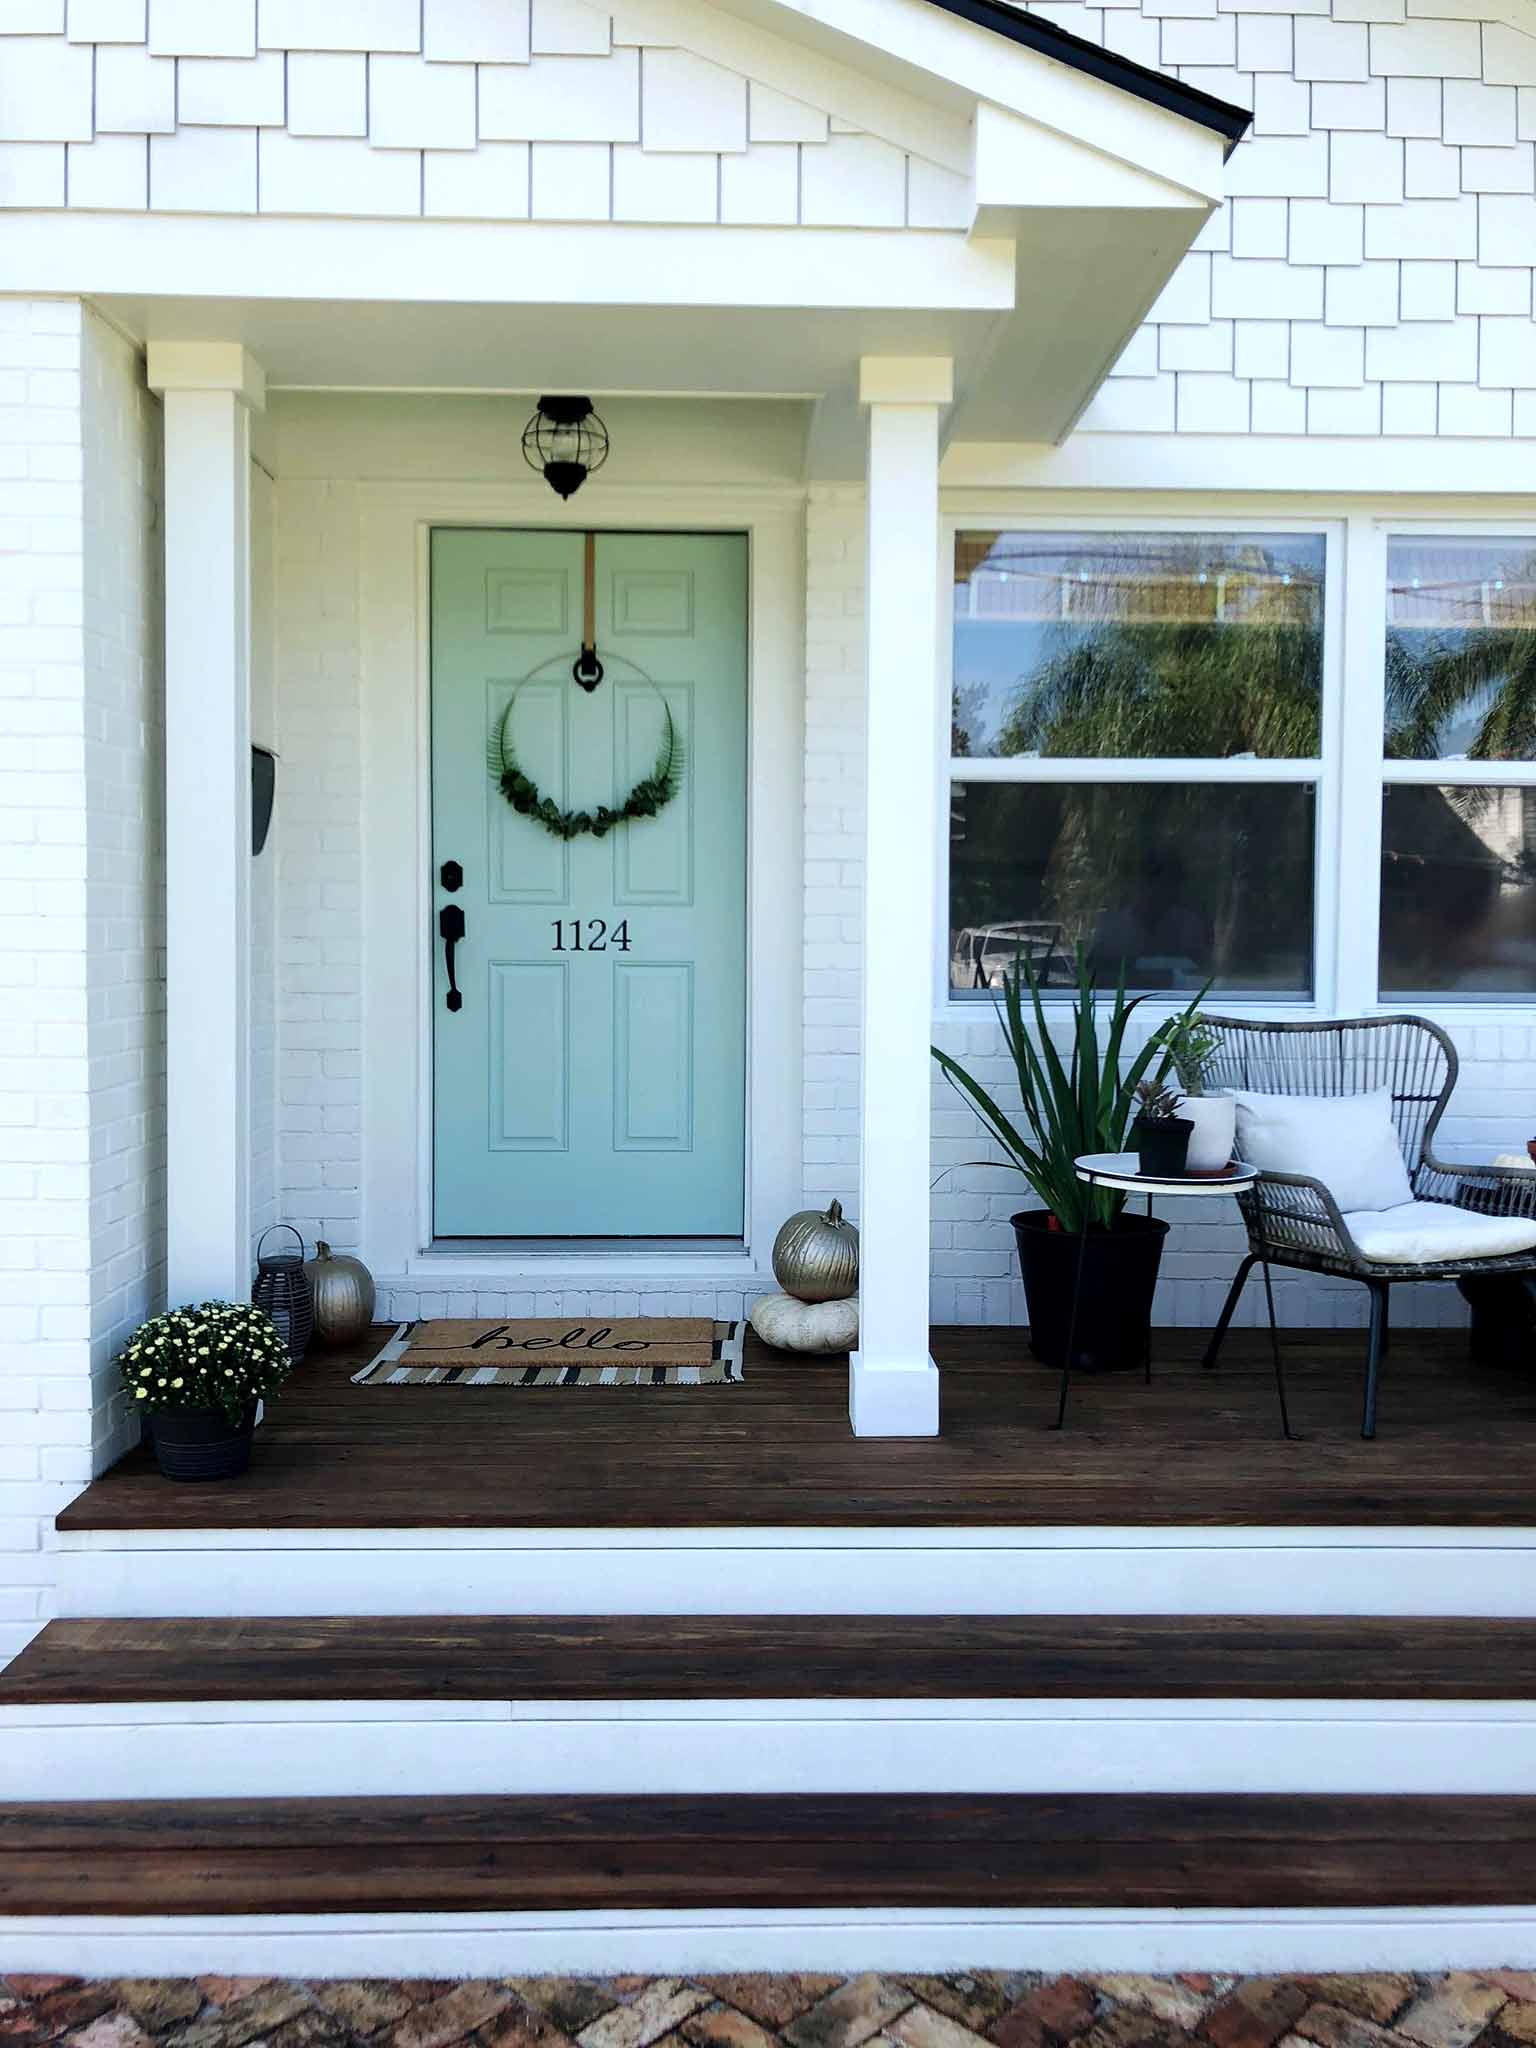
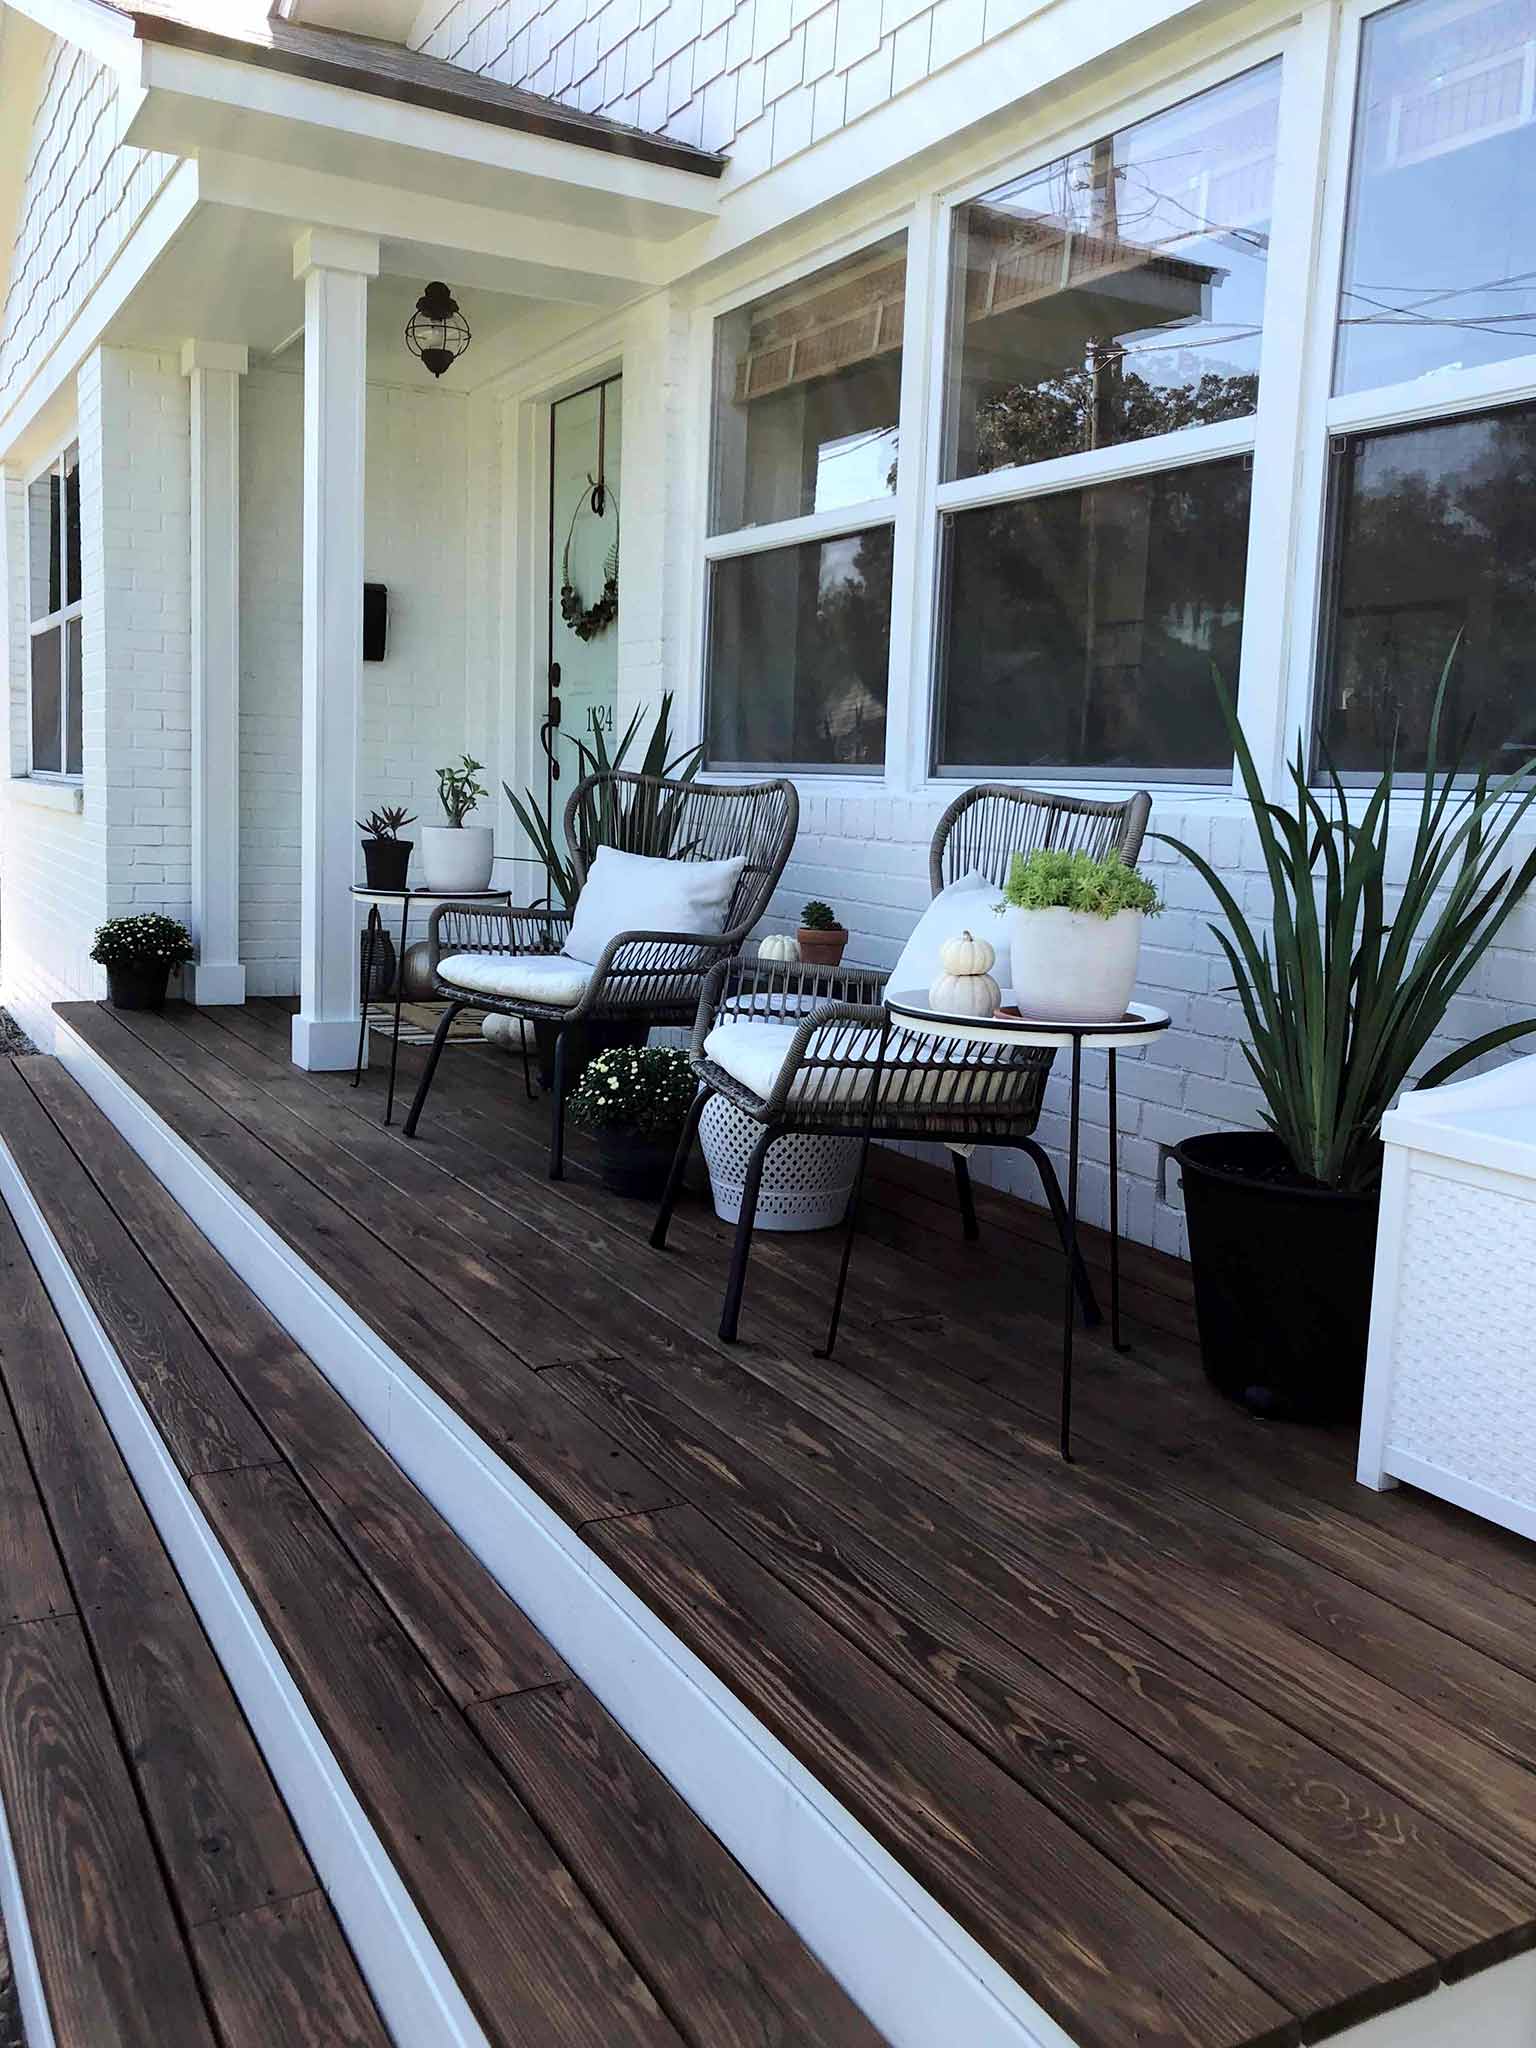
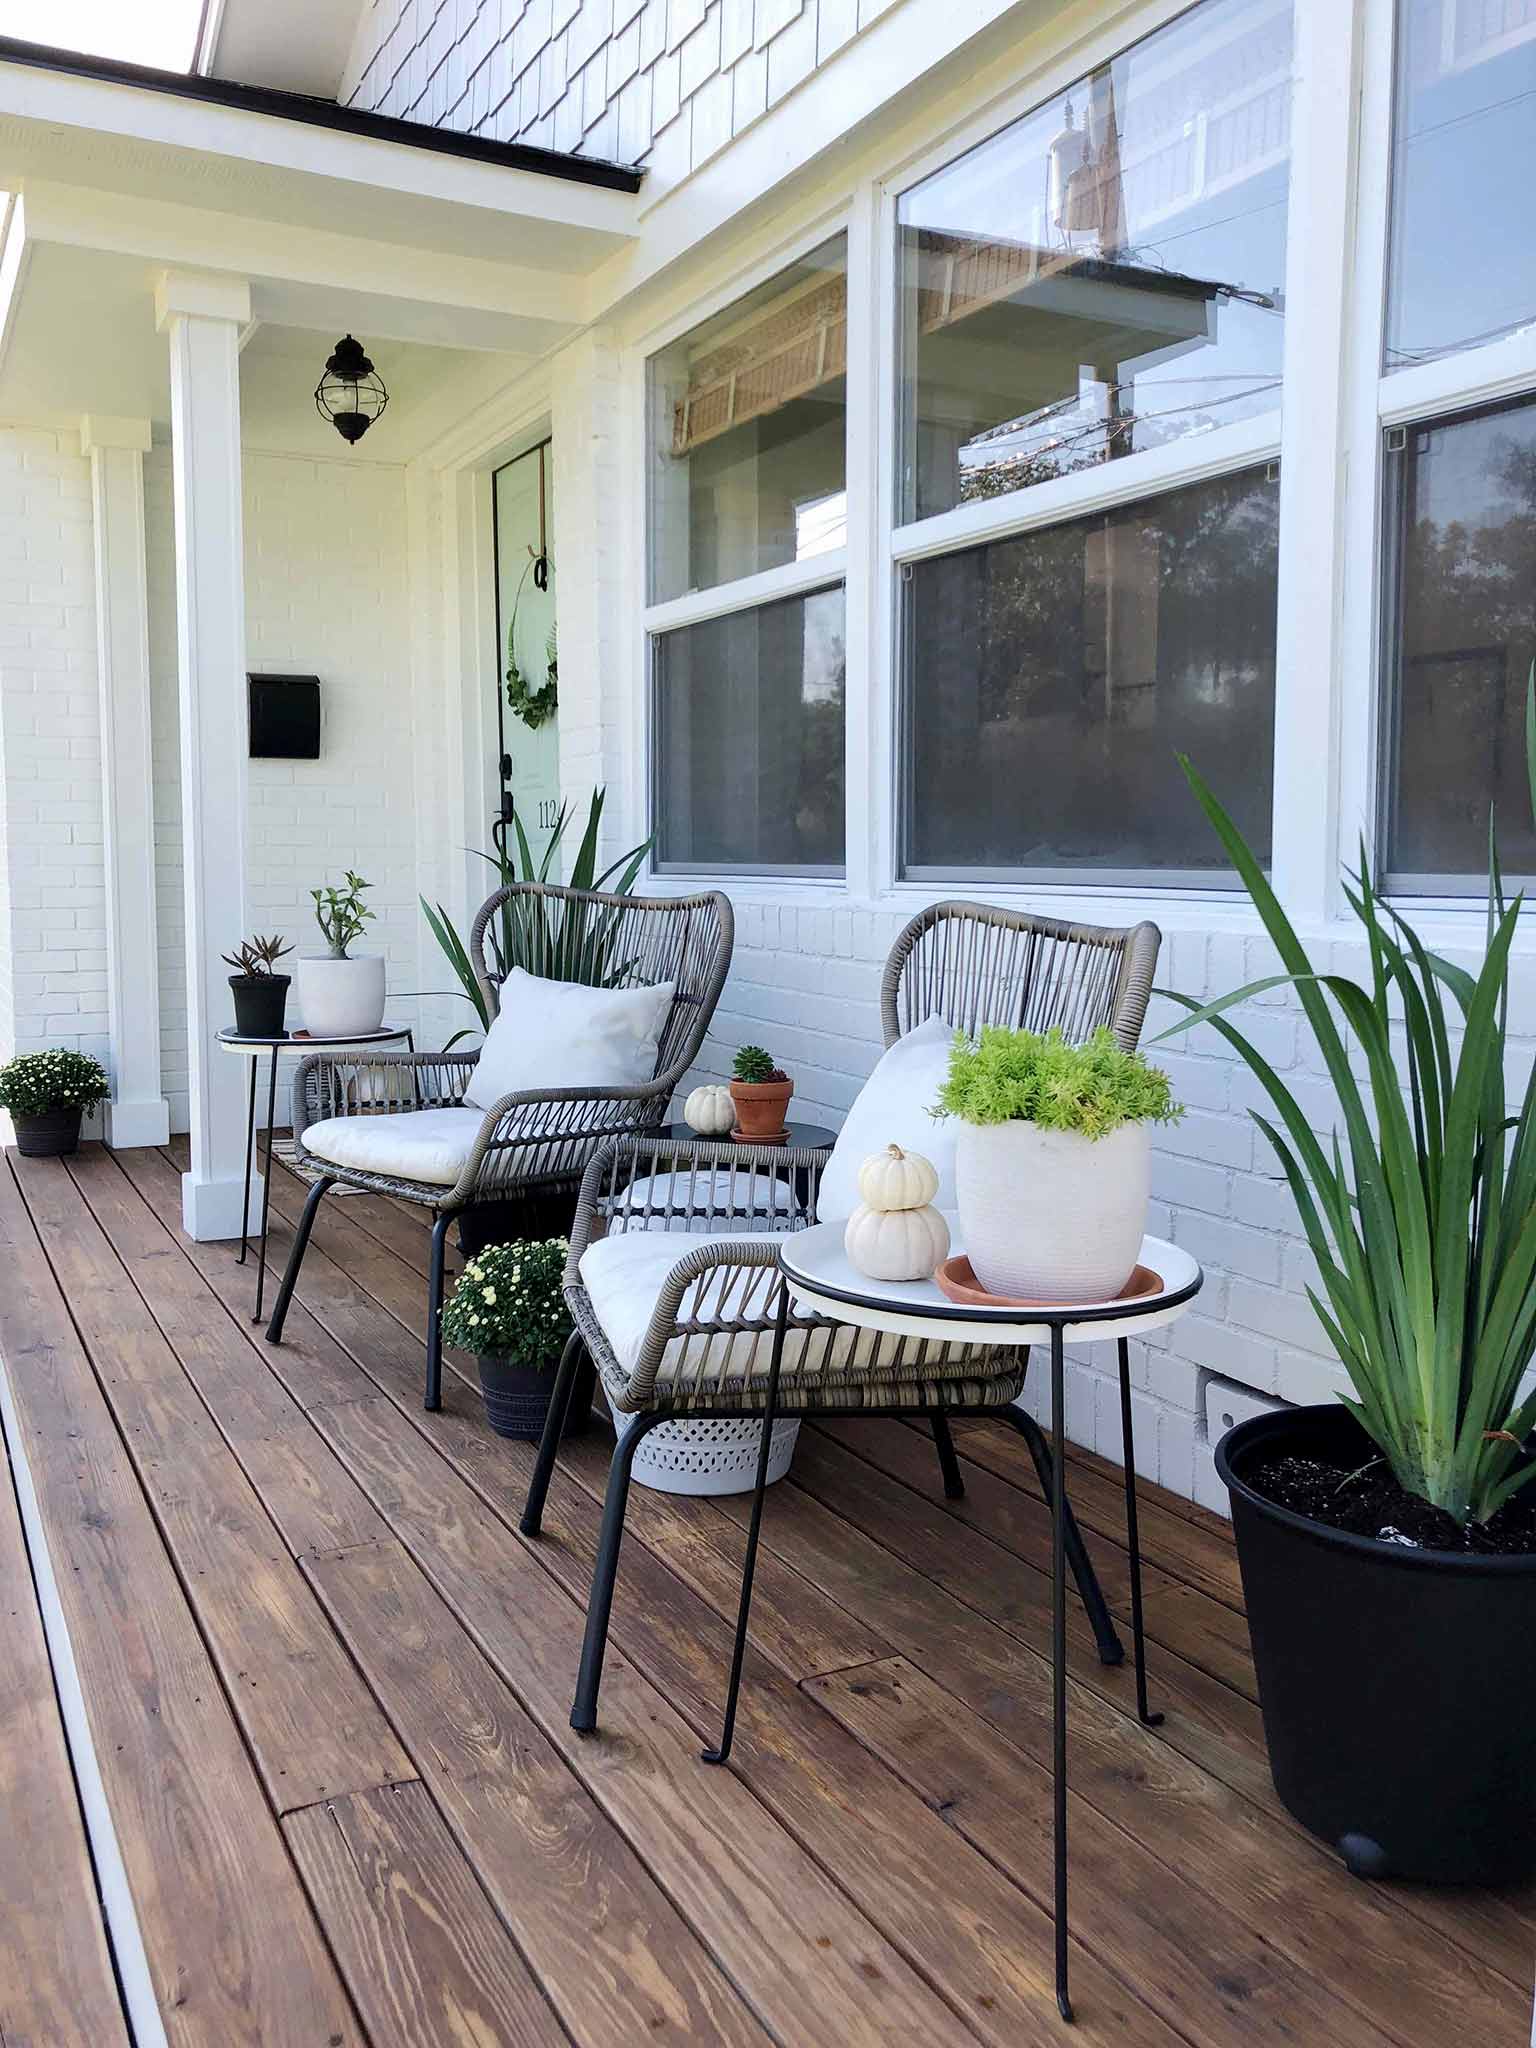
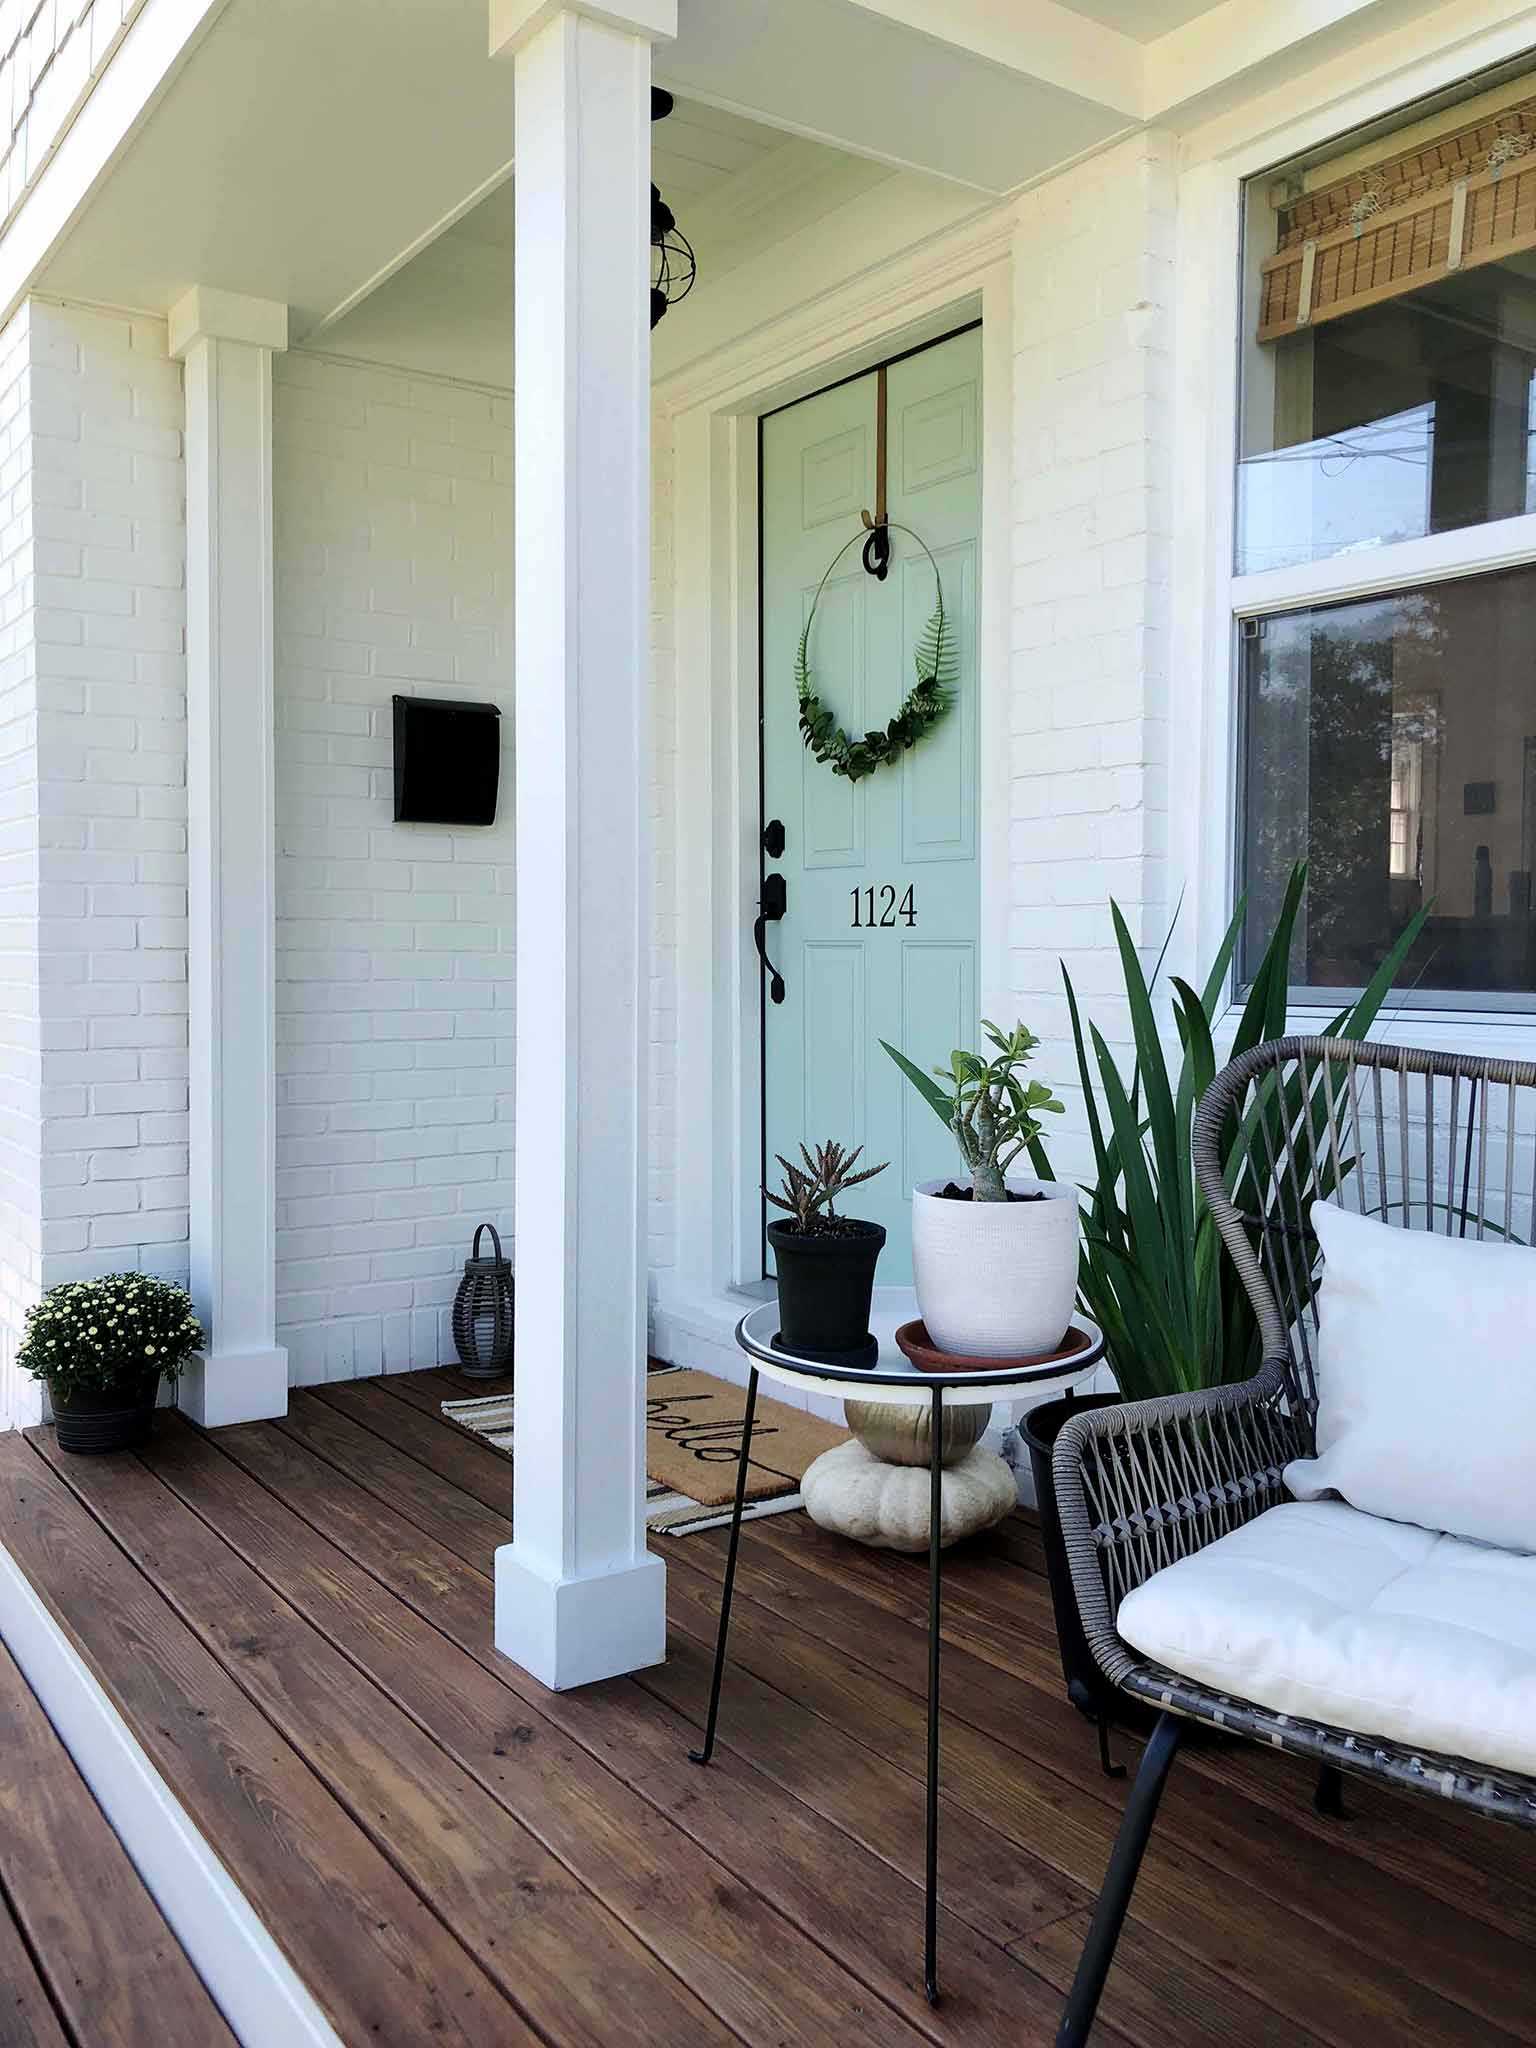
And here's how it looks now!
So, what exactly did we get done during the two days?
REFINISHING THE DECK
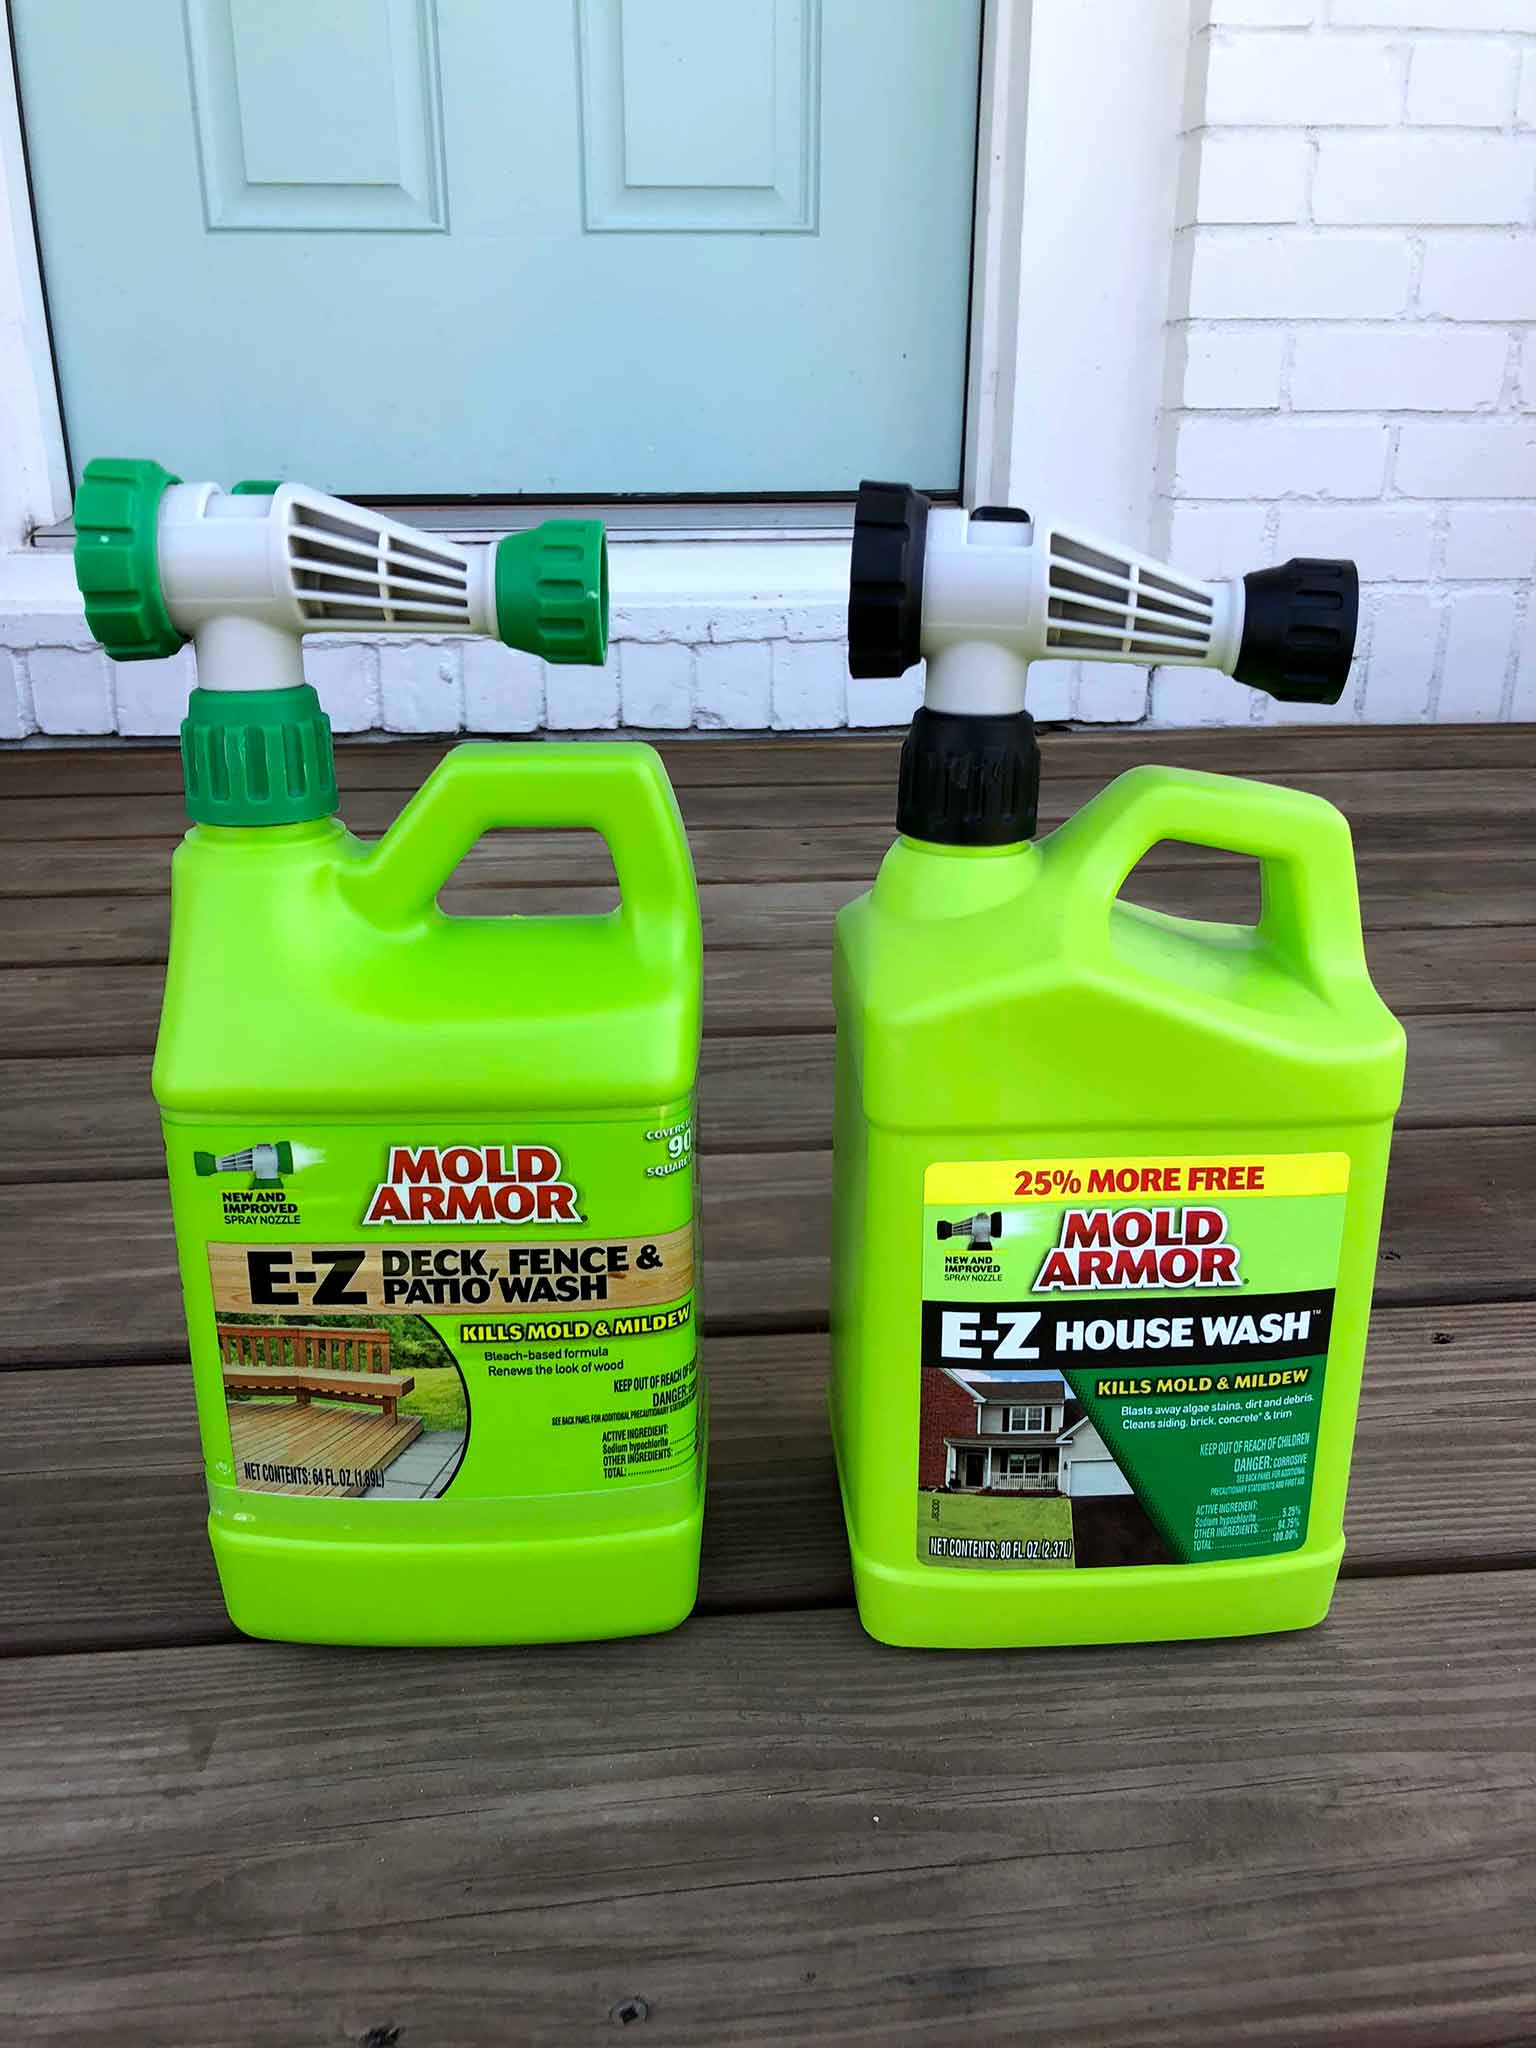
First off, we had to clean the entire porch, followed by sanding and re-staining the deck. This was a surprisingly quick and simple process—it probably took us about three hours total. We used a deck wash and a house wash
to clean everything up, which was such a breeze as it simply attached to our garden hose.
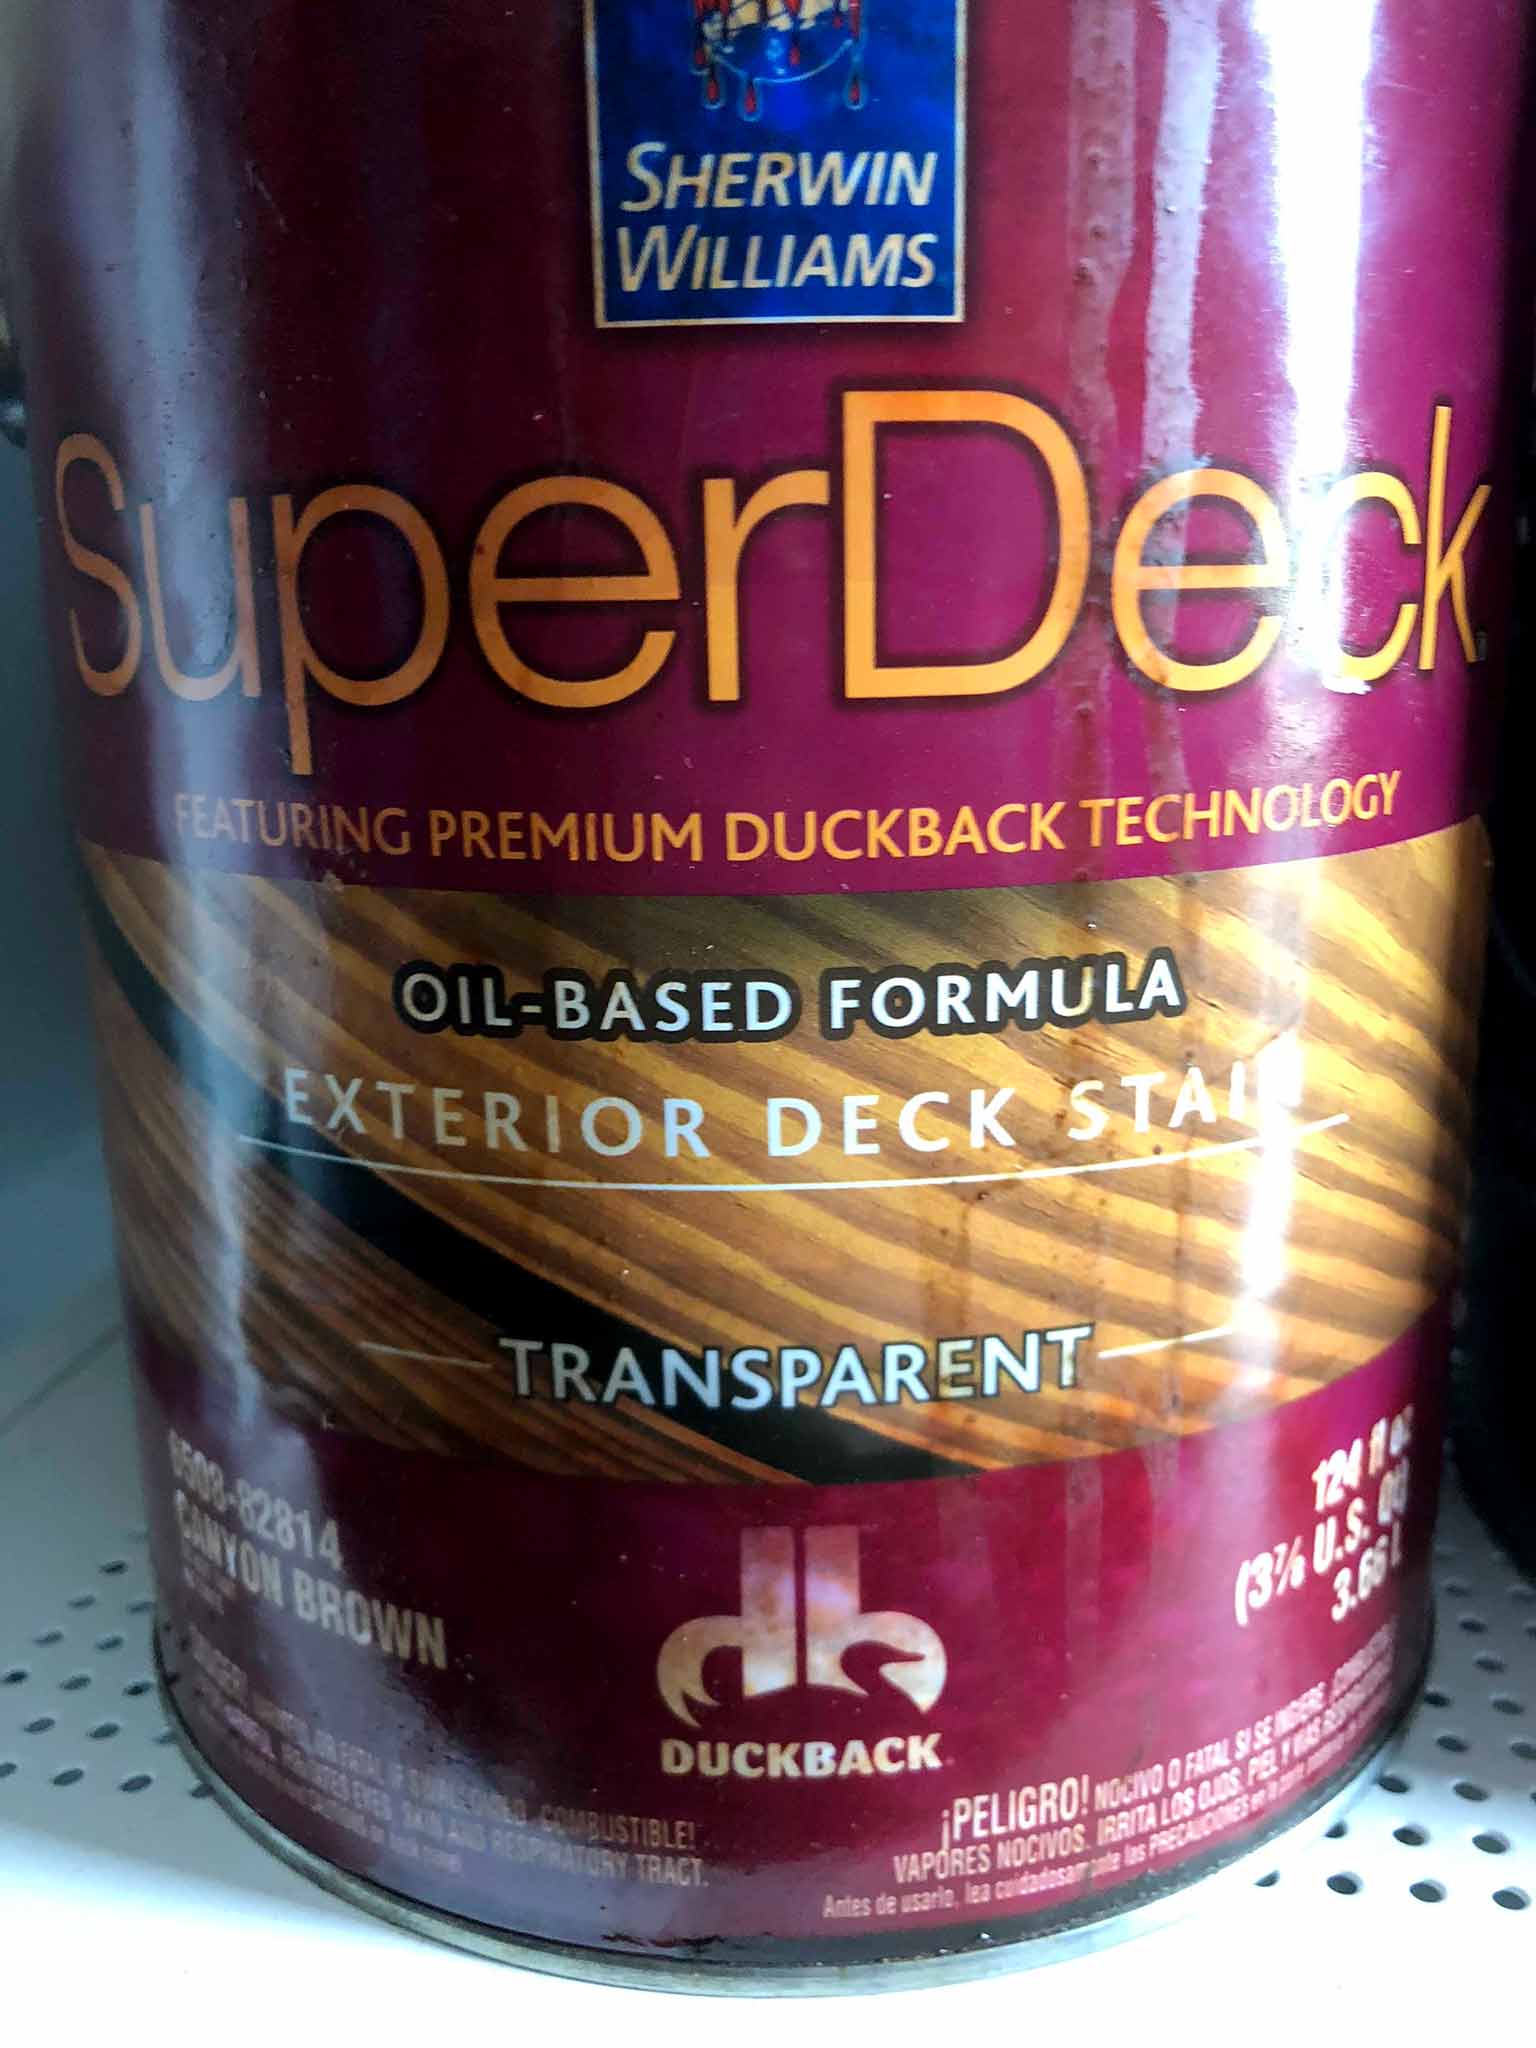
After waiting for the deck to dry out overnight, we used a palm sander to give it a quick once-over—this just makes sure that the wood is prepped and will absorb the stain evenly. Finally we stained the whole area with Superdeck transparent deck stain in Canyon Brown
—it’s a transparent penetrating stain and is very easy to apply if you prepare the surface properly beforehand.
We had a bit of a scare with an unexpected downpour straight after applying the stain, but thankfully it doesn't show!
PLANT LIFE
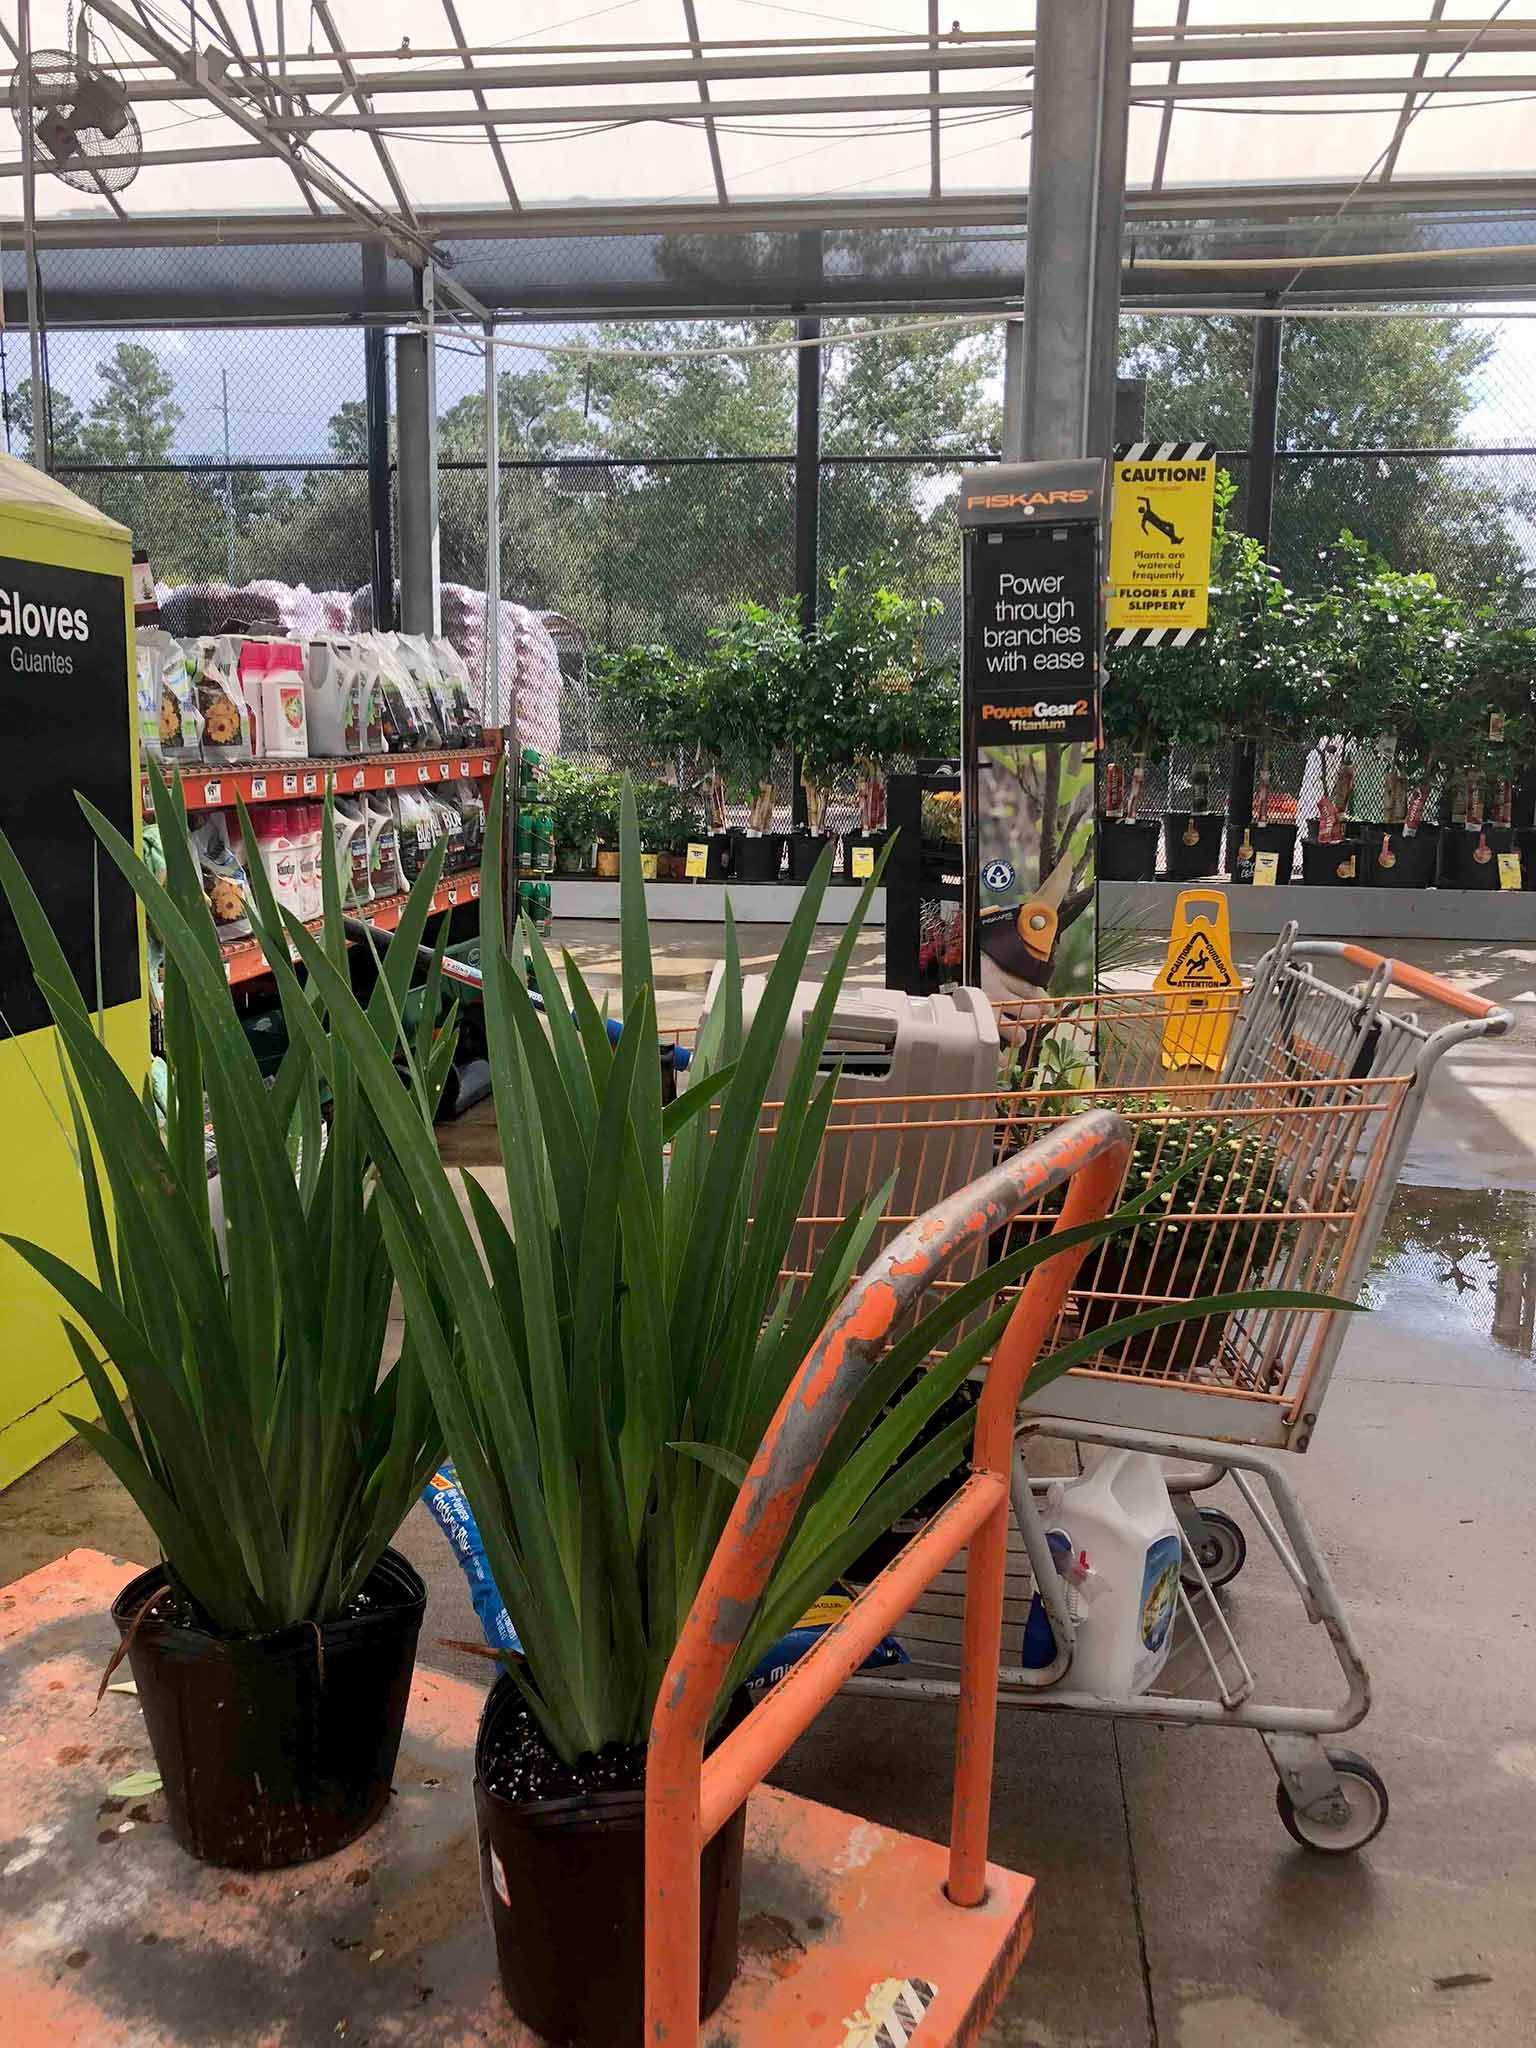
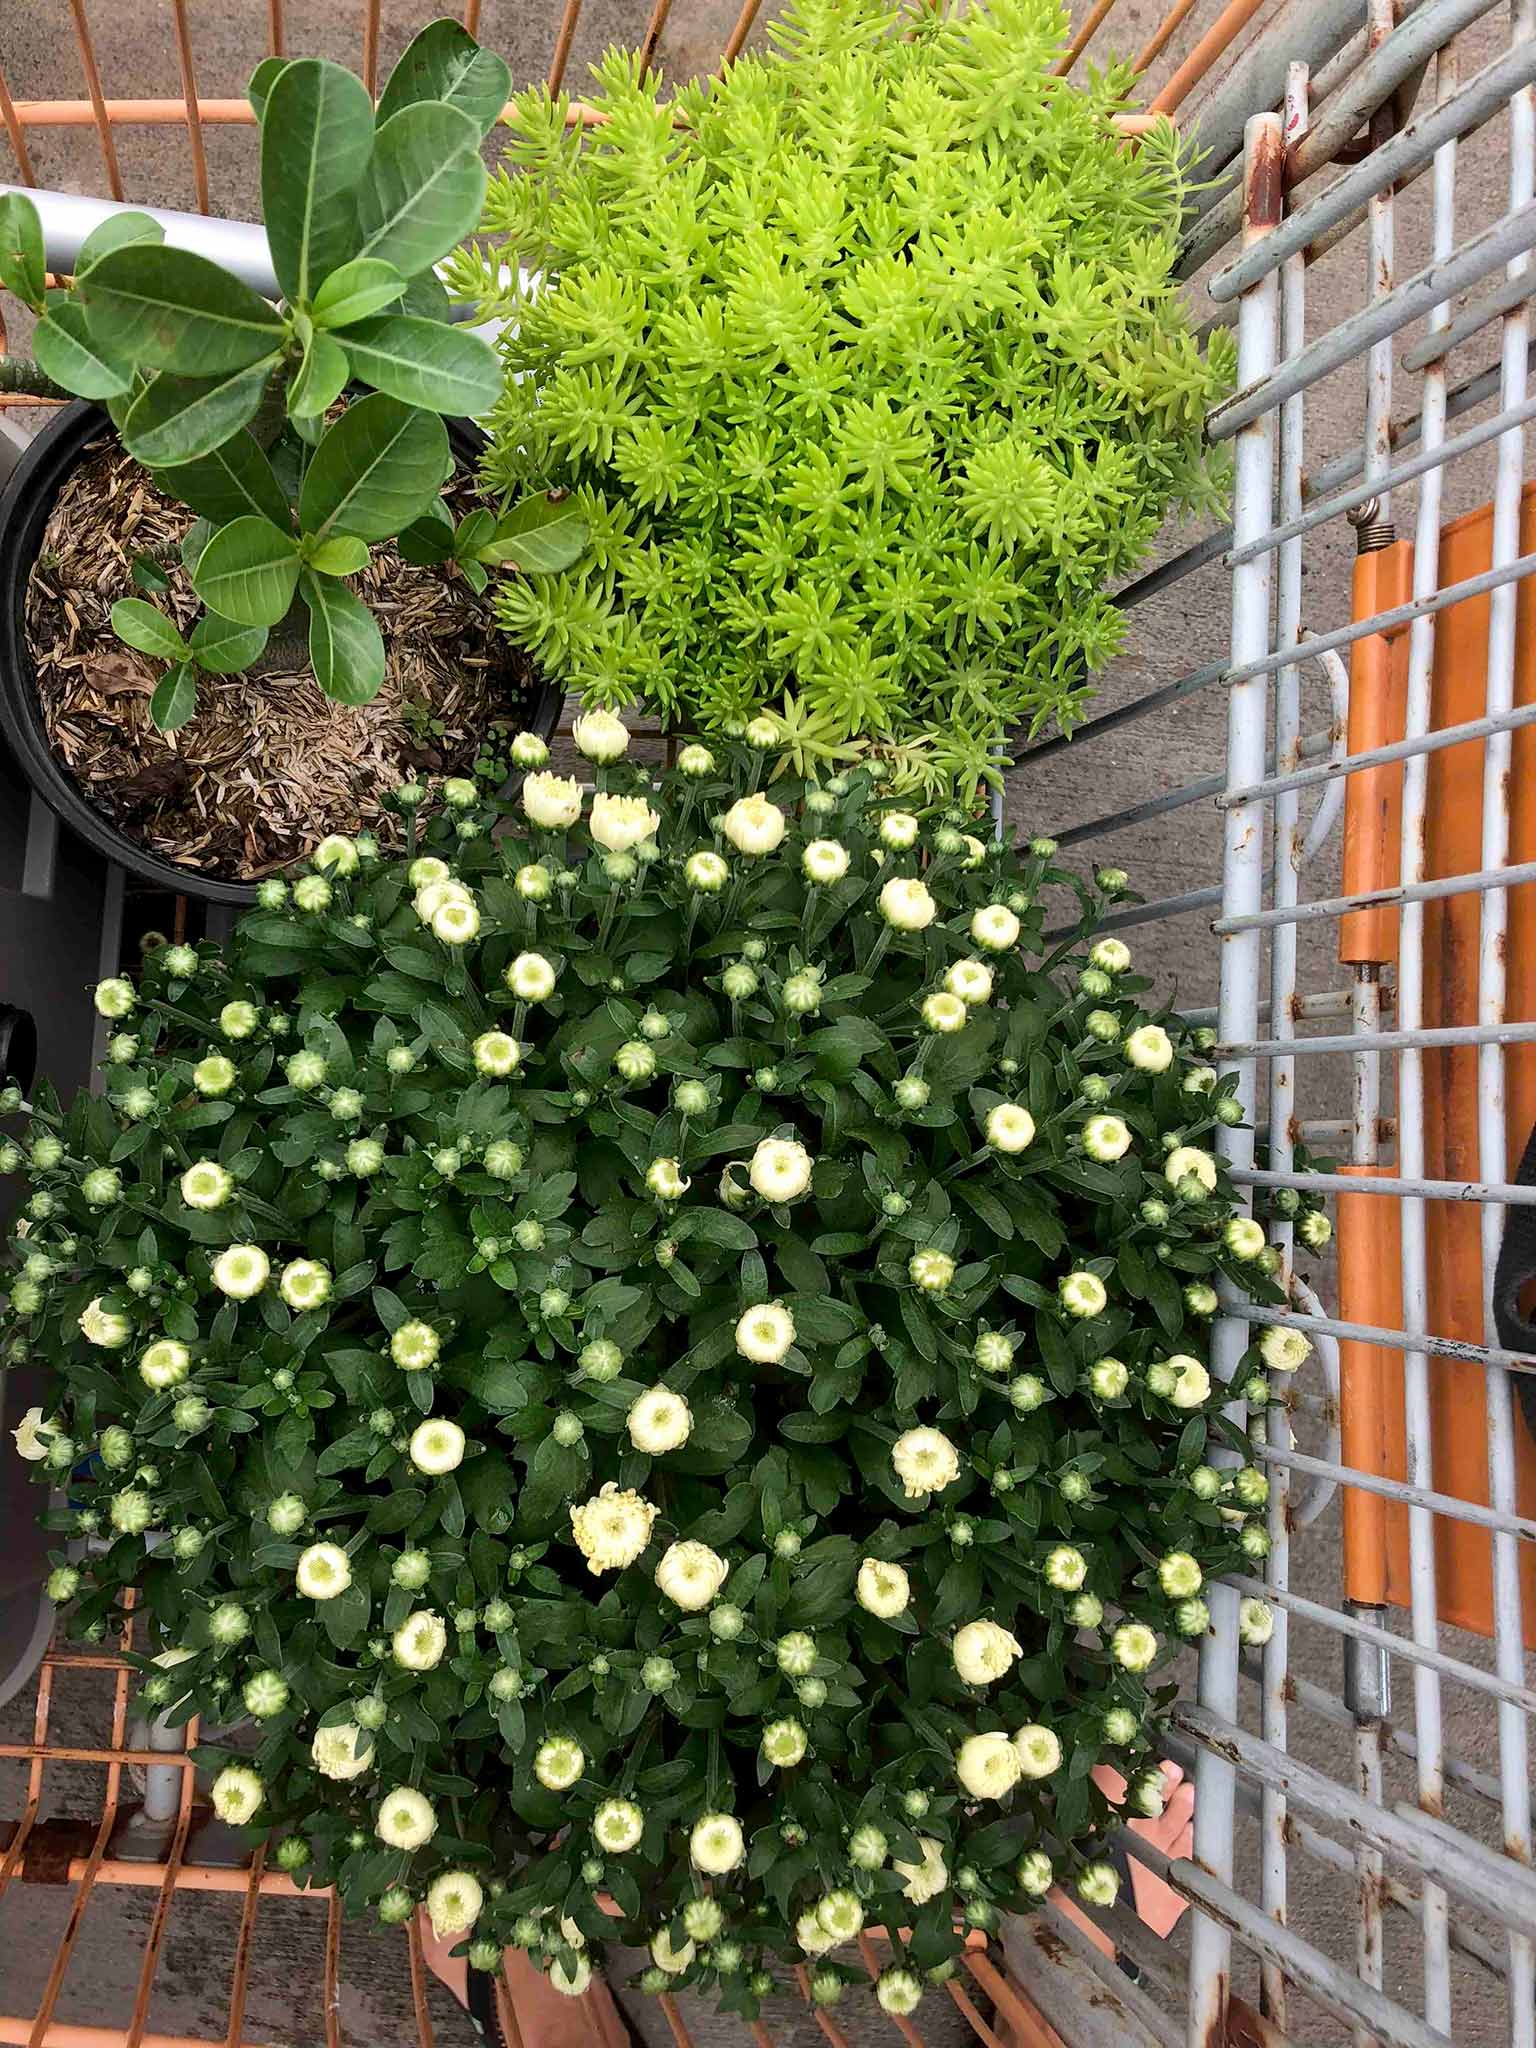
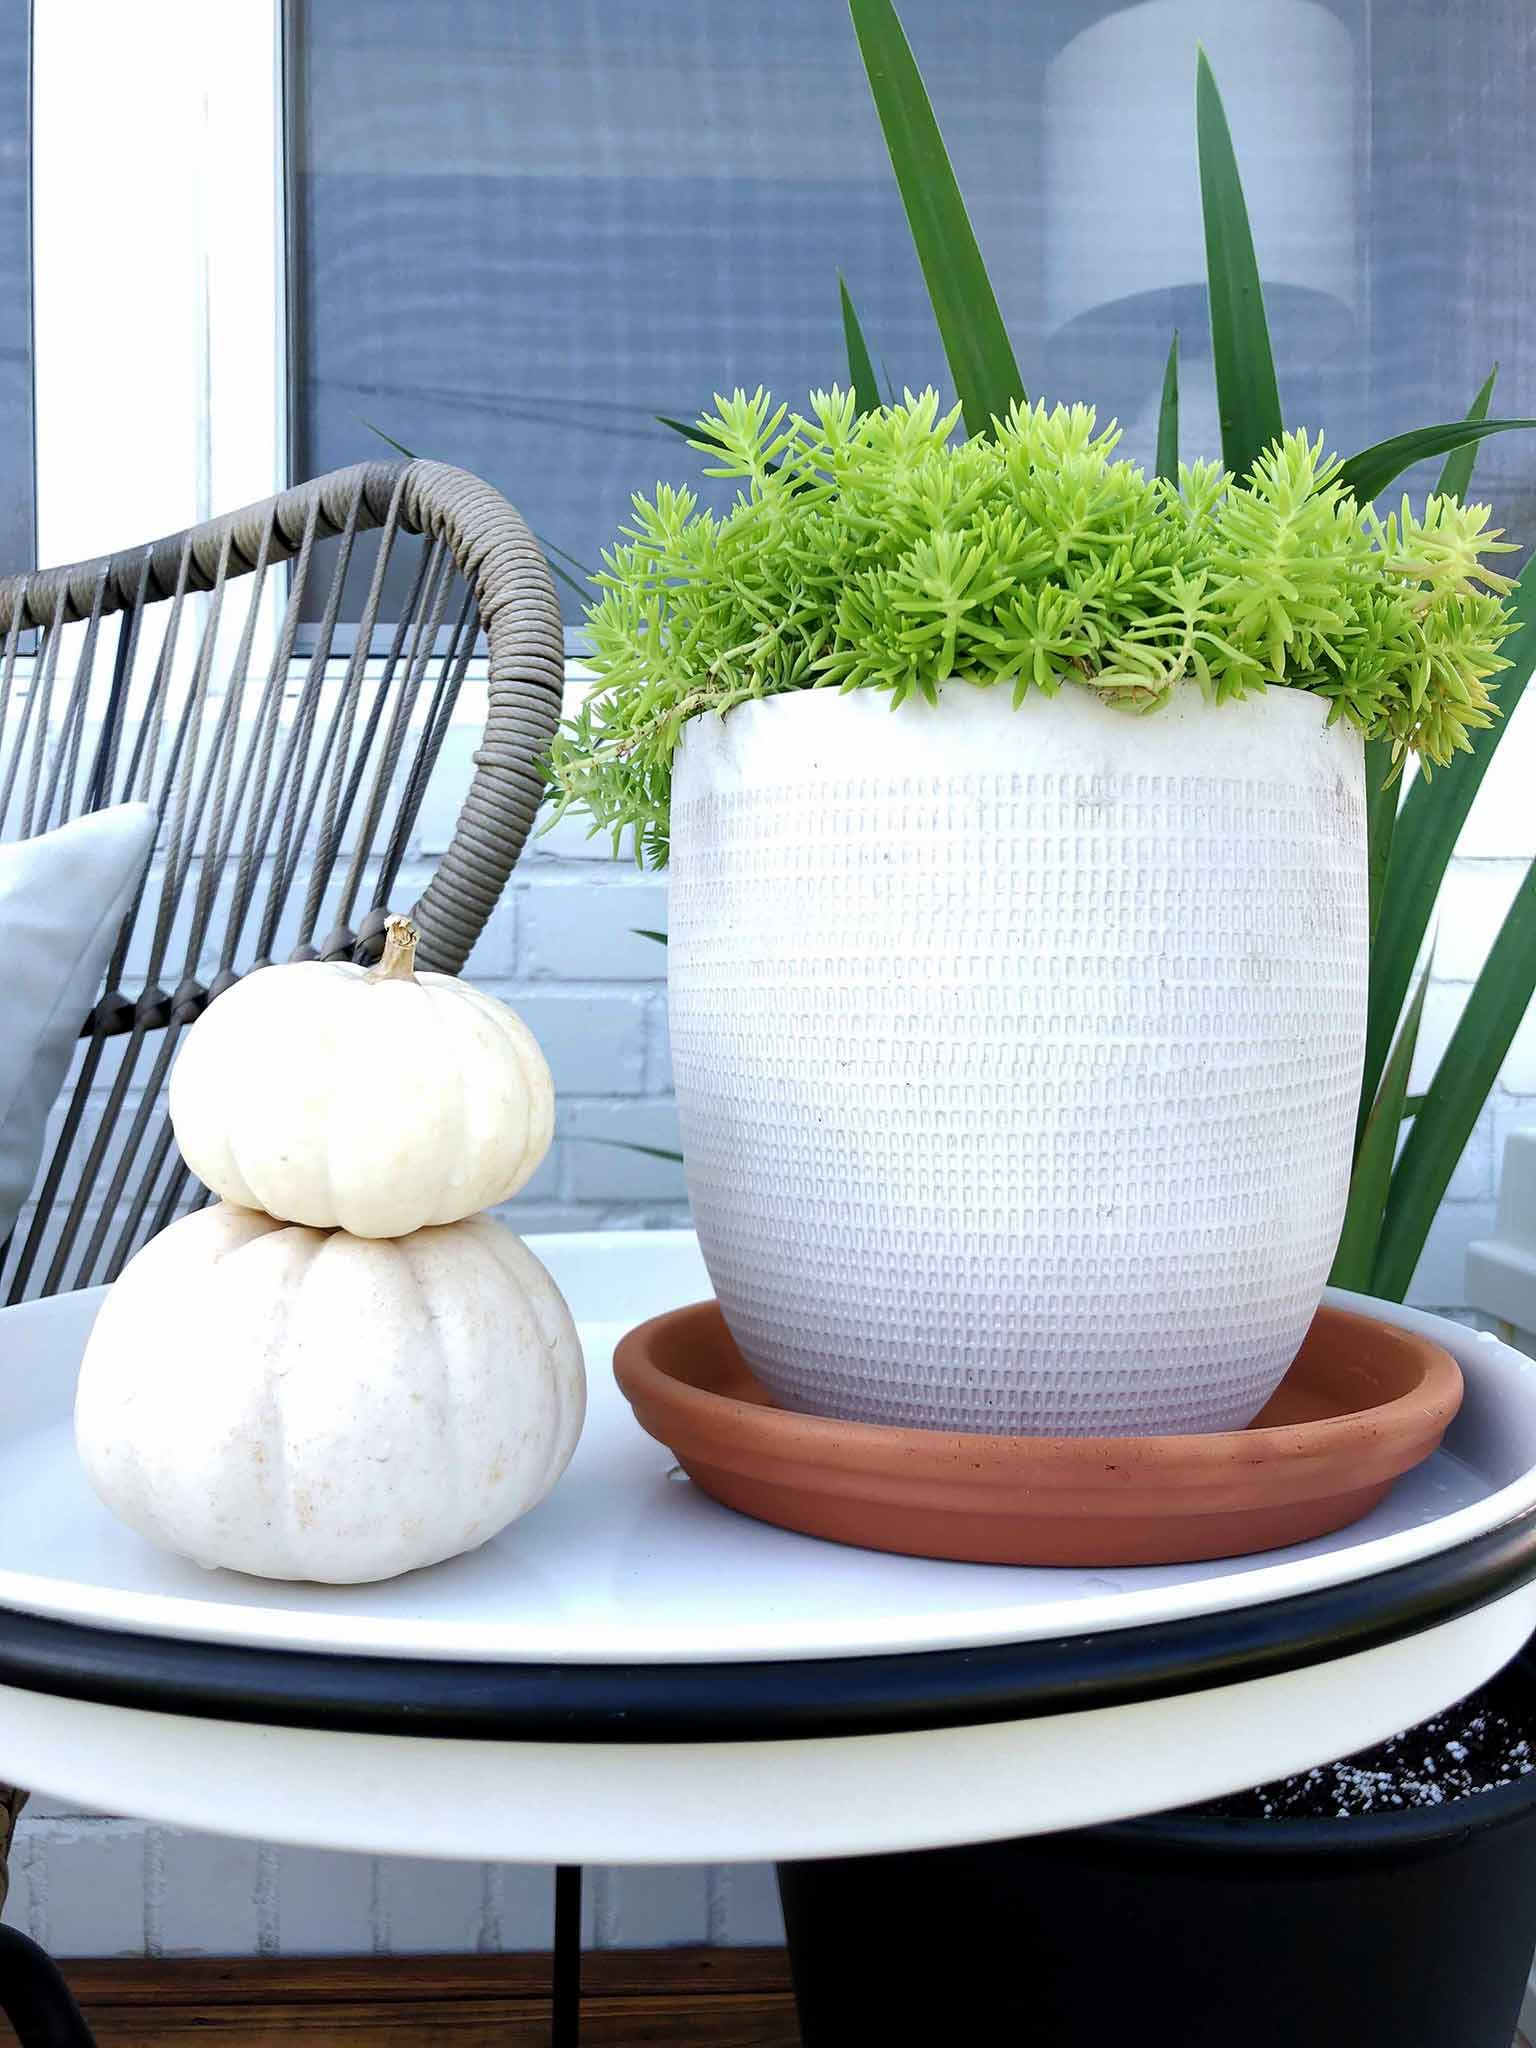
With the deck newly refinished, I turned my attention to plants. We had a pretty pathetic looking collection of empty pots after I left our ZZ plants to die out in the frost, so we were starting with a blank canvas. I knew I wanted a couple of bigger planters for height and scale, and some smaller tabletop plants, as well as those all important fall mums!
After a few hours of deliberating in Lowes and Home Depot, we ended up purchasing two Iris plants for the big planters, some succulents for the smaller pots, and some simple white mums.


FALL DECOR
This was of course the most fun part! I raided my local Trader Joes for a selection of pumpkins, and spray painted a couple of the orange ones with Rust-Oleum spray paint in Champagne Mist. Let me tell you, this spray paint is no ordinary shade of gold. It is just so subtle and beautiful, and I love how it blends with all the neutral tones in the rest of the decor.

We haven't had a doormat since we moved into this home. It’s just one of those things that I didn't get around to buying, and then I got used to not having one. I’ve always loved the layered rug look, so I sprayed an indoor jute rug that we had already with Scotchgard Water and Sun Shield, and layered a cute coir doormat over the top. I absolutely love how this turned out, and it makes me smile every time I approach my front door!

The final finishing touch was making a simple faux greenery wreath for the front door. I'll do a quick tutorial for this next week, but seriously—it was the easiest thing to make. I bought waaaay more greenery than I needed, as I realized halfway through that I was liking the simple look. And I didn't even need any glue!


BUDGET BREAKDOWN
This was a refresh rather than a full blown makeover, so the $200 budget was easy to stick to.
Here’s a breakdown of where our money went:
Deck Wash - $10
House Wash - $10
Palm Sander - used one we already had
Deck Stain - used a leftover can
Plants & Potting Mix - $77.50
Planters - $36
Pumpkins - $16
Gold Spray Paint - $7
Doormat - $10
Scotchgard Spray - $10
DIY Wreath - $14
GRAND TOTAL: $190.50
Other Sources:
Patio Set
Plant Stands (no longer available—similar)
Garden Stool (no longer available—similar)
Accent Table (no longer available—similar)
Ceramic Tabletop Planters
Deck Storage Box


You can check out many more #2days200dollars projects over on Instagram, and be sure to follow Cynthia for tons more inspiration and motivation!