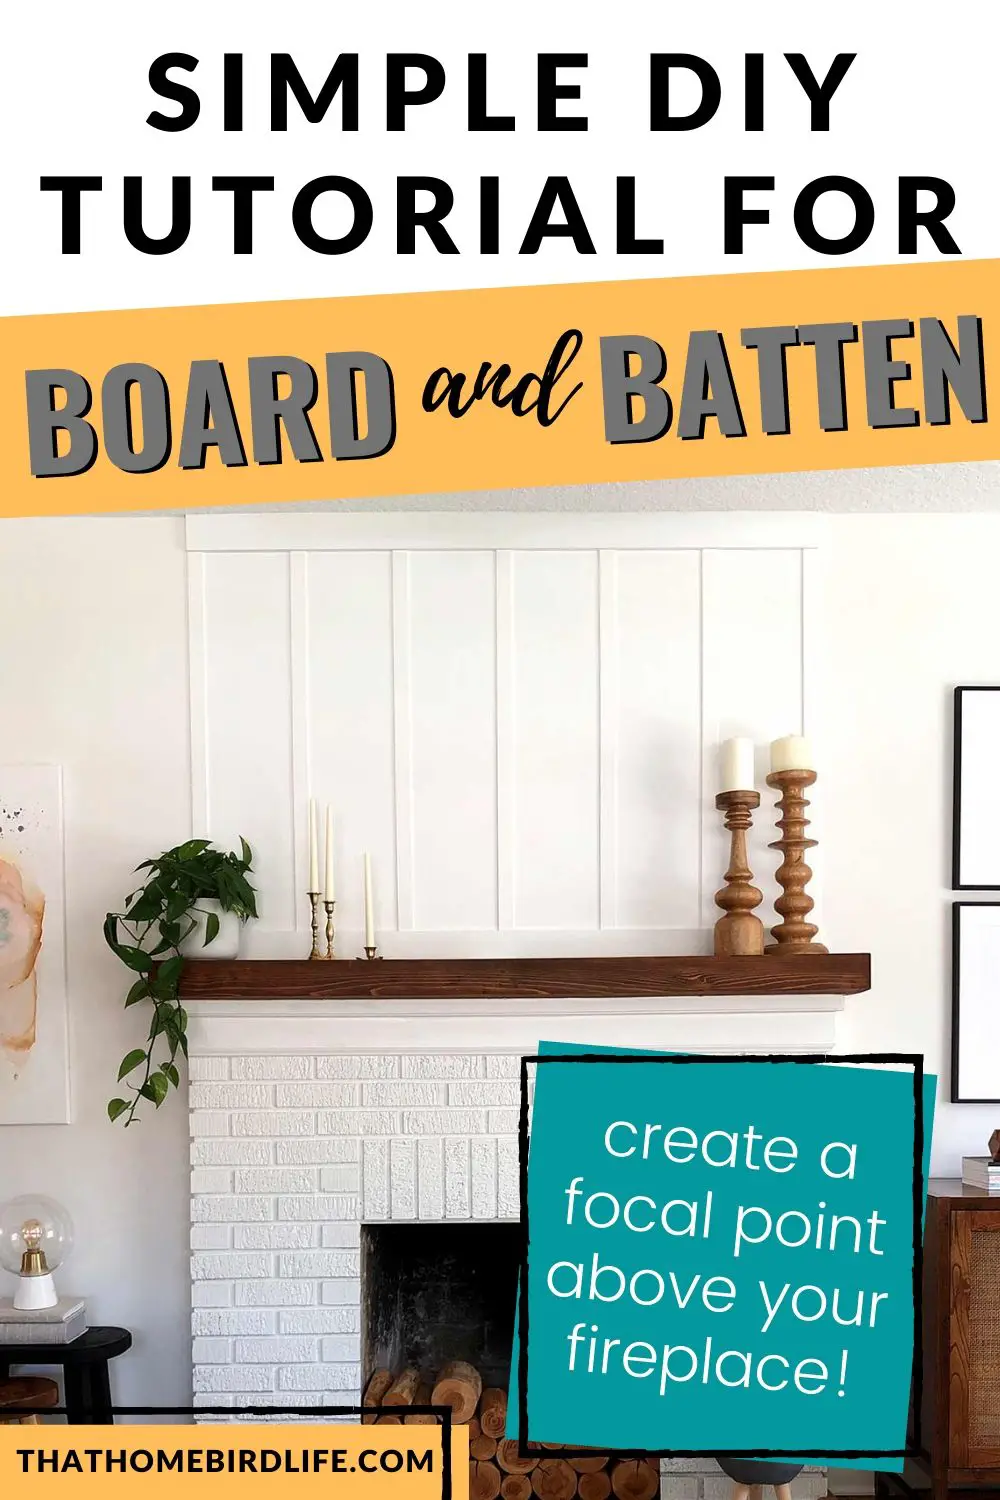
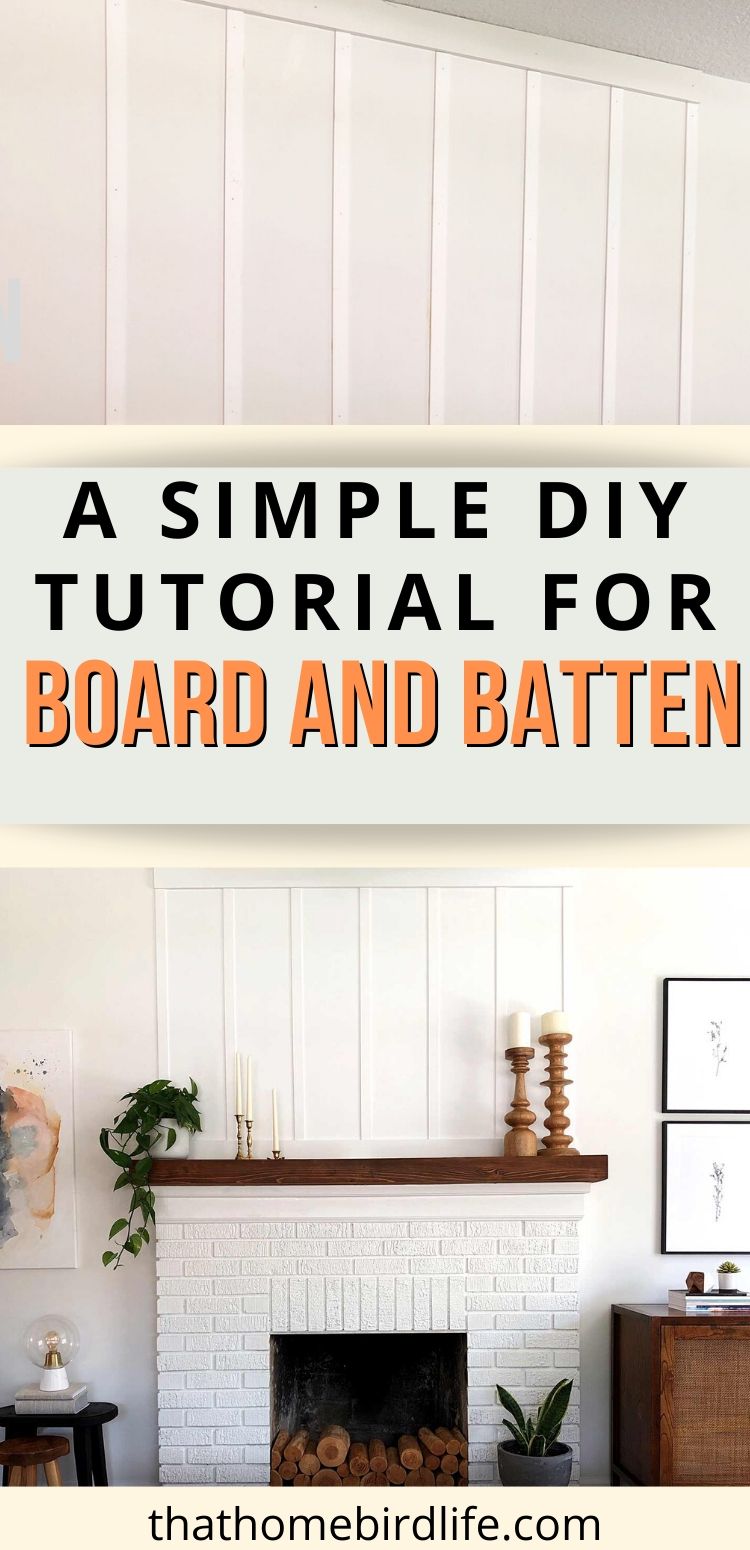
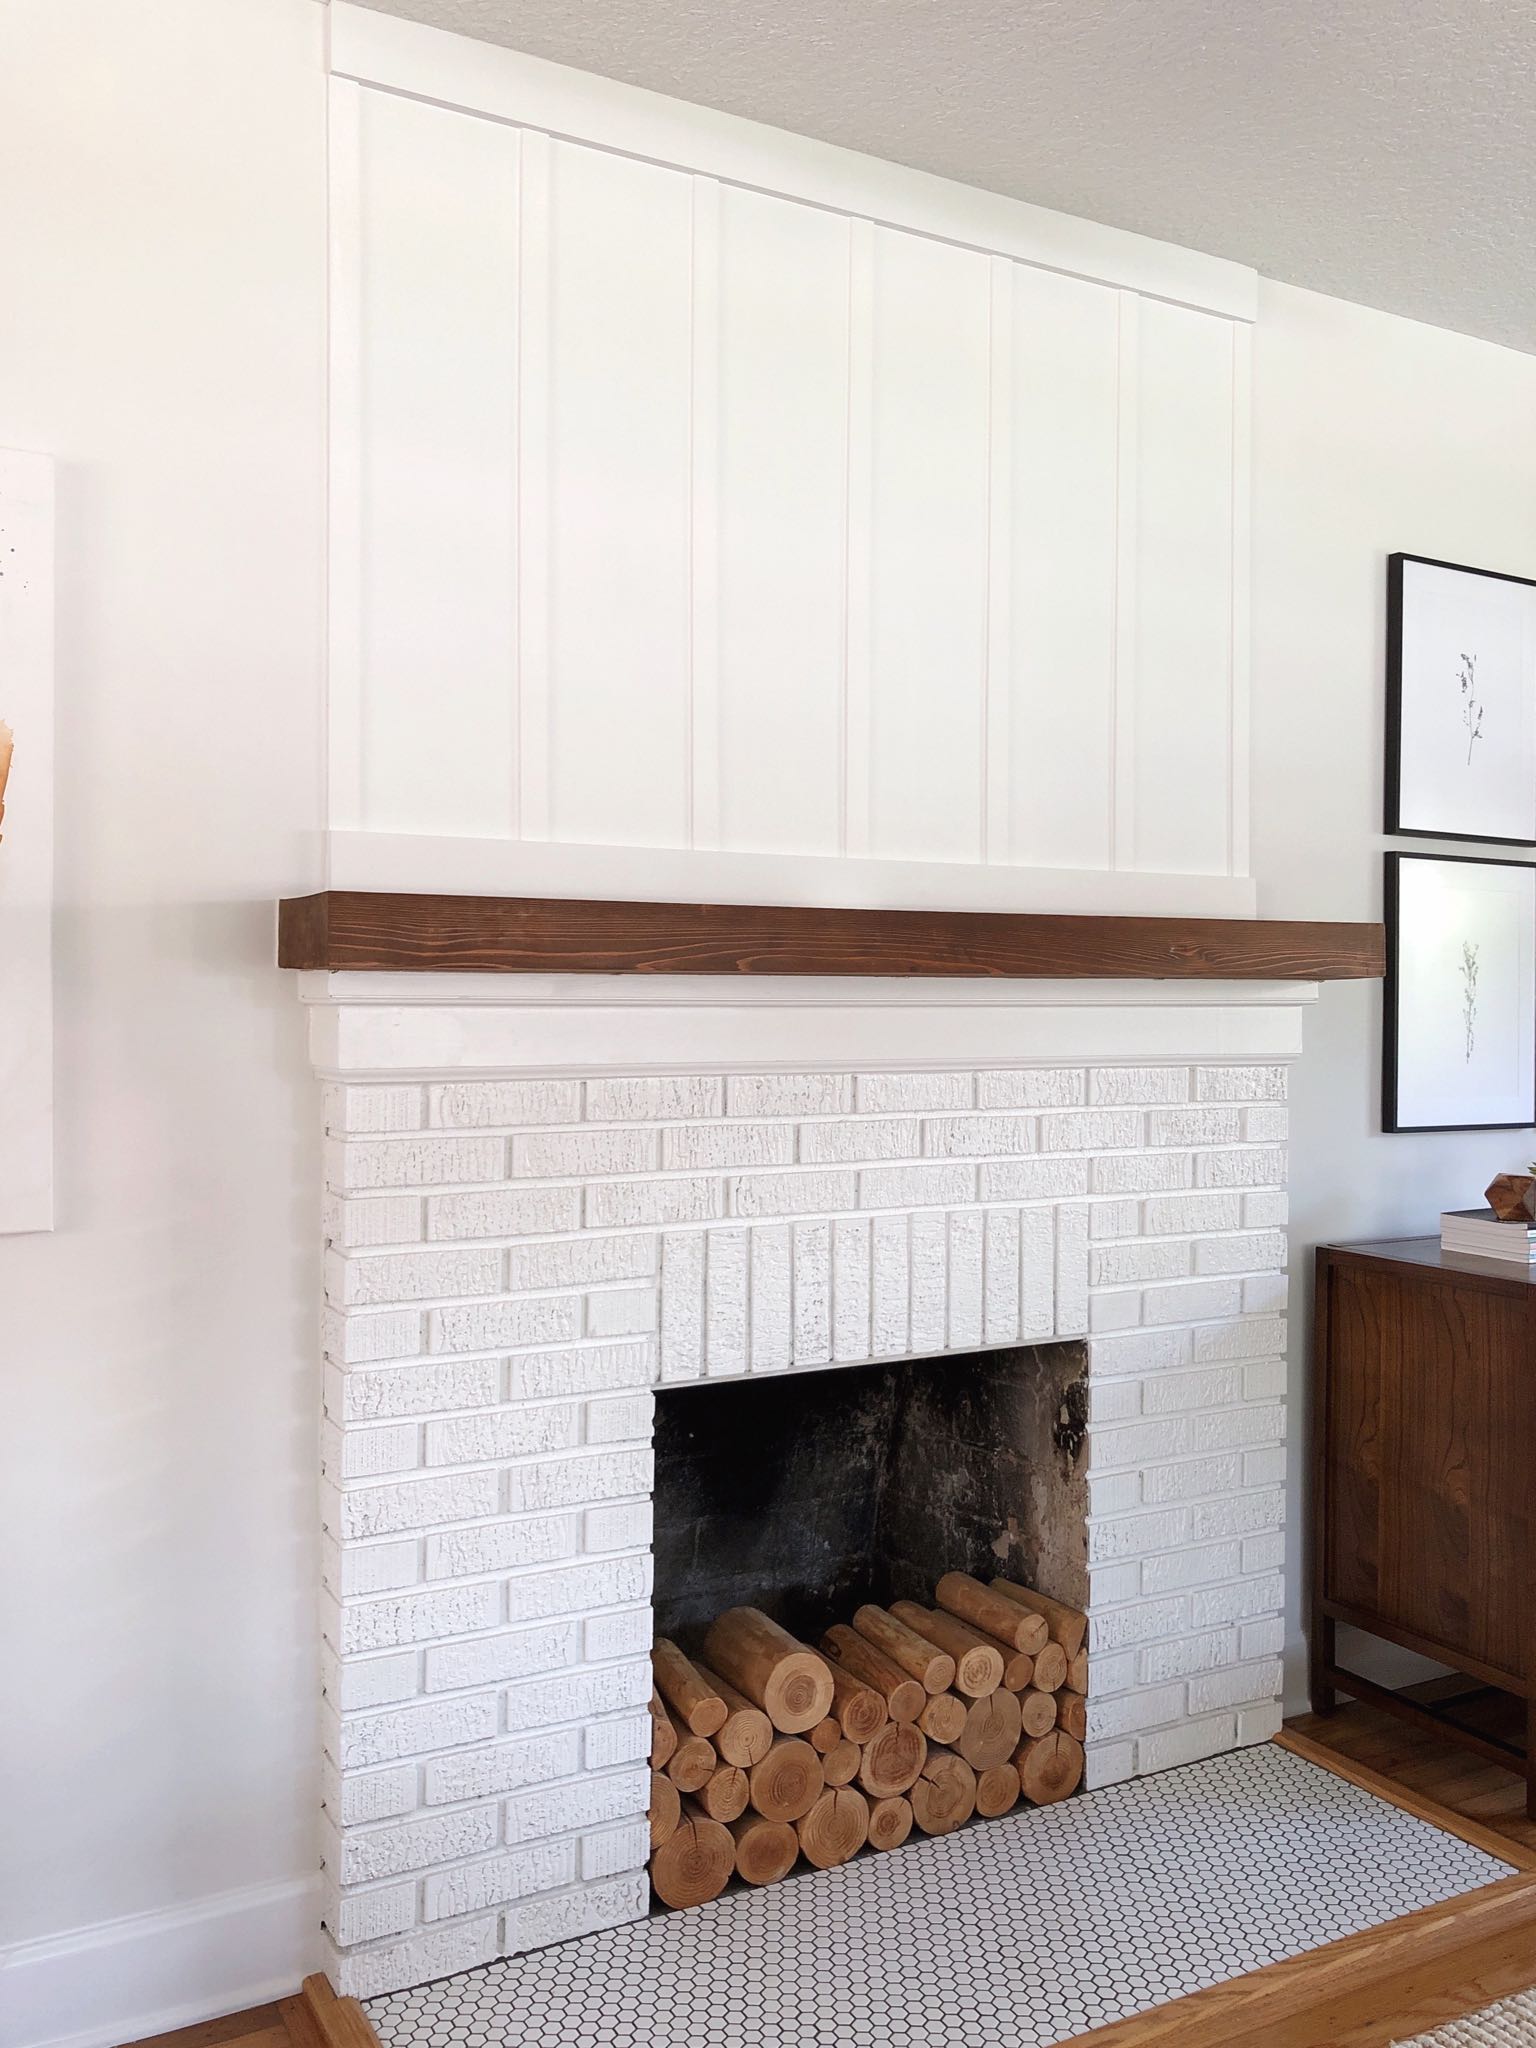
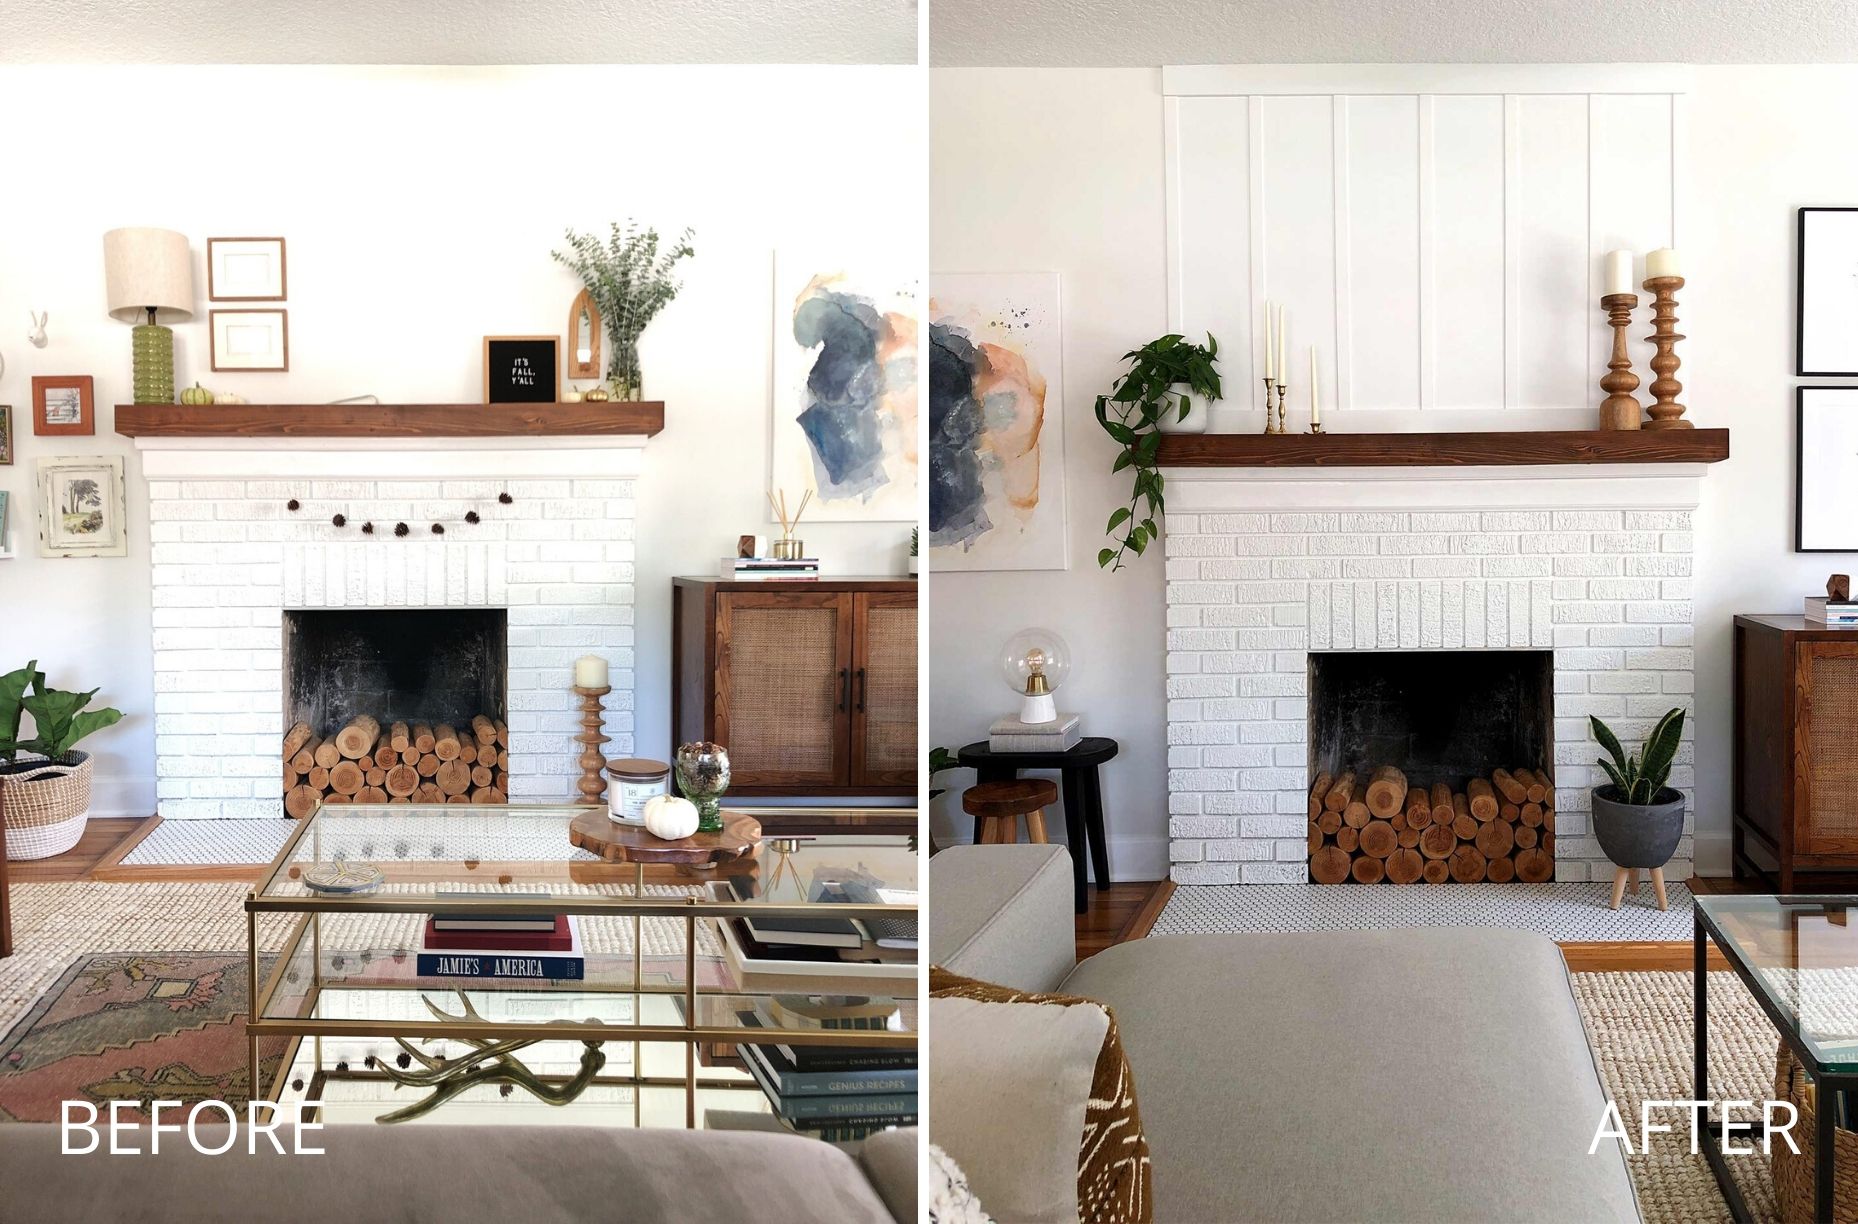
This weekend's project was quick, cheap and simple and has made the BIGGEST difference to our living room—so it's basically categorized under Dream Projects. We added some board and batten above the mantel to zhush up our bland-and-boring fireplace, and managed to do it WITHOUT a nail gun—yep, we did it the old-fashioned way with a hammer and nails.
Why didn't we buy a nail gun? Well, since purging a lot of our belongings last summer, we've become a lot more concious of what we add to our home. I didn't want to commit to buying a tool for this one tiny project, but now I know how easy it is, I may be thinking about adding a whole lot of board and batten to the rest of our house—in which case, a nail gun is definitely worth having! For this project size though, it's totally manageable without one—with the right know-how (I'll tell you everything!)
Related: KonMari Part One: 10 Tips to Prepare You for KonMari Success
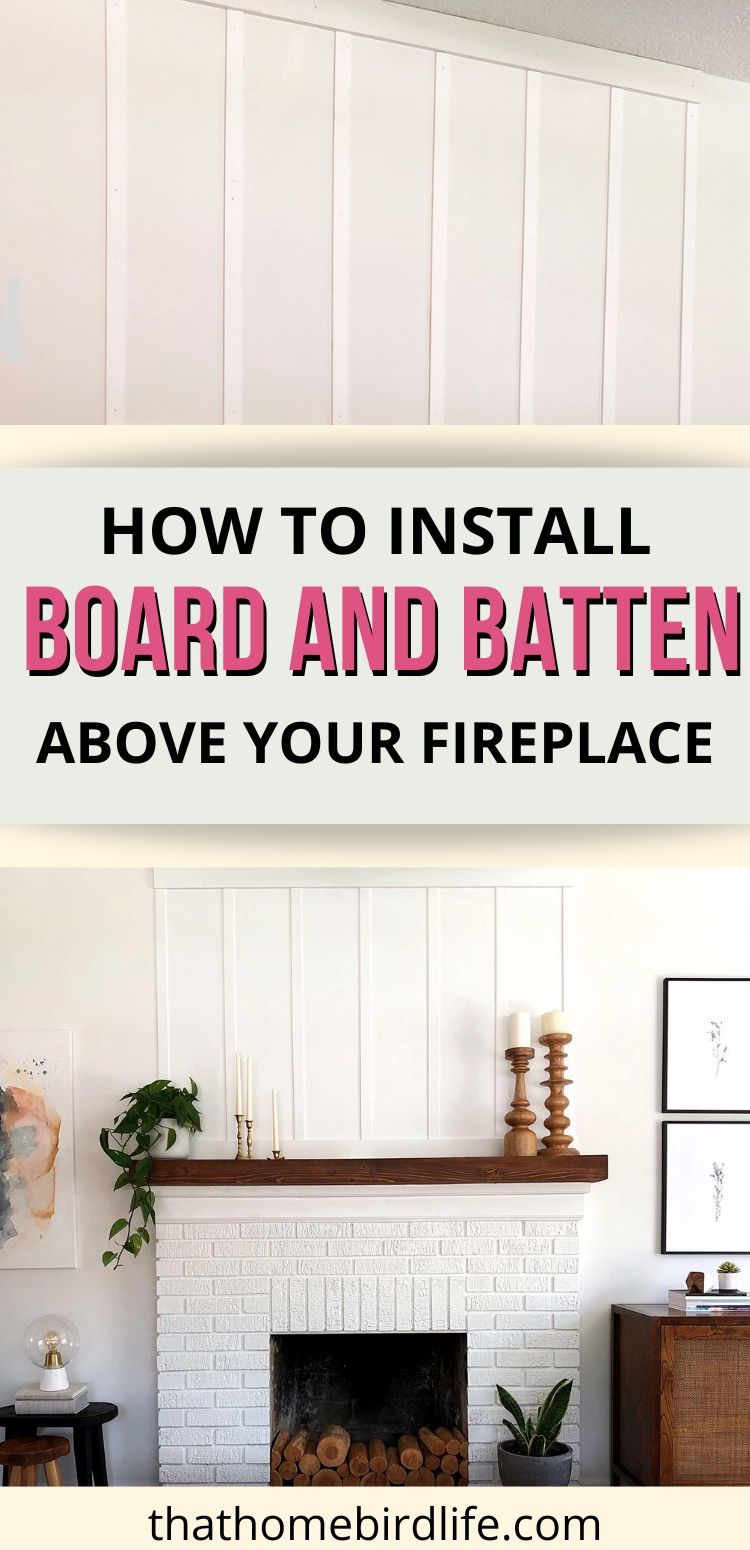
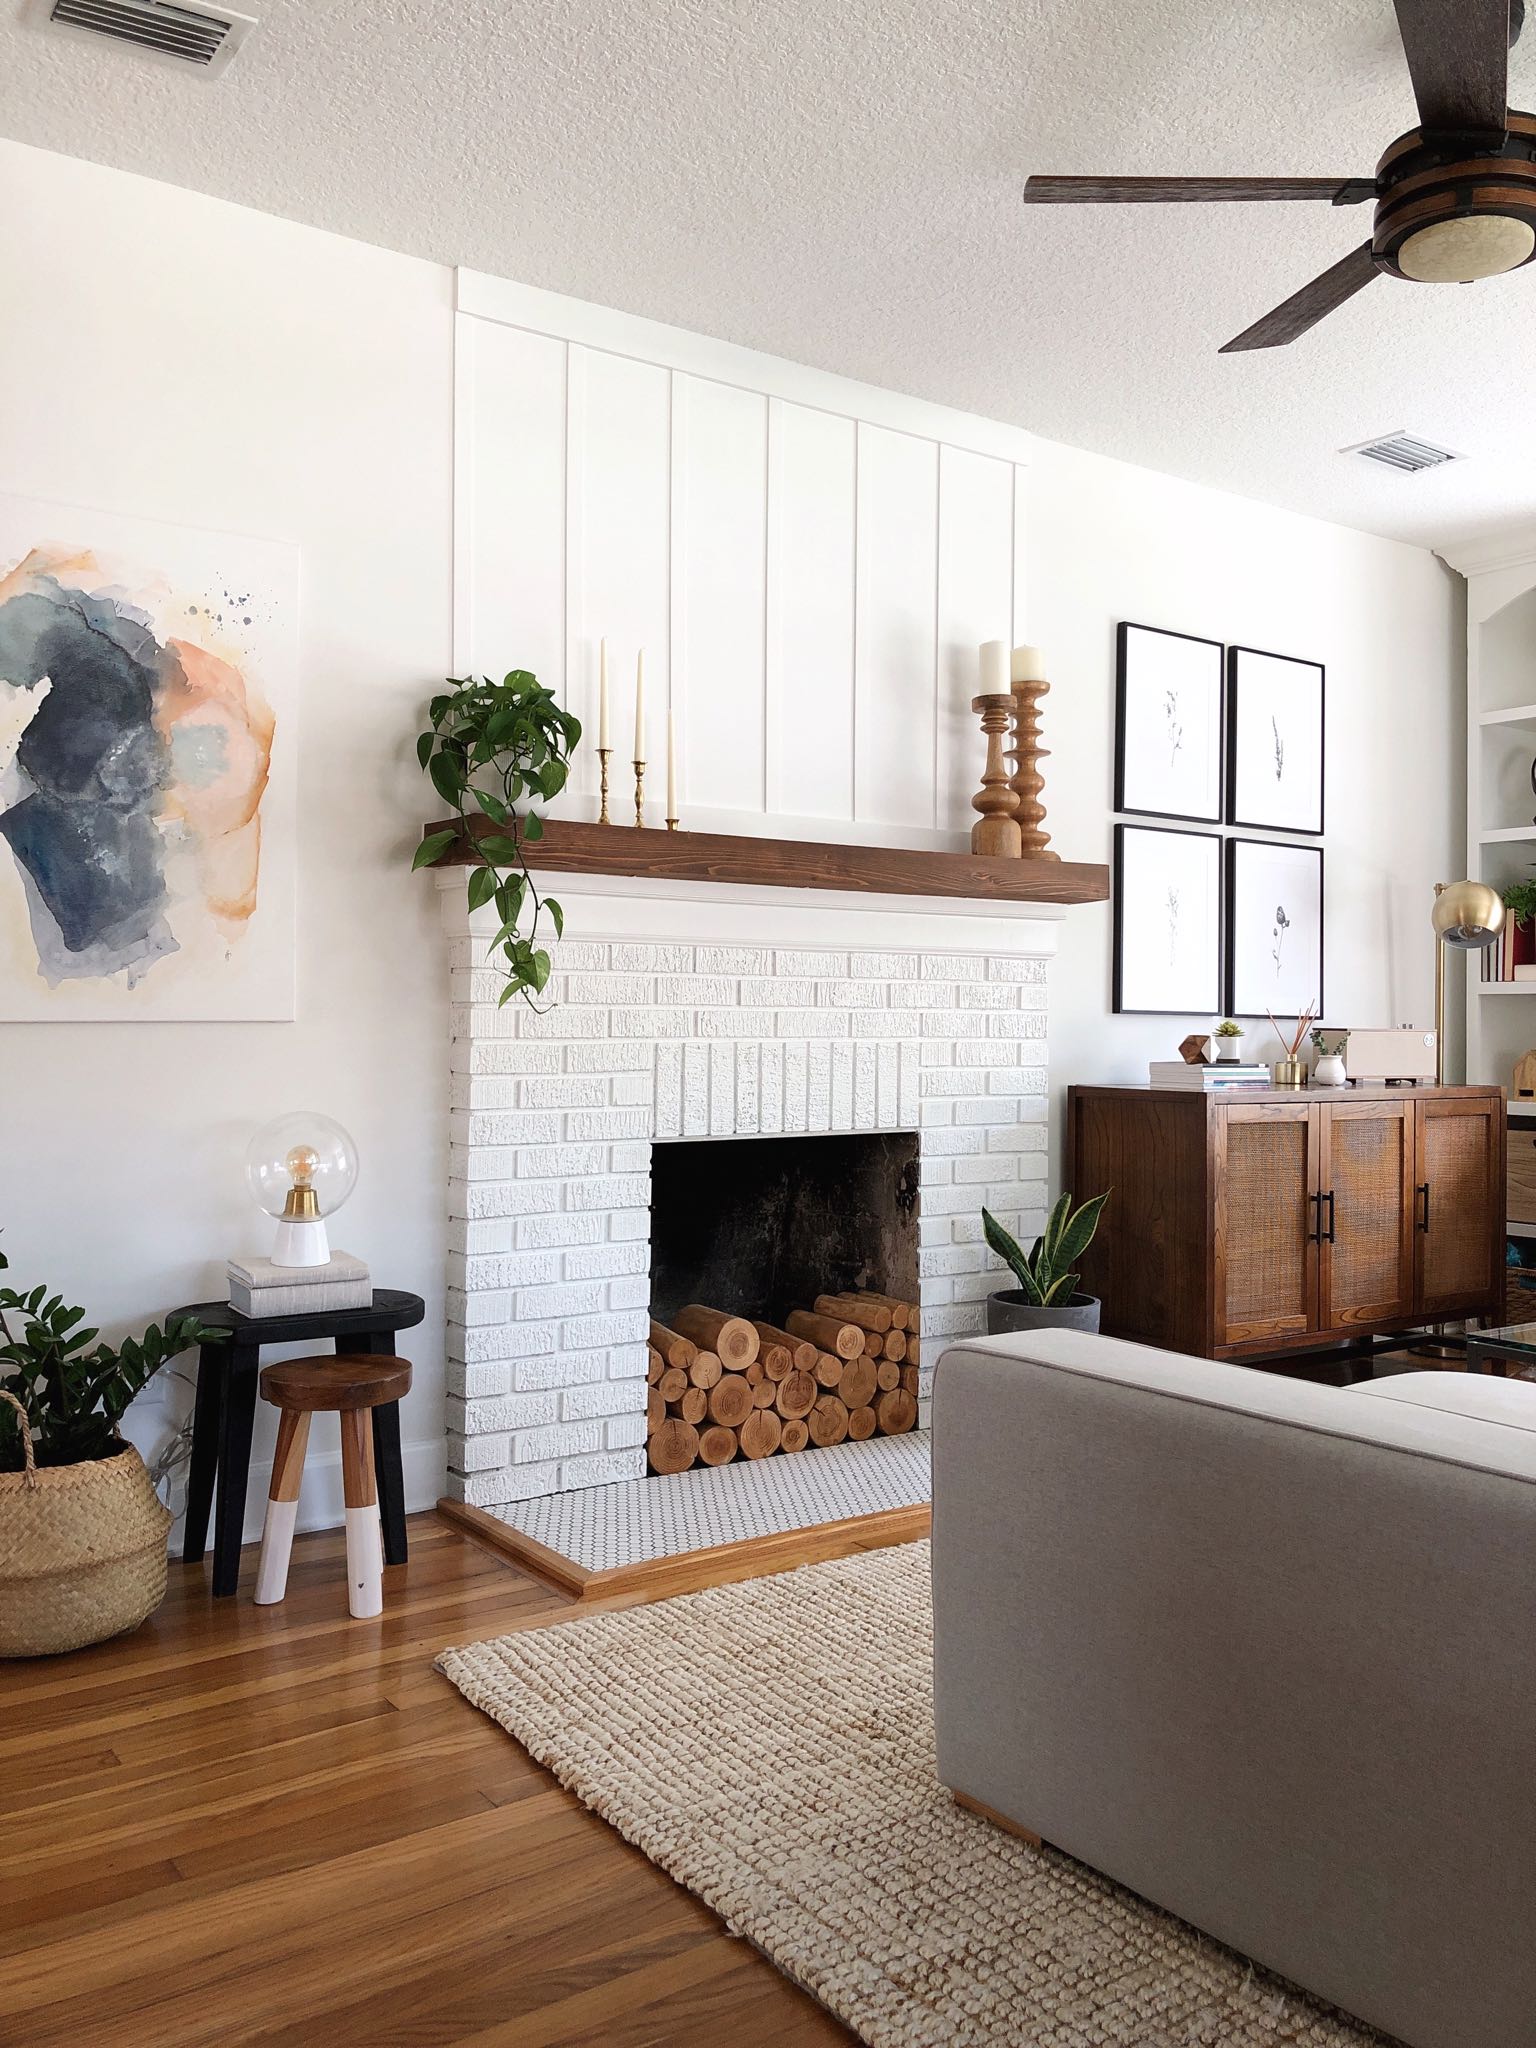
I've wanted to do something with this spot for a while. The fireplace was desperately needing a focal point because it's on a flat wall and something has always felt "off" to me. I thought about adding a large mirror, but I didn't want anything that would compete with the artwork either side (which I love the placement of). By adding the board and batten above the mantel, it has given the fireplace so much more impact with no additional visual clutter. It really has added a focal point to the whole room and I also think it has made our ceilings appear much higher—which is totally an optical illusion!
Side note: is it MANTEL or MANTLE? I've always spelled it "-el" but I see so many conflicting spellings...can anyone confirm either way?!
Anyway, enough of an introduction. I'm going to show you exactly how to add a board and batten accent above your fireplace—or anywhere else in your home, for that matter!
This post contains affiliate links, which means that I may earn a small commission if you purchase something that I have recommended, at no cost to you. More information can be found on my disclosures page.
QUICK LINKS
- Materials needed for a board and batten accent above your fireplace
- Amazon shopping list with the items you will need for this project*
- Steps to install a board and batten accent above your fireplace
*this list excludes lumbar and paint—it's best to purchase these items in person at your local hardware store.
How to Install Board and Batten Above a Fireplace (Or Anywhere Else in Your Home!)
(Be sure to pin this tutorial so you can refer back to it later!)
STEP ONE: GATHER YOUR SUPPLIES
- 1" x 4" x 8' primed boards (for your top and bottom rail)
- 1-1/2" x 8' primed pine finger joint lattice moulding (for your vertical pieces)
- tape measure
- level
- pencil
- miter saw or miter box and saw
- liquid nails
- hammer and nail set (if you want to do it the old-fashioned way) OR finish nailer (if you want to get the job done quick!)
- finish nails (we used 1 1/2 inch for the lattice and 2 1/2 inch for the boards)
- caulk (make sure it's paintable!) and dap cap
- spackle/wood filler and putty knife (or an all-in-one tool)
- sanding blocks
- painter's tape
- foam paint brush
- satin paint in the color of your choice
For your convenience, I've created an Amazon shopping list with almost all of the items you will need for this project. You can access it here.
(NOTE: this list exludes lumbar and paint—it's best to purchase these items in person at your local hardware store.)
STEP TWO: CUT AND INSTALL HORIZONTAL BOARDS
To get started on this project, decide on the width you want your board and batten accent to be. We decided to match the width of our brick fireplace (our mantel is slightly wider) so that it would mimic the look of a chimney breast. If you're unsure and need a little help to visualize things, you can use painter's tape to plan it out. We skipped this step as I like to live dangerously ;)
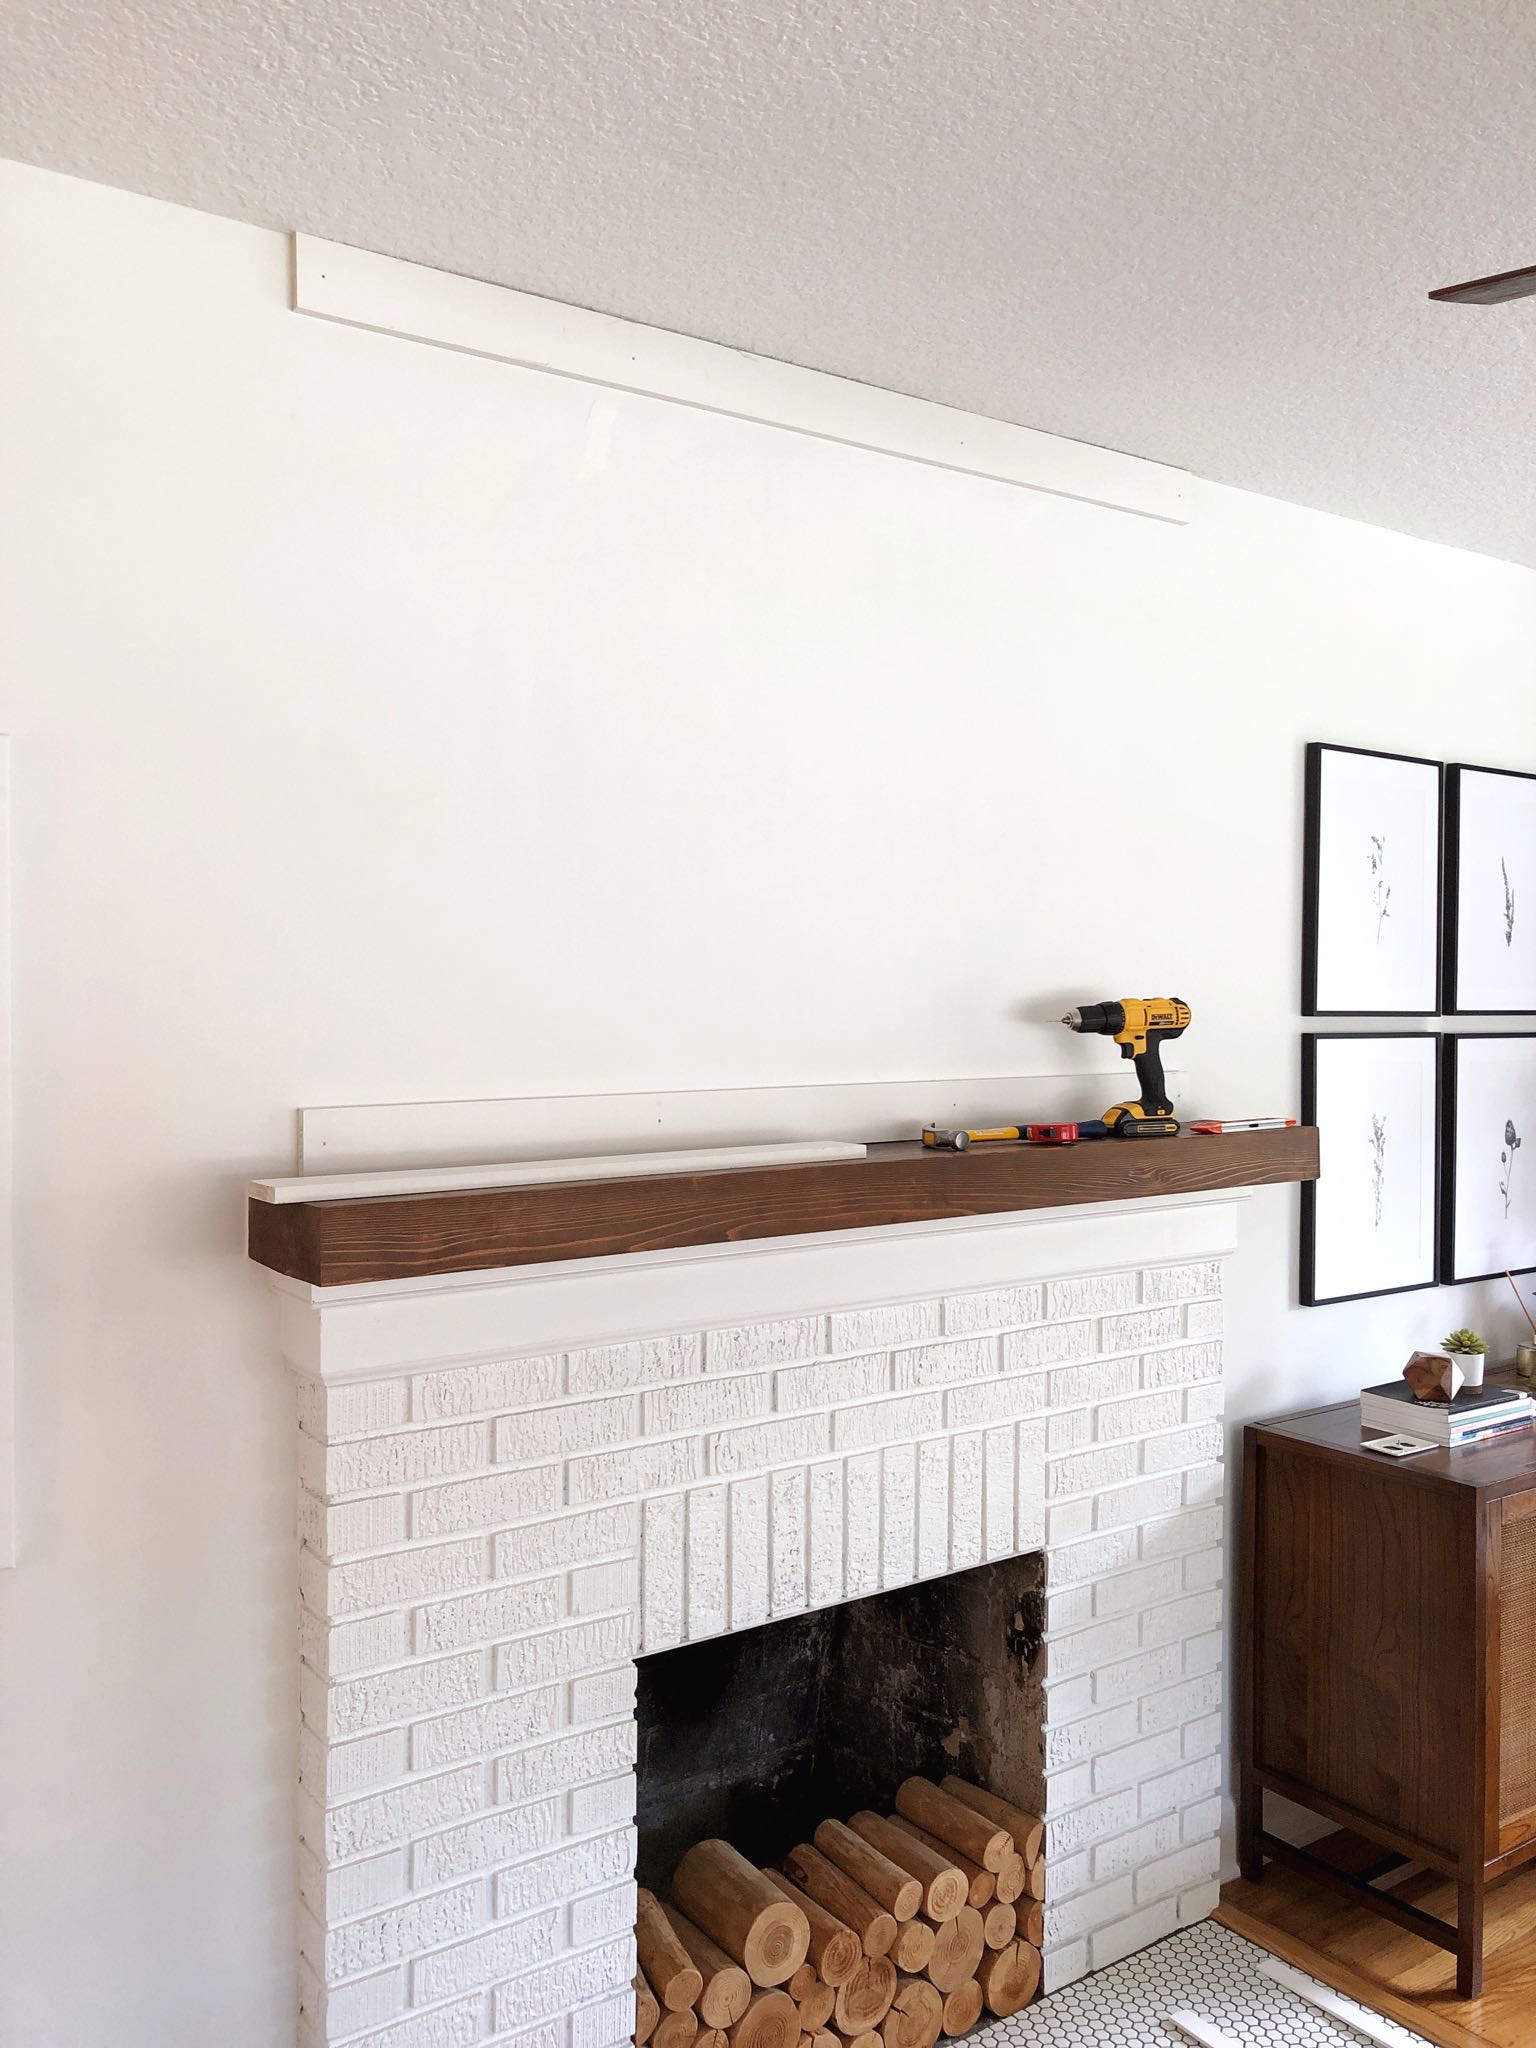
Once you've decided on the width, you can measure and cut two 1" x 4" boards. One will go directly above your mantel, and the other butting up to the ceiling.
To attach the bottom board to the wall, apply a squiggle of liquid nails to the back of the board and set it in place on the wall. Check that it's level, and then grab your nail gun or hammer and nail set. Tip: if you're using a hammer and nail set like we did, you could drill a very small pilot hole for each nail—it will make the process a lot easier! With the liquid nails, you should only need a handful of nails to secure each piece to the wall—one at either end and a couple in the middle.
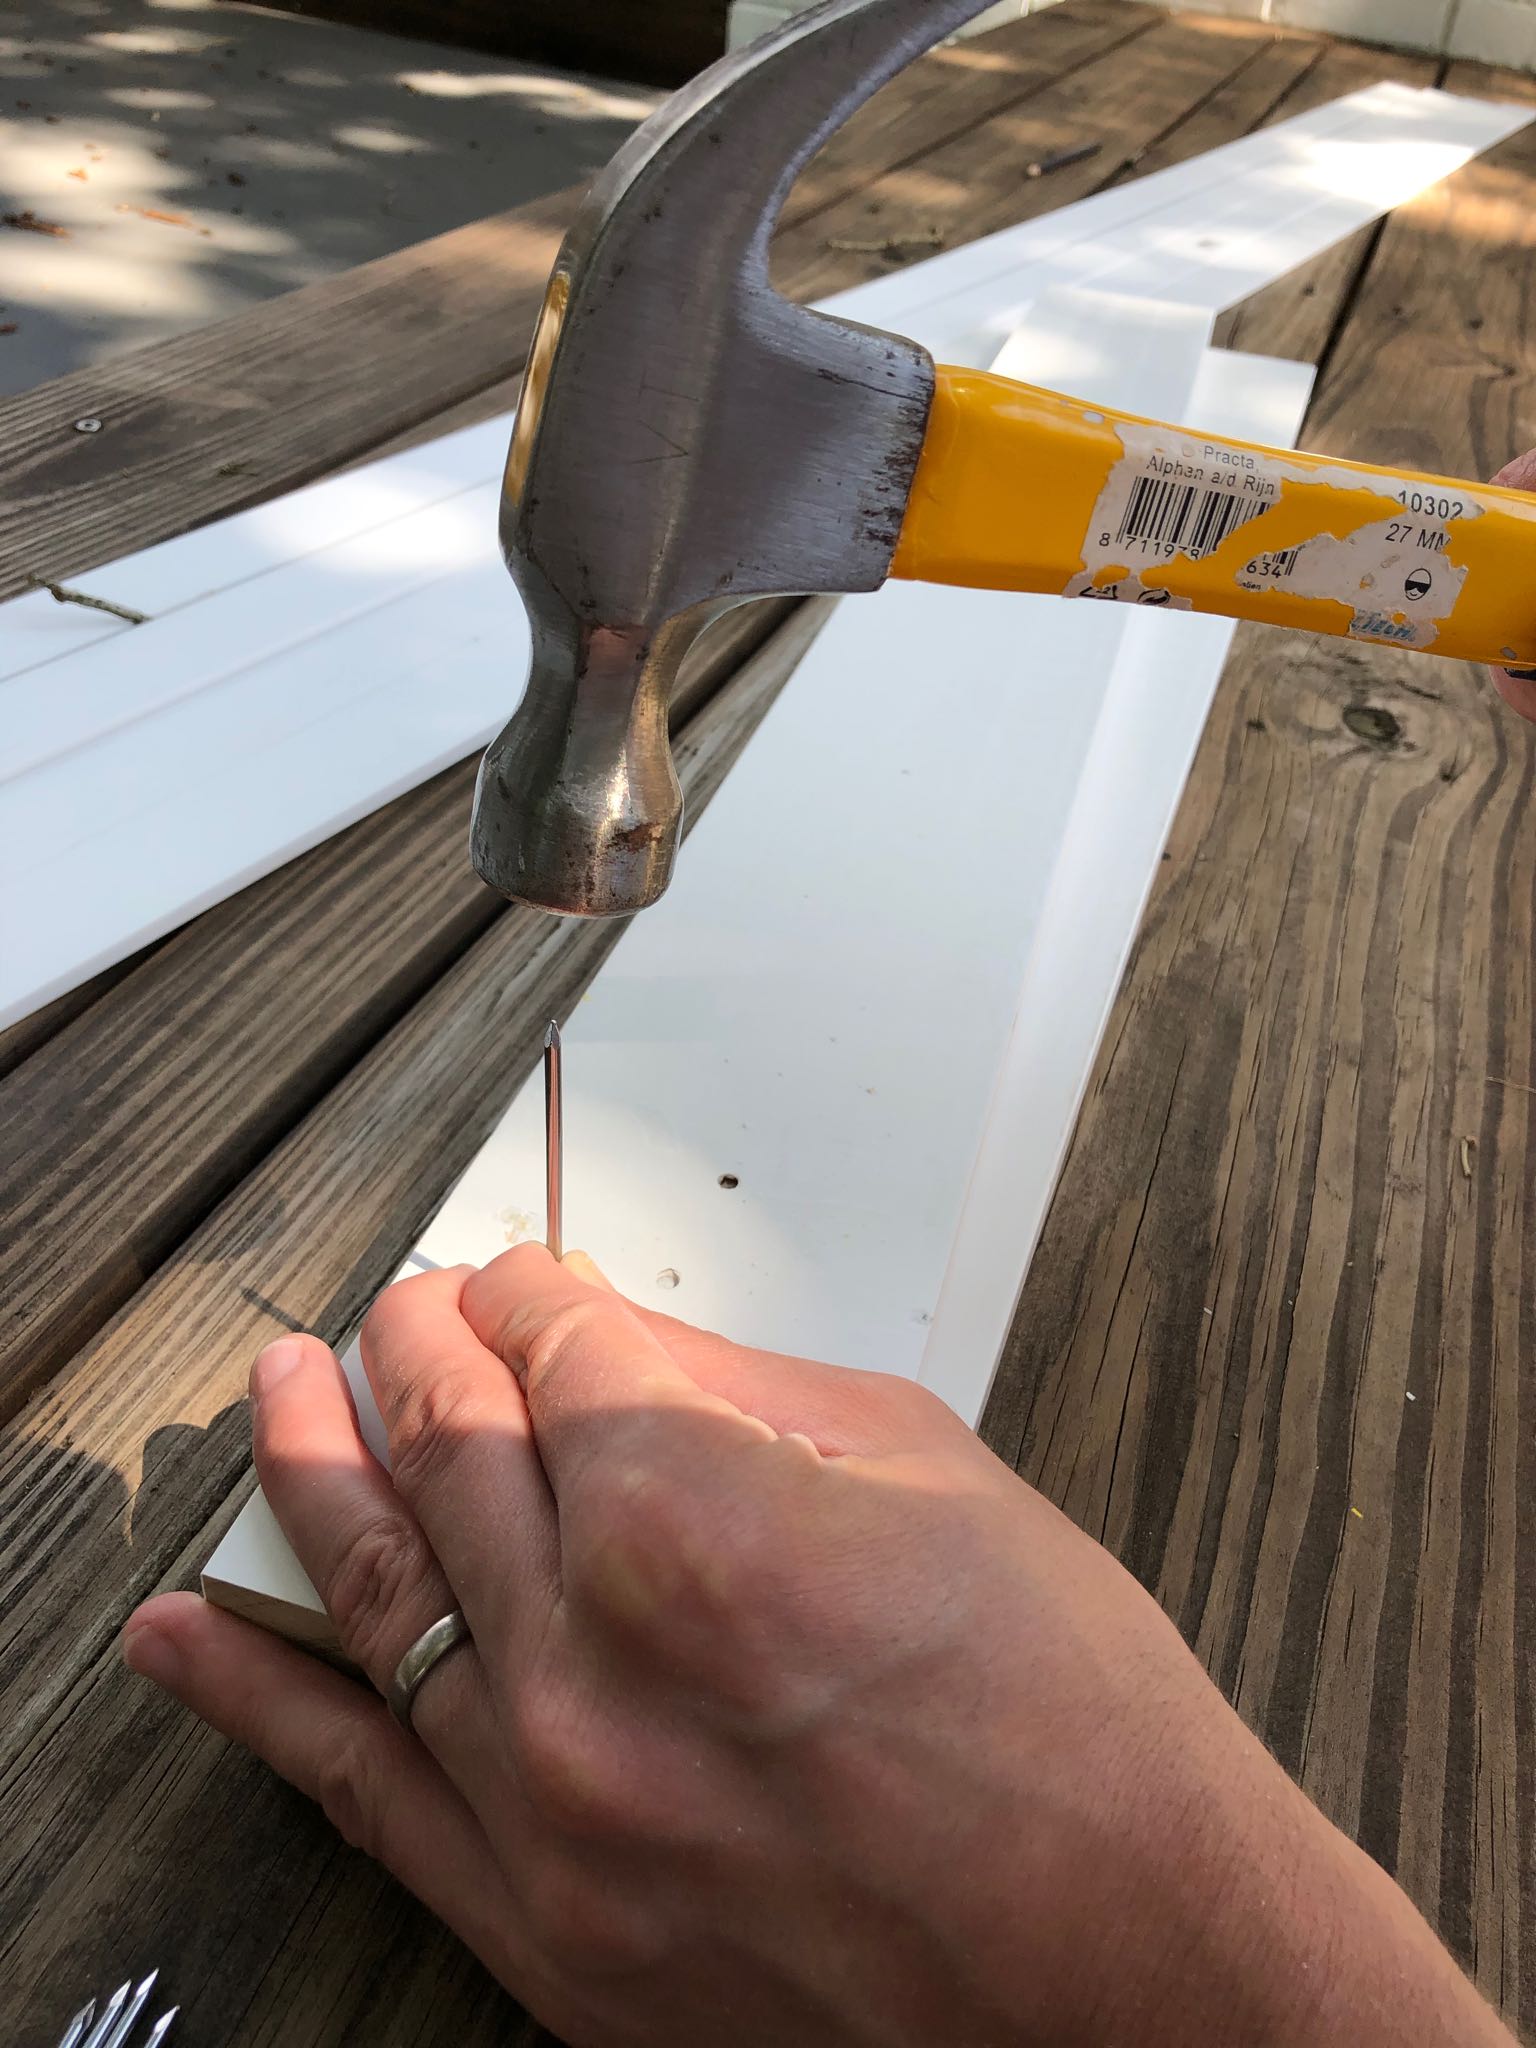
Important: If you are using a hammer and nail set to attach the wood to the wall, be sure to blunt your finish nails before using them—this will mean that they are less likely to split the wood. To do this, just turn them upside down, place them on a scrap piece of wood and blunt them with the hammer a few times.
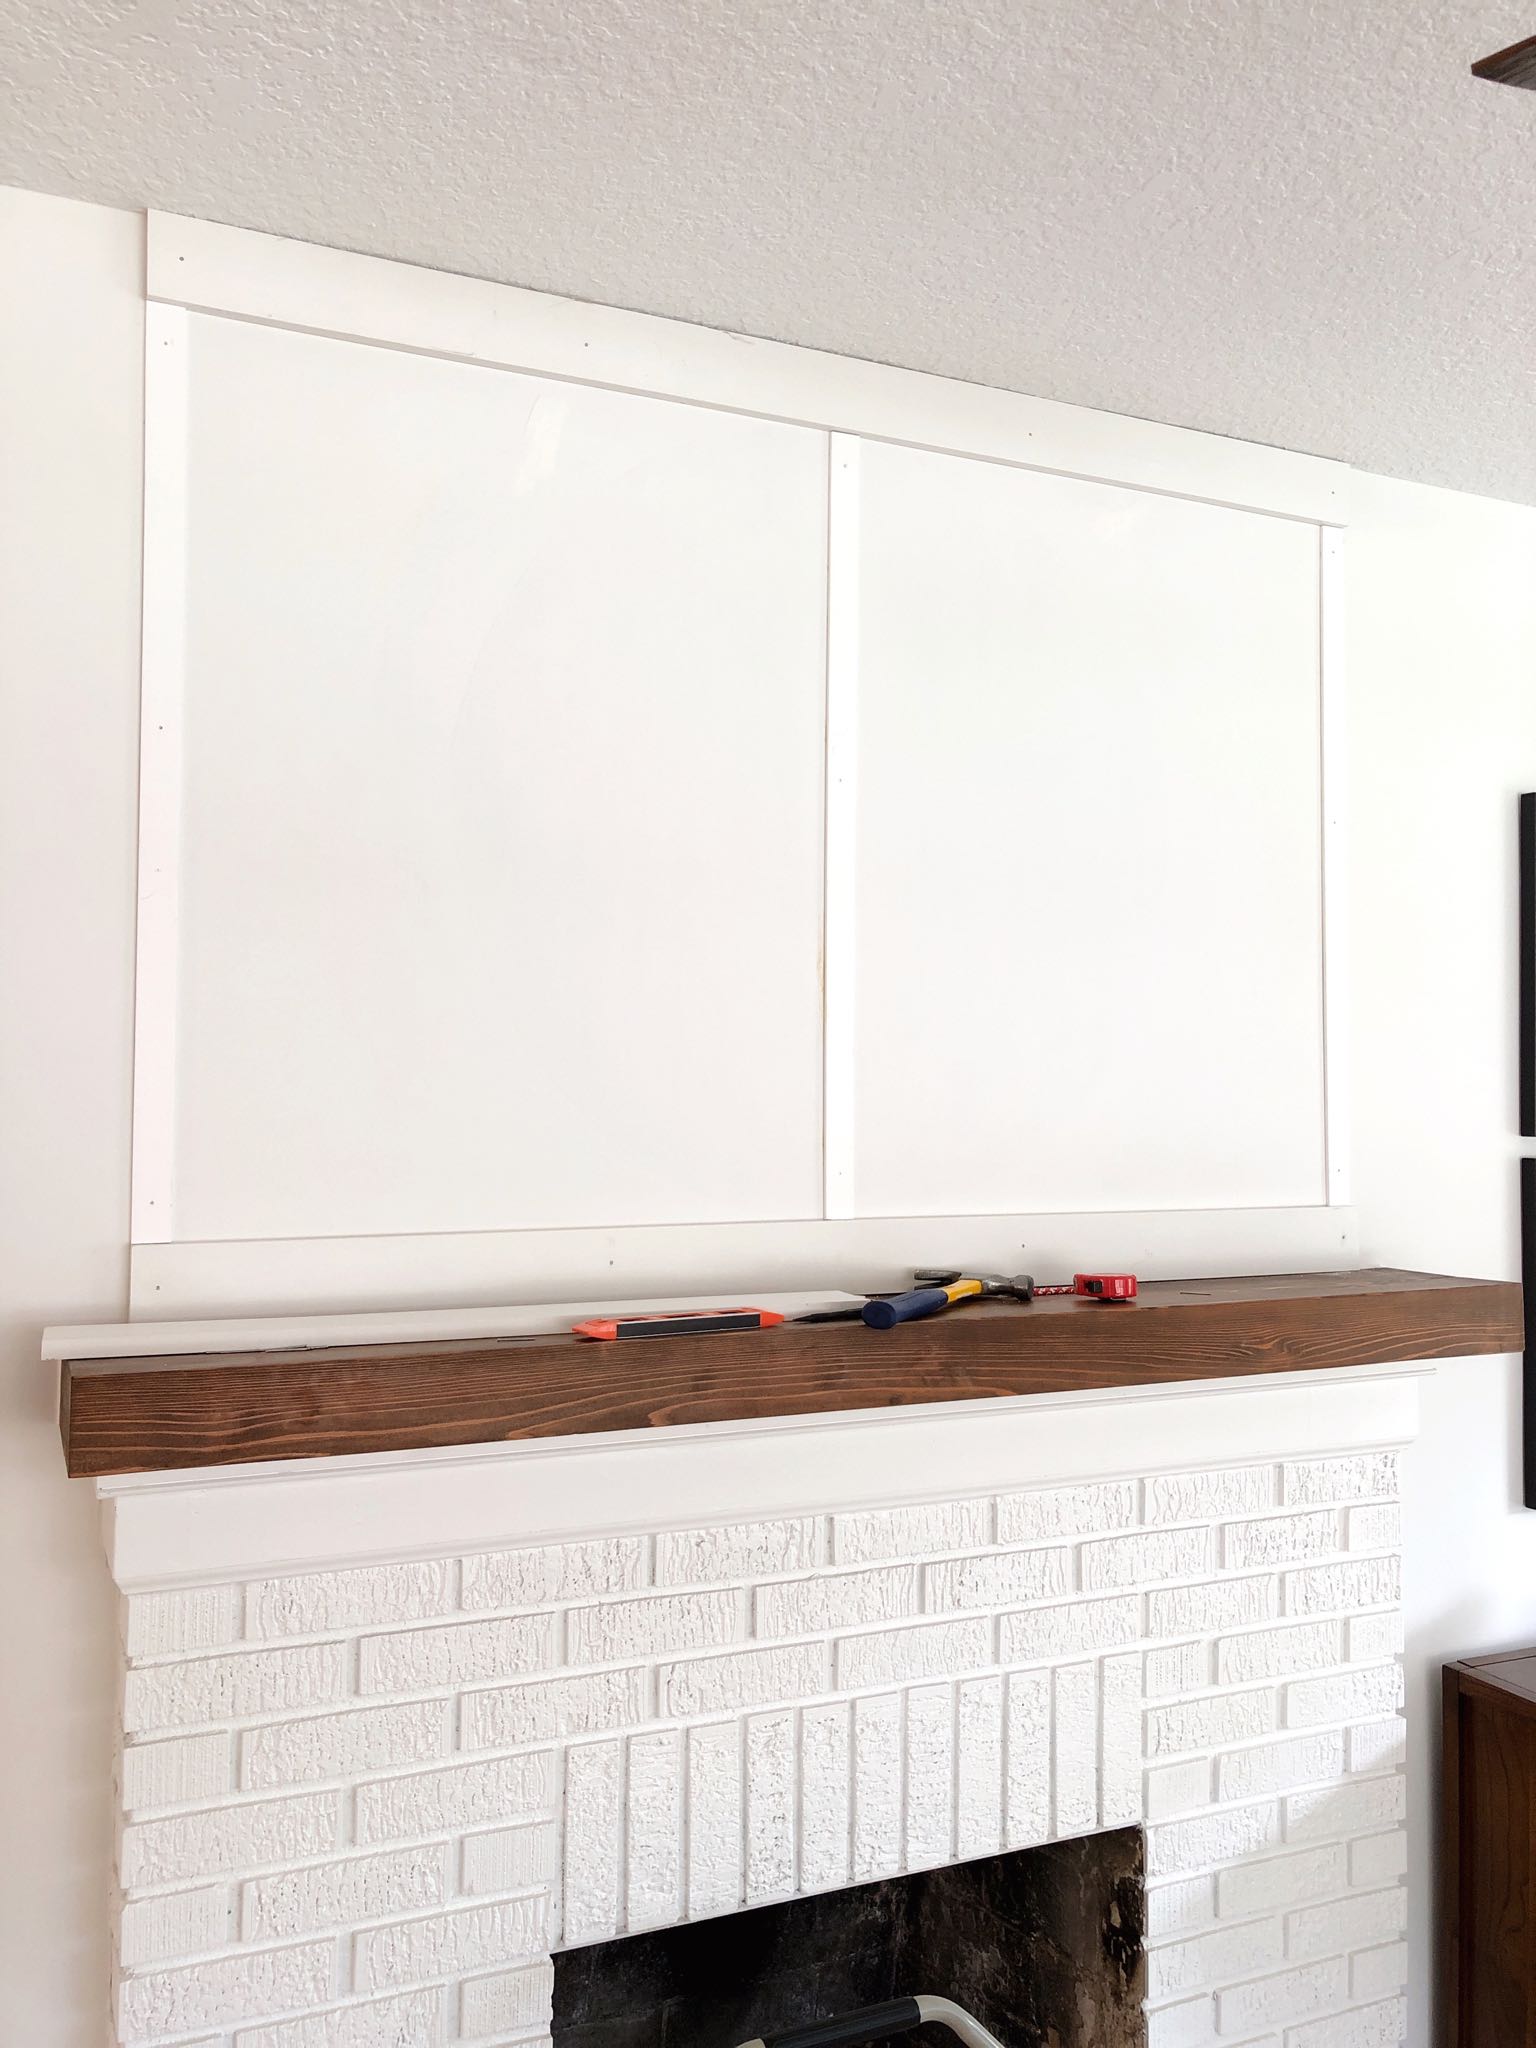
Once the bottom board is secure, attach the second board as close to the ceiling as you can get it. Use your level and a pencil to mark the position and to make sure that it is exactly in line with the bottom board. It's important to take some time over this step as otherwise your vertical battens will not line up! If you don't have a 48" long level, you can use an extra piece of board cut to size and move a smaller level along it.
STEP THREE: CUT AND INSTALL VERTICAL BATTENS
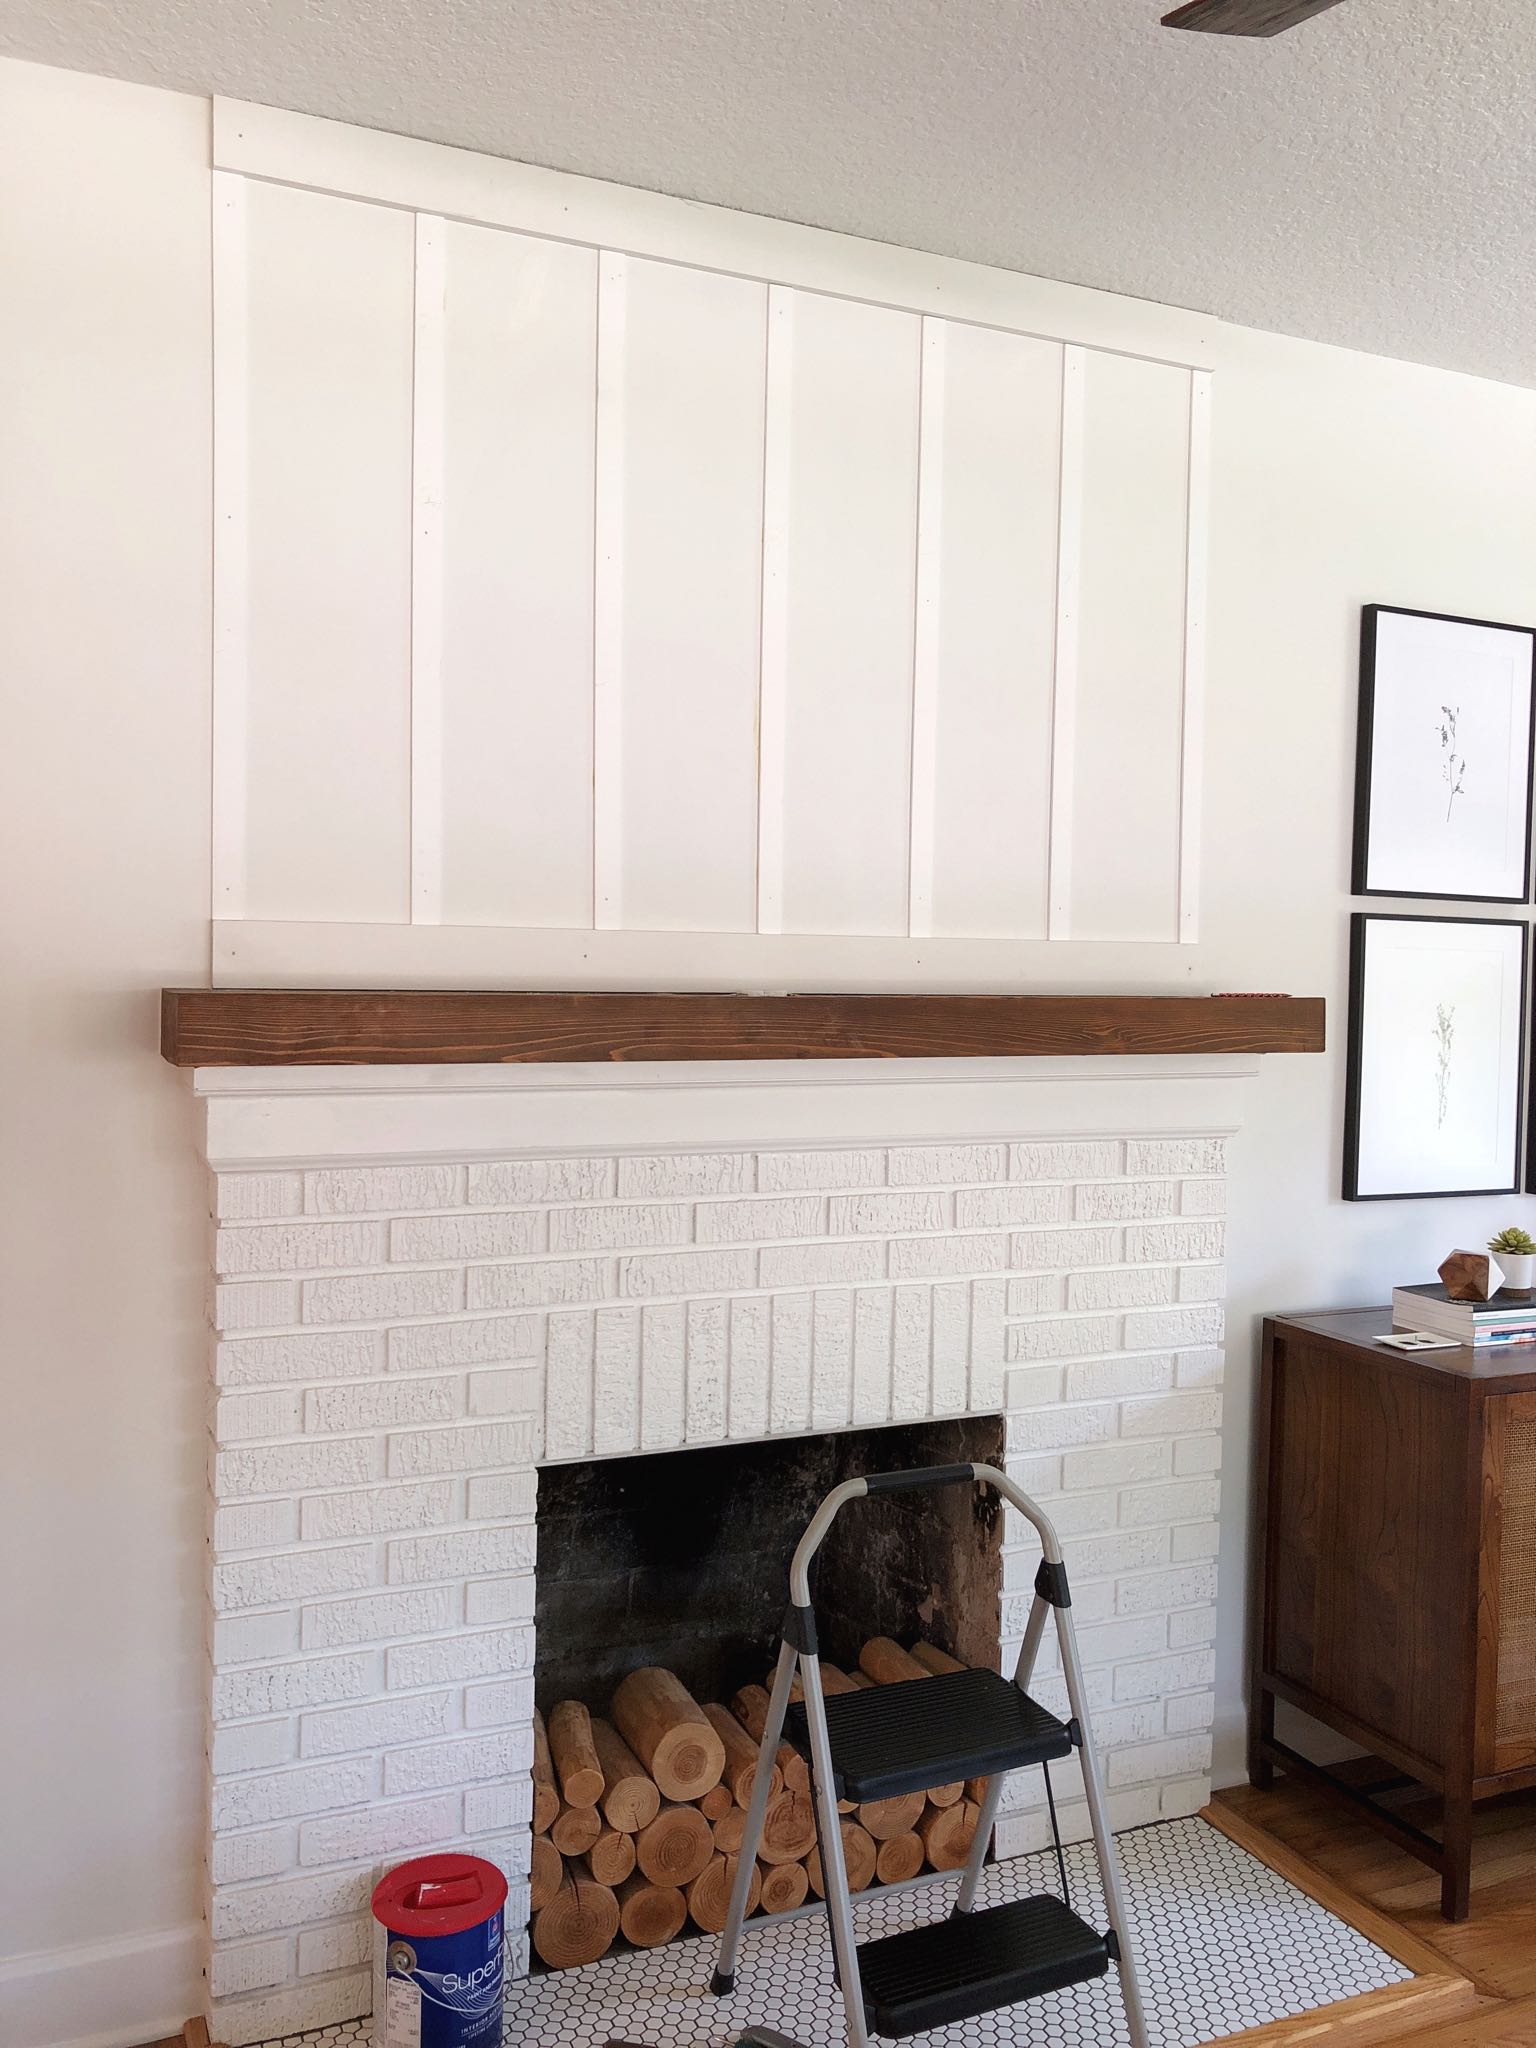
Now your top and bottom rails are in place, you need to decide on the spacing of your battens, which will determine how many you need. We decided on an odd number so that there was a center point. We went ahead and cut them to size so that we could play around with spacing, and found that seven was the magic number for us—which worked out at around nine inches between each batten.
We installed the side pieces first followed by the center piece. We used the shorter 1 1/2 inch finish nails for the vertical battens since the lattice had less depth. We didn't need to drill pilot holes for these pieces.
With the two sides and center battens installed, I was able to work out the spacing for the remaining four battens—I did this by dividing the width each side into three, and made sure to account for the width of the battens in my calculations. I double checked that I had calculated it correctly by measuring the spaces in between the battens to check they were even before installing them.
STEP FOUR: FILL, CAULK AND SAND
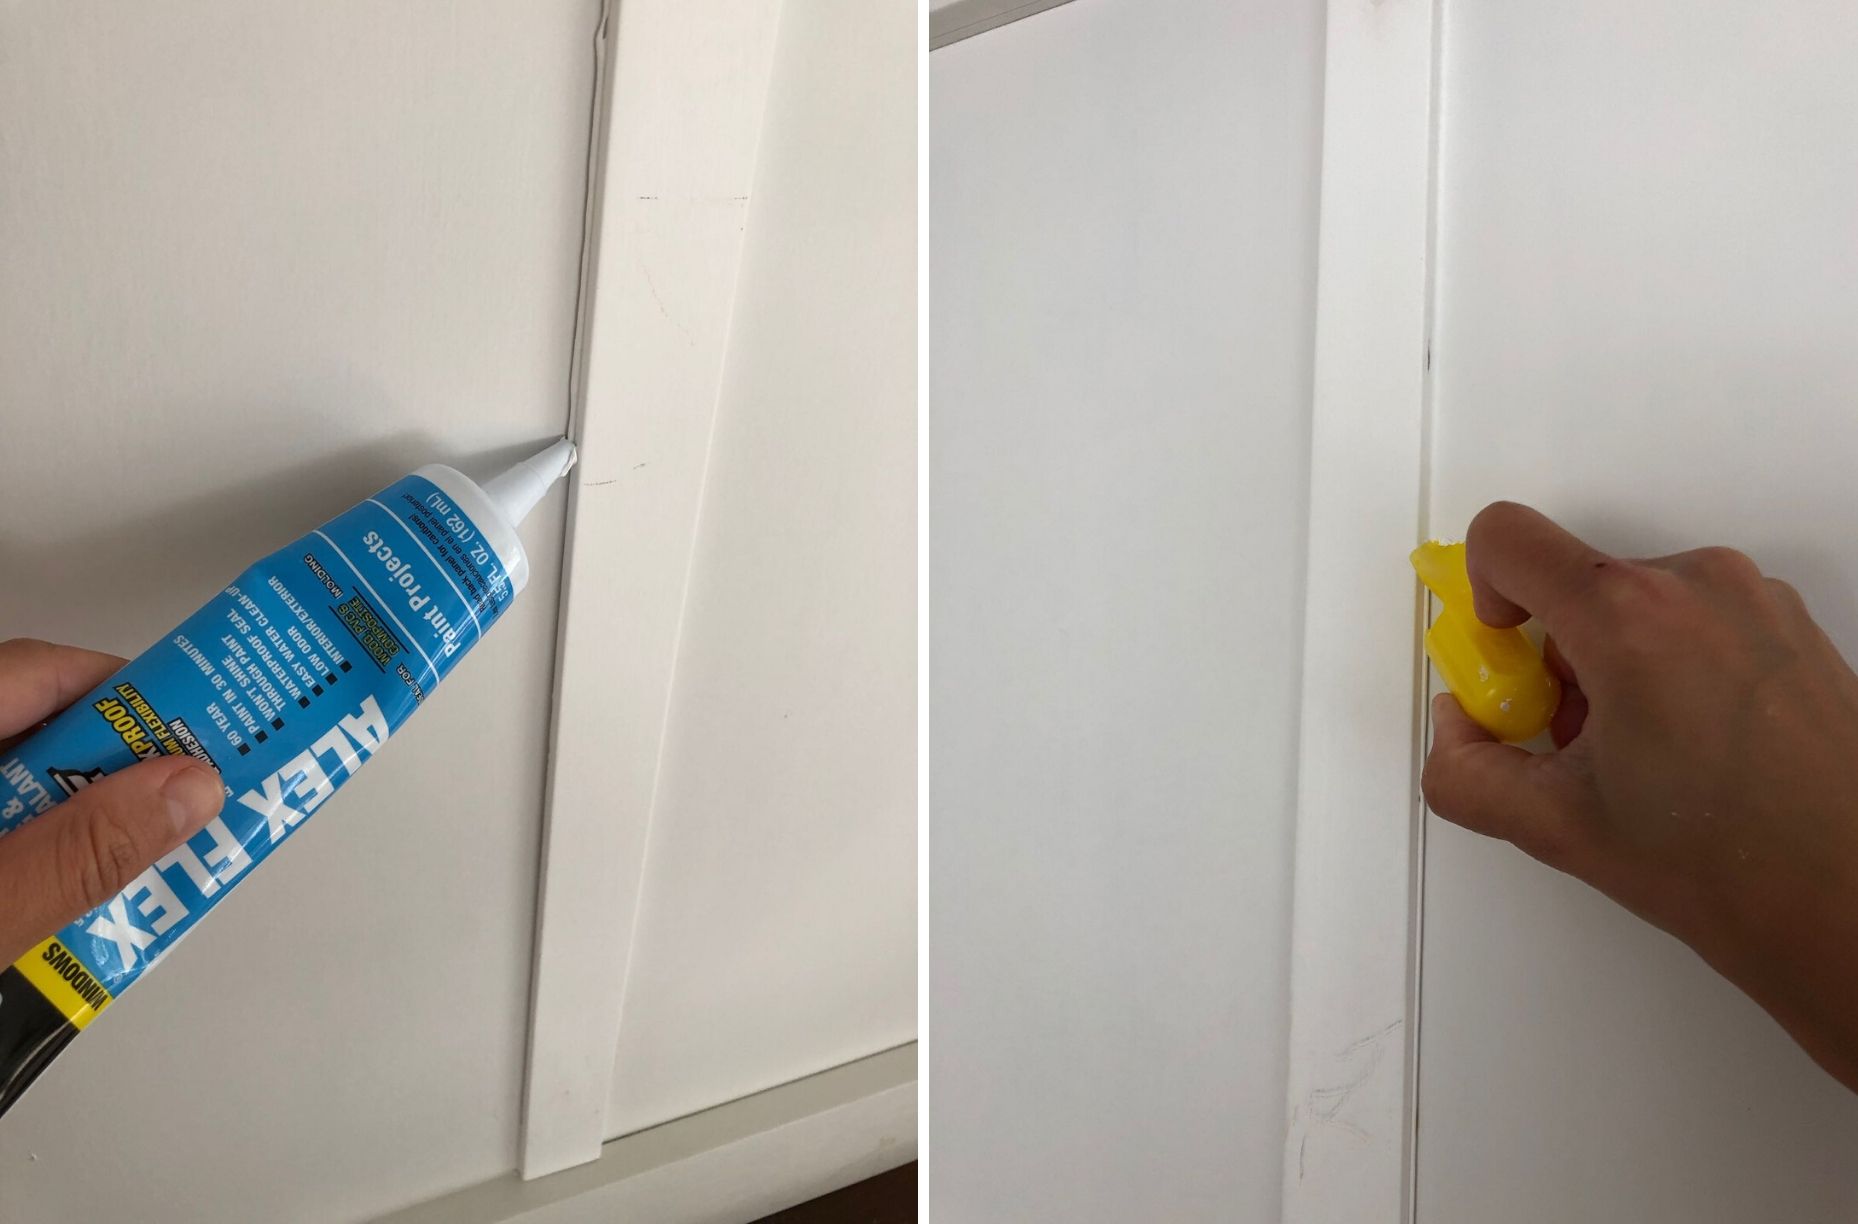
With the board and batten installed, it's time for the finishing touches. Caulking the seams and filling the nail holes makes SUCH a difference to the finish of this project. It's worth taking the time to do as neat a job as you can. For caulking the seams, I cannot recommend this dap cap highly enough—I'm definitely not an expert "caulker" but by running the cap over a line of caulk it creates a PERFECT finish.
I then used spackle to fill the nail holes, and when it was dry I sanded all the rough bits to prepare for the final step—painting!
STEP FIVE: PAINT
I decided to use the same paint as we have on our trim—Sherwin Williams Pure White in a satin finish. By using trim paint, it mimics the look of real panelling—even though it's just drywall. You could prime before painting for a really sharp finish, but I didn't happen to have any primer at home so I just went ahead and painted. After three coats I think it turned out just fine! (The primer probably would have saved me at least one coat of paint, but nevermind!)
I can't emphasize enough how much bang for your buck this project will give you! We spent around $60 on supplies, and it was TOTALLY worth every penny. Such a simple and easy DIY which has given our living room a huge upgrade. Let me know if you try it yourself!
Looking for more easy DIY projects? I've got you covered! Here are some you might like to try: