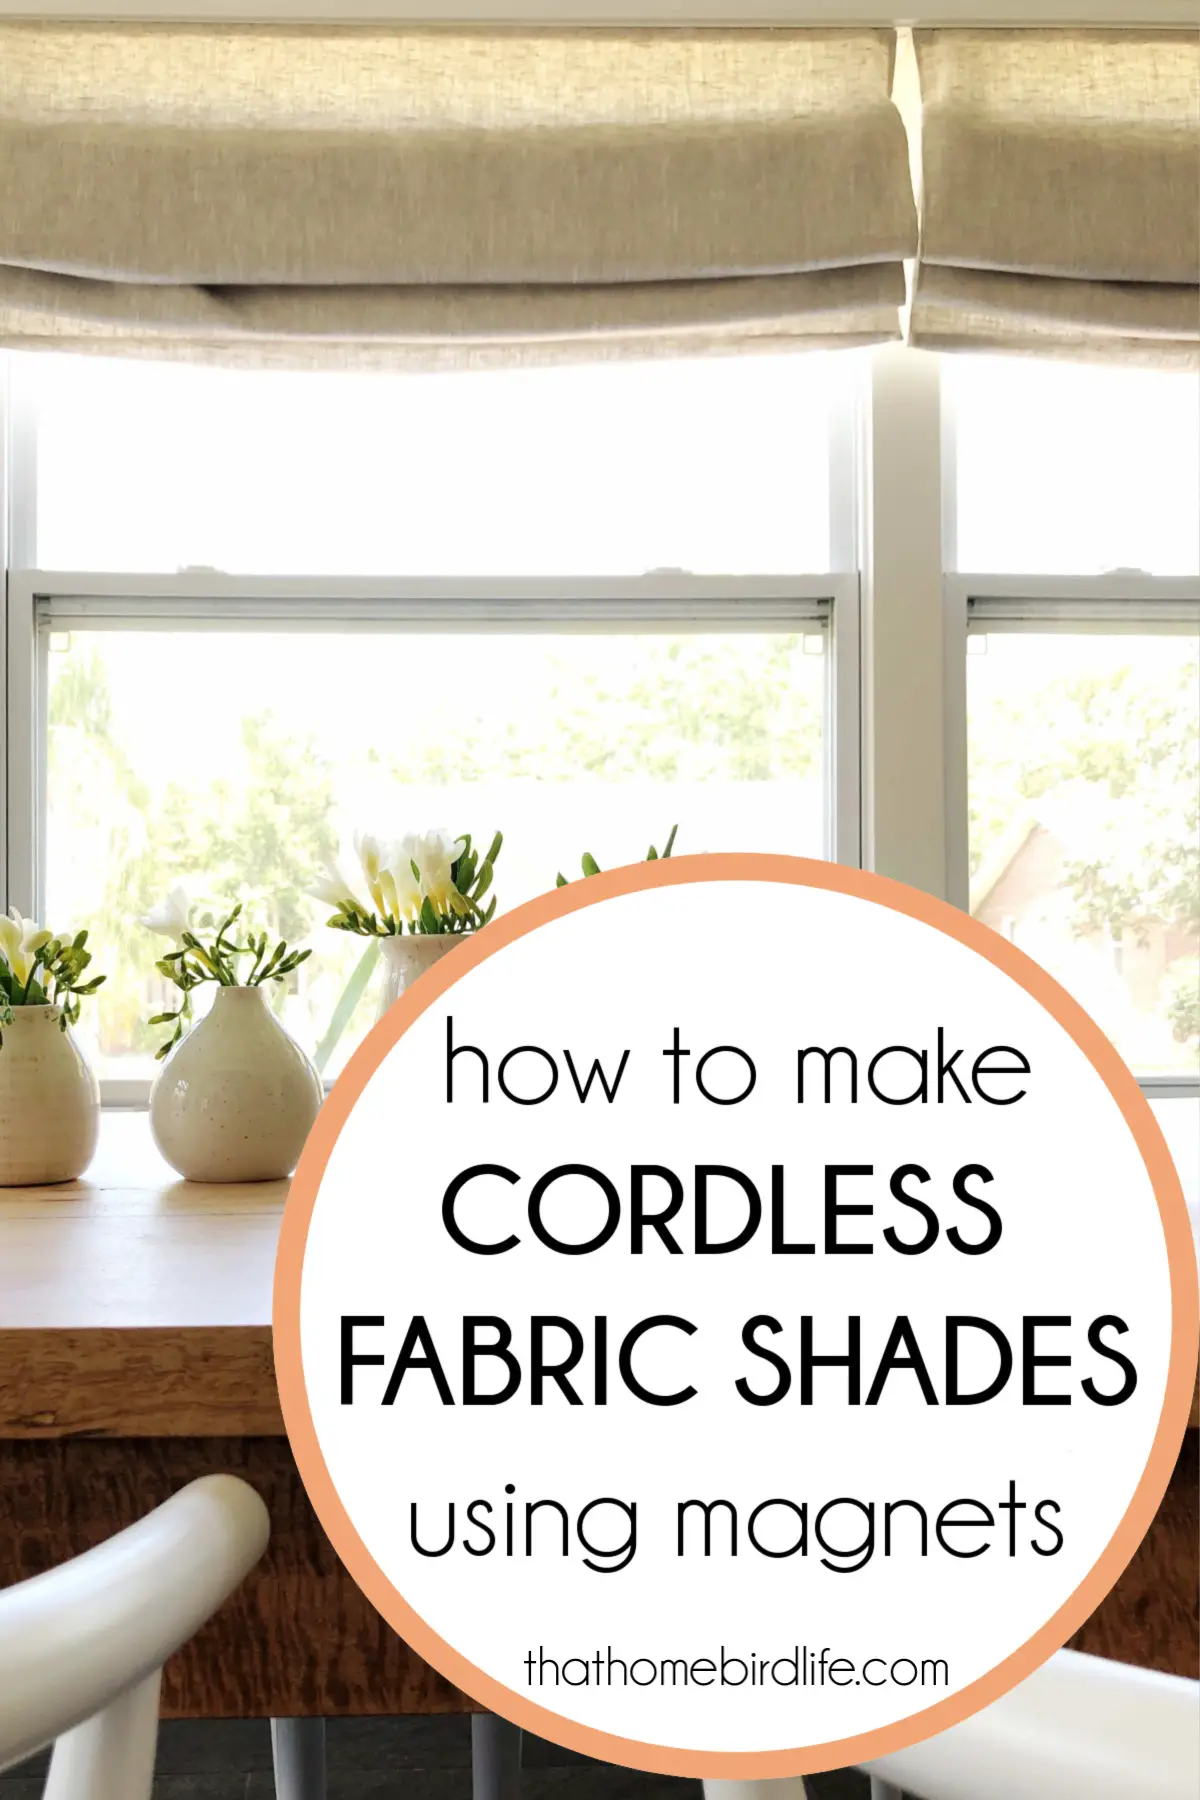
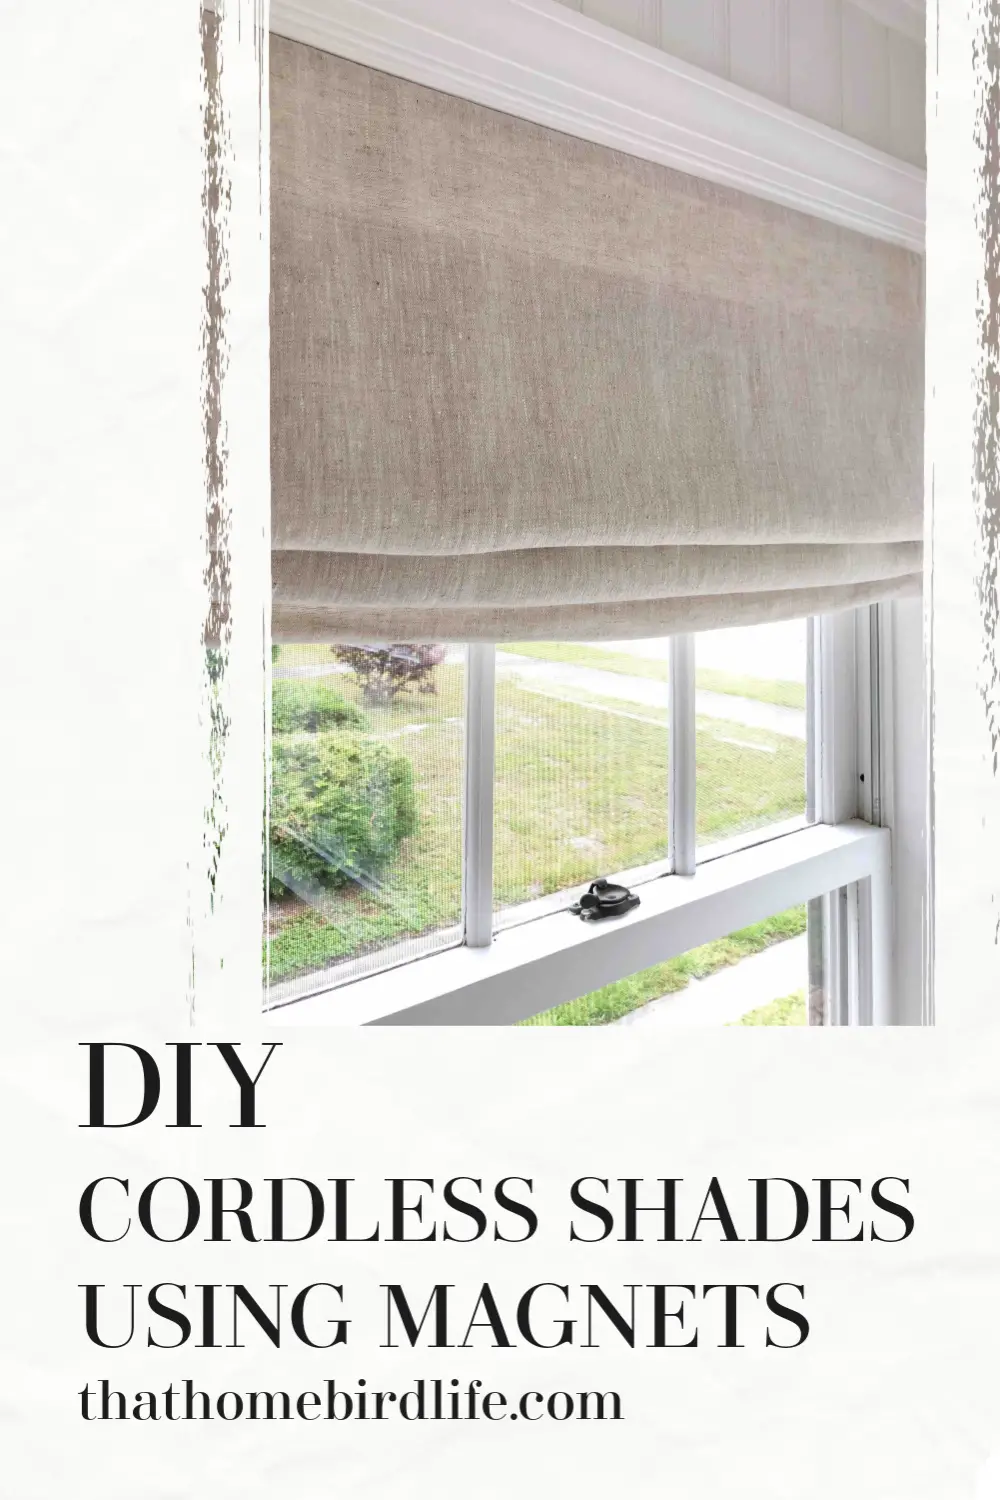
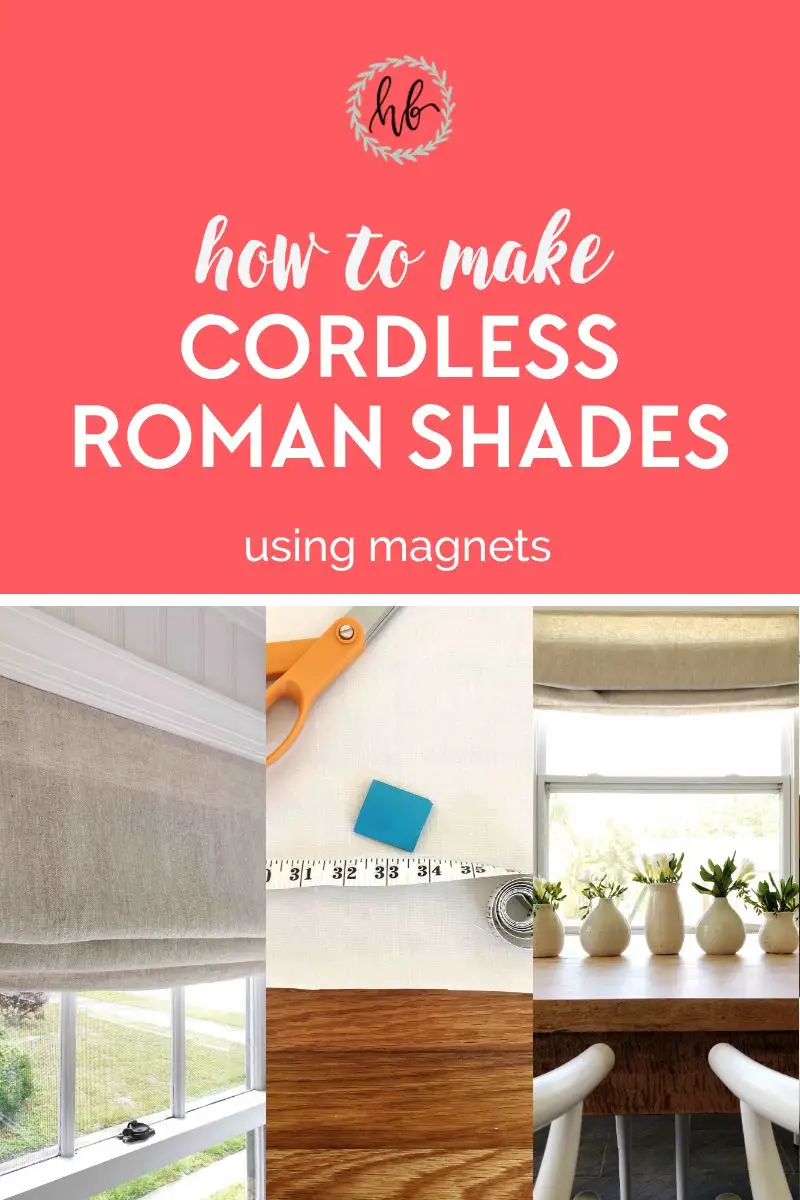
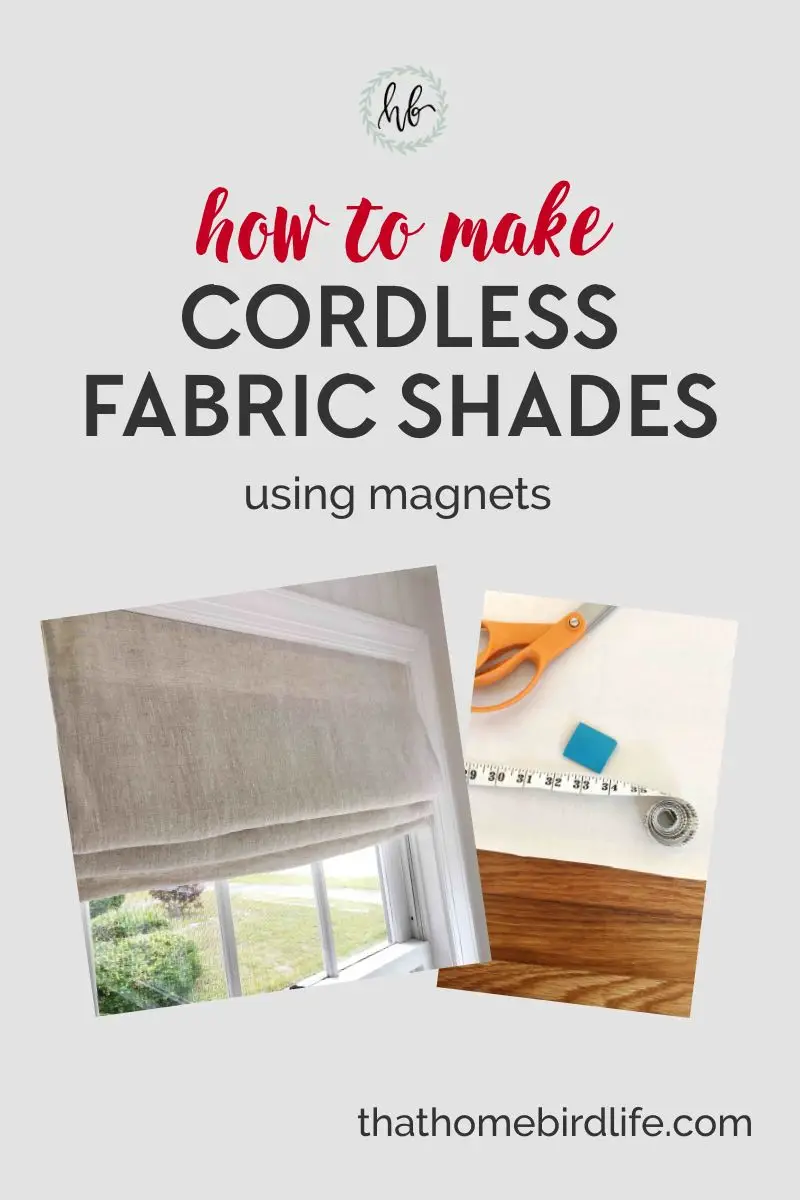
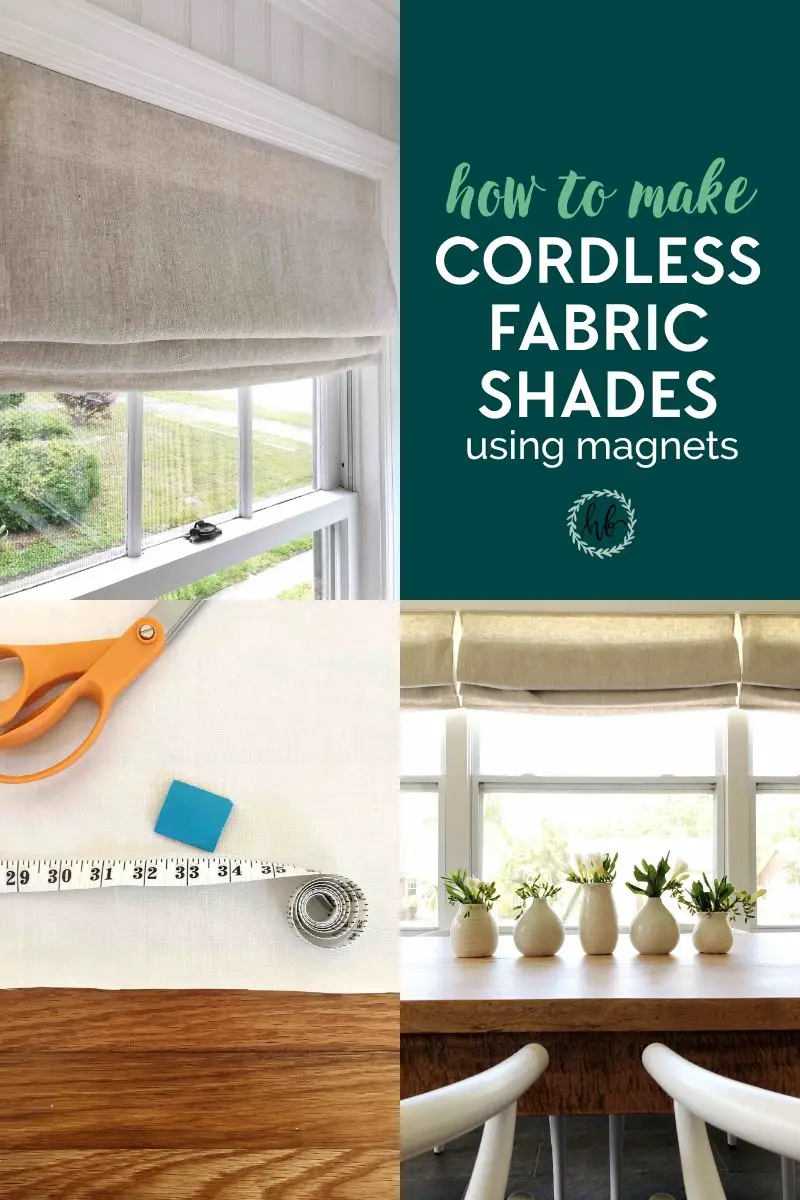
If you've been following along with my One Room Challenge from the start, you might remember that one of my biggest anticipated hurdles of this project was to make make five cordless fabric shades—without crying or losing my mind. I'll admit there were a few tears along the way, but I'm happy to say that I have survived to tell the tale and my windows are now fully covered!
I was unsure whether to share a tutorial, because I'm not 100% happy with the method or the result (I struggle with being perfectionist about things like this) but the fact is that I saved a ton of money with this project. Custom roman blinds would have costed hundreds EACH, and I spent well under $200 for all five blinds, the biggest expense by far being the fabric. Even with some imperfections, I would say that's a pretty good deal!
At this point I wanted to give my Mum a special mention, as she came up with the genius idea of using magnets to make these cordless. She also gave me a lot of advice and help along the way via FaceTime—thanks Mum!
I would definitely suggest testing this method out on a small-ish window. The magnets work much better on the two narrower shades I made (31 inches). The wider ones (46 inches) take a bit more tweaking to get them to stay put. (I might figure out a longer term solution for this at some point, but that's definitely a project for another day!) And if you value your sanity, then please don't do what I did and launch into this project with five shades to make and a deadline looming. (Or if you do, then don't say I didn't warn you ;)
In summary: if you can sew in a vaguely straight line and you are not in a hurry, then you are probably in good shape to take this project on!
This post contains affiliate links, which means that I may earn a small commission if you purchase something that I have recommended, at no cost to you. More information can be found on my disclosures page.
QUICK LINKS
- Materials needed to make cordless roman shades
- Amazon shopping list with the items you will need for this project*
- Steps to make cordless roman shades
*this list excludes lumber—it's best to purchase this in person at your local hardware store.
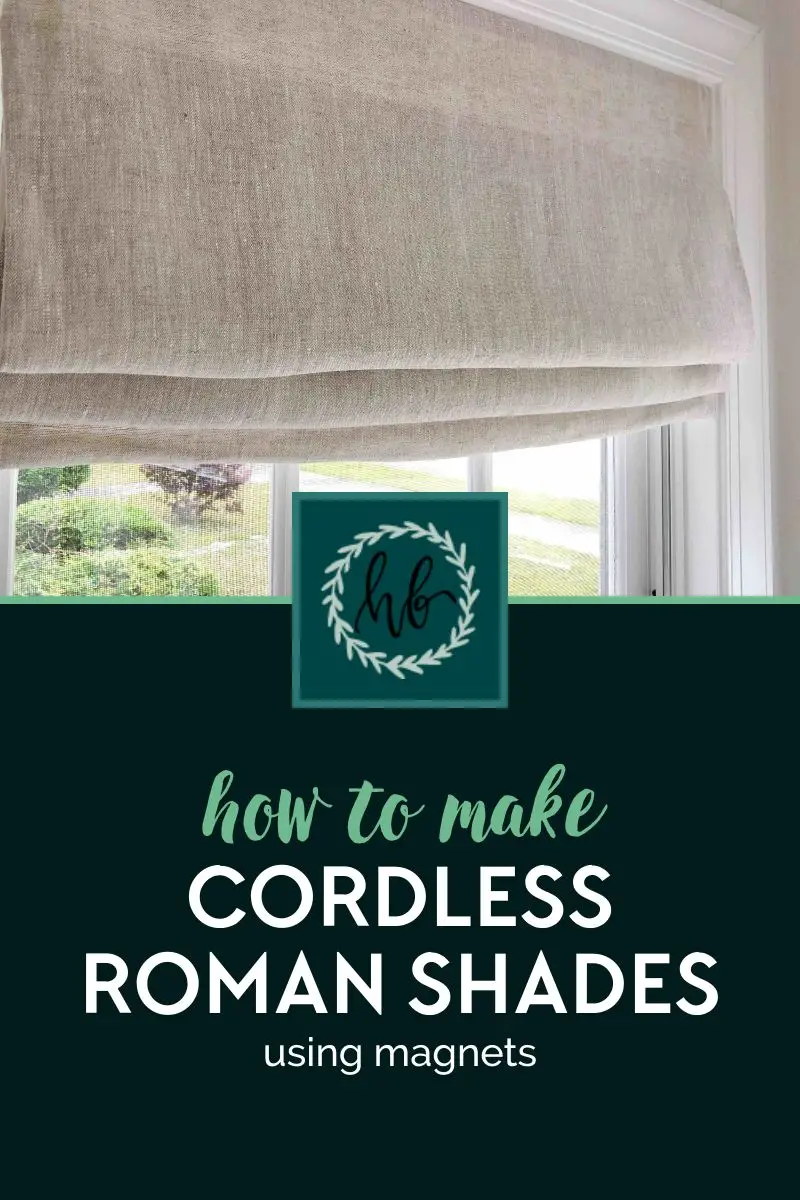
How to Make Inexpensive Cordless Fabric Shades Using Magnets
(Be sure to pin this tutorial so you can refer back to it later!)

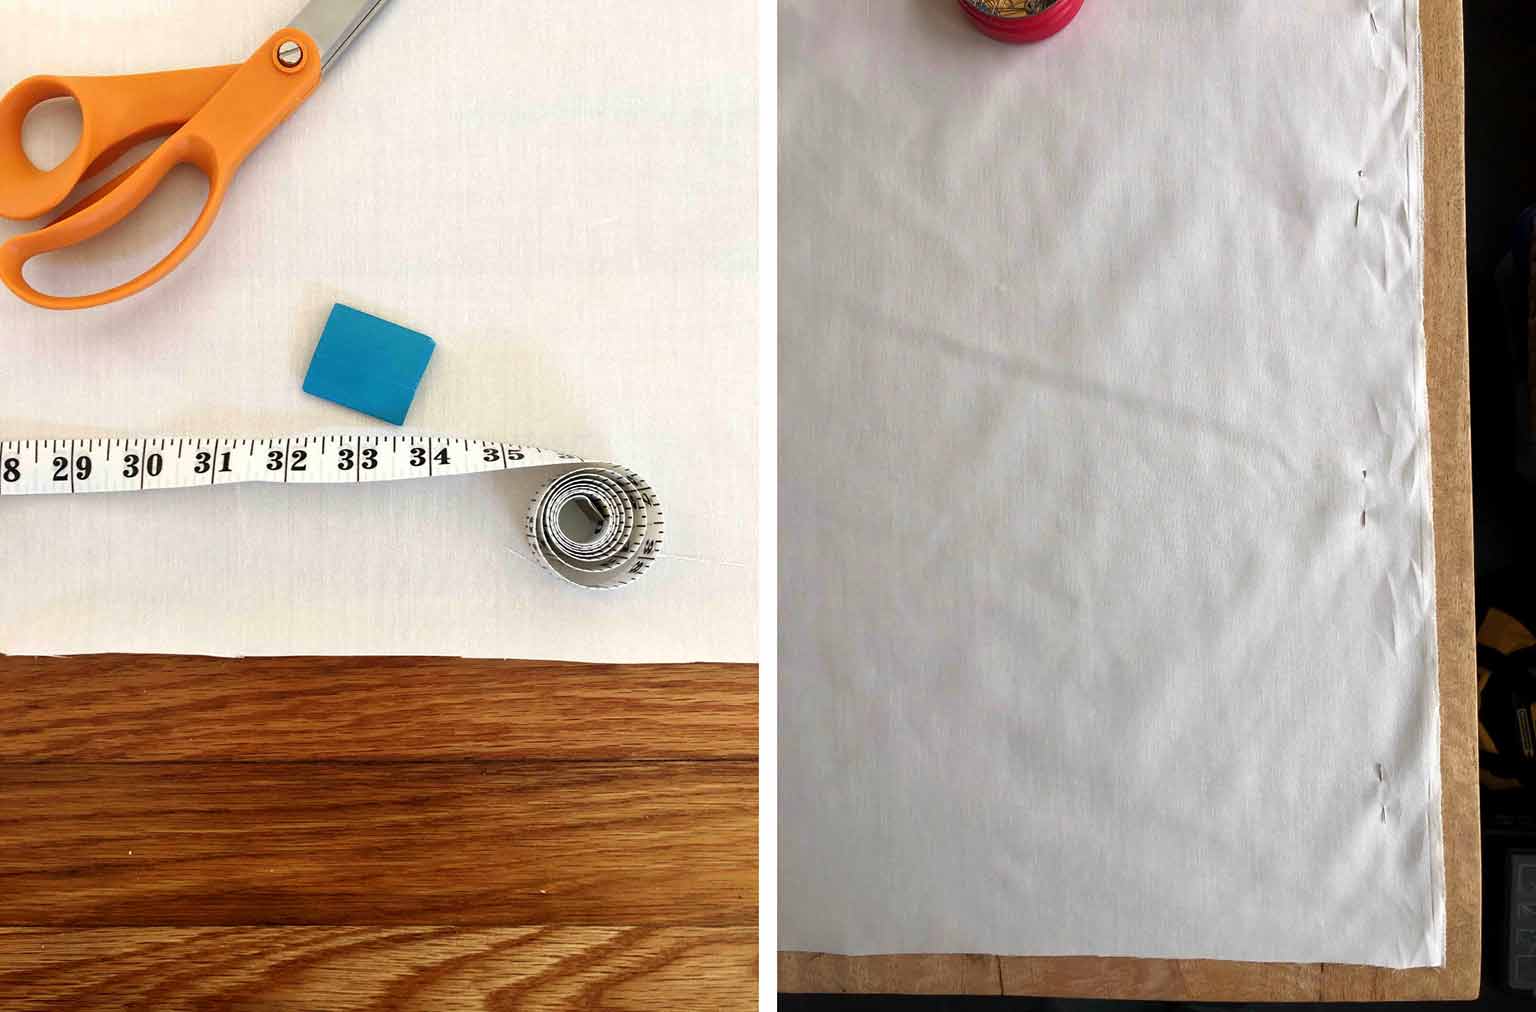
STEP ONE: GATHER YOUR SUPPLIES
- a sewing machine (I'm a big fan of my Brother sewing machine
)
- a needle, pins, thread (to match your fabric), tape measure, yard stick and tailor's chalk
- fabric of your choice (I used this softened linen fabric)
- drapery lining fabric
- six VERY STRONG magnets per shade (I used these ones)
- sew on + sticky back Velcro
- cut away stabilizer or interfacing (you only need a small amount—I used leftover scraps from another project)
- roman shade tube tape
(or wide grosgrain ribbon)
- two 5/16 inch wooden dowel rods
- a flat & narrow piece of wood to use as a bar at the bottom (I used pine casing)
- a 1" x 2" board cut the width of your window (to use as a headrail)
- a wood saw
- two long wood screws and a drill
For your convenience, I've created an Amazon shopping list with almost all of the items you will need for this project. You can access it here.
(NOTE: this list exludes lumber—it's best to purchase this in person at your local hardware store.)
STEP TWO: CUT YOUR FABRIC AND SEW SEAMS
Once you have all your supplies together, you need to measure your window and decide whether you will mount your shades inside the window frame or outside. For an inside mount, you will want your shade to be just smaller than the window itself. For an outside mount, you'll want it around a 1/2 inch bigger on each side. Measure twice, and take a note of these measurements on a piece of paper because you'll need to refer back to them often!
Once you've decided on the size of your shade, you can cut your fabric and lining with an extra two inches added to the width, and an extra 4 inches added to the length. This is your seam allowance (or as I like to refer to it—a wonky cutting/sewing allowance). To help with cutting your fabric straight, you can use a yard stick and tailor's chalk.
Pin your fabric and lining together with right sides facing each other. I like to use plenty of pins to keep everything secure when I'm sewing.
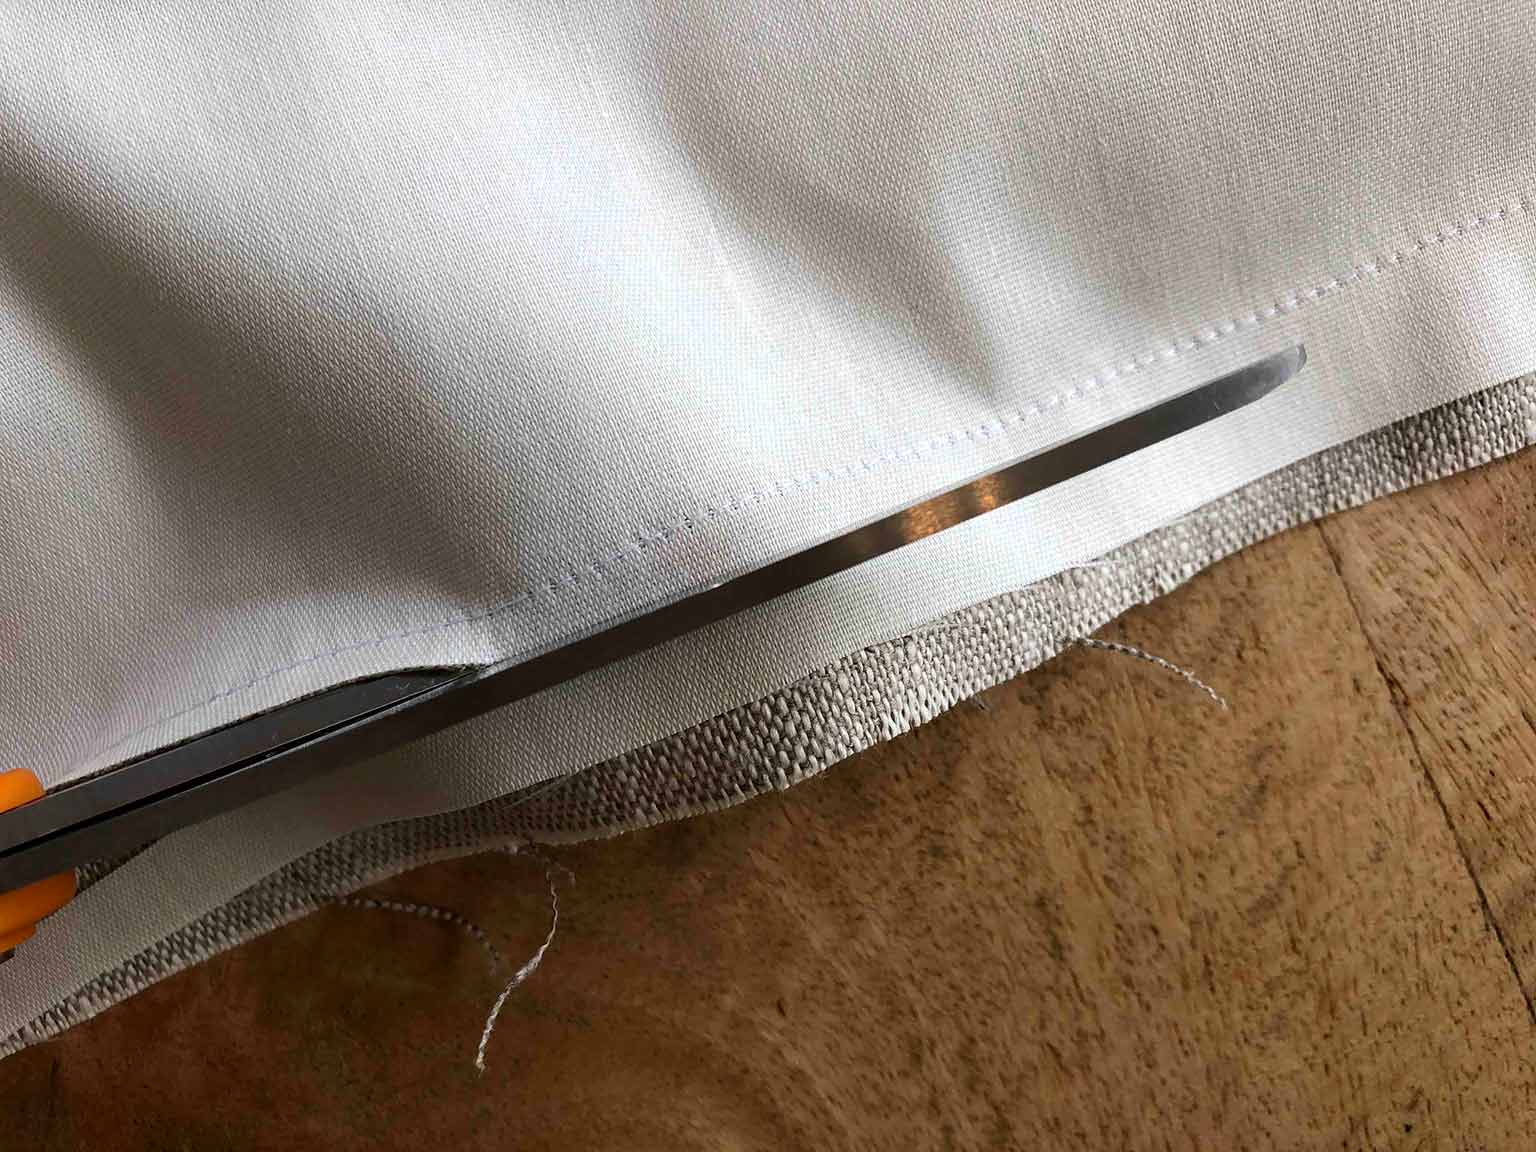
Next, get your sewing machine all threaded up, and sew along each side and the bottom of your shade. Leave the top seam open! These seams will determine the width of your blind, so it's worth taking a little bit of time to measure again, and perhaps even draw a line with tailor's chalk to guide you.
Once you have sewn three seams, you can trim the excess fabric, and snip diagonally across the two bottom corners (being careful not to cut any of the stitching.) This will give you a nice crisp finish when you eventually turn it right side out.
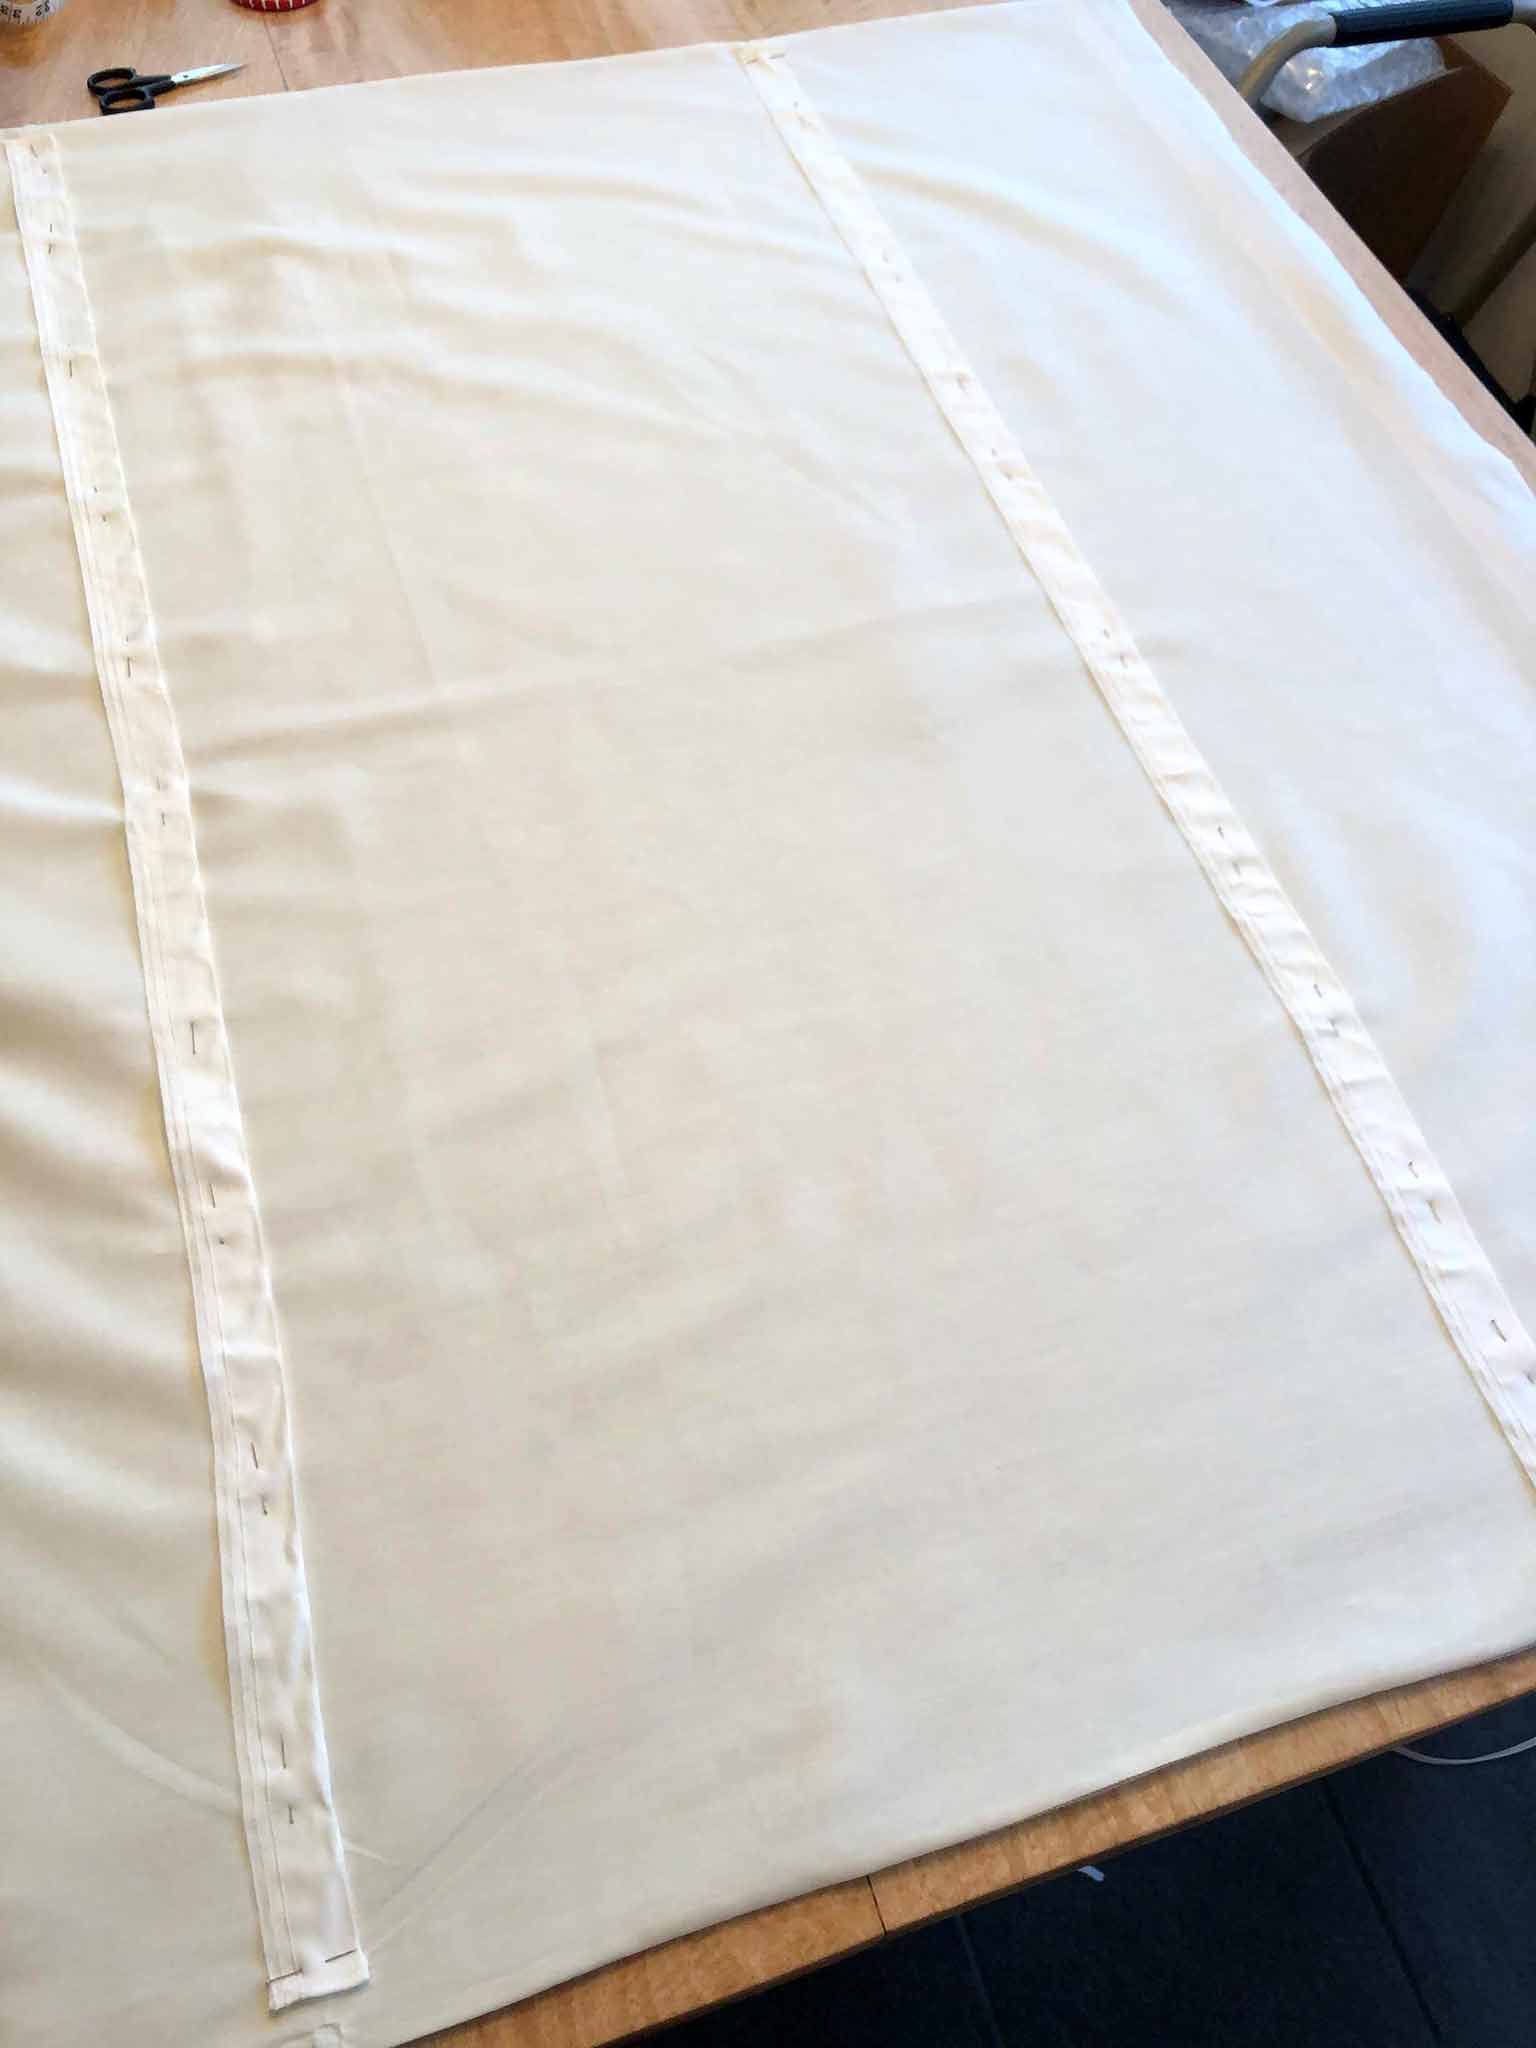
STEP THREE: HAND SEW MAGNETS
This part is a little tricky, but I'll try and explain it as simply as I can! To create the folds in the roman shade when it's up, you need to add magnets at intervals along the edges of the shade that will snap together. For my 31 inch width x 53 inch length blind, I created three pleats, which meant three magnets on each side. This calculator helped me figure out the exact measurements (although you'll need to convert it from centimeters to inches!) I also used a piece of paper and folded it to help me visualize it.
As a rough formula, though, take three inches off the length of your blind (you want a little bit of room at the top) and divide the remainder into 5 (three pleats=5 sections.) This number is how long each pleat will end up being. Then, from the bottom of the shade, your magnets will go 1/5 of the way up, 3/5 of the way up, and 3 inches from the top.
I know, it's so confusing when it's written down, but stick with me!
This is how it worked out for my 53 inch length blind:
53 minus 3 = 50 inches
50 divided by 5 = 10 inches
So...
First set of magnets: 10 inches from the bottom
Second set of magnets: 30 inches from the bottom
Third set of magnets: 50 inches from the bottom (3 inches from the top)
Still with me??
Now that you have those calculations worked out, and while your shade is still turned inside out, you can add pins on either edge of your lining to mark where your magnets are going to be sewn in.
Now, there's one more detail at this stage that's very important, and then it gets easier from here! Promise! Magnets have two sides to them, and you need to make sure you have the right side facing the right way, so that they will attract rather than repel. From the top, your first set of magnets will be face up, and the other two sets will be face down. Again, it's hard to explain in writing, but if you do it this way, the magnets will be attracting each other when folded up:
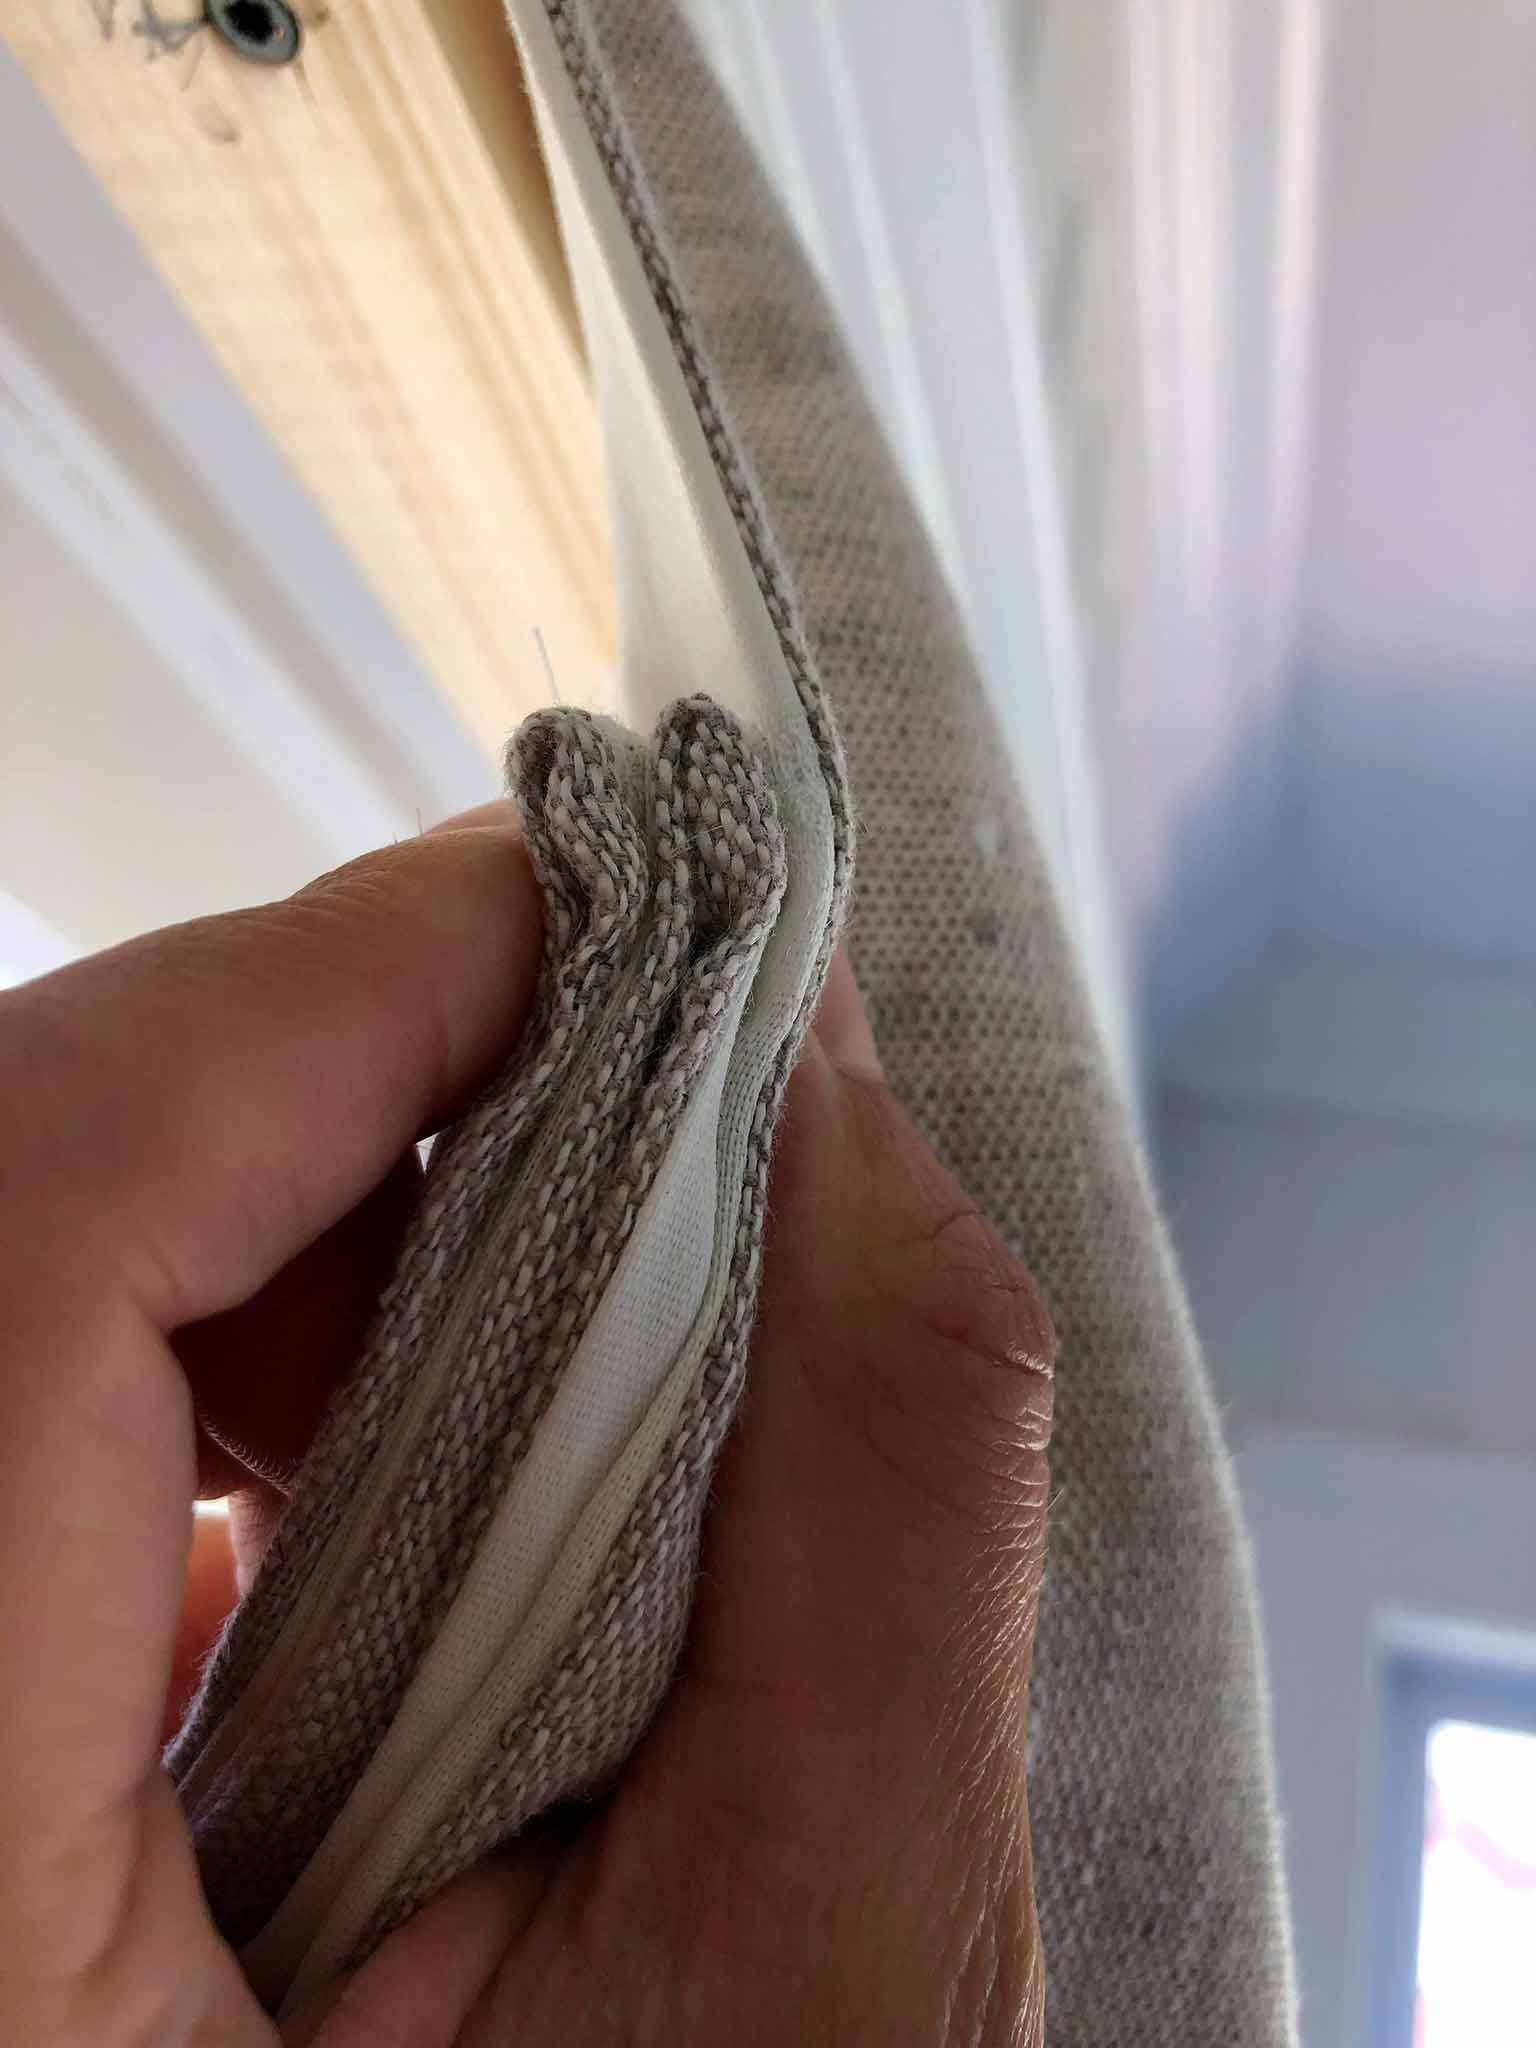
You might even want to mark your magnets with a sharpie or add stickers temporarily, just to make sure you're sewing them in the right way. I did make a mistake with one of my magnets, and I was able to turn over the magnet inside the lining, so it's not a huge deal if you get it wrong.
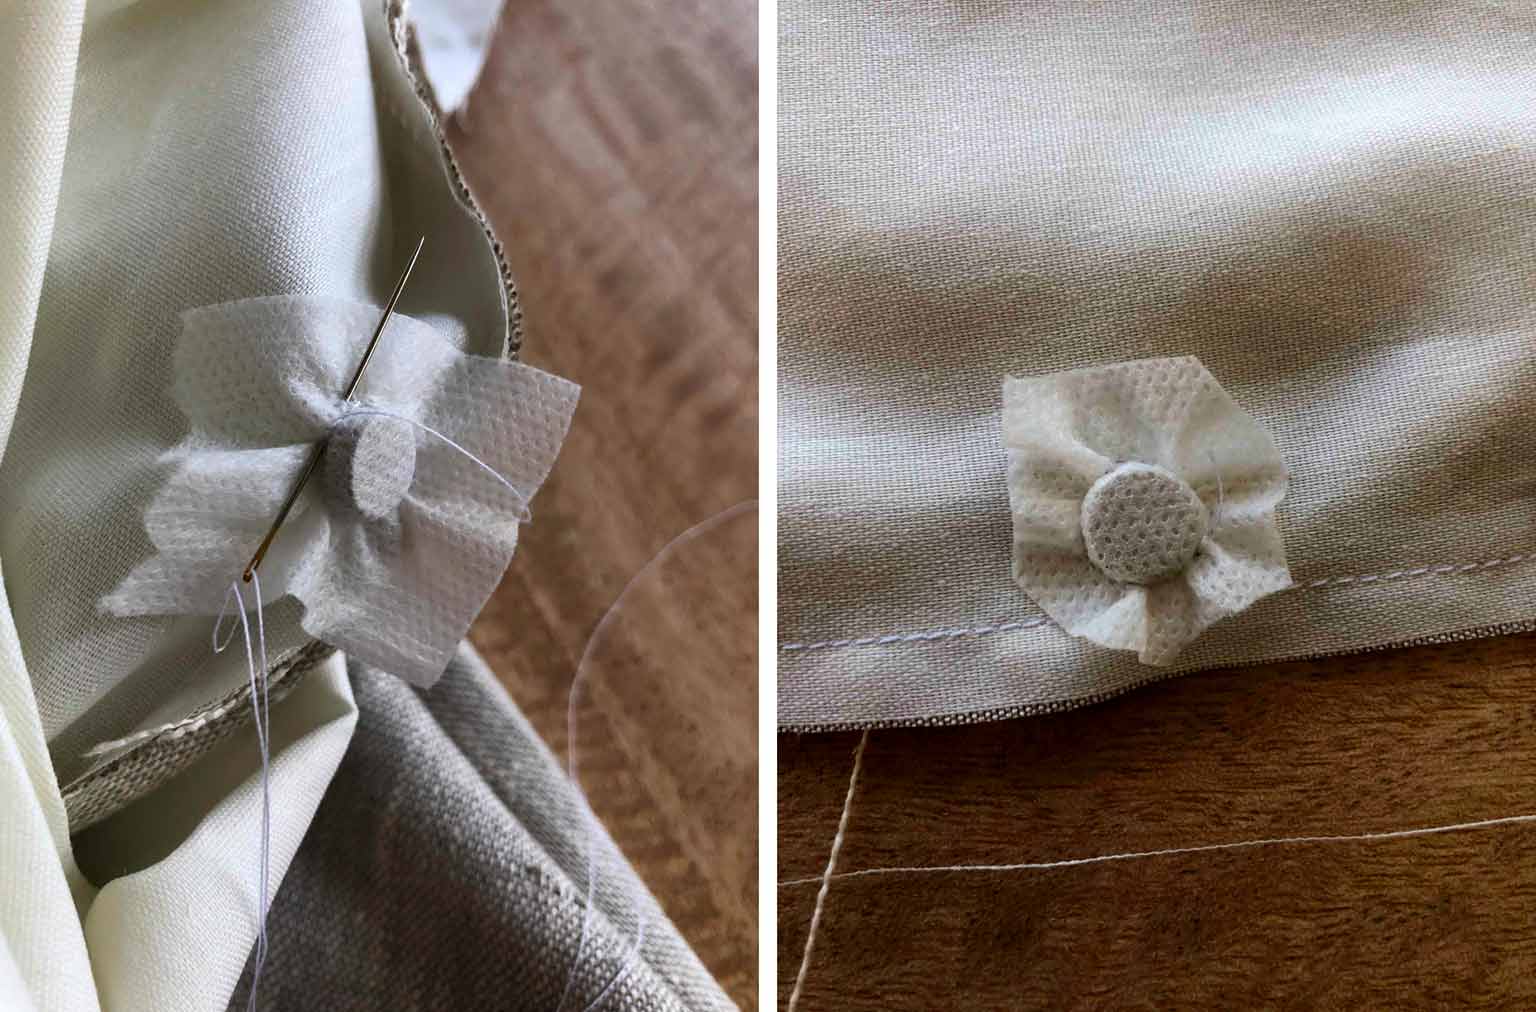
To sew the magnets into the lining, I used small pieces of interlining (because it's thin and it doesn't fray) and back stitched around each magnet so that it was nice and snug. (Reminder: your blind is still turned inside out at this stage.)
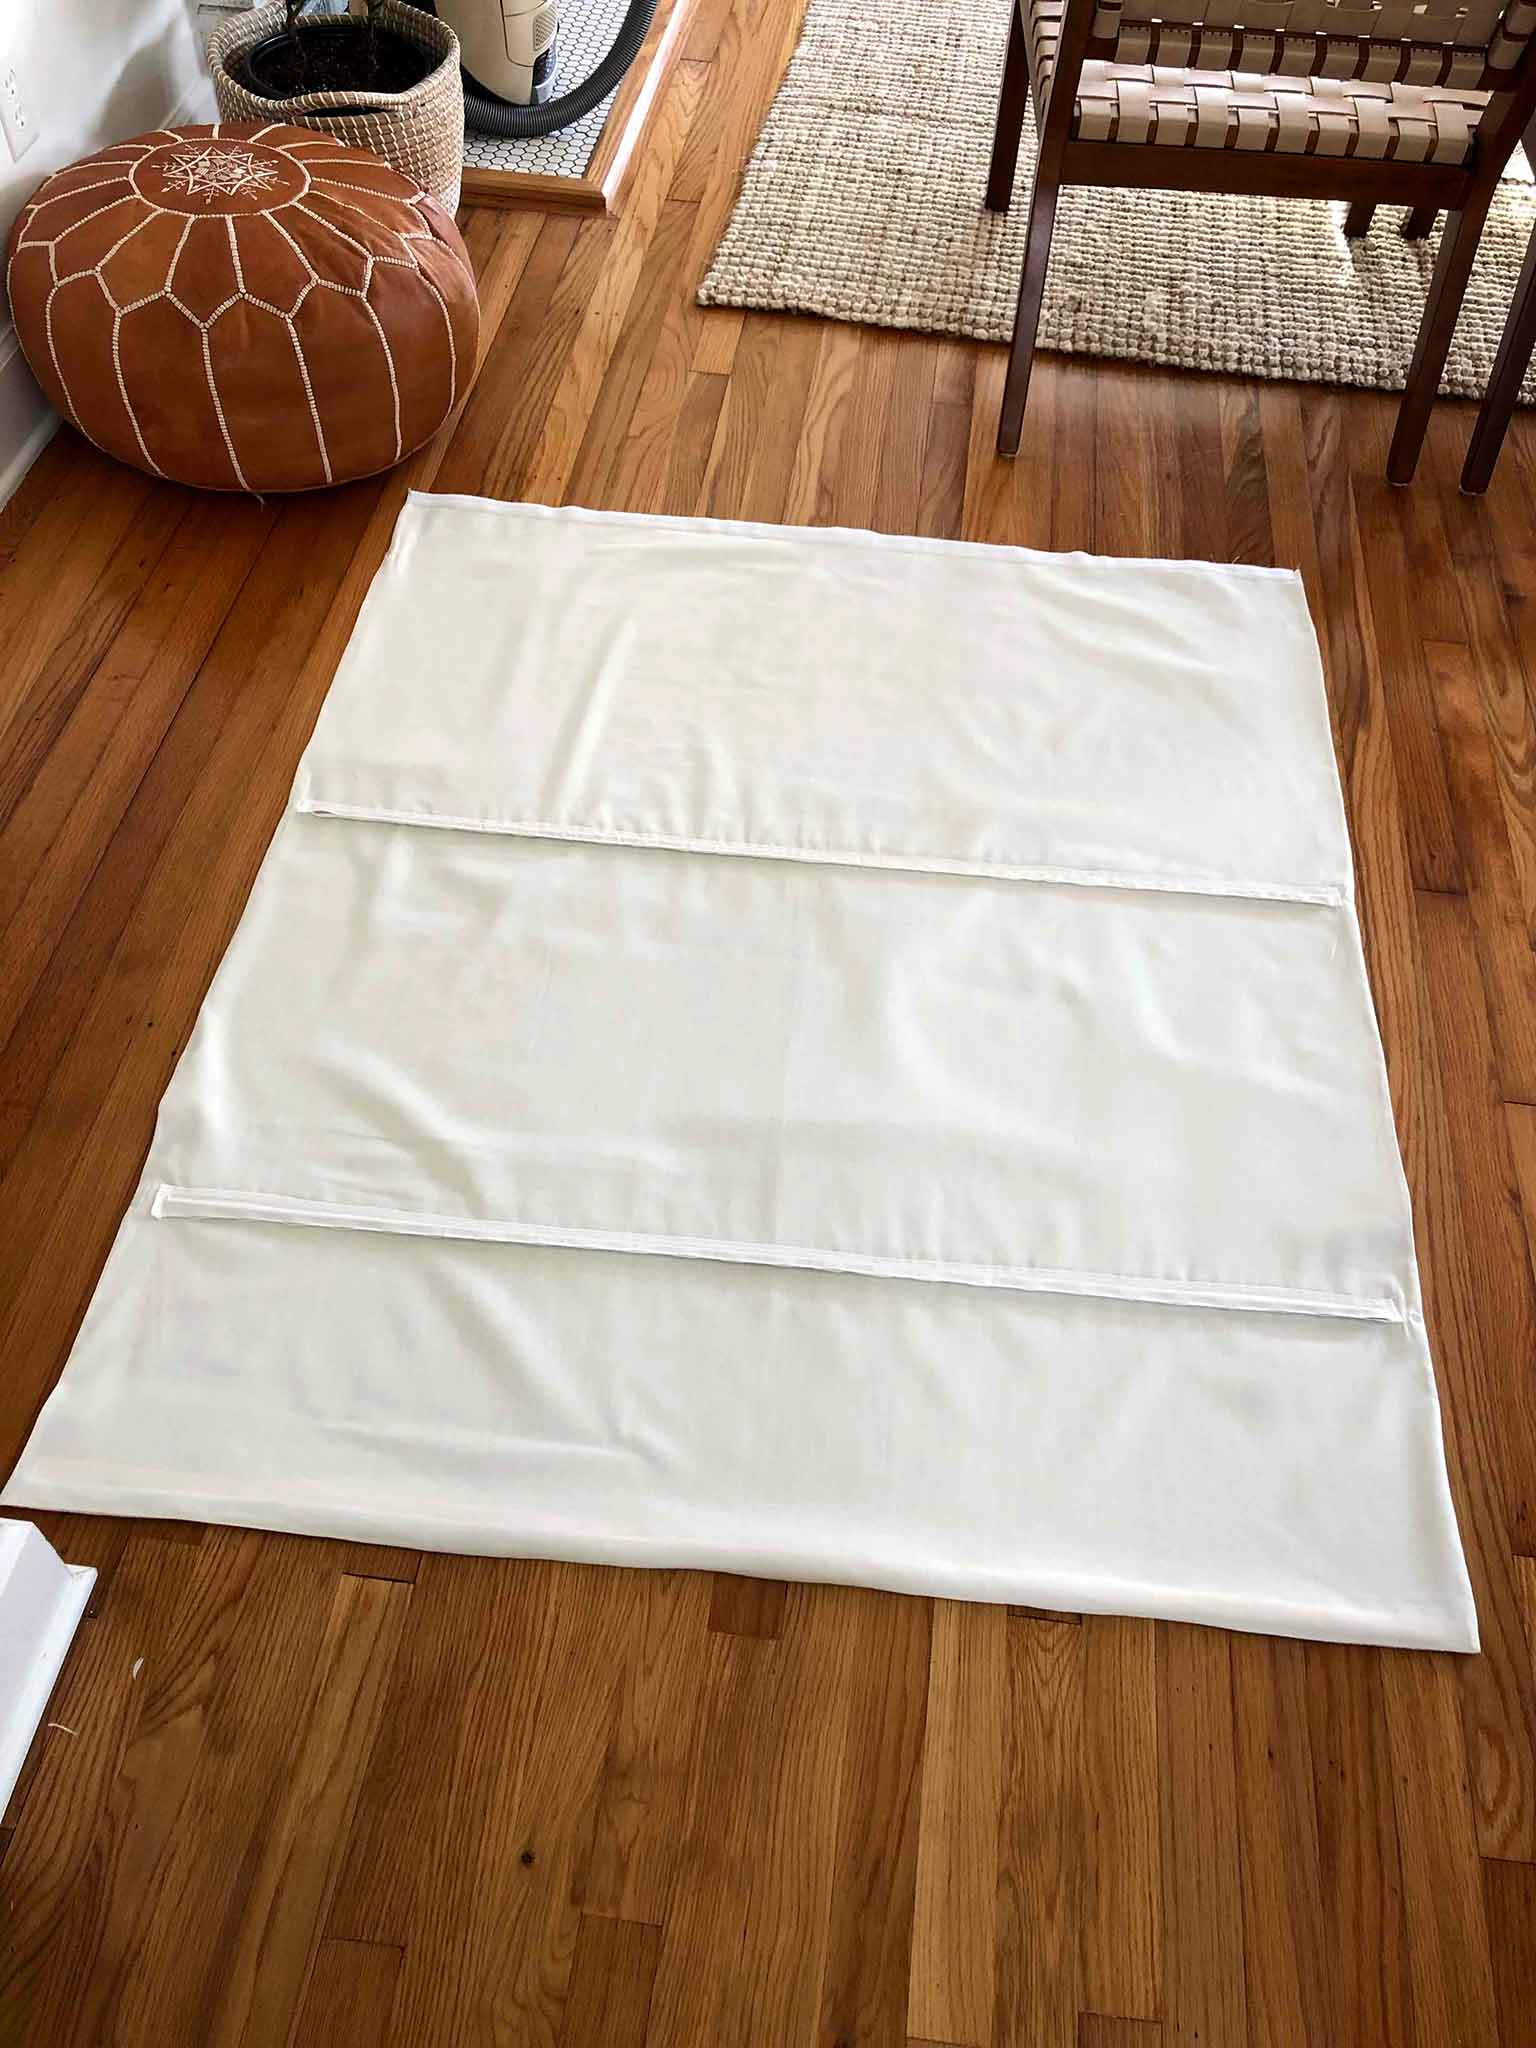
STEP FOUR: ADD DOWELS
If you've made it this far, then you're doing GREAT! The rest of the process is a little fiddly, but it won't make your head hurt quite as much.
Alright. So now you want to turn your blind the right side out, and give it a good iron around the seams. Now cut down your weight bar (I used a piece of pine casing) slightly smaller than the width of your blind, and insert it into the bottom of the shade.
Next, grab your roman shade tube tape or your wide ribbon, and cut two pieces to fit the width in between the magnets, with a little extra for hemming. If you are using tube tape, you can hem both ends as there are slits to insert the dowel. If you are using ribbon, fold and iron it in half width ways and hem one end, leaving an end open so that you can insert the dowel.
Pin your two widths of tube tape/ribbon on to the lining in between the bottom two sets of magnets. (You won't need a dowel for the top set.) Use plenty of pins so that it doesn't slip around.
Then machine stitch along the top of the tube tape/ribbon all the way across your shade. Smooth the fabric as you go, and take your time!
Cut your dowels a little shorter than the width of your blind and insert them into the tube tape/ribbon. If you used ribbon, hand sew the remaining open end.
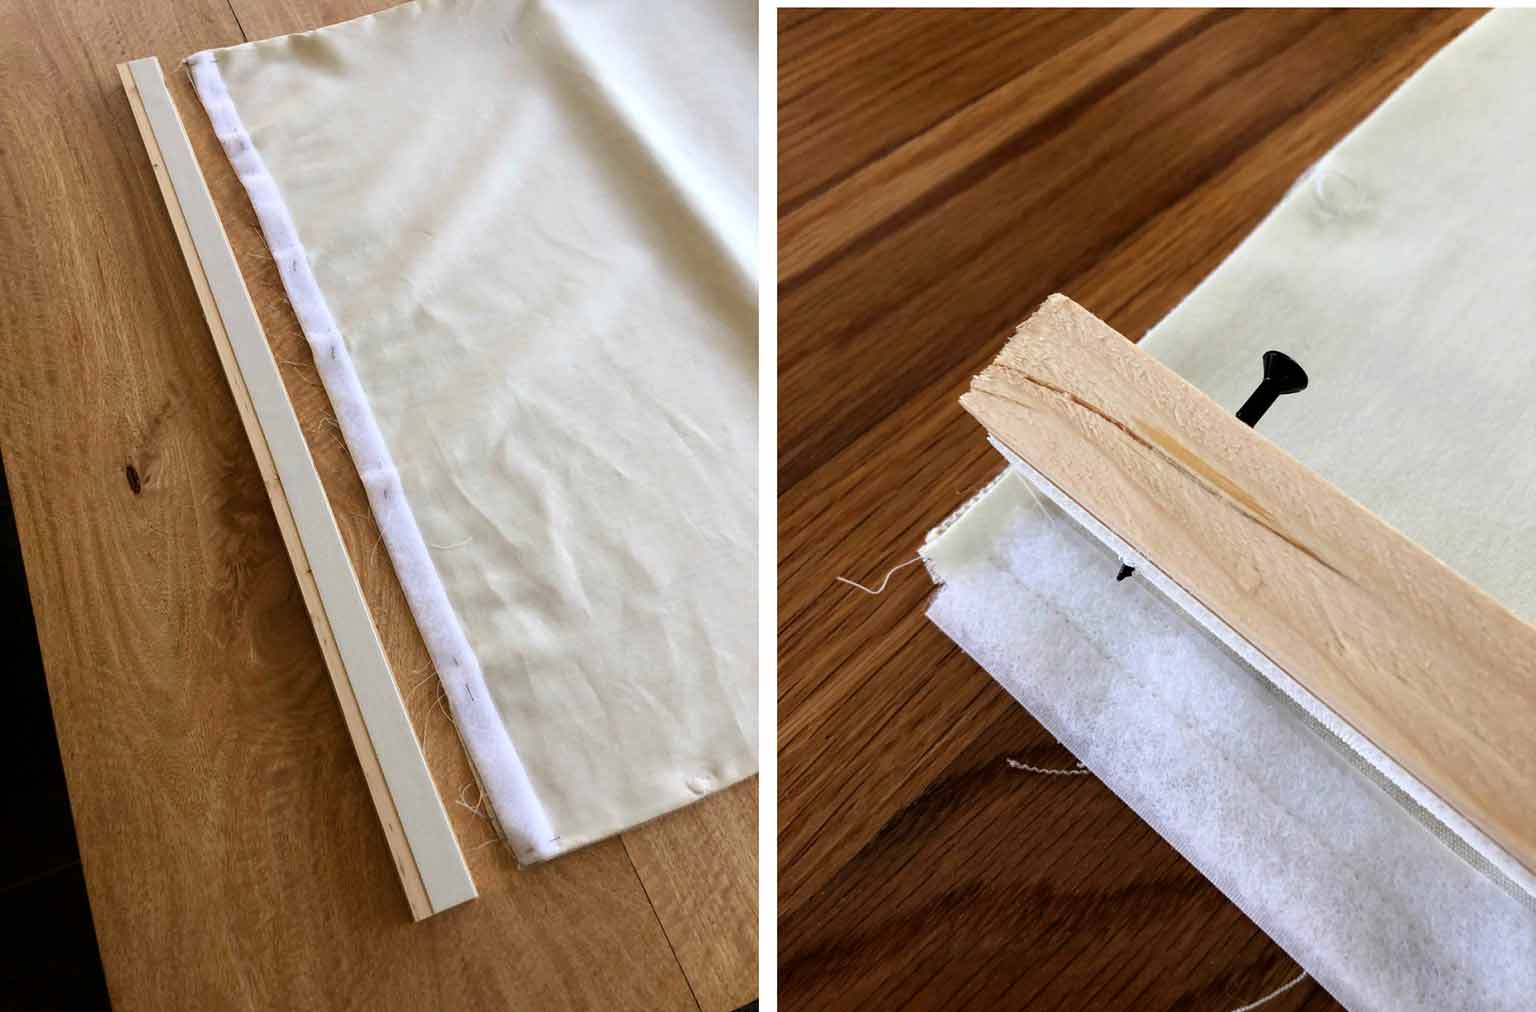
STEP FIVE: ADD VELCRO AND INSTALL
OK. Last part! Add the sticky side of the velcro to your headrail. Then pin the sew-on side of the velcro to the top of your blind. You might want to measure from the bottom of your blind to make sure it's pinned straight. For an inside mount, the velcro should be placed just above the length you want your finished blind to be. For an outside mount, allow an extra inch in length. Machine stitch the velcro to the top of your blind to secure it.
Now give your blind one last iron, as it's time to fix it to the window! (You're almost there!)
Make a couple of pilot holes on either side of the headrail for your screws. Then attach the headrail to the shade with the velcro, and carefully drill the screws into your window frame.
Installing the shade was a two person job—one person to screw in the headrail, and one person to hold the blind tightly in place against the window, whilst making sure the fabric doesn't pucker.
PHEW!! You made it! Are you proud of yourself? You should be!
I truly hope that at this point you are standing back admiring your beautiful cordless roman shade, but if you did get stuck at any point along the way, then feel free to email me. I'd love to help if I can, and your feedback will help me improve this tutorial for other people. I hope this helps you find an inexpensive way of making a cordless fabric shade, and I'd love to see your results if you tried this method!
Catch up on other weeks...
Week One: Inspiration, Mood board, and Plans
Week Two: Refinishing the Dining Table
Week Three: Favorite Finds so Far
Week Four: Building a Freestanding Window Bench
Week Six: The Reveal!
Don't forget, you can view all the other talented guest participants here—head on over and show them some love!


Are you a fellow ORC Guest Participant?
I've written a guide (which you can read here) and designed a printable planner to help get you organized for the challenge! Simply put in your email below to have the PDF planner emailed to you: