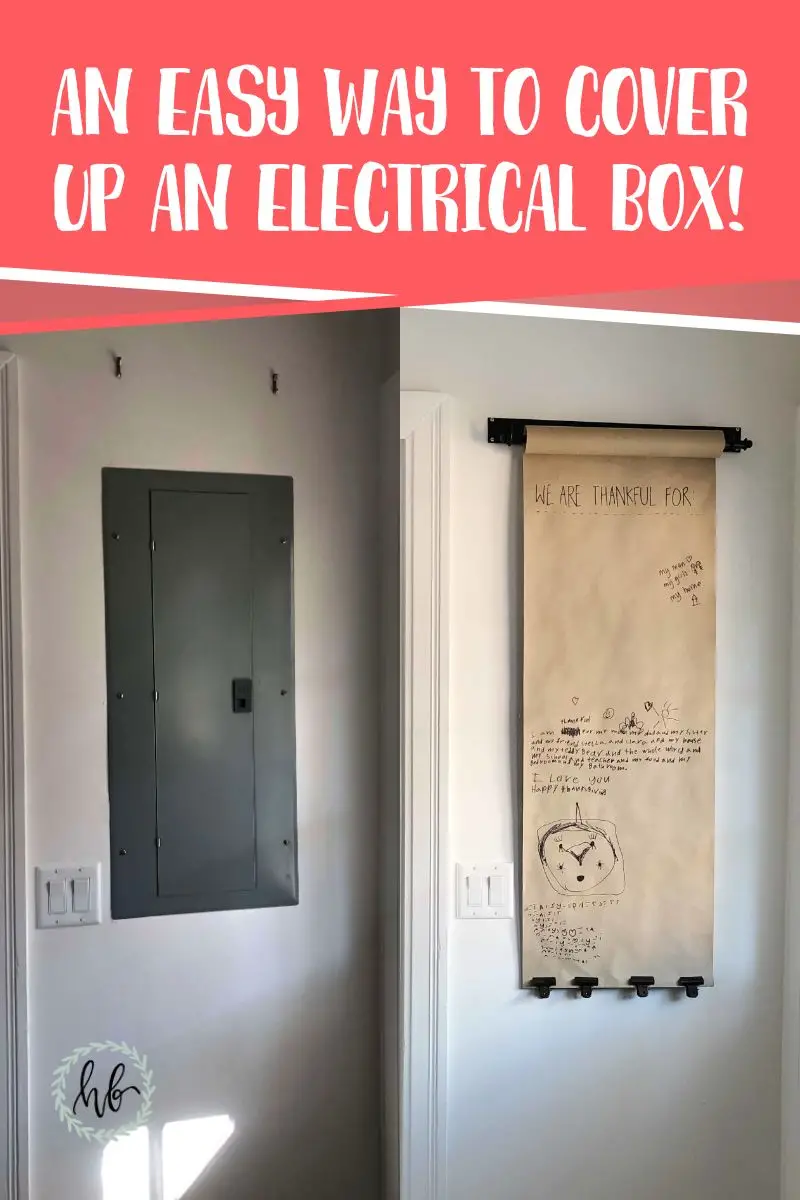
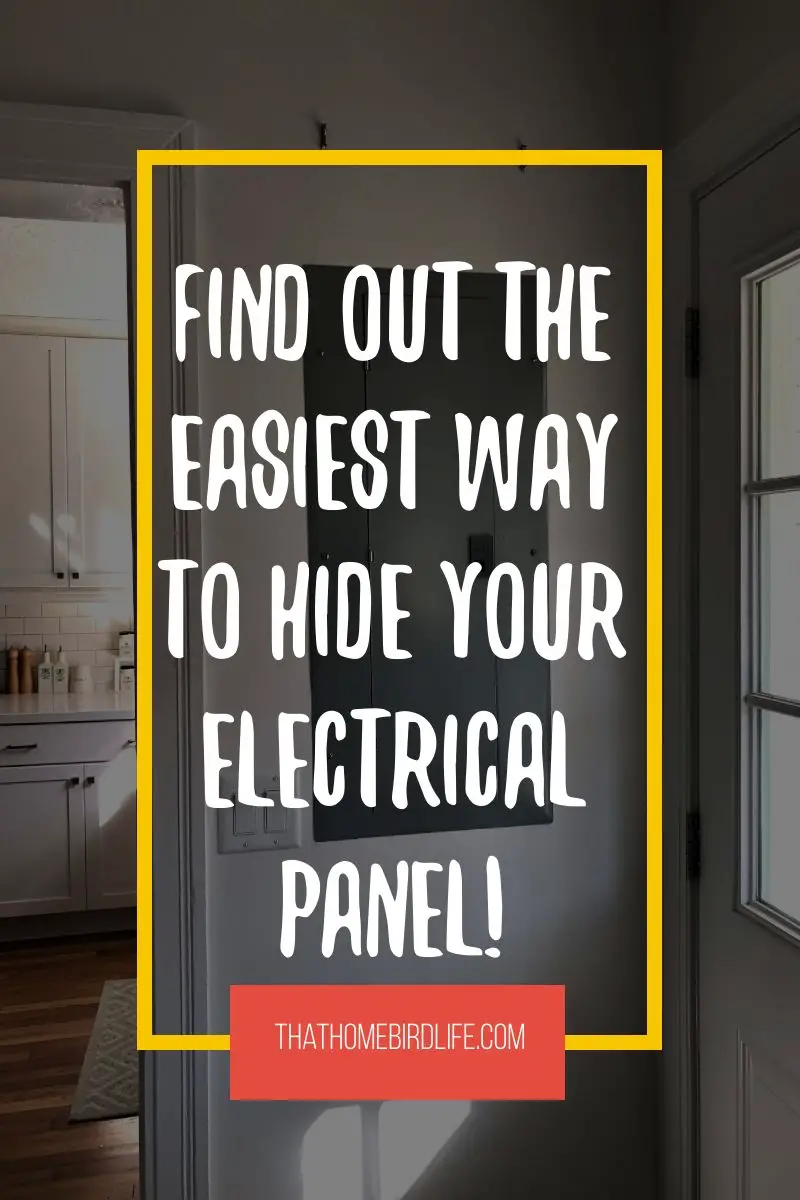
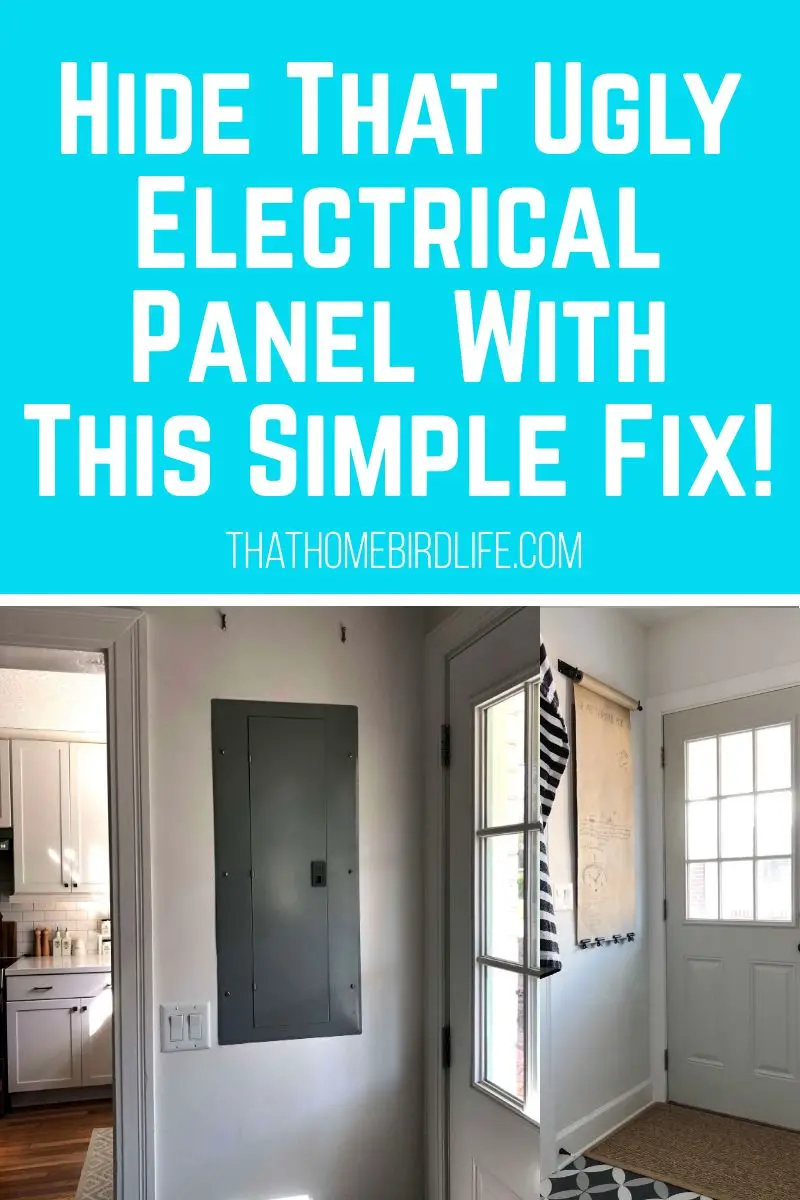
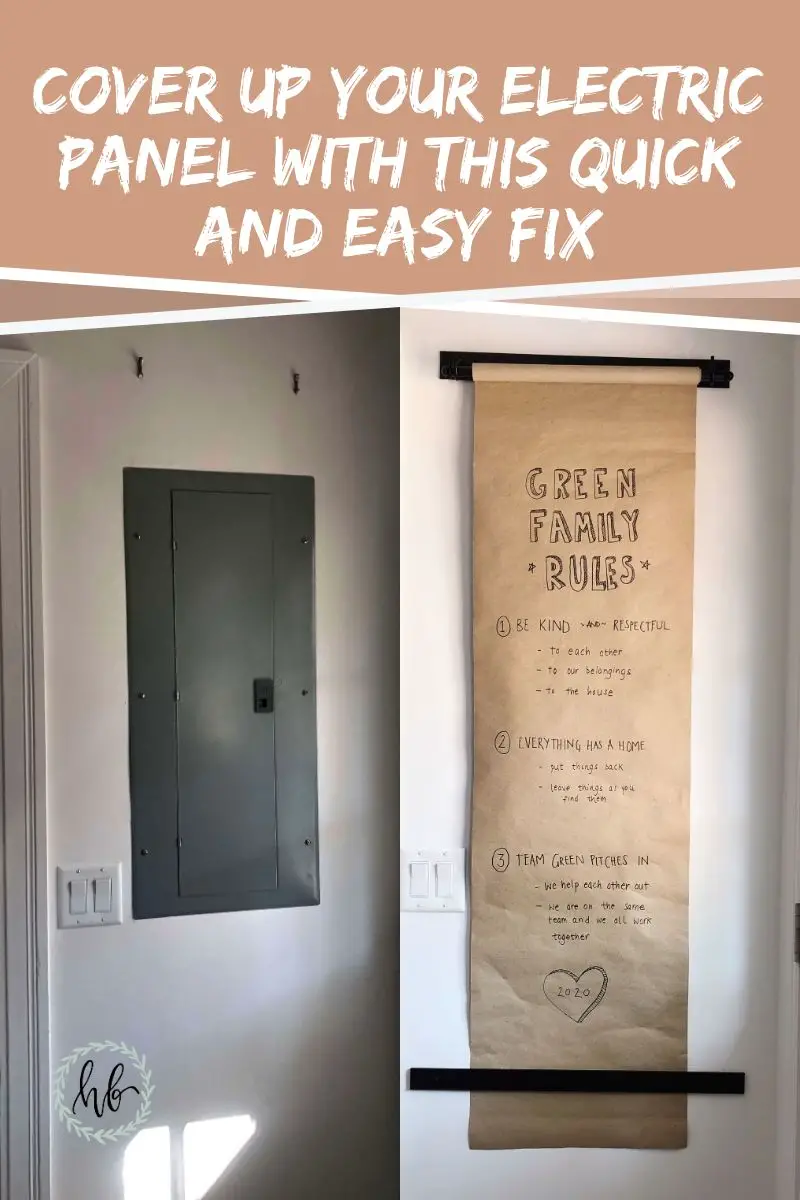
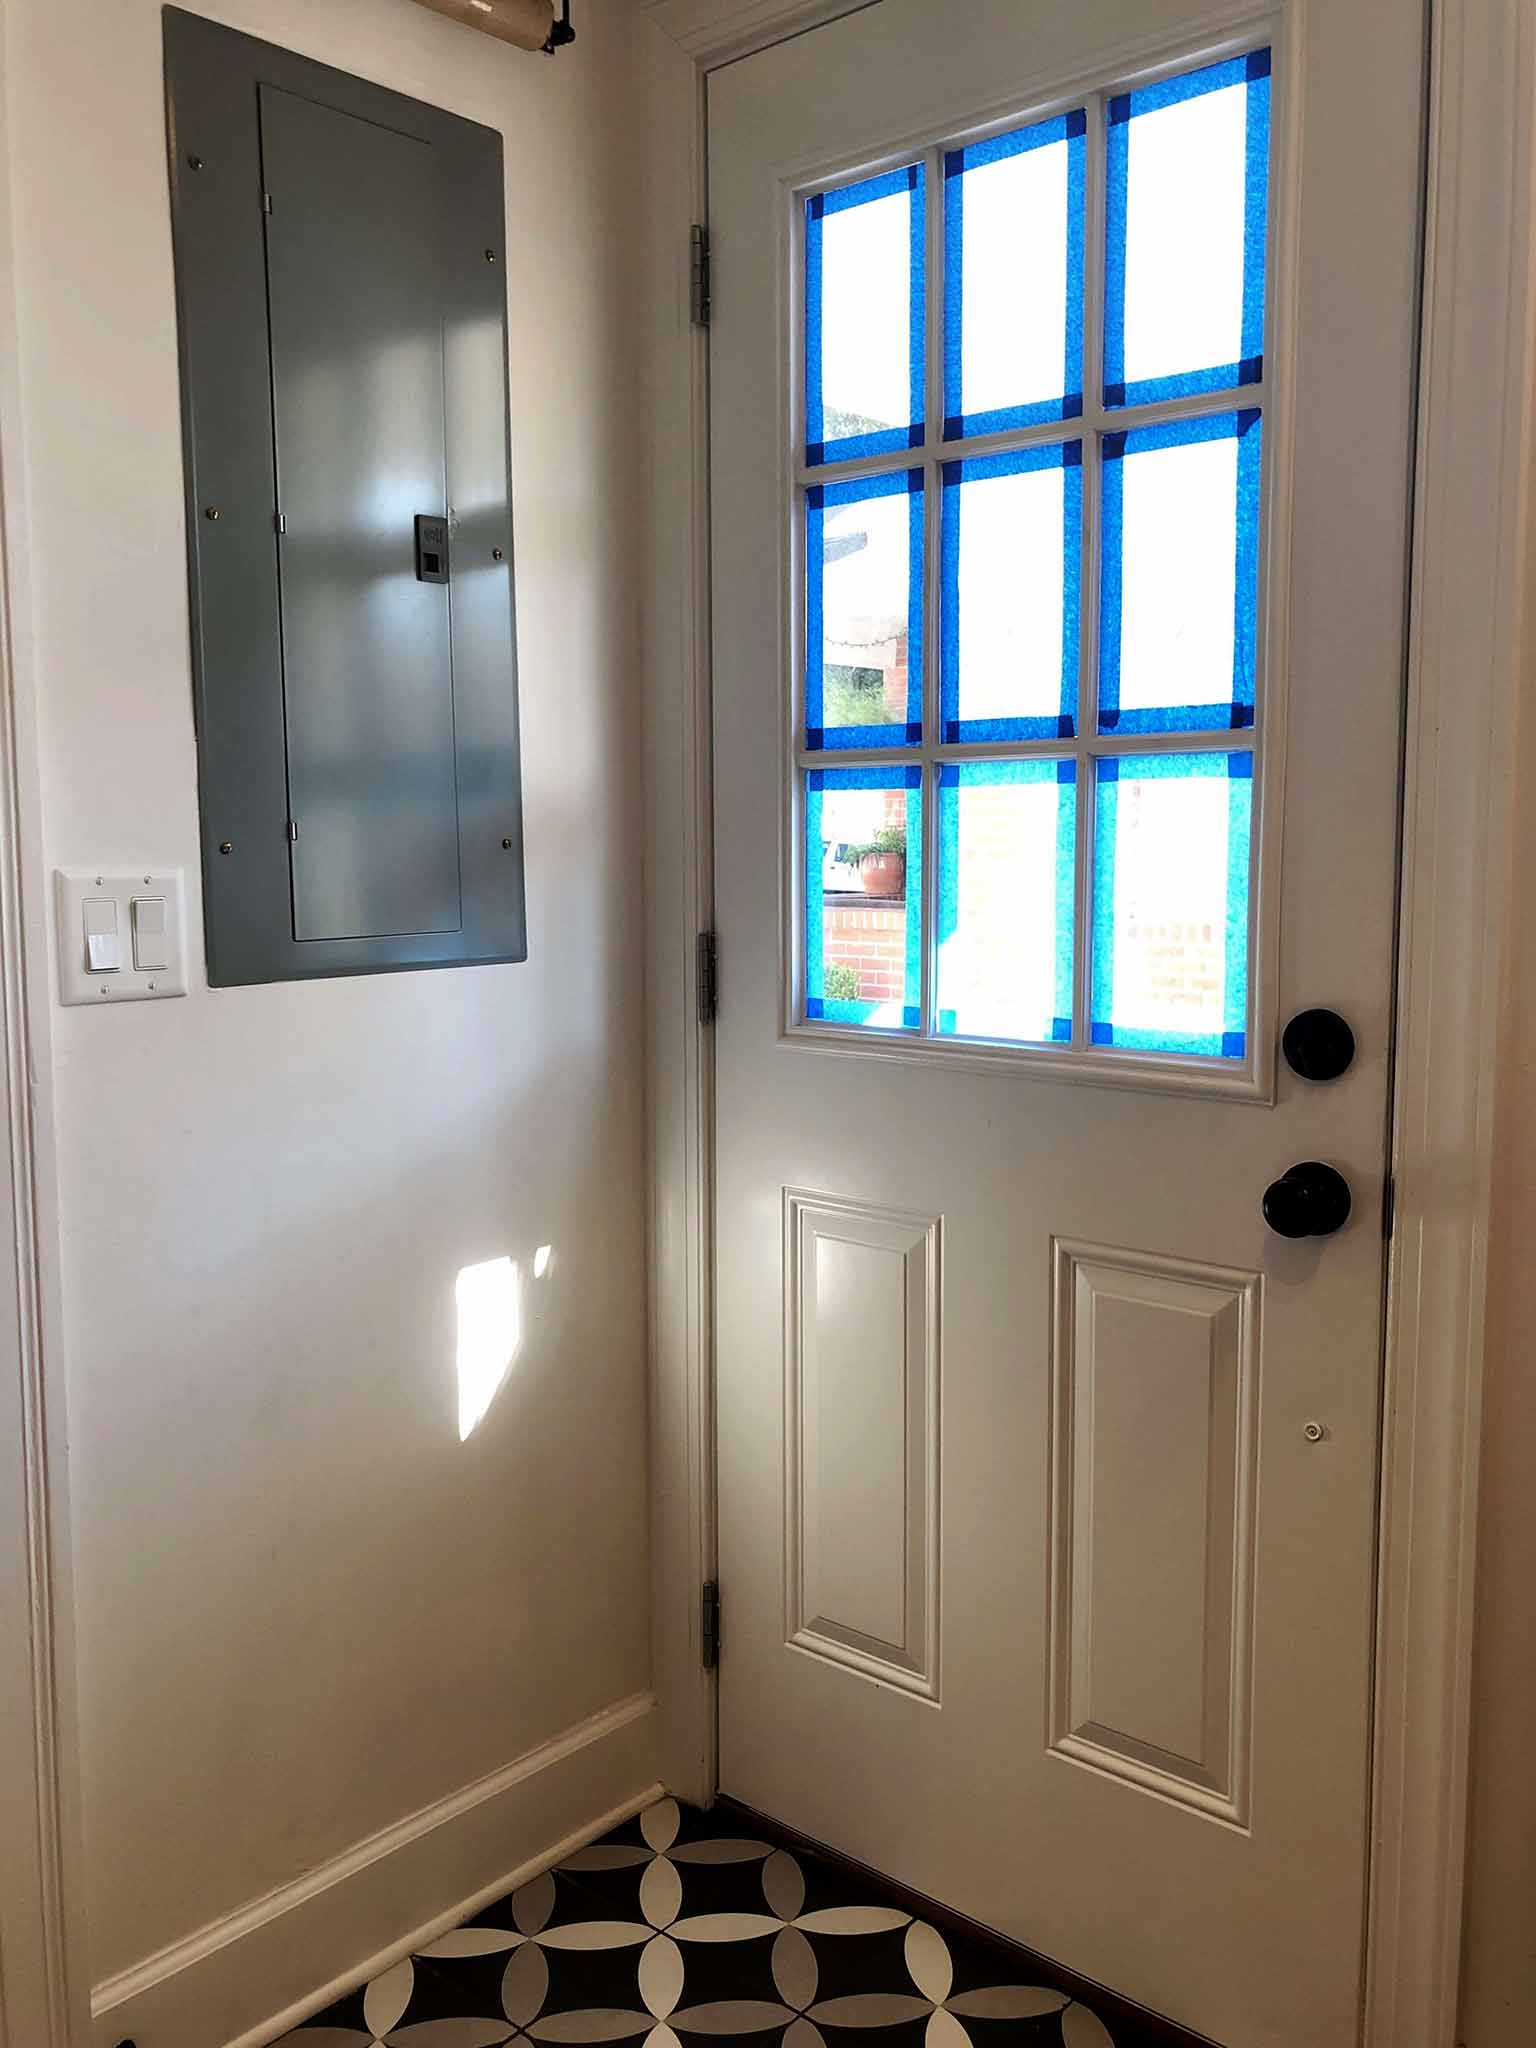
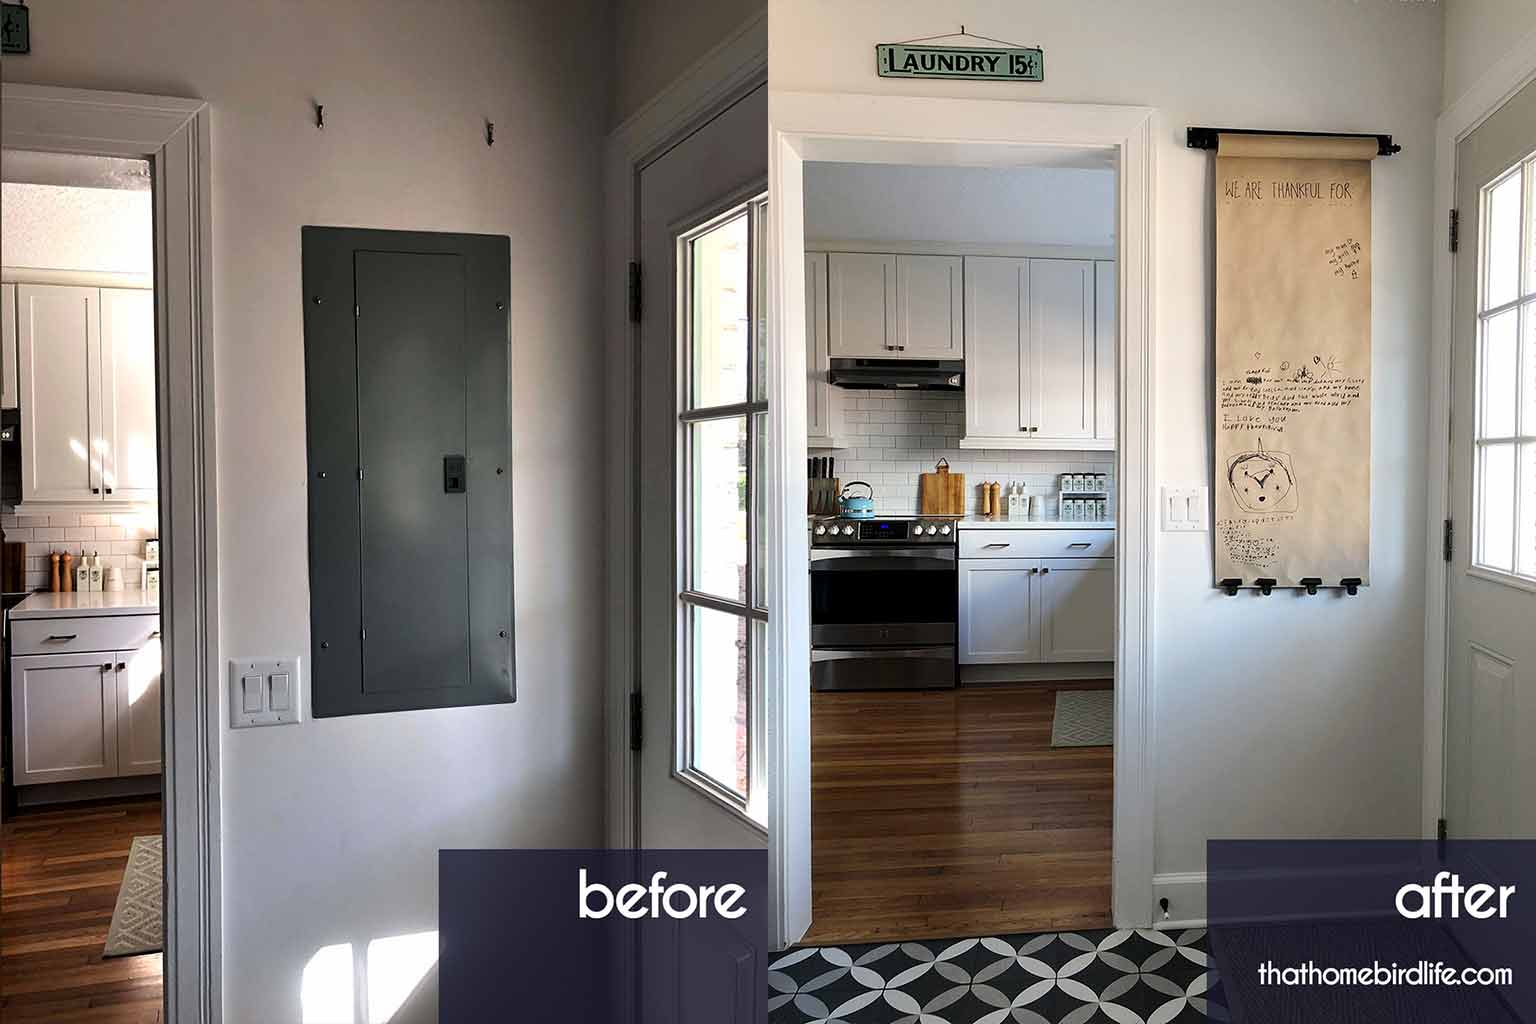
When we built the guest house in our backyard, we also had to update our small electrical panel to accommodate the extra breakers. Actually, I think it was the addition of the hot tub that pushed us over the limit of our old panel, but hot tub or no hot tub—it was a good idea to upgrade it as we had added so much square footage to the house. Of course, the new panel was a lot larger than the old one, and so I wanted to find something that would cover up the utalitarian (read: ugly) panel.
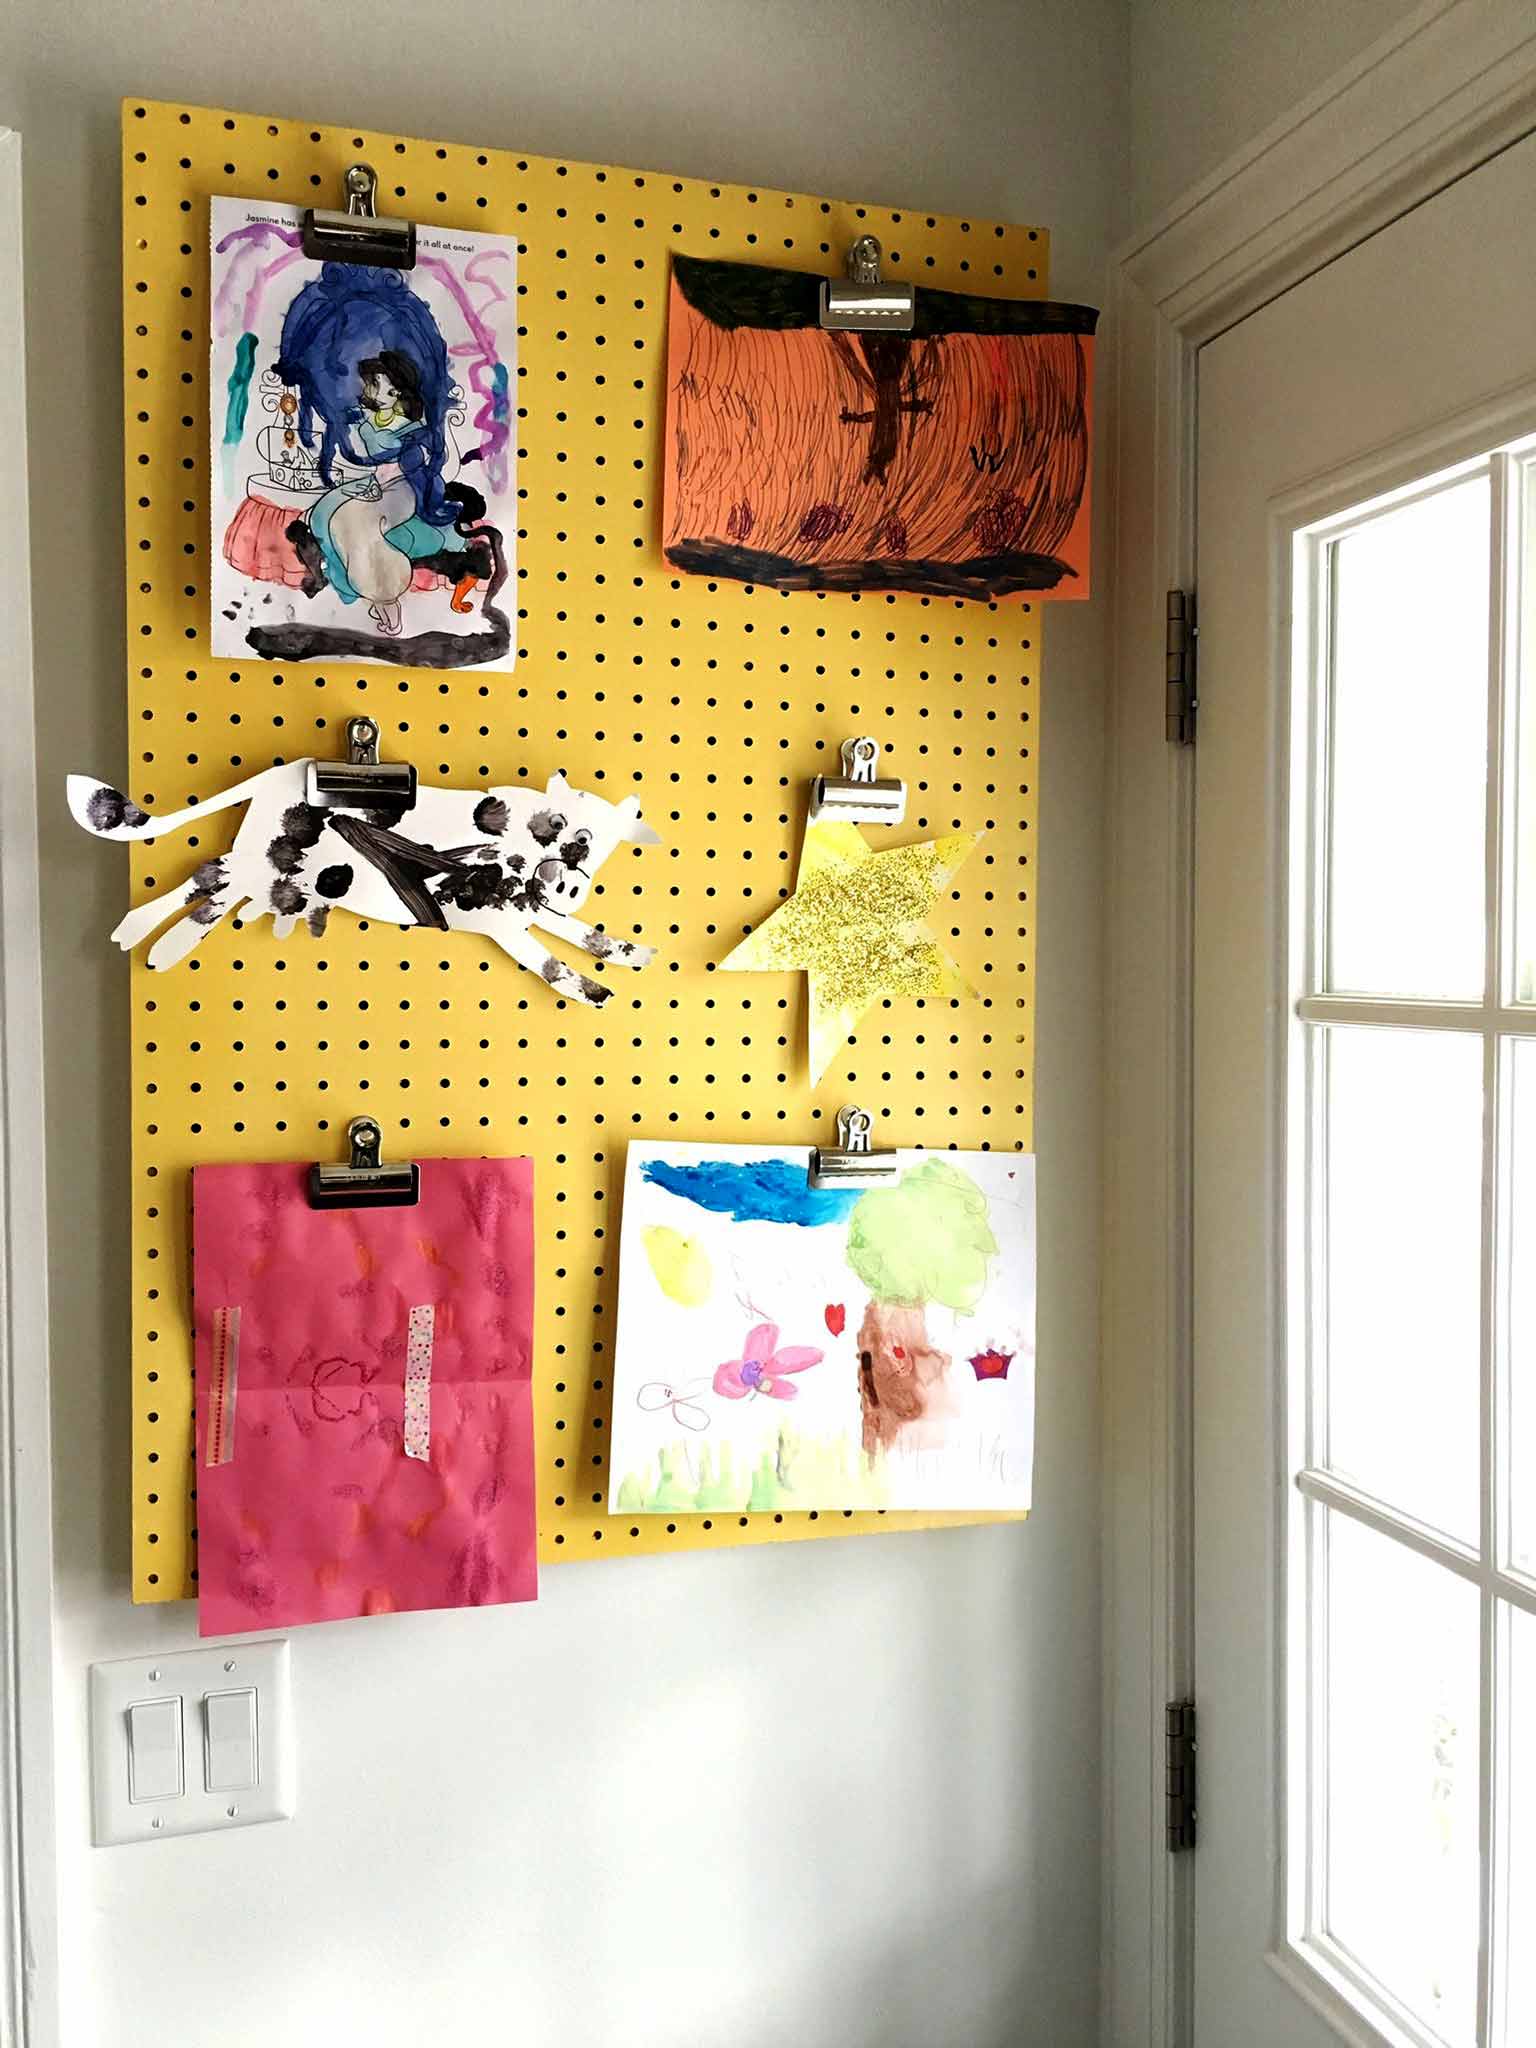
If you've been reading this blog from the start, you may remember we used to have our girls' artwork displayed to cover up the old panel. I liked that solution for a time, but the pegboard wasn't large enough to fit over the new panel. Plus—I wanted something simpler, as the room was feeling a little busy and chaotic. (Isn't it funny how our tastes and needs can change in such a short time?!)
Related: How to Organize Your Kids' Artwork and Keep it that Way!
The roadblock I was facing was that I couldn't find anything easily removable so that we could access the panel, and something narrow enough that it wouldn't obstruct the light switches.

So how did I hide my electrical panel?
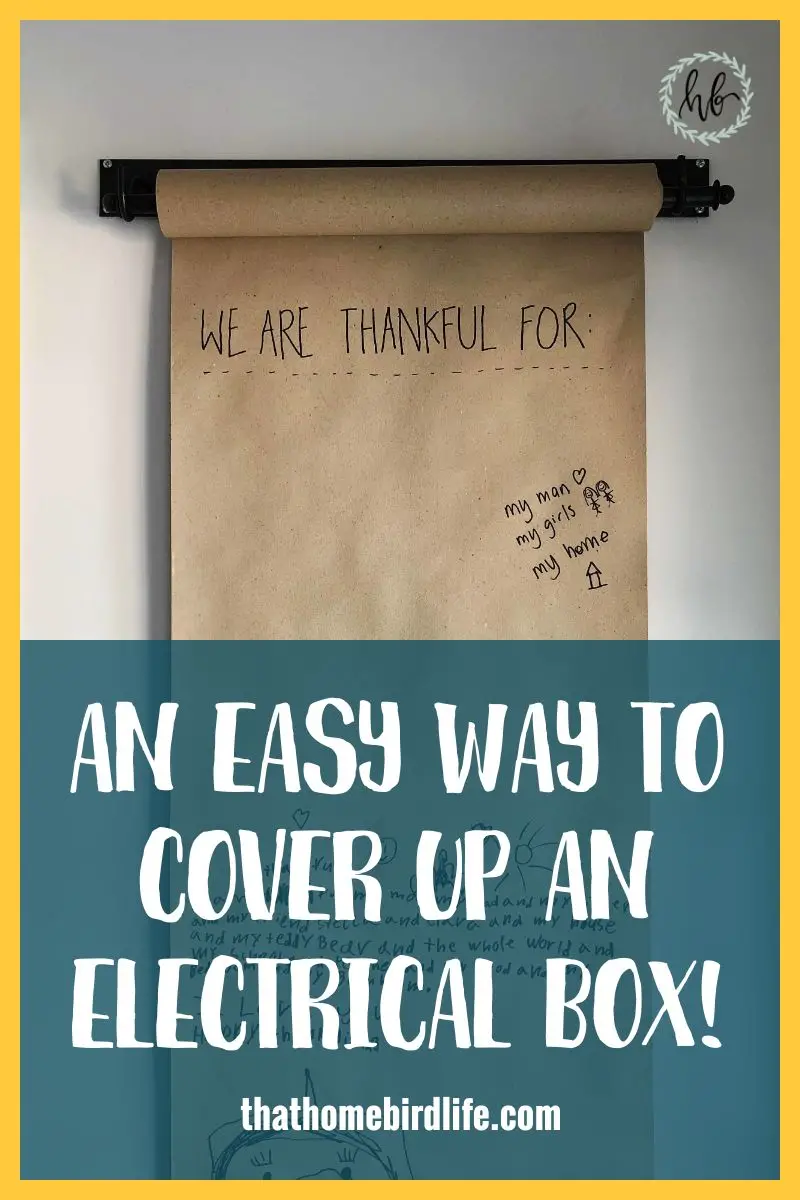
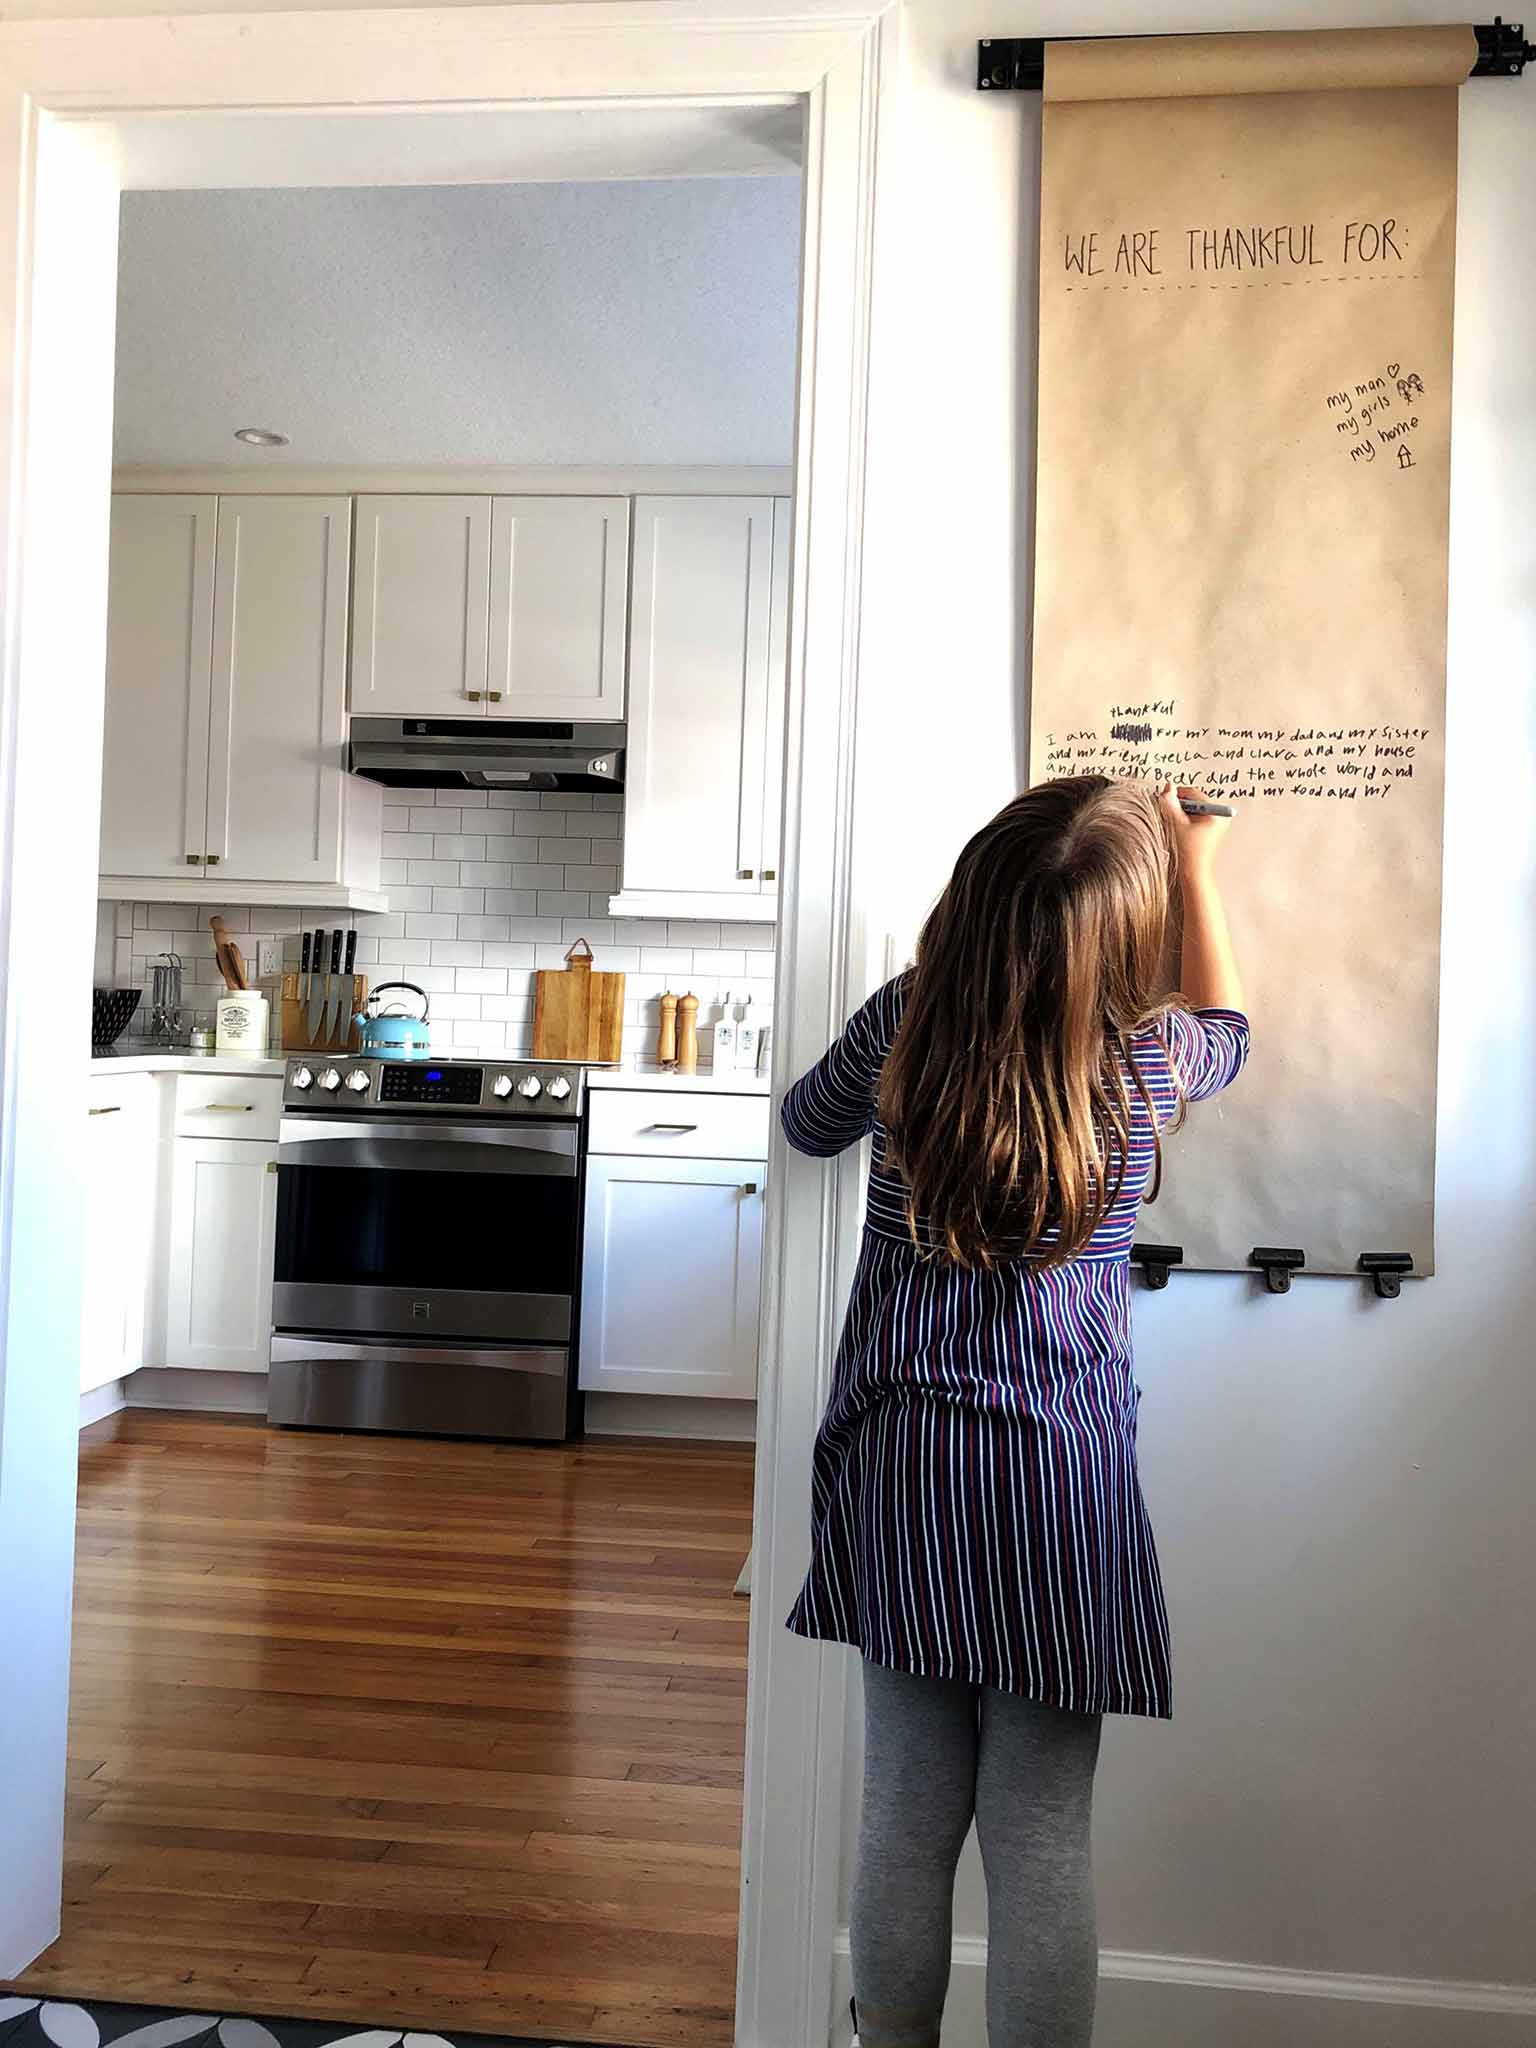
Thankfully, due to a stroke of luck and good fortune, I came across a hanging note roll on Amazon. When I saw the measurements, I couldn't believe how perfect it would be for this spot!
I had also been planning on painting the back of our side door for a while, and used some leftover paint from the girls' closet doors.
To finish the project, I got rid of the busy yellow doormat that I'd bought in a hurry when we moved in, and replaced it with a simple seagrass mat.
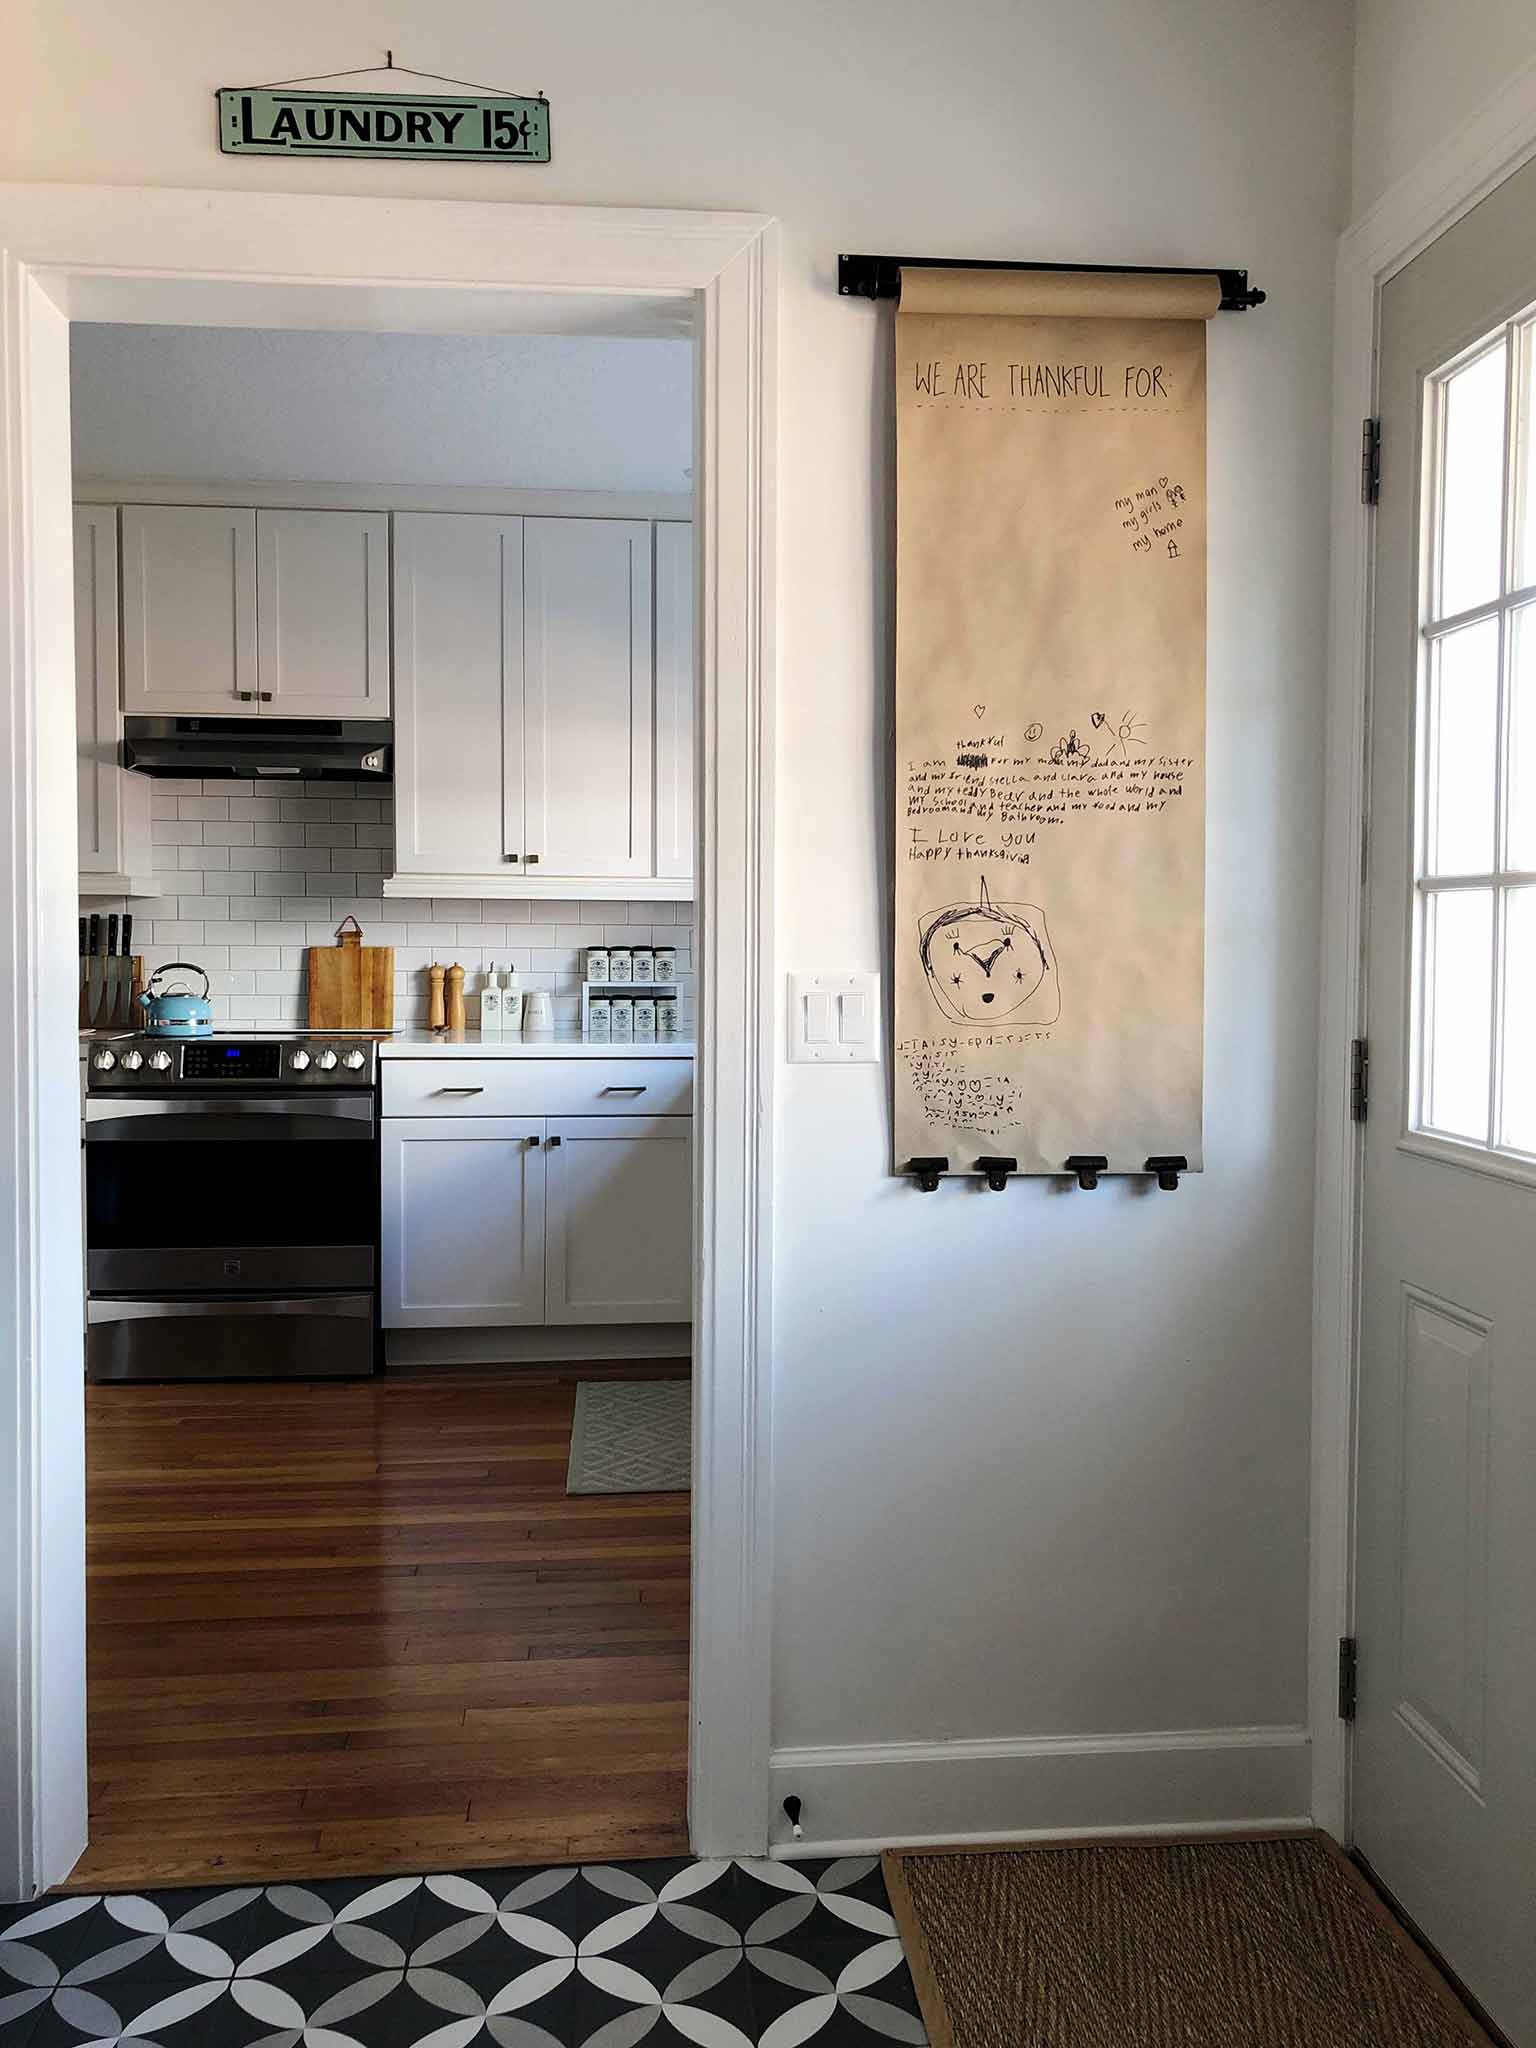
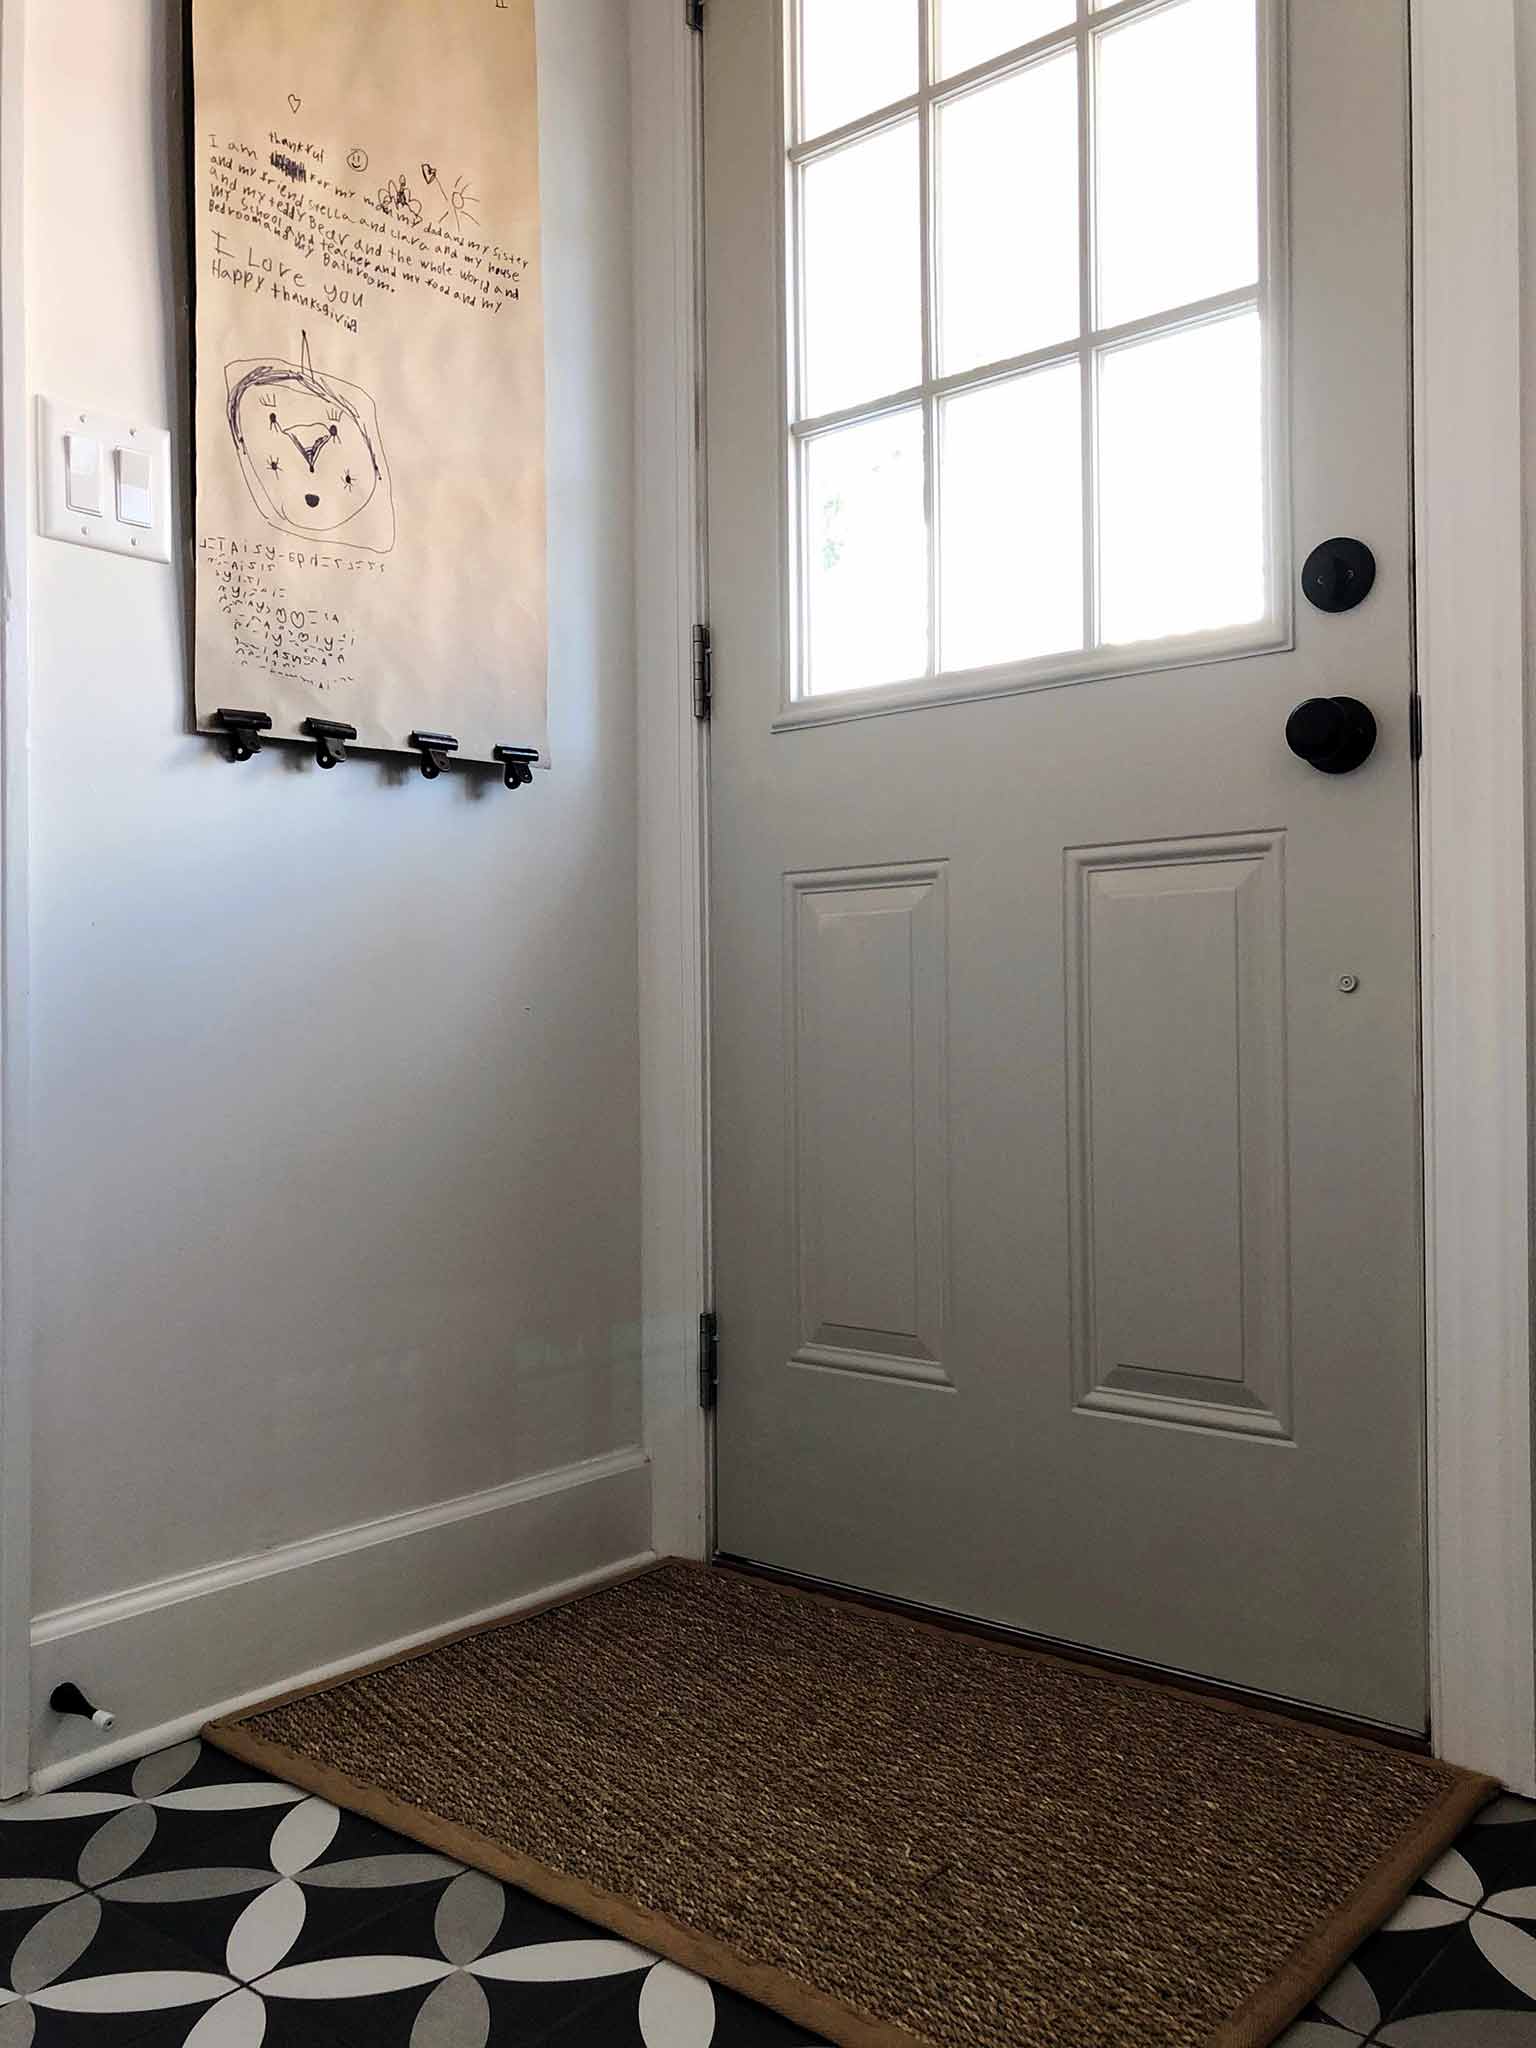
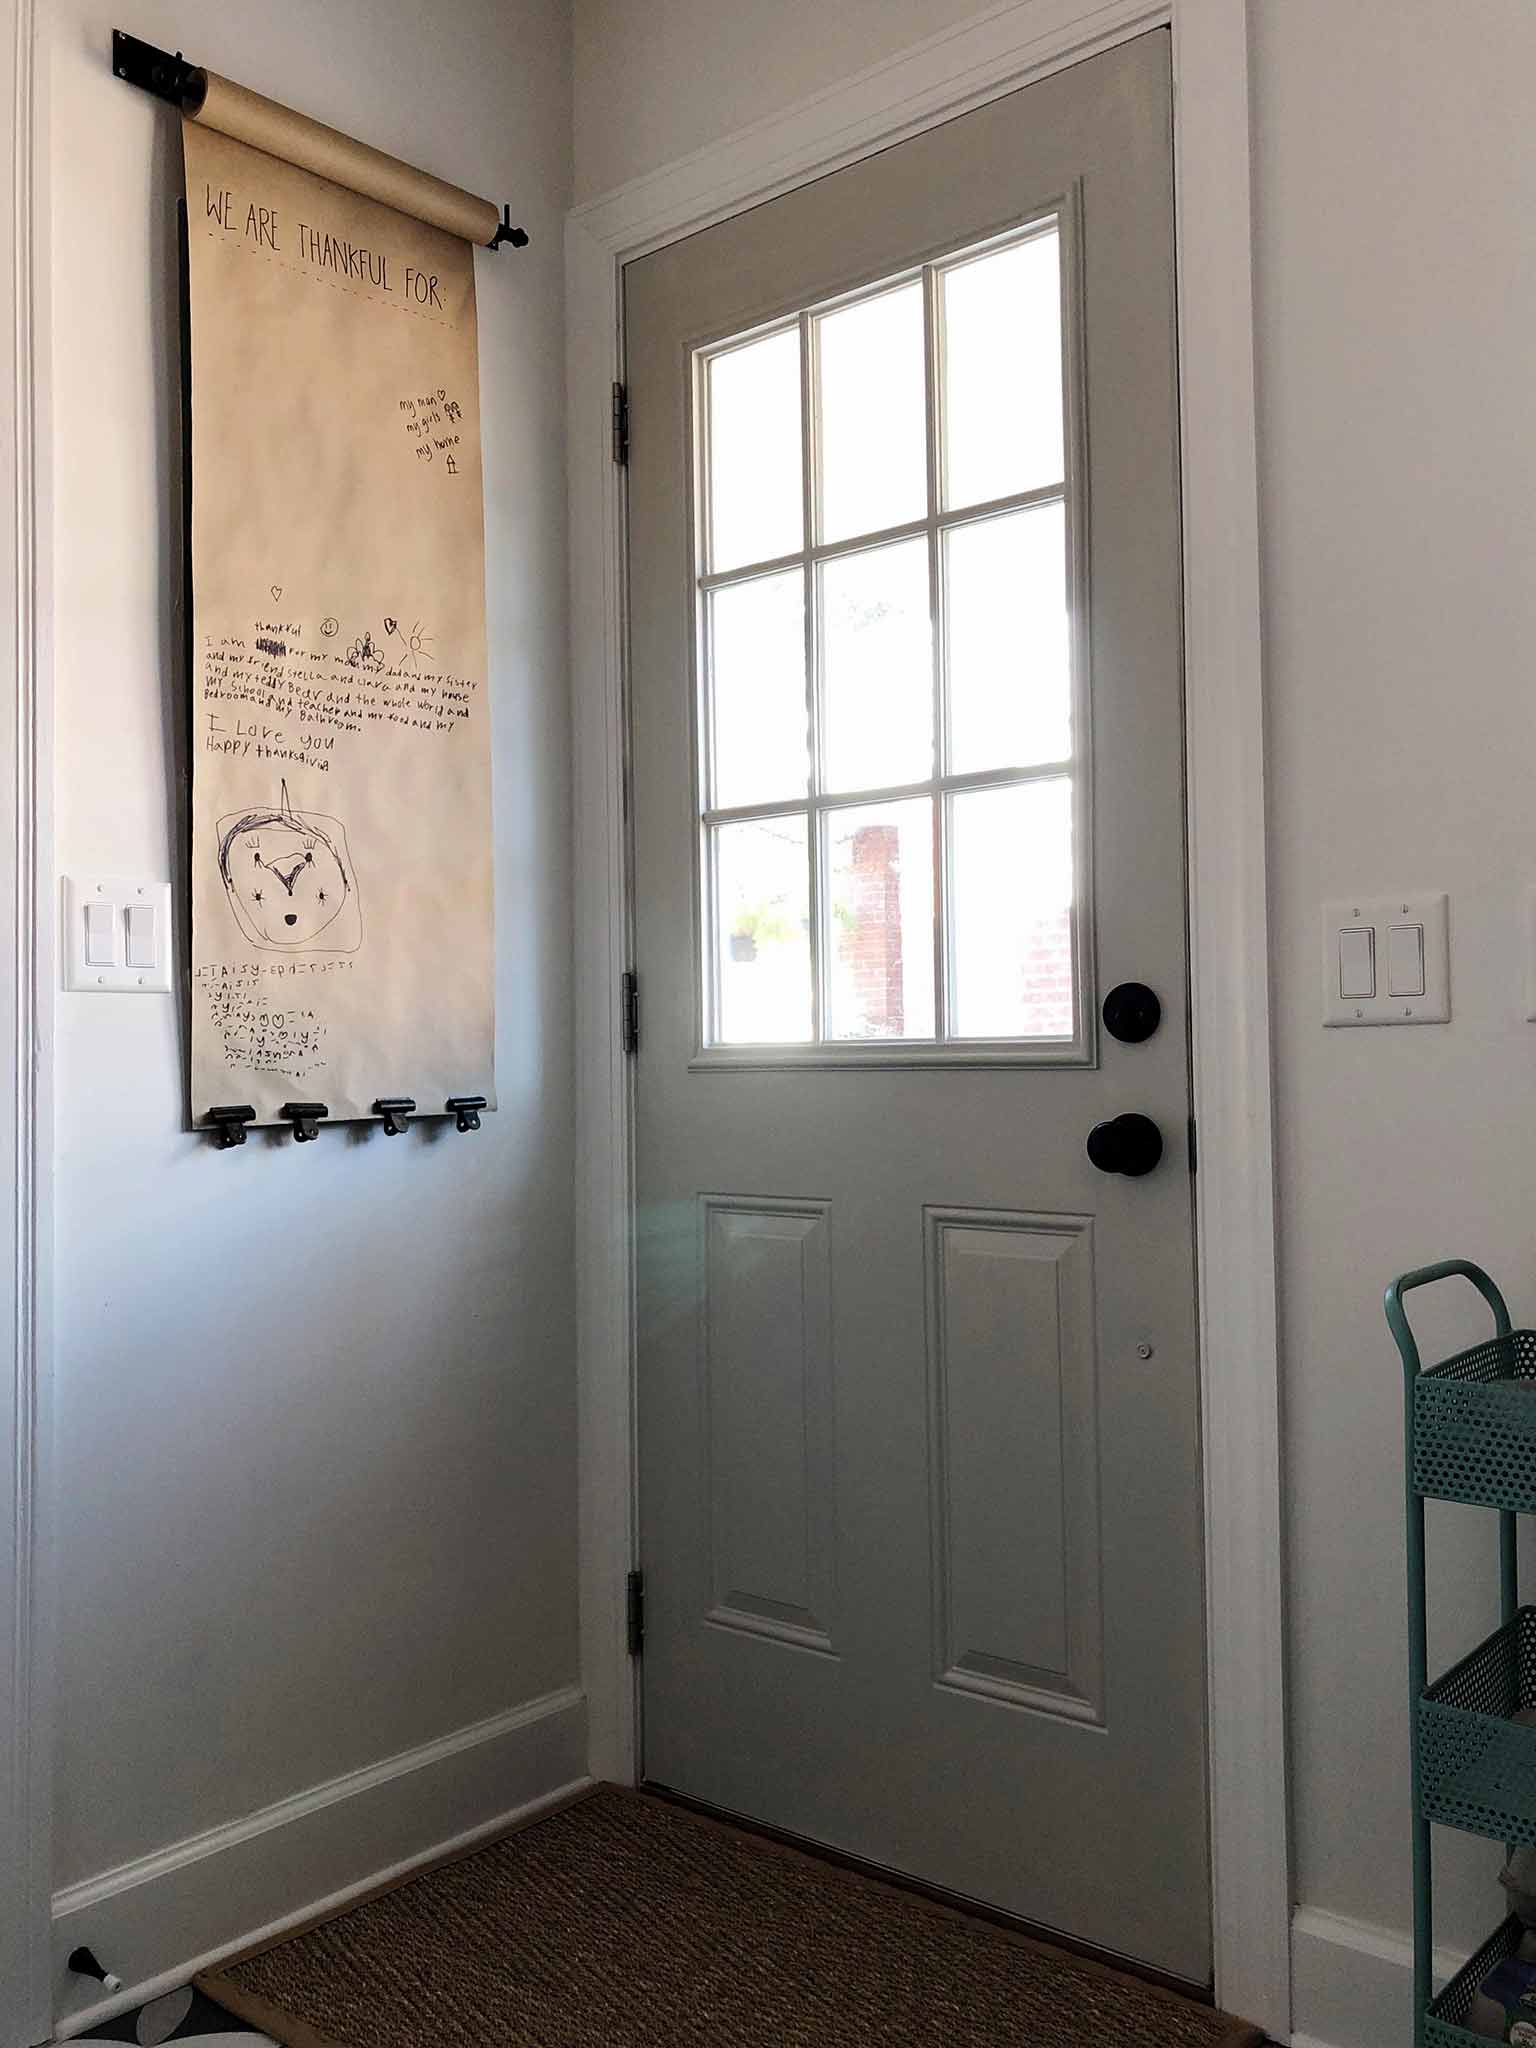
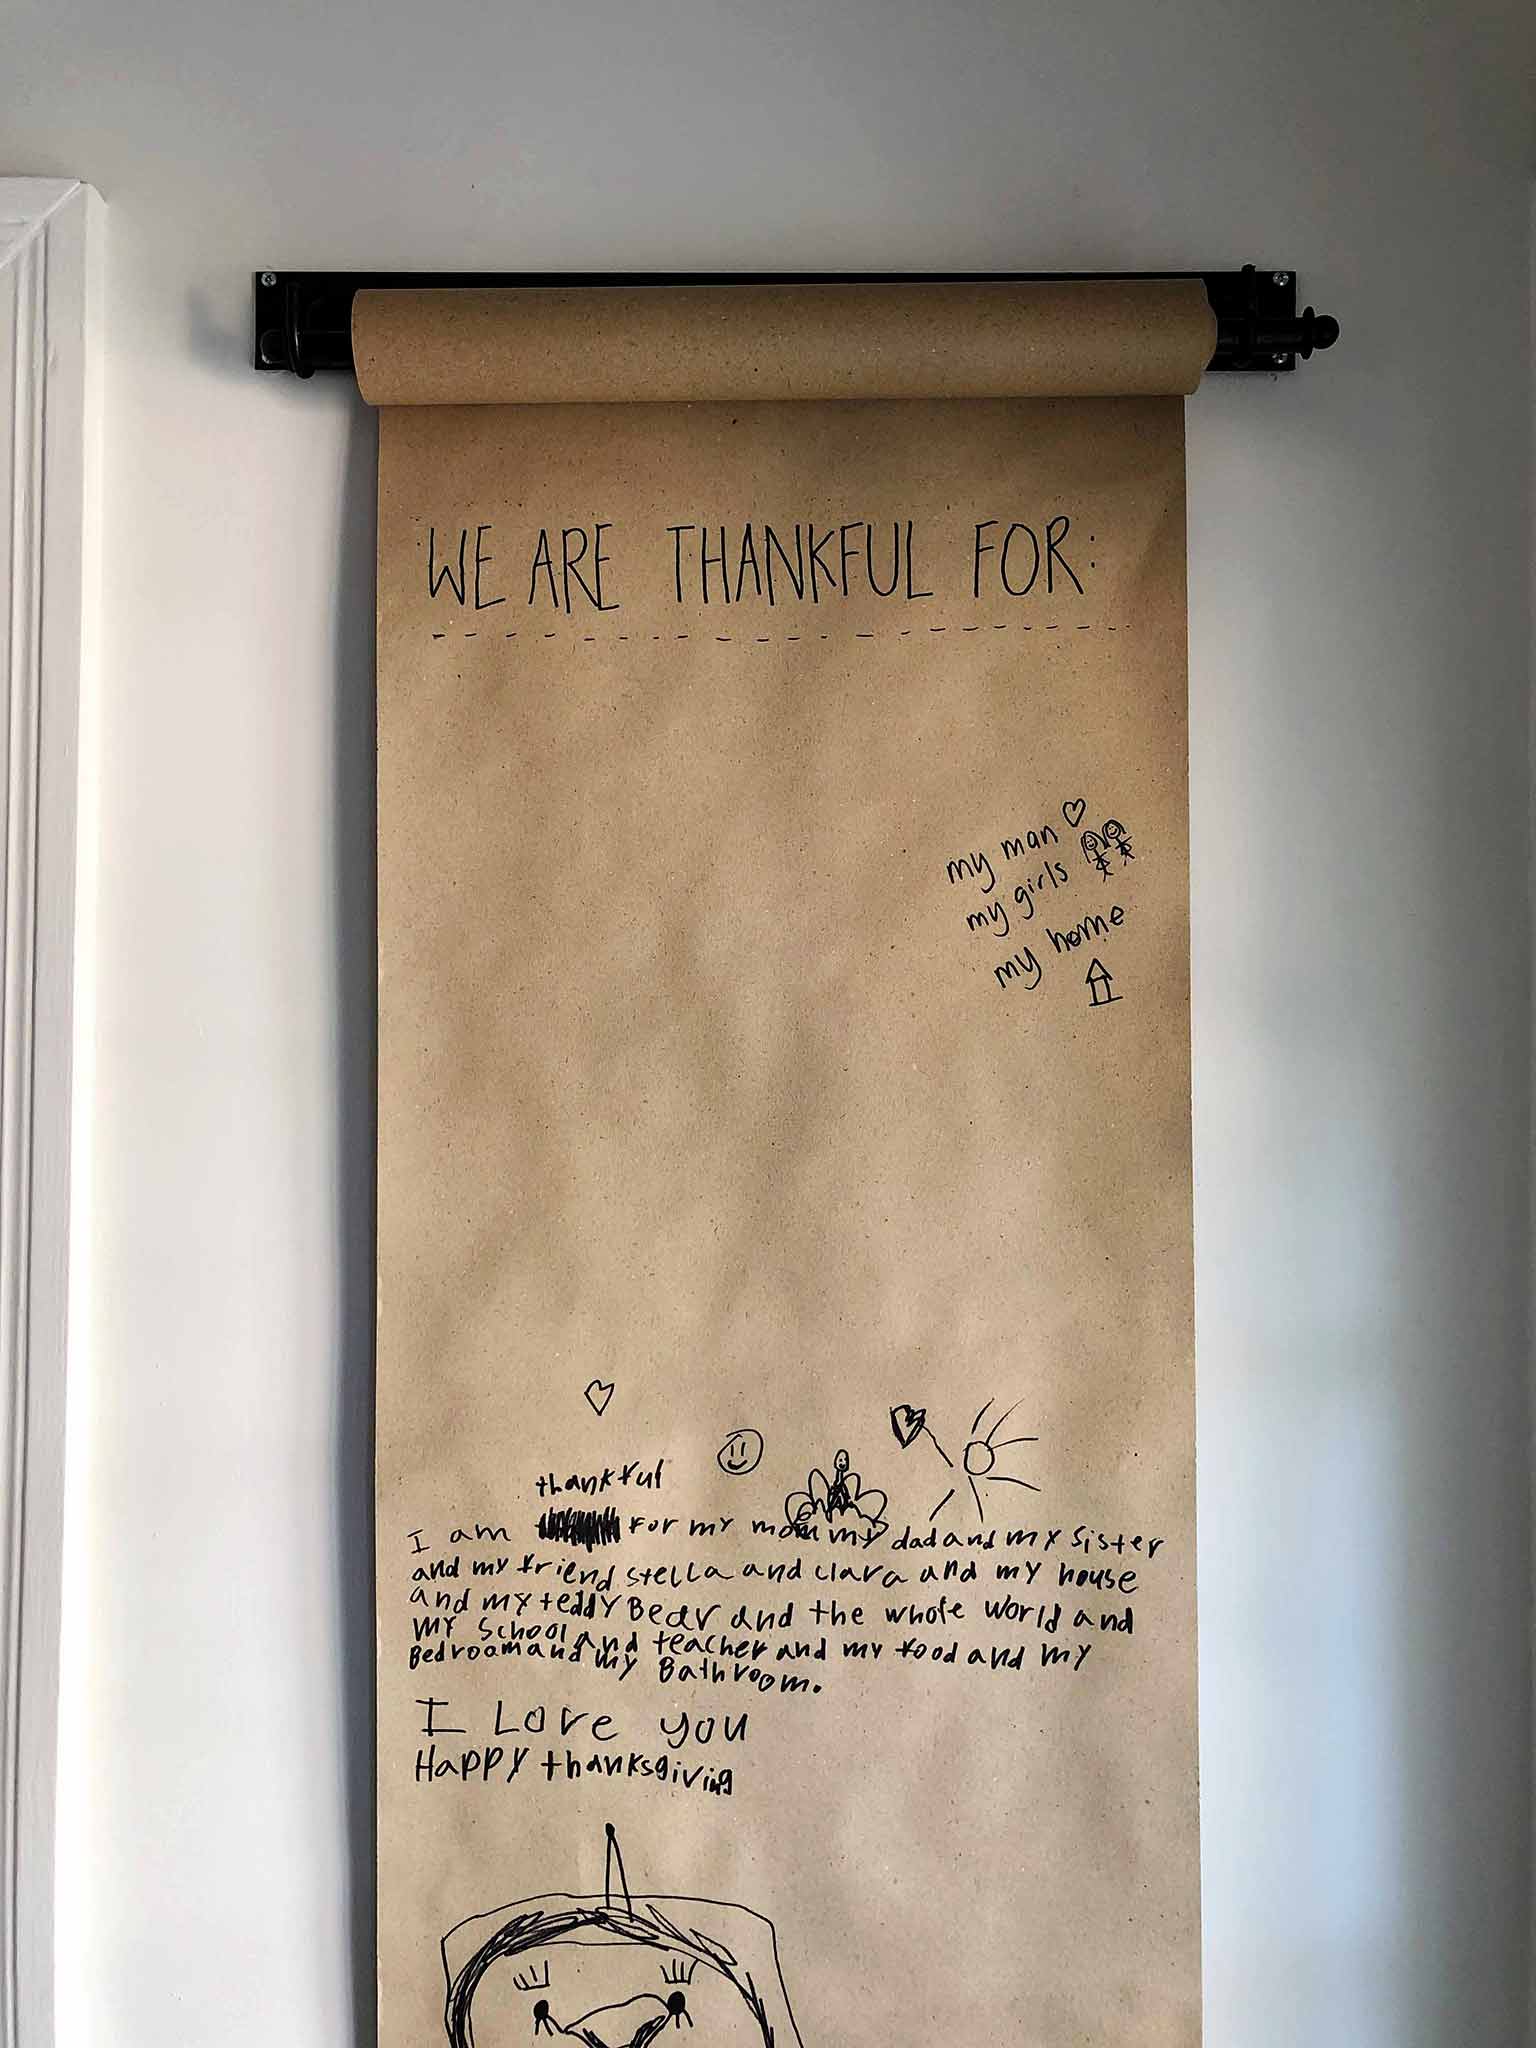
These hanging note rolls come in a few different sizes and you can also purchase replacement paper rolls. Now we have a spot as a family to write little notes to each other, and I love that we can just roll it up when we need access to the panel! With it being Thanksgiving, we've been using it as a way to practice daily gratitude, but I'm thinking we could switch up the theme depending on the season.

All in all, this was a fun, quick pre-Thanksgiving project to freshen up a spot in my home that has been bugging me for ages! A lot of projects take me a long time to plan and implement, but sometimes it's possible to update a space in an afternoon. I'd encourage you to look around your own home and see if there is a spot you could improve without too much graft or budget—it's an uplifting thing to do and you may find a creative solution to a problem in your home that surpises you!
April 2020 Update
I recently gave my hanging note roll a little update to give it a more streamlined look. I had seen this version in a friend's house and liked that it was matte black and had a bar rather than clips to secure the bottom of the paper. I knew the asethetic would work better in my mudroom than the one I have, but I couldn't justify purchasing a brand new one.
So I went to Lowes and purchased a small pieces of trim which just happened to be the exact right size (a 1/4 inch x 1 1/2 inch x 2 feet poplar board) and only cost me around a dollar! I painted it black using some leftover paint, and painted the top wall mount and pole to match. Then after a coat of polyurethane, I attached the bottom bar to the wall with a couple of washers between the wall and the bar to provide a small gap for the paper to feed through.
Finally, I updated the kraft paper with our new Green Family Rules:
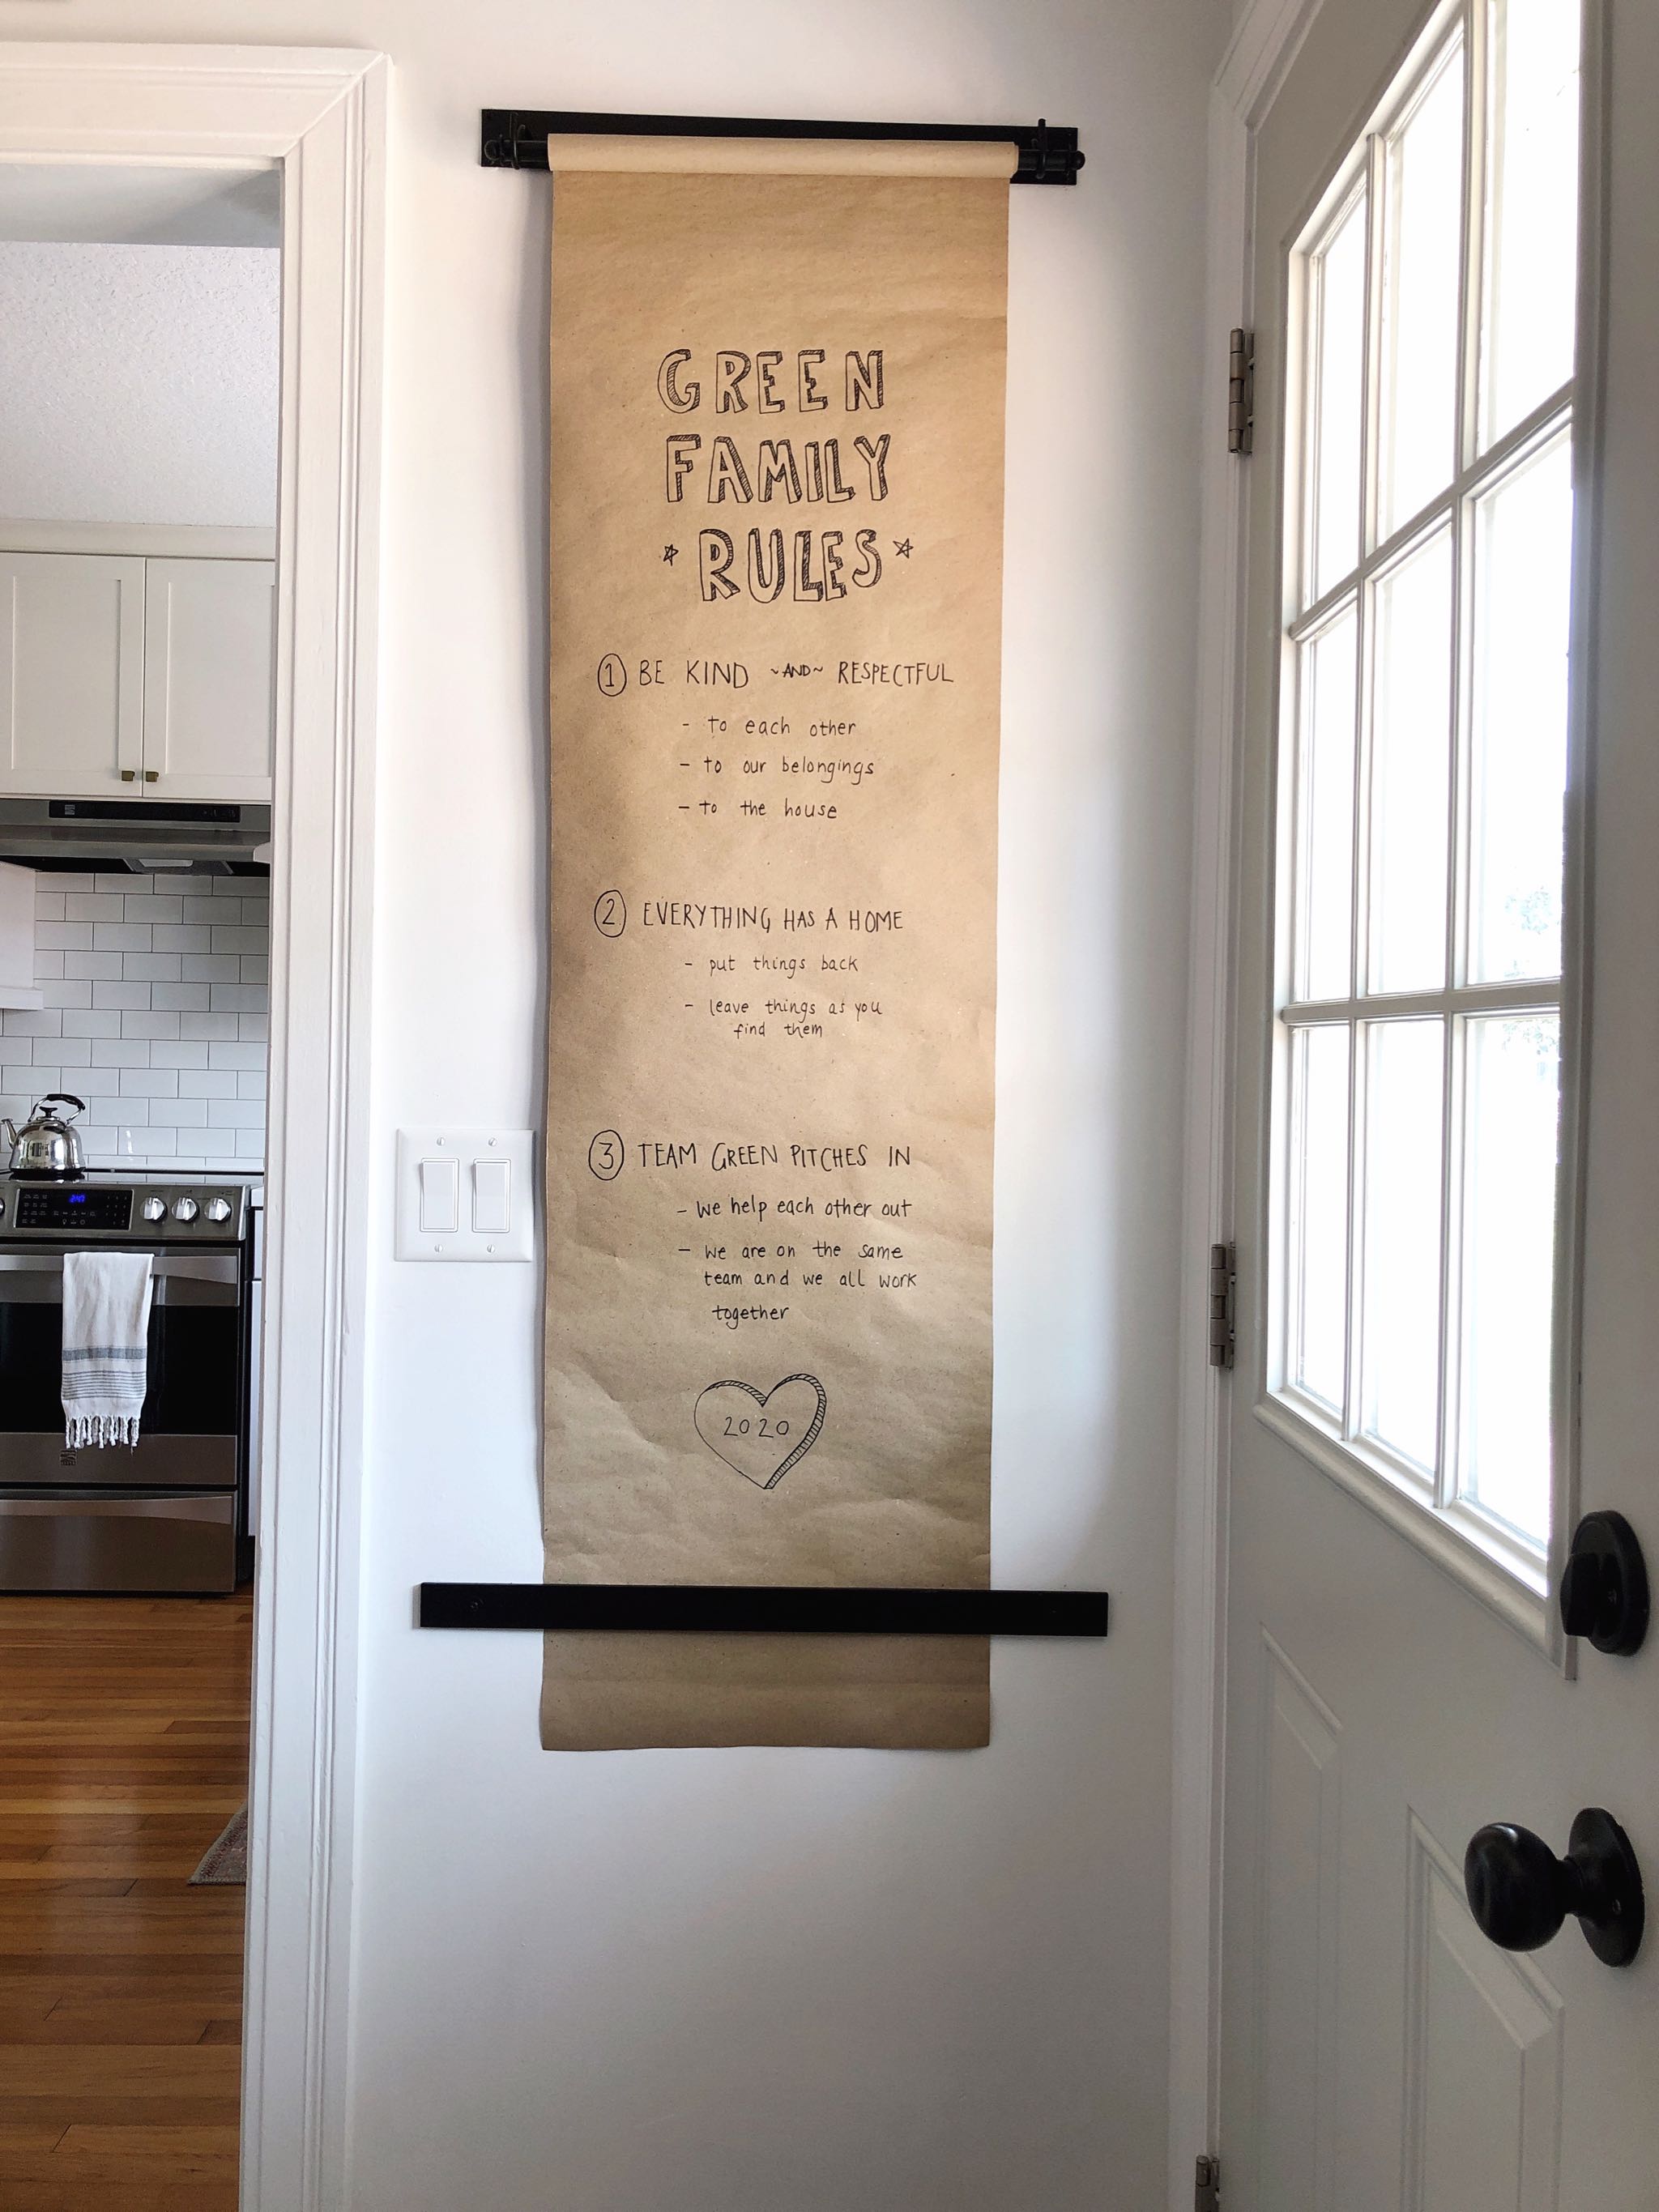
What do you think of the update—not bad for a dollar and some leftover paint, right?! We've been working on these rules with the kids during this season of homeschooling and it's helpful to have them in a place that we can all see them to remind ourselves.
If you like the more modern look but would prefer a less hands-on route than I took, you could simply purchase the modern hanging paper version, but this worked out a lot cheaper and I think it's definitely a comparable look:
There is also this version which is a little cheaper, and has an inbuilt paper cutter at the bottom:
Looking for more simple updates to your home? Try these:
Stenciled doormat tutorial
Playroom desk organization with IKEA
Simple yarn wall art
Minimalist wreath tutorial