One of the ways I've been coping during this incredibly unsettling time is by working on some projects. Spending time doing something creative AND productive helps me feel more like myself during this weird season of life. I highly recommend finding yourself a project or two to work on—and the good news is that this particular one is super easy!
This post contains affiliate links, which means that I may earn a small commission if you purchase something that I have recommended, at no cost to you. More information can be found on my disclosures page.
QUICK LINKS
- Materials needed to make a stenciled doormat
- Amazon shopping list with all of the items you will need for this project
- Steps to make a stenciled doormat
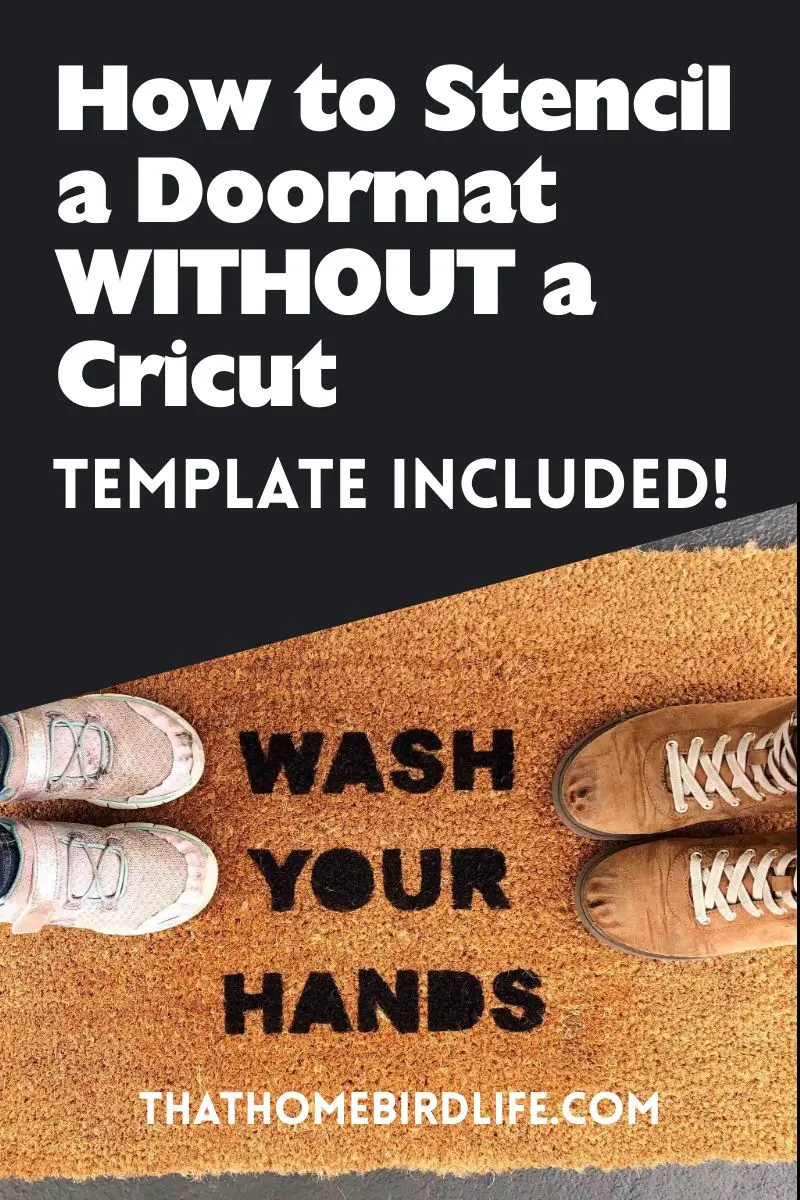
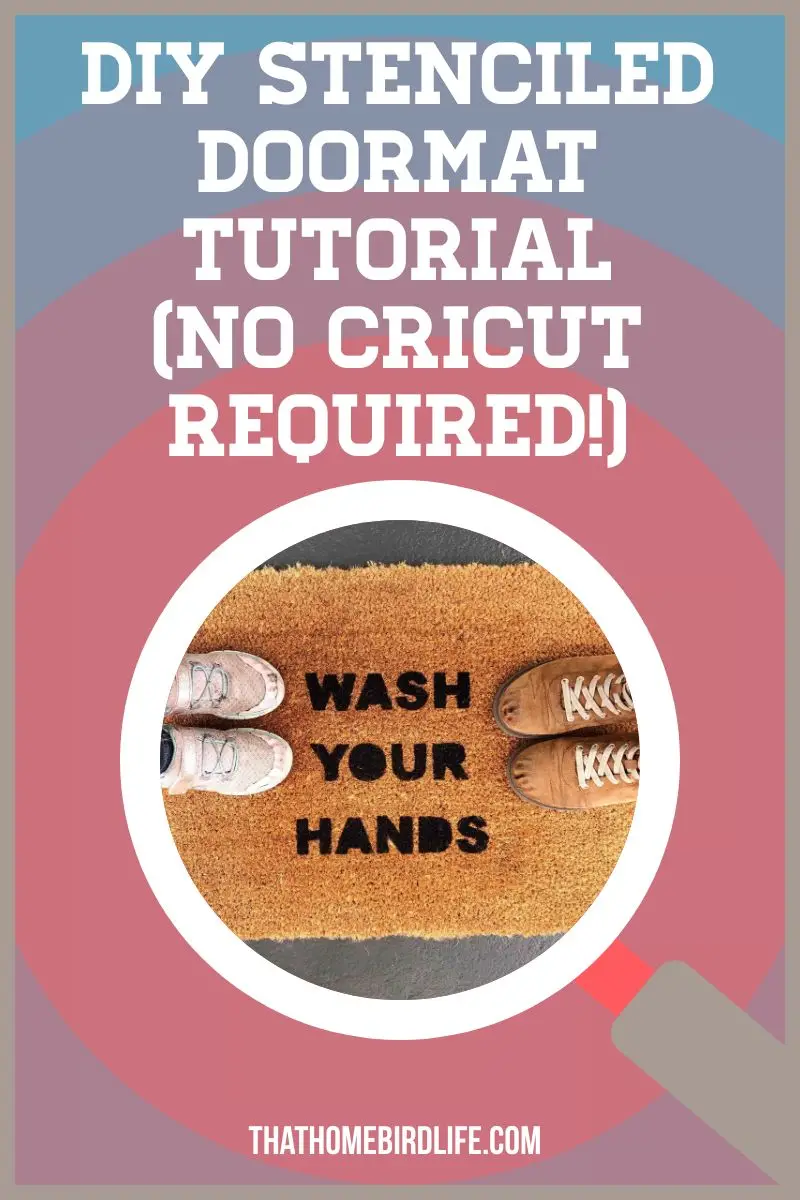
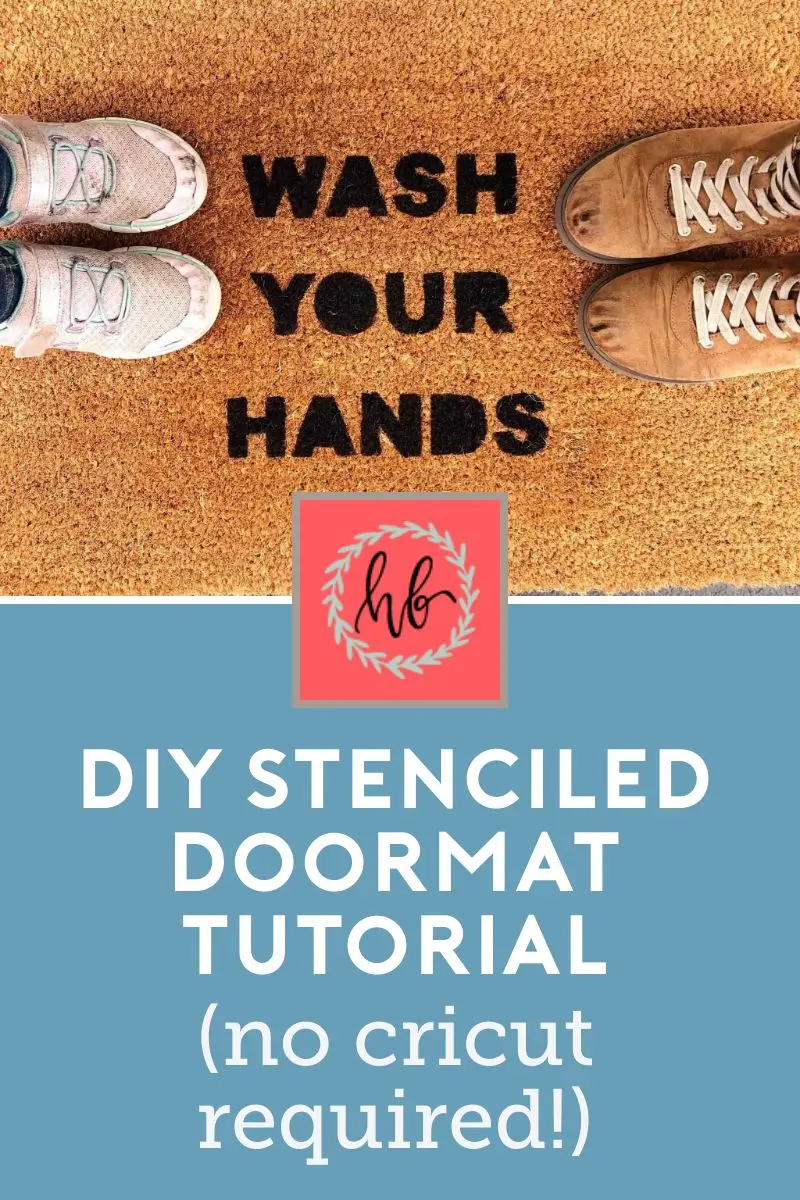
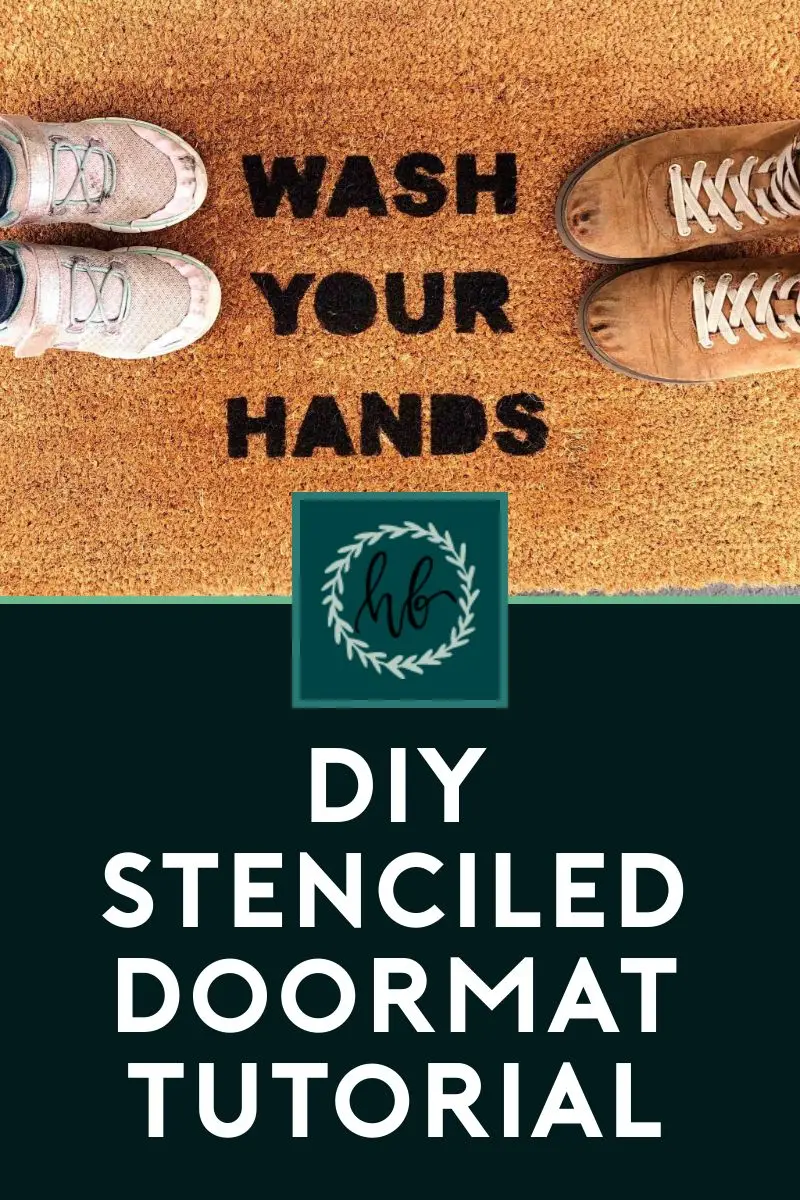
So, this weekend's project was stenciling a doormat for our side porch with a very important message. I actually had all the supplies ready to go because I have a lot of projects that I haven't gotten around to starting yet...I guess now is as good a time as any to crack on with them! I think I'd been putting this one off because I wasn't sure if it was going to turn out well without having a special machine to cut a stencil, and I also didn't have a good idea for what message to put on the mat. (The frontrunner up until this weekend was "HELLO"—not the most creative!)
Related: How to Beat Project Fatigue, and (Lack Of) Progress on Our Outside Space
But with the times being as they are, I've found myself yelling "wash your hands!" every time my kiddos walk into the house, and so this seemed to be the winning phrase! Plus, I'd like them to do that anyway—health crisis or otherwise.
Side note—I was scrolling doormats for font inspiration, and a lot of them are no-gos during this season, for example "WELCOME, FRIENDS."
NOPE.
I love you, but please stay outside until further notice!
Anyway...I'm going to show you how to make your very own custom doormat, and you can get creative and add whatever message feels right! A friend suggested "NO GUESTS ALLOWED" for a front door—kind of like an "anti-welcome" mat. There's also "STAY HOME," "PLEASE DON'T KNOCK," or the more inspirational "KEEP CALM AND KEEP YOUR DISTANCE."
So many options!
As an aside, please don't think I'm making light of this serious situation—I'm simply trying to make the most of being at home, and using a little bit of humor to get me through.
I made this WITHOUT any special craft tools—no cricut machine, no special stencil—just plain old copy paper and scissors. (You do need access to a printer, though.) And it probably took me an hour tops from start to finish. I will also admit that I only started documenting the process part way through because I had such little faith in how it would turn out. But the result FAR exceeded my expectations—I want to make one for the front porch, too!
Related: How to Make Craft Resin Coasters (a Step by Step Tutorial)
So if you want to start off with a manageable project that doesn't require much time or special equipment, then this might just be the perfect thing for you!
How to Stencil a Door Mat (WITHOUT Using a Cricut)
(Be sure to pin this tutorial so you can refer back to it later!)
STEP ONE: GATHER YOUR SUPPLIES
You may already have some of these supplies lying around at home, but if not, they are all available online so you do not need to go out shopping for them.
Here's what you will need:
-
Copy paper (and a printer)
-
Scissors
-
Black paint (make sure it's suitable for outdoor use)
For your convenience, I've created an Amazon shopping list with all of the items that you will need for this project. You can access it here.
STEP TWO: MAKE YOUR STENCIL
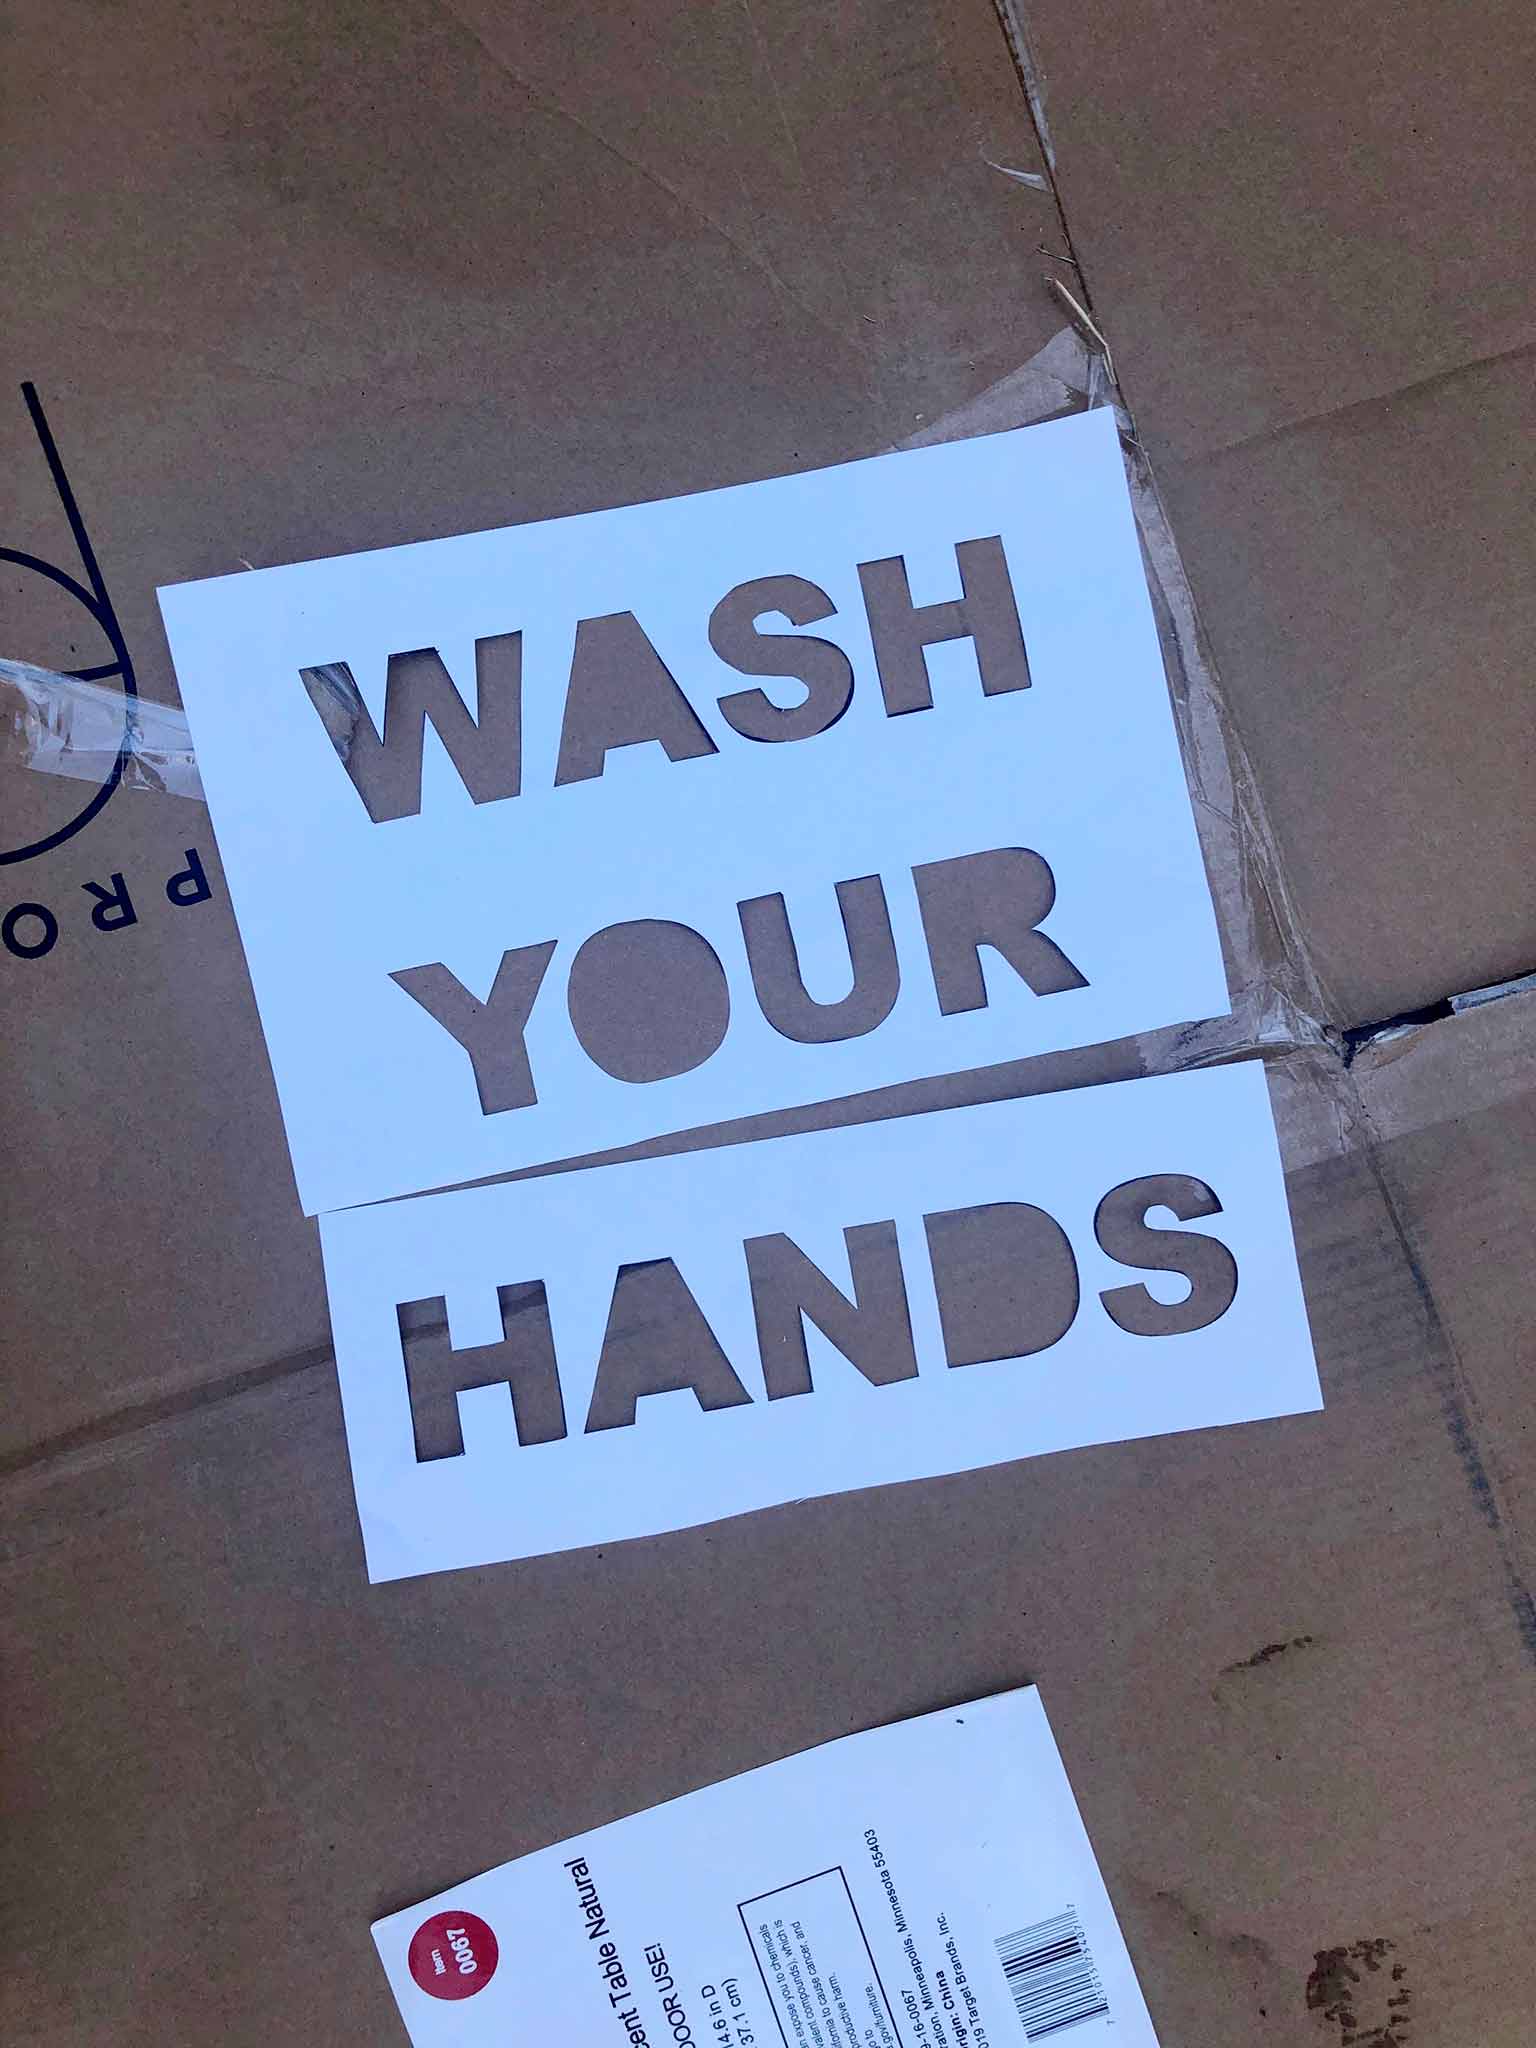
I was too impatient (and cheap) to order a proper stencil, so I took a risk and made one using regular old copy paper. It took a few rounds of trial and error to get it looking right when printed, but I landed on uppercase Arial Black at 180 pt, center aligned. I had the page orientation set to landscape.
Once you've printed your design (mine was on 2 separate sheets of paper—that's totally fine) you can carefully cut out the letters, making sure you leave the piece of paper intact. For letters with a "hole" (like R, O & A) I decided to cut the entire shape out and not worry about the inner part of the letter—it just gave the font a different style and it made the process a lot simpler.
Note: if your design is spread over two pages, you may need to trim the top/bottom to get the line spacing between the words nice and even.
STEP THREE: PAINT YOUR DESIGN
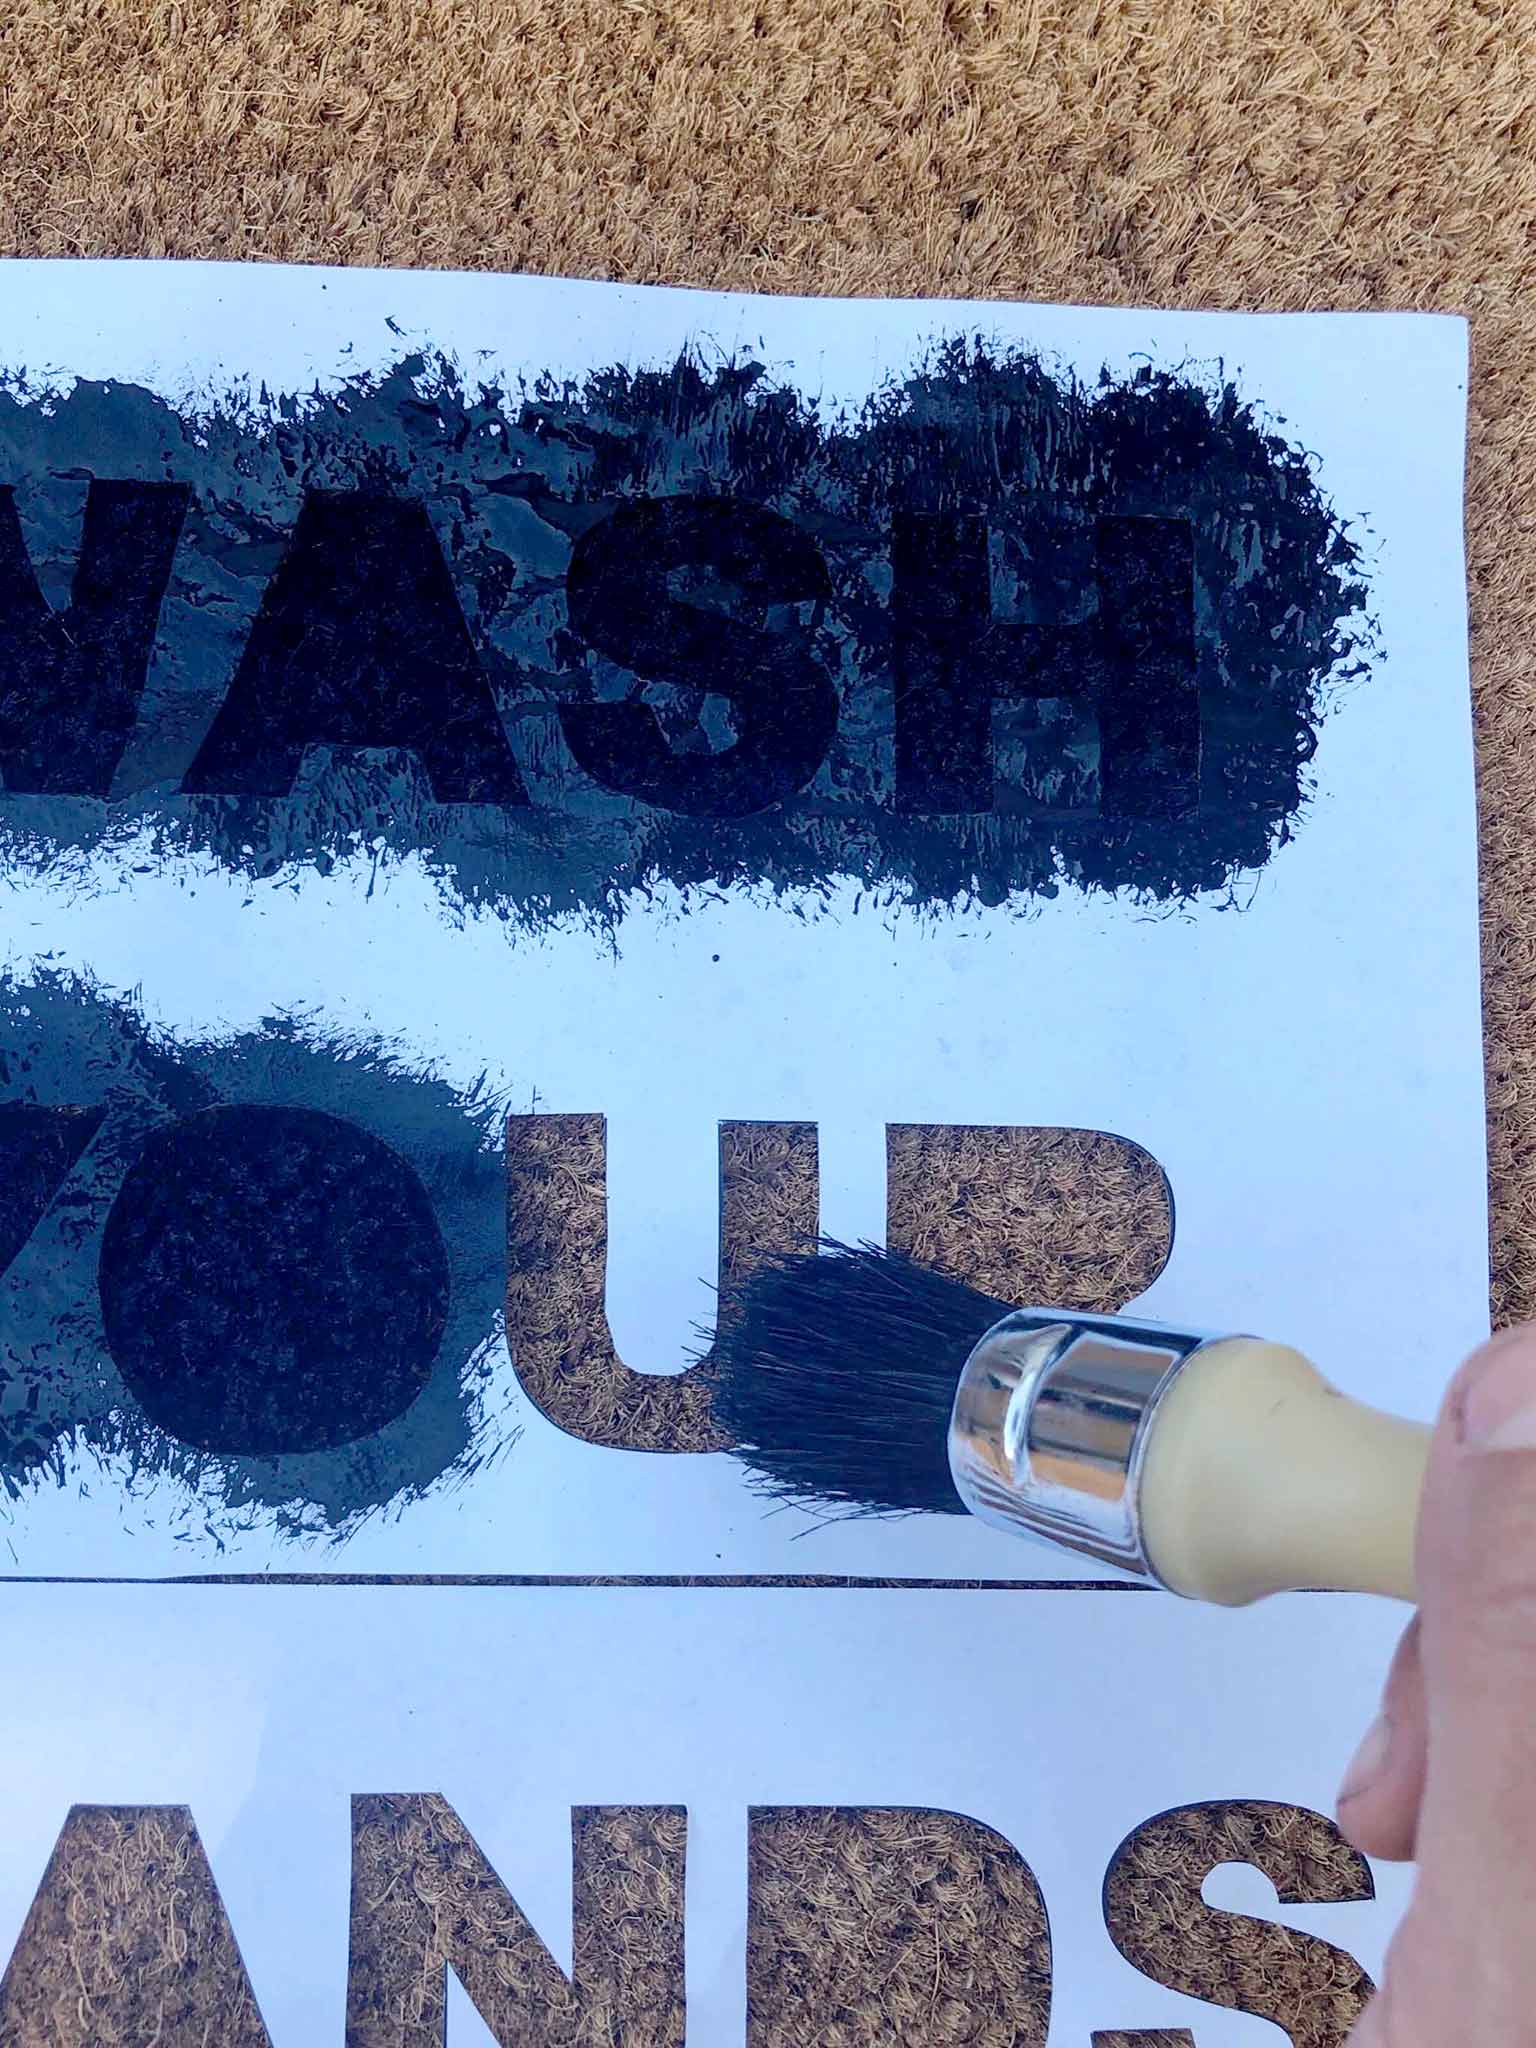
Before you bust out the paint, you need to secure your template to the doormat. Here's where that repositionable adhesive spray comes in handy! Lightly spray the back of your template(s) and gently place it in the center of the doormat. The spray allows you adjust the position of it as you need to.

Grab your paint and your stencil brush, and start painting! You can experiment with techniques, but an up and down "dabbing" motion worked best for me. Don't overload the paintbrush with paint and go easy on the stencil—remember it's just paper. Keep going until you've covered the whole stencil. When you're done, gently peel the stencil off.
STEP FOUR: SEAL IT
Let the paint dry, then finish with 2-3 coats of spray topcoat to give it some extra durability. Allow to dry for 24 hours before you start using your doormat.
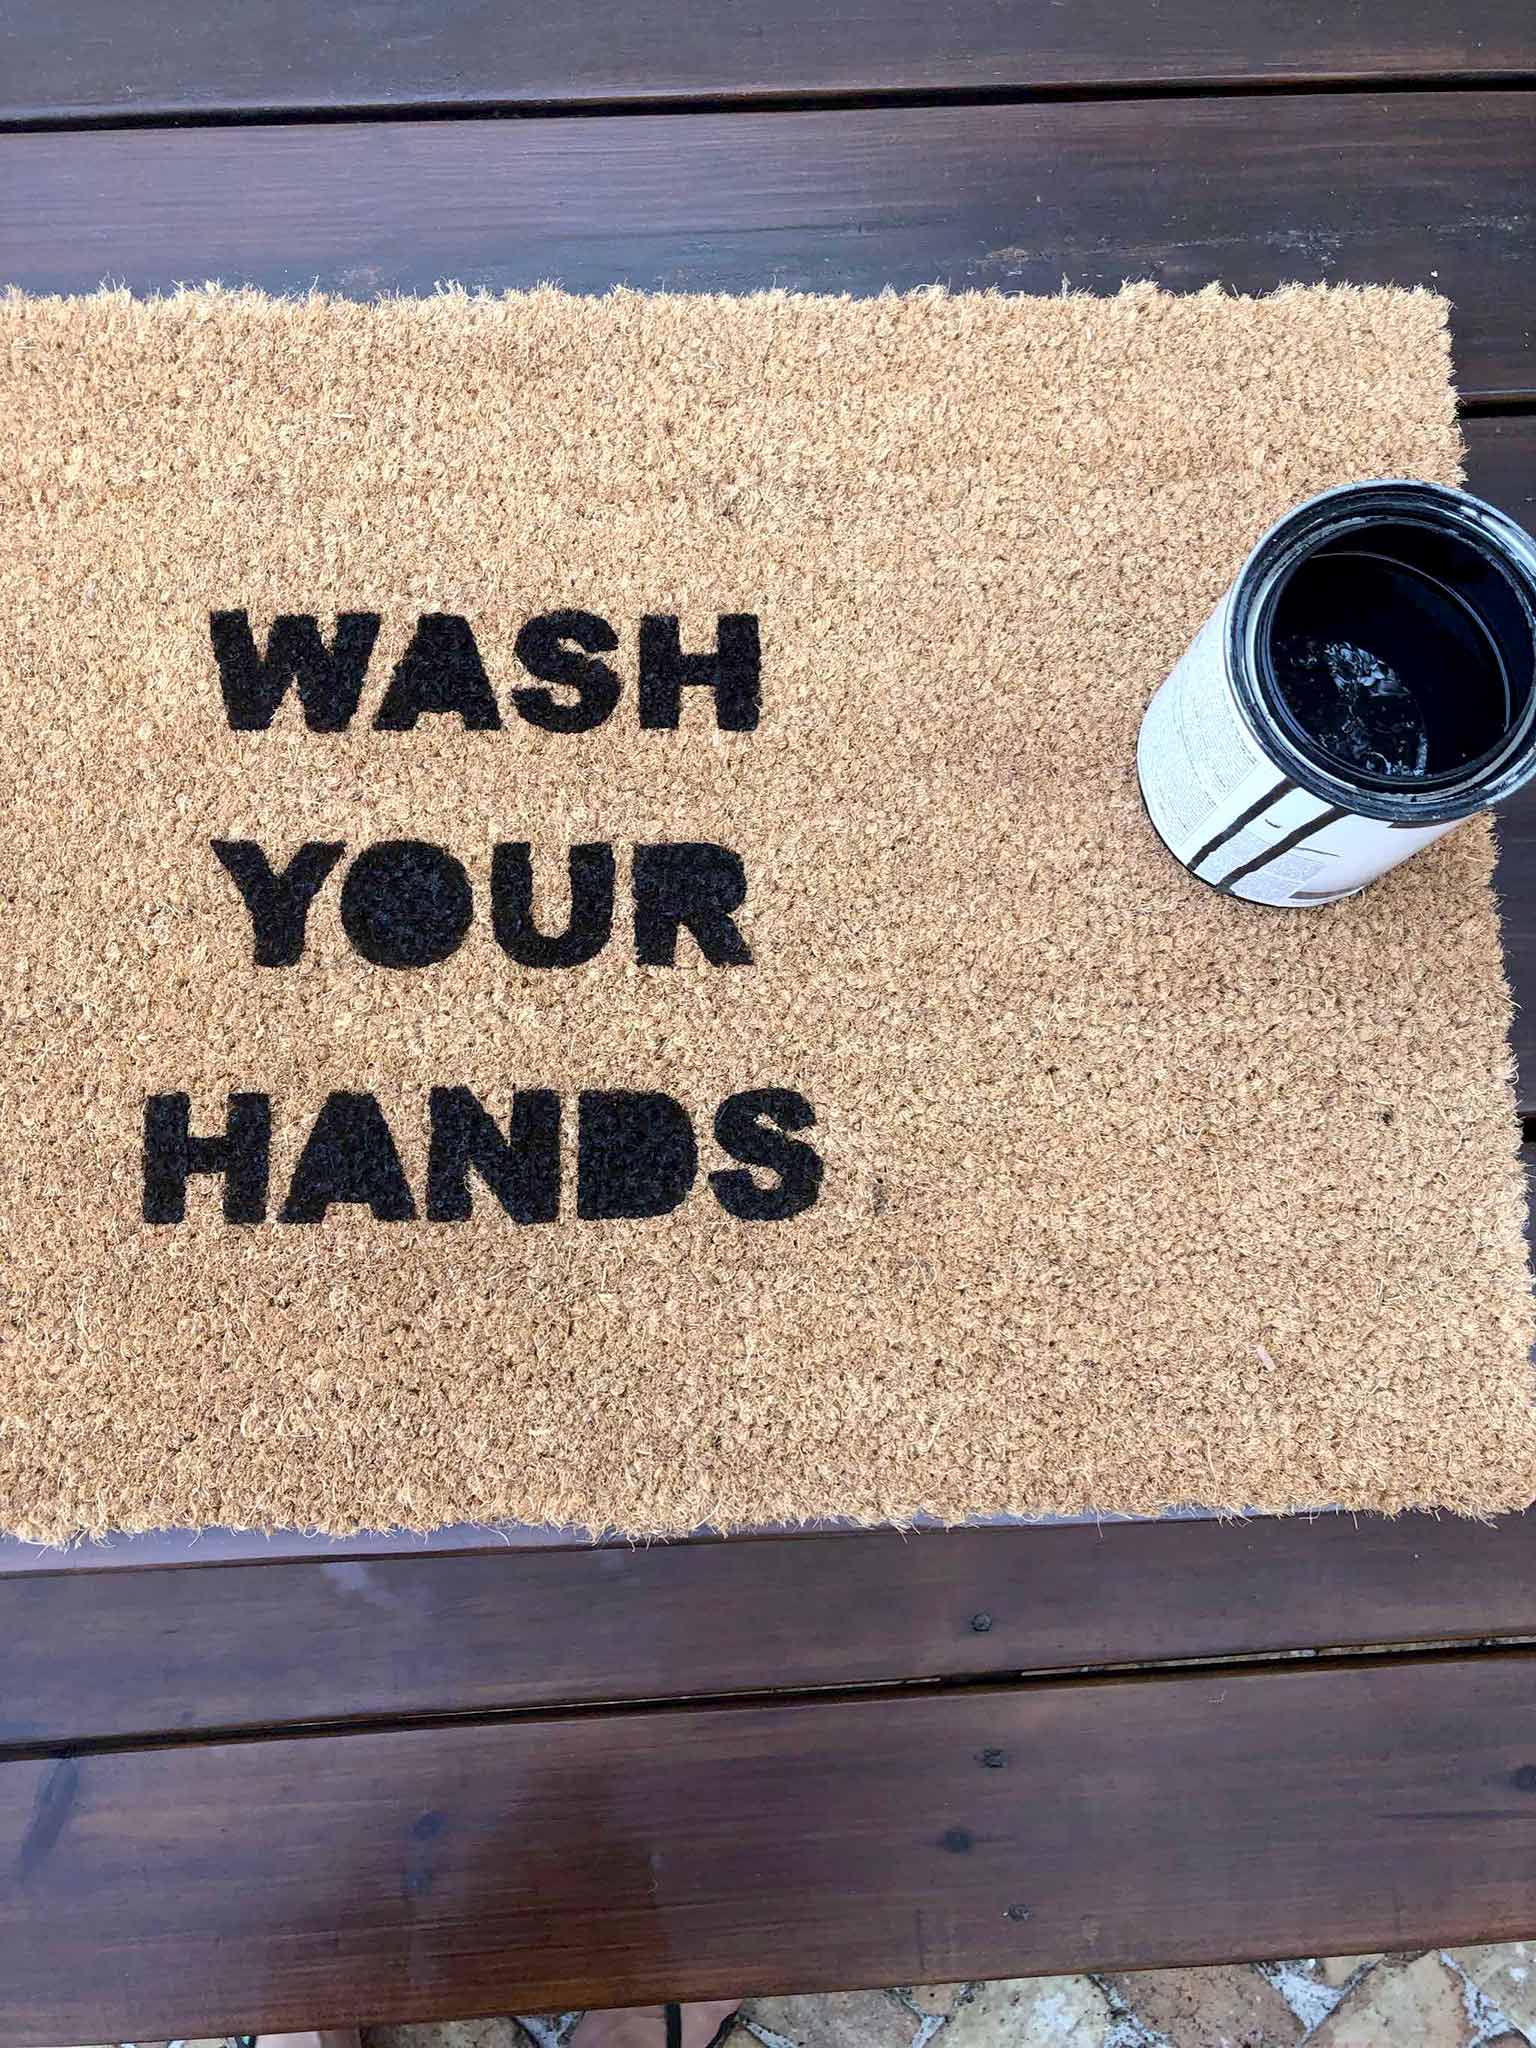
And that's it—I told you it was an easy project! I'm so pleased with how this turned out, and I'm hopeful that the kids might even pay attention to it! (Probably wishful thinking...but at least it looks good...)
If you try out this simple DIY then please do send me a picture, or tag me on Instagram! I'd love to see your work!